Toothless??
 03-06-11, 08:51 PM
#31
Driver
Thread Starter
Join Date: Feb 2011
Location: Colorado
Posts: 155
Likes: 0
Received 0 Likes
on
0 Posts
Unfortunately, I have no experience with downloading pictures on websites. I usually put pics on my computer through the CD that I order when developing them. I'm not sure at this moment where the CD is of the pics that I did take when I picked up the car. My digital camera is on the fritz, so I've been using a disposable camera for any picture-taking. Maybe I'll try and shoot some pics with the disposable and put them on CD and see if someone can show me how to upload pics on this website.
But mine are the OEM 19-inch seven-spoke wheels.
The 18-inch wheels that I've seen on the 2010's have five spokes.
But mine are the OEM 19-inch seven-spoke wheels.
The 18-inch wheels that I've seen on the 2010's have five spokes.
As far as posting pics - I am sure there are many other threads on here that show how to do it in various ways, but if you wanted to give it a go, here is one quick way to do it. I am using Windows 7, but the steps would be similar for other Windows versions, the Mac and Linux.
--------------------------------------------------------------------
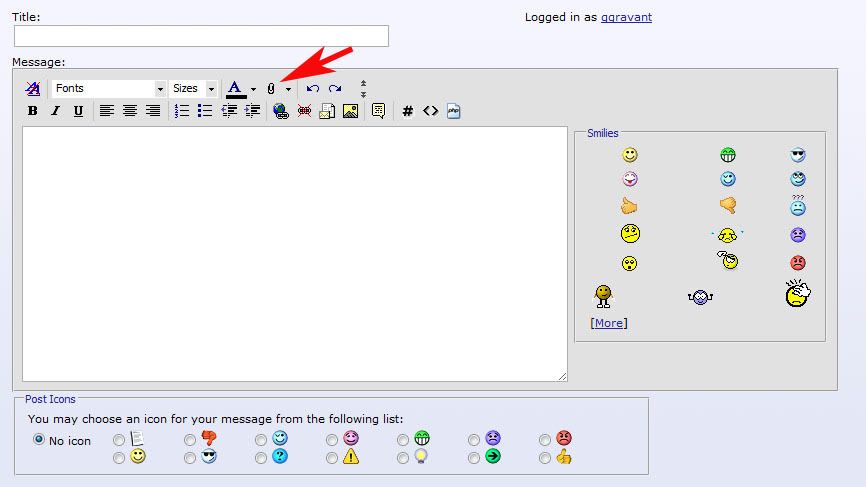
When you hit the Reply to Thread button, you will see the window as shown below. Just click on the little paper clip icon pointed to by the red arrow.
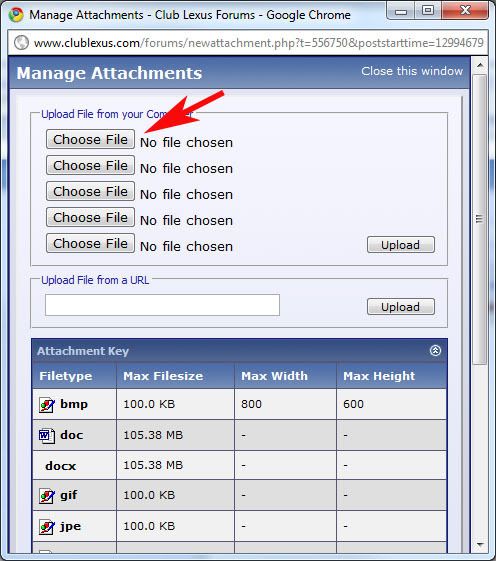
When you do that the "Manage Attachments" dialog will open. Click the first "Choose File" button and a standard Open dialog will display (Mac, Win XP, Win Vista will be a bit different).
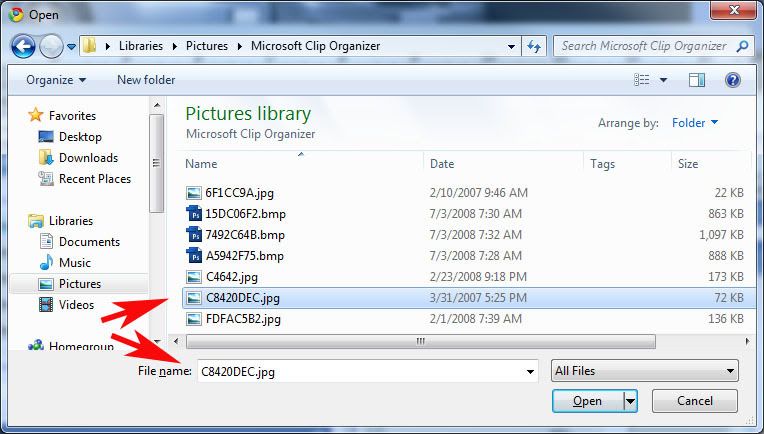
Navigate to the folder that you stored your pictures on from your CD and click on the file you want to upload. I show the C8420DEC.jpg highlighted and it also shows up in the File name: box below. Then click the open button in the lower right:
You will then return to the Manage Attachments dialog and the file name you chose will be shown next to the Choose File button that you just clicked. In the example below, I did it three times, so three files are listed next to those buttons:
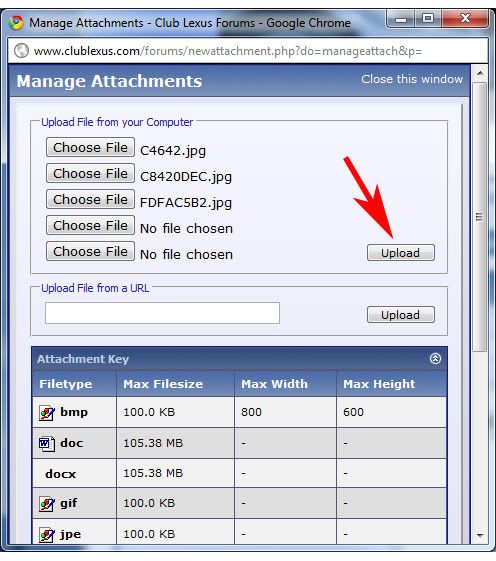
Next hit the Upload button and the files you selected will be sent to Club Lexus. It may take several seconds, but eventually you will see them as shown in the Current Attachments area. You can also remove individual files if needed. One issue you may have is that the pictures may be too large. If so, they would have to be re-sized and there are thread on this site about how to do that, but this example assumes they are small enough.

Finally click the Close this window link at the top right of Manage Attachments, and you will be back at the Reply to Thread window, and you will see your files attached lower down in the window (you may have to scroll a bit):
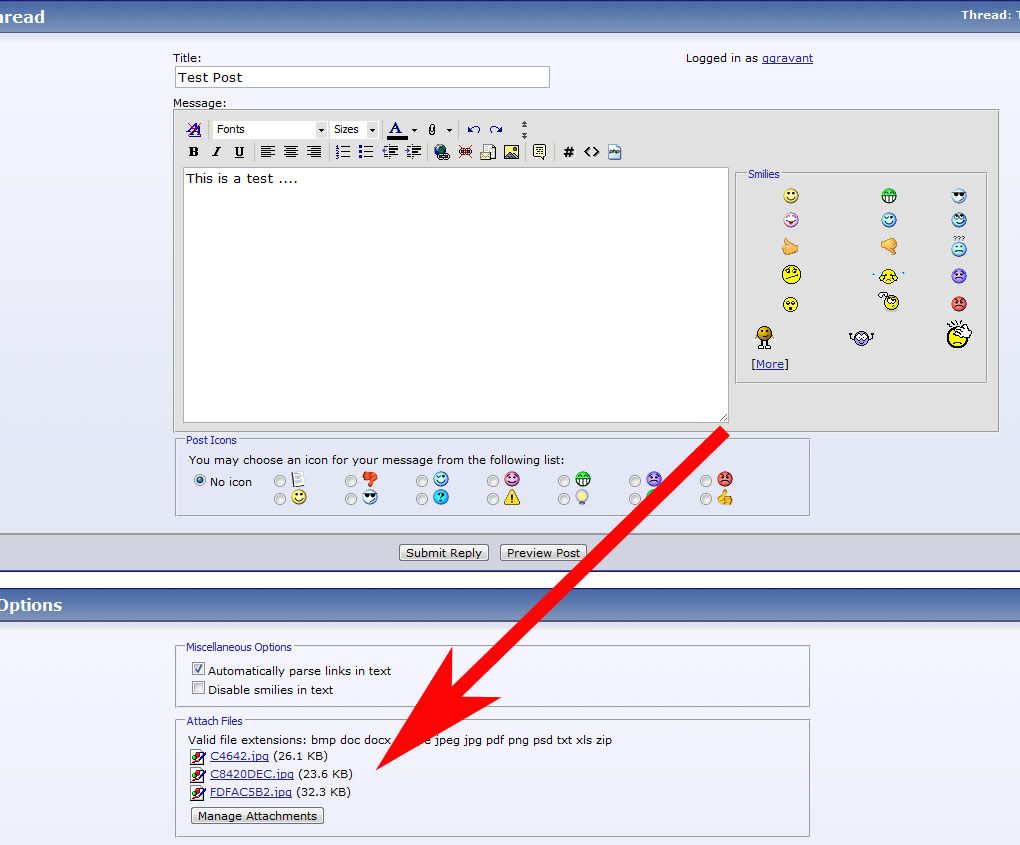
Just add any text you want to include with the reply and either click the Preview Post or Submit Reply buttons. I usually like to Preview Post first to make sure the pictures show up as expected. The limitations with this method are that you can only attach 5 pictures per reply and all the pics get attached at the end of of the post. You can not mix text and pics as I am doing in this reply.
Hope this helps ...


Thread
Thread Starter
Forum
Replies
Last Post
nas2344
Automotive Care & Detailing
15
06-19-17 10:55 AM
PB430
Automotive Care & Detailing
3
12-02-03 12:48 PM