

 01-09-15, 10:04 AM
Last edit by: IB Advertising
See related guides and technical advice from our community experts:
Browse all: Lexus IS Lighting Guides
- Lexus: How to install HID Headlights (on your non-HID equipped 2IS)
Step by step instructions for do-it-yourself repairs
Browse all: Lexus IS Lighting Guides

Lexus LED Fog Lamps at Sewell
10-20-13, 03:38 PM
#31
Driver School Candidate

Big difference is seen at the bottom and side where the LED lights up the road. I took the picture at 34mm, had it been taken at 16mm it would show more light on the outer edges. This is a great contrast to the old halogen fog lamps where I could barely tell they were on as they were washed out by the HID headlights.


 10-20-13, 09:17 PM
#34
Pole Position
Yes, received them and just installed them this morning. Here is a quick DIY.
I've been busy with work and soccer lately and haven't washed the car in over a month, so please excuse the dirty RX. Due to the tight space, I could not use my DSLR, we'll have to live with the pictures taken with my phone.
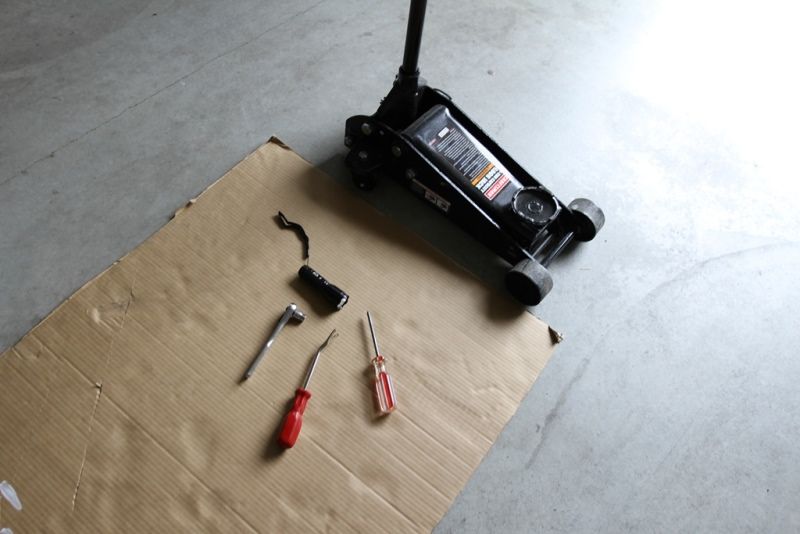
1st Picture - Tools:
- I cut out a piece of cardboard to have something to sit/lay down on
- a philips screwdriver
- ratchet wrench 10mm socket worked well for me
- trim removal tool (you can get by with a flat bladed screw driver)
- a small flashlight,
- my trusty Craftsman floor jack (optional, not needed but definitely helps)
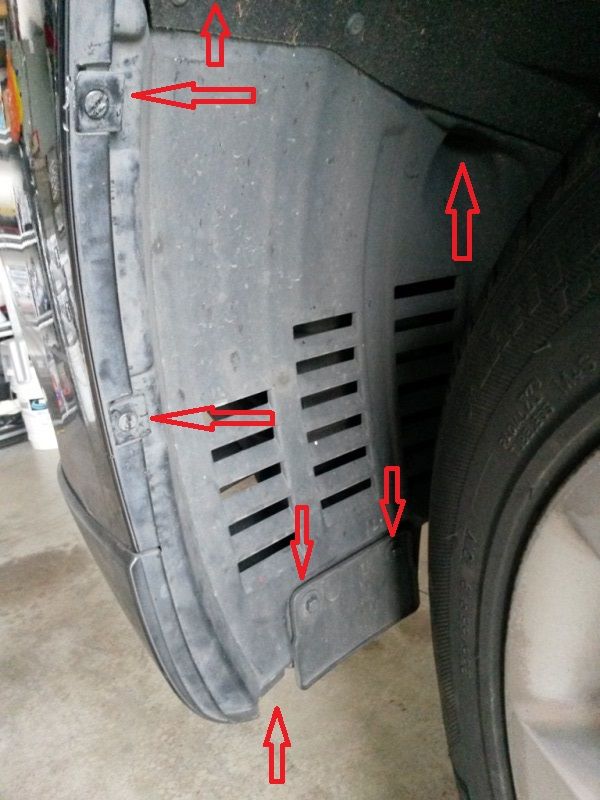
2nd Picture - Remove screws and clips of fender liner
- Turn the wheels away from the side you're working on to give more space
- remove two retaining clips on the outer edge of the fender, they stand vertical, rotate them horizontal then pull out
- remove two clips holding the carpet (top arrow and right most arrow)
- remove 3 screws as shown at the bottom, the bottom most screw is accessible from beneath
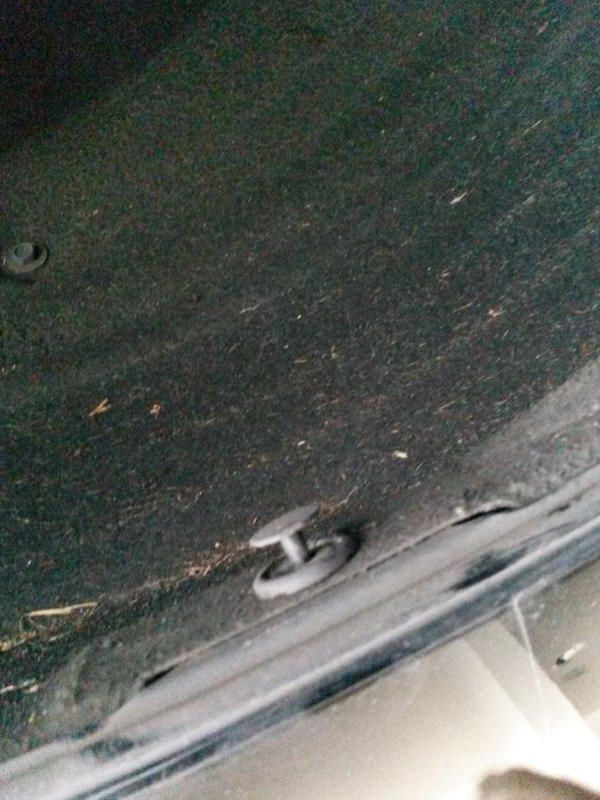
3rd Picture - Carpet clip
- to remove the carpet clip, just pry out the center then pull the entire clip out
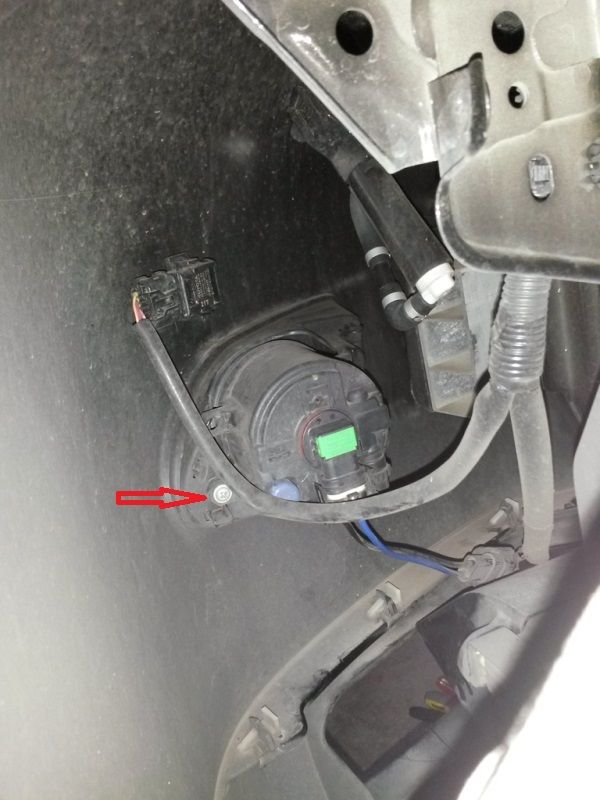
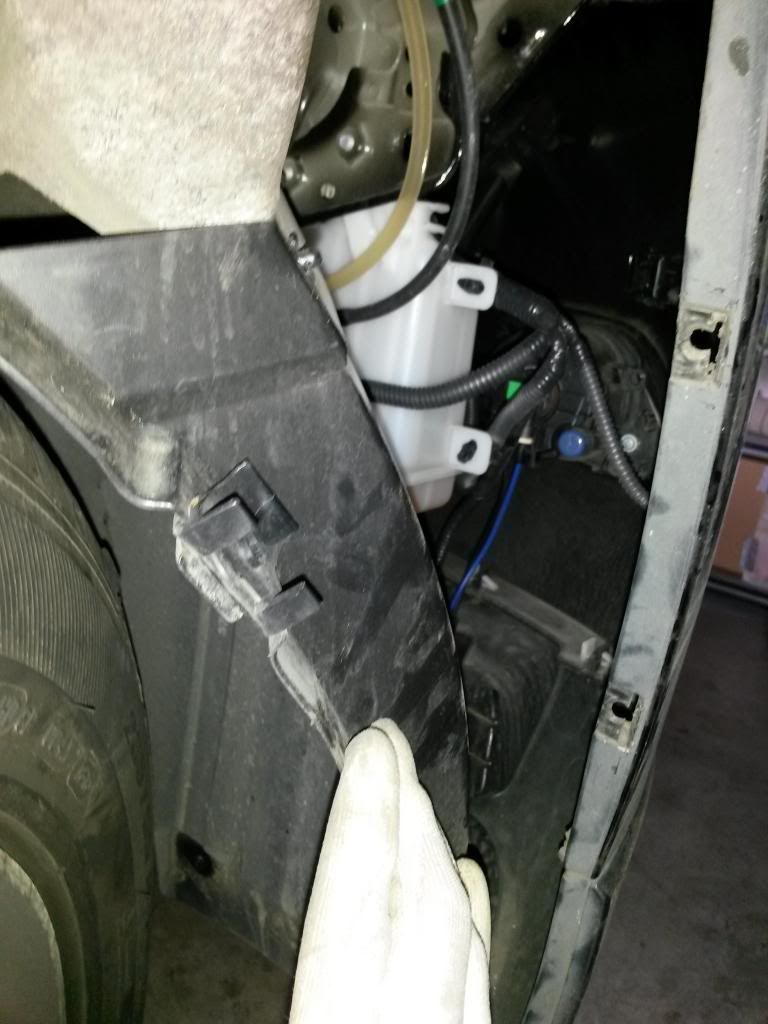
4th Picture - Driver's side fog light
- pull back the fender liner - I found it easiest to start out pulling away the bumper to release the fender liner, then pull the liner to the side
- looking inside, you can see the fog light is held on by a single screw (red arrow)
- the tabs on the opposite side simply insert into a slot
- Also visible:
-- the wire on top of the fog light is for the parking sensor
-- the black/white hose on the upper/right of the fog light is for the headlight washer
5th Picture - Passenger side fog light
- pulling back the fender liner shows the passenger side fog light
6th Picture - Inside passenger side
- Again, the passenger side fog light is held on by only a single screw

7th Picture - Detailed view (passenger side)
- A view looking from the inside the bumper, showing the screw hole (circle) and the two slots through which the fog light tabs inserts (arrows)

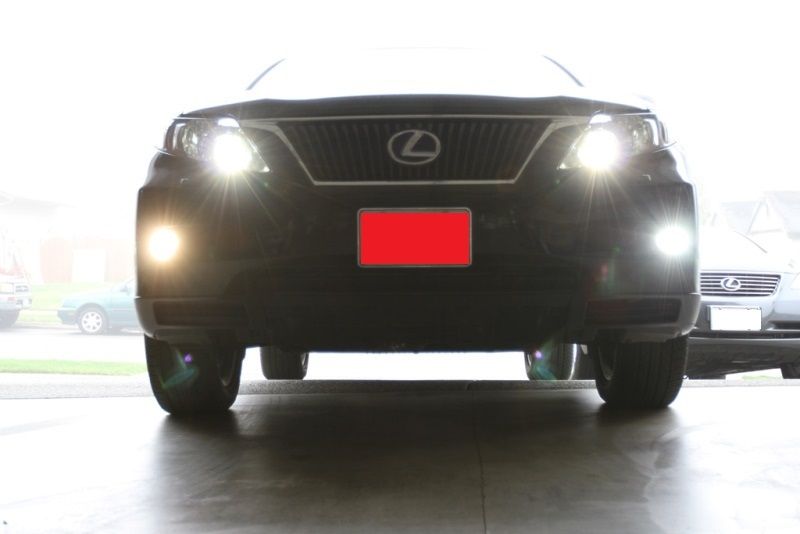
8th Picture - Comparison
- Driver's side = LED foglamp
- Passenger side = Philips X-tremeVision Ultra H11
- Notice the difference; the LED fogs looks to be even whiter than the HID.
Removal/Installation was simple. It took me about 30 minutes to do this. Everything was plug & play
I hope this helps any DIYer out there - it's not as bad as you might think. Bumper removal absolutely NOT required!
After I get it washed and cleaned up, I'll have more pictures to share.
I've been busy with work and soccer lately and haven't washed the car in over a month, so please excuse the dirty RX. Due to the tight space, I could not use my DSLR, we'll have to live with the pictures taken with my phone.
1st Picture - Tools:
- I cut out a piece of cardboard to have something to sit/lay down on
- a philips screwdriver
- ratchet wrench 10mm socket worked well for me
- trim removal tool (you can get by with a flat bladed screw driver)
- a small flashlight,
- my trusty Craftsman floor jack (optional, not needed but definitely helps)
2nd Picture - Remove screws and clips of fender liner
- Turn the wheels away from the side you're working on to give more space
- remove two retaining clips on the outer edge of the fender, they stand vertical, rotate them horizontal then pull out
- remove two clips holding the carpet (top arrow and right most arrow)
- remove 3 screws as shown at the bottom, the bottom most screw is accessible from beneath
3rd Picture - Carpet clip
- to remove the carpet clip, just pry out the center then pull the entire clip out
4th Picture - Driver's side fog light
- pull back the fender liner - I found it easiest to start out pulling away the bumper to release the fender liner, then pull the liner to the side
- looking inside, you can see the fog light is held on by a single screw (red arrow)
- the tabs on the opposite side simply insert into a slot
- Also visible:
-- the wire on top of the fog light is for the parking sensor
-- the black/white hose on the upper/right of the fog light is for the headlight washer
5th Picture - Passenger side fog light
- pulling back the fender liner shows the passenger side fog light
6th Picture - Inside passenger side
- Again, the passenger side fog light is held on by only a single screw
7th Picture - Detailed view (passenger side)
- A view looking from the inside the bumper, showing the screw hole (circle) and the two slots through which the fog light tabs inserts (arrows)
8th Picture - Comparison
- Driver's side = LED foglamp
- Passenger side = Philips X-tremeVision Ultra H11
- Notice the difference; the LED fogs looks to be even whiter than the HID.
Removal/Installation was simple. It took me about 30 minutes to do this. Everything was plug & play
I hope this helps any DIYer out there - it's not as bad as you might think. Bumper removal absolutely NOT required!
After I get it washed and cleaned up, I'll have more pictures to share.
10-20-13, 10:24 PM
#36
Intermediate
Thread Starter

Sorry, I did not take any pictures with the halogens prior to the installation... The only comparison pics I have is the head-on shot with one side being H11 bulb and the other LED. I was too excited with the installation and didn't think about it =)
10-20-13, 10:31 PM
#37
Intermediate
Thread Starter
As a tip to anyone who is about to do this...
I ordered a pair of LAMIN-X clear protection film for the foglamps. I installed the film and let them dry overnight before installing the lamps onto the car because its much easier to work with while the lamps are not behind the bumper.
You can find them here:
http://www.lamin-x.com/Lexus-RX-10-1...ers-p/l116.htm
10-21-13, 06:40 PM
#38

Wow. I'm impressed! Those LED fogs look great! Thanks for the write up. I may just have to order these. I got my CPO 2010 450H about a year ago and still have yet to do anything to the car. I typically heavily modify all cars I own but told myself I wouldn't with the RX but hey...this is OEM right, by the way I'm the king of rationalizations. 
Rudi
Rudi
10-21-13, 07:57 PM
#39
Intermediate
Thread Starter
Thanks everyone for the complements.
For those who aren't aware, if you create an account at Sewell and link it to your ClubLexus membership, you'll get a nice discount on a lot of the items they sell.
With my sewell account, these LED foglamps came down to $116 each. I paid $239.07 total including shipping.
For those who aren't aware, if you create an account at Sewell and link it to your ClubLexus membership, you'll get a nice discount on a lot of the items they sell.
With my sewell account, these LED foglamps came down to $116 each. I paid $239.07 total including shipping.
11-13-13, 06:15 PM
#40

Installed Lexus LED Fog lights from Sewell this afternoon on my 2014 RX. Love the light color and output…
I went and took off each Wheel before removing the Wheel Well Liner.
Made the install much easier.
There are more clips on the 2014 RX then what 07LexusGuy removed from his RX.
My fogs are much whiter then the OEM Hids.
I went and took off each Wheel before removing the Wheel Well Liner.
Made the install much easier.
There are more clips on the 2014 RX then what 07LexusGuy removed from his RX.
My fogs are much whiter then the OEM Hids.
Last edited by A320pilot; 11-16-13 at 03:44 AM.
11-15-13, 08:18 PM
#42
Driver School Candidate

Join Date: Nov 2013
Location: OR
Posts: 15
Likes: 0
Received 0 Likes
on
0 Posts
Installed Lexus LED Fog lights from Sewell this afternoon on my 2014 RX. Love the light color and output�
I went and took off each Wheel before removing the Wheel Well Liner.
Made the install much easier.
There are more clips on the 2014 RX then what 07LexusGuy removed from his RX.
My fogs are much whiter then the OEM Hids.
Now to do my Es300h
I went and took off each Wheel before removing the Wheel Well Liner.
Made the install much easier.
There are more clips on the 2014 RX then what 07LexusGuy removed from his RX.
My fogs are much whiter then the OEM Hids.
Now to do my Es300h
11-16-13, 03:42 AM
#43
I took some pics of my 2013 Es300h with Vleds and my 2014 Rx350 with the Oem Fog Lamps
You can see the differences of each application’s light output.
I posted them in the Es300 forum…. #’s 137 & 138
https://www.clublexus.com/forums/es3...lights-10.html
You can see the differences of each application’s light output.
I posted them in the Es300 forum…. #’s 137 & 138
https://www.clublexus.com/forums/es3...lights-10.html
 01-29-14, 10:31 AM
#45
Driver School Candidate
Thank you for posted the pictures, I recently ordered a 3k (yellow) HID kit; and wanted to get an idea on how to get to the fog lights, whether it's better to go from loosening the wheel well liner or the bottom liner from under the front bumper.
Very useful information to help me gained an idea on how/where to begin.
It's been cold here in New York recently, with snow flurries once a while.
I am waiting for one good warmer weekend to install it, I will post pictures upon successful installation.
Very useful information to help me gained an idea on how/where to begin.
It's been cold here in New York recently, with snow flurries once a while.
I am waiting for one good warmer weekend to install it, I will post pictures upon successful installation.