Pictures of my 98 SC with a Modified OEM 92 Front Bumper Lip
 03-08-08, 01:55 PM
#1
Driver
Thread Starter

Join Date: Dec 2007
Location: MICHIGAN
Posts: 188
Likes: 0
Received 0 Likes
on
0 Posts
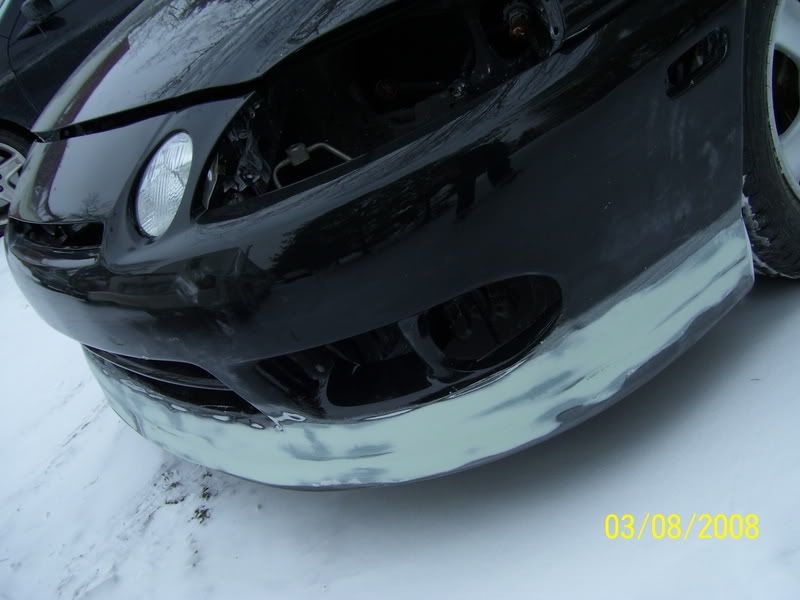
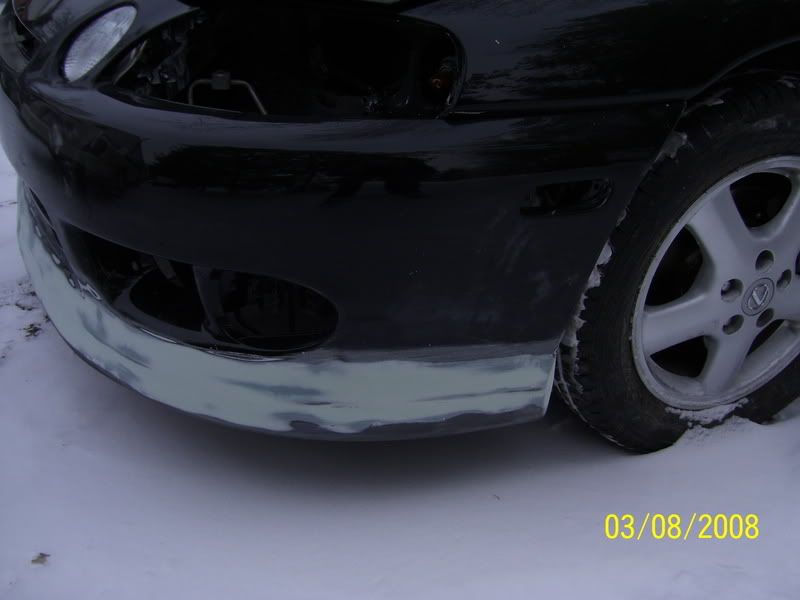
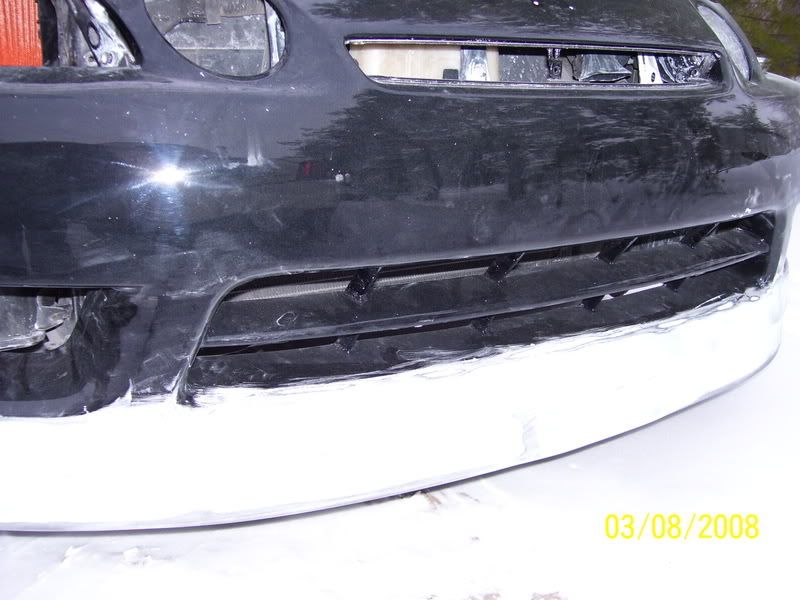
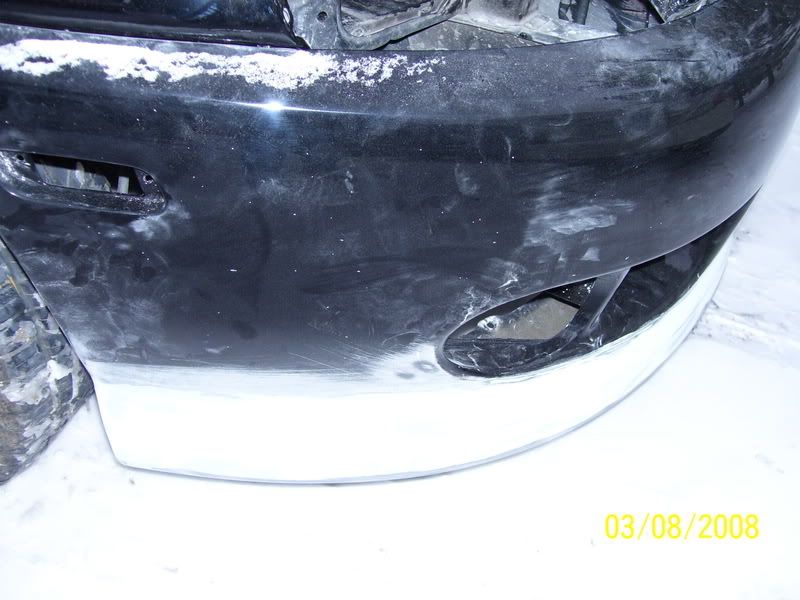
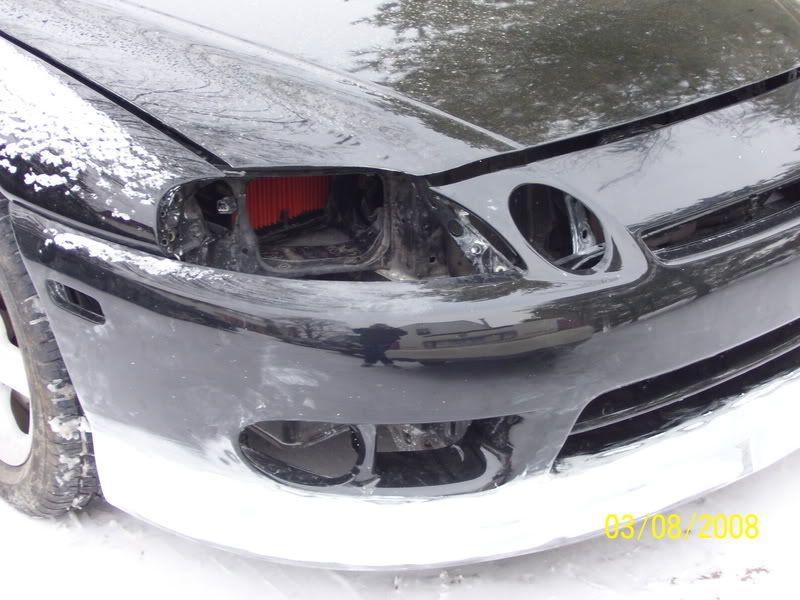
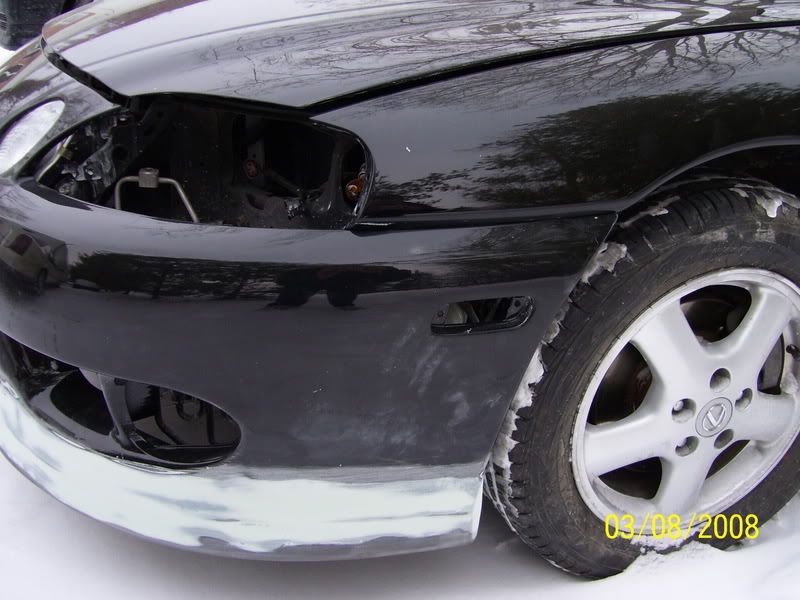
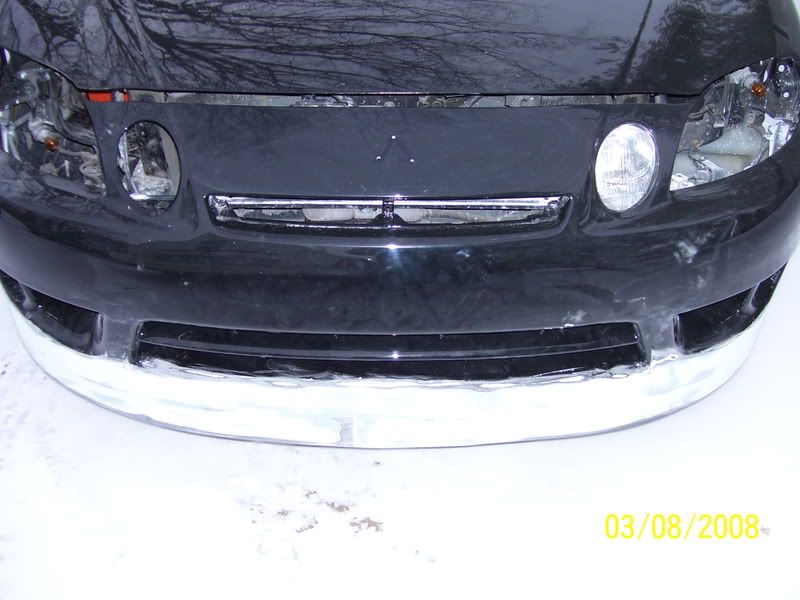
I decided to remove the factory chin spoiler from my Dad's 92 SC400 and modify it to work on this 98 SC400. I decided to go one step further than just bolting it on and making a middle extension piece and than painting it. I decided to fill the gap between the bumper and the chin spoiler. We used an automotive resin to make the middle extension piece between the two sides of the OEM spoiler. This middle piece is very rubbery like the factory and should also remain pliable once it is painted. We are in the process of also building an extended large snorkel that goes from the front grille to the factory airbox. The weather here in MI sucks. The pictures hopefully give you guys an idea of what this will look like when completed. It is hard to tell in the pictures but we kept the bottom front bumper lines. I think it looks much better in person than in these few pictures. We still have more sanding and prepping before the primer gets applied. Enjoy!!

Last edited by 98supra6sp; 03-08-08 at 01:59 PM.


 03-08-08, 02:43 PM
#7
Pole Position
Join Date: Nov 2007
Location: Saarland,-Germany
Posts: 242
Likes: 0
Received 0 Likes
on
0 Posts
 wet ? LOL never heard that one before
Trending Topics

 03-08-08, 05:20 PM
#11
Driver
Thread Starter
Join Date: Dec 2007
Location: MICHIGAN
Posts: 188
Likes: 0
Received 0 Likes
on
0 Posts
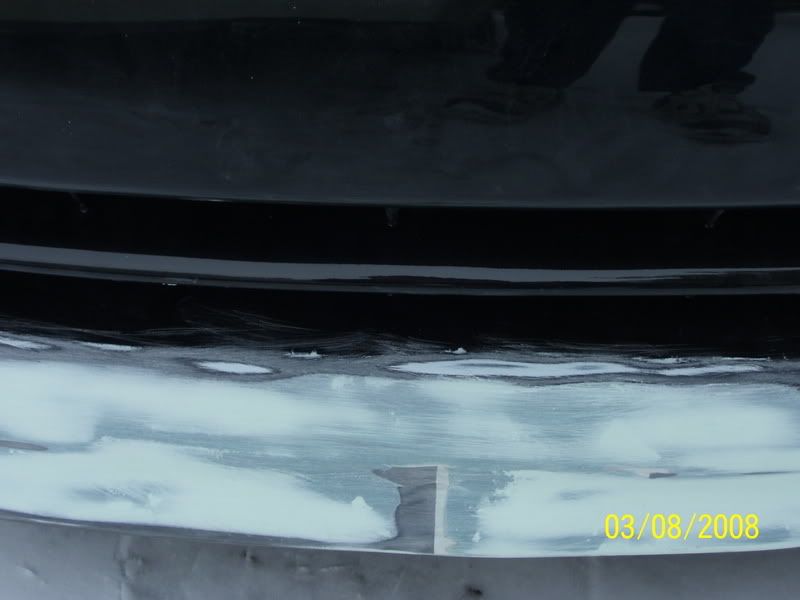
We used this Automotive epoxy glue that is still pliable to cast a mold that went about 3 inches inside of each side of the original lip. We also shaved down the original bumper in places for proper fitment. We used all of the 92 OEM brackets and bolts. We also used a epoxy bonding glue to secure the bumper to the lower lip. It looks a lot better when you can see the lines of the bumper, my pictures were horrible. I am amazed at how flexible this center piece is as well as strong at the same time. We used heated up ABS plastic to mold the underside of the bumper cover together as one piece. I can't wait to see the finished product.
