
Is it safe to power sand the highlights?
 10-04-09, 05:38 PM
#1
Driver
Thread Starter

I delined the lens by hand but I want to sand it down so its thinner.
Will it be safe to use a palm held power sander and go at it with a fine grit sandpaper?
I don't want to burn the plastic like I did with my last headlight
Will it be safe to use a palm held power sander and go at it with a fine grit sandpaper?
I don't want to burn the plastic like I did with my last headlight
 10-04-09, 08:13 PM
#3
Driver
iTrader: (5)
Join Date: Apr 2008
Location: CA
Posts: 105
Likes: 0
Received 0 Likes
on
0 Posts
do not use anything lower than 1500 grit sandpaper, trust me its a PITFA to buff after.
I have a question for you, how do you deline the lens and do you have any pictures of how they look? Kinda interested in the outcome.
I have a question for you, how do you deline the lens and do you have any pictures of how they look? Kinda interested in the outcome.
10-04-09, 08:32 PM
#4
Driver
Thread Starter
I only did the area infront of the projector because I have TSX projectors in there

Trending Topics
11-10-09, 06:42 PM
#8
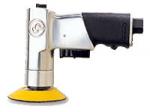
I used the CP-7200 Mini Random Orbital Sander for everything associated with my headlight lenses.
I used 3M hookit 320, 400, 500, then wet 600, 800, 1000 and then clear coated then lenses. Turned out perfect.
It's about $100-$150 for everything you need.
http://www.airelectrictool.com/en-US...ers-polishers/
Last edited by UpInTheLex; 11-10-09 at 06:47 PM.
11-10-09, 07:09 PM
#9
I wouldnt use power tools just cause you dont have the same control as doing it by hand..same with sanding a car while prepping for paint..by hand is always best, and it wont cost you $100+ extra for something that takes 10 minutes for each headlight doing it by hand.
Process, and I have done this on more cars than I can count including my SC.
Items/Materials needed:
800 grit (depending on how bad the lens is)
1000 grit
1200 grit
1800 grit
2000 grit
**2 4''x8'' pieces of each listed above per headlight**
Meguiars Plastx, with buff ball(kits are sold at wal-mart for $25)(**LINK: http://www.meguiarsdirect.com/detail/MEG+G1900)
2 terry cloth towels
2 microfiber towels
1 cordless drill for Meguairs ball
5 gal bucket with clean water
1: Remove headlight, or prep area around light (fender, bumper, open hood) with painters tape.
2: Starting with 800 grit(again depending on how severely damaged the lens is, you can start here with 1000 grit) soak sand paper in water and wet headlight thoroughly.
3: Using light pressure, sand in a uni-directional pattern (left to right works best) keeping sandpaper and lens as wet as possible till surface is scuffed evenly. If your headlights are really yellow, you will see the water on the lens start to discolor while sanding.
4: Continue this process till lights are very hazy, but appear white and show no signs of yellowing or discoloration on the lens or in the water run off from sanding.
5: Now the time consuming part. Starting with the 1000 grit or 1200 grit depending on headlight condition, and sanding in the same direction keeping everything wet as possible, sand the lens smooth. After the 1200 grit you should beable to start to see through the lens again, but it will still be very hazy.
6: Continue step 5 until you have reached the point where you can start to see the lines inside the lenses. Now, using 1800grit and a tad bit more pressure, continue sanding/buffing again while keeping everything as wet as possible until the lens is clear.
7: Once lens is clear and shows minimal signs of haze from sanding, use the 2000grit until the lens appears crystal clear with water on it..when it dries it will appear slightly hazy, but the water is the key..you can even continue with a higher grit paper if desired..I personally went all the way to a 3500 grit on my SC, but that was by choice. I did my Durango with 2000 grit and got the same results, just took a bit longer.
8: After you have reached the point where the headlight is extremely smooth to the touch, and I mean bikini-waxed smooth, use a terry cloth towel to dry the lenses completely.
9: Now your ready to use the Plastx. If you have the ball, or know what I am talking about, place a liberal amount on Plastx on the ball in the center, and buff lens with the cordless drill on high speed. I used about a .25 amount each time, 5 to 6 times on each headlight. If you DONT have the ball, using a terry cloth towel, and a dense foam block if avaliable, put some elbow grease to it, and start buffing using a good amount of pressure. More pressure= better cutting performance from the Plastx abrasive nature.
10: After lenses are 100% crystal clear from buffing, using a microfiber towel or detailing cloth, place a small line of Plastx on the headlight and LIGHTLY buff by hand, and when finished, flip detailing towel to a clean side, and wipe off all excess Plastx.
11: Pull chair from garage, place in front of your car approx 10ft back, open beer and enjoy your new headlights.
If I can find the time, I will do a step by step (with pictures of course, maybe a video) on how to do this properly.
Last edited by turbodremz; 11-10-09 at 07:13 PM.


Thread
Thread Starter
Forum
Replies
Last Post
Marqevans
RX - 4th Gen (2016-2022)
10
02-01-18 07:07 AM
bluelex
Automotive Care & Detailing
34
01-18-13 11:07 PM