
DIY SC400/300 High Beam Refinishing
 01-30-11, 01:14 PM
#1
Pole Position
Thread Starter
iTrader: (3)

Join Date: Jan 2011
Location: CA
Posts: 382
Likes: 0
Received 0 Likes
on
0 Posts
Hey everyone. Well I searched high and low and could not find a DIY for refinishing the high beam headlights. Lots of posts about the low beams. At any rate I refinished my low beams because they were pretty trashed. Previous owner must have let the car sit in the sprinklers. Drivers side headlight had condensation in it and the passenger side one had water in it at one time and the chrome was all discolored.
I am not a huge fan of blacking out the headlights, but in this case it was either buy new ones or do something about the chrome. I tried chrome paint, but that was a mess. So I settled on some nice black metallic. They lights look great, but now my high beams dont match.
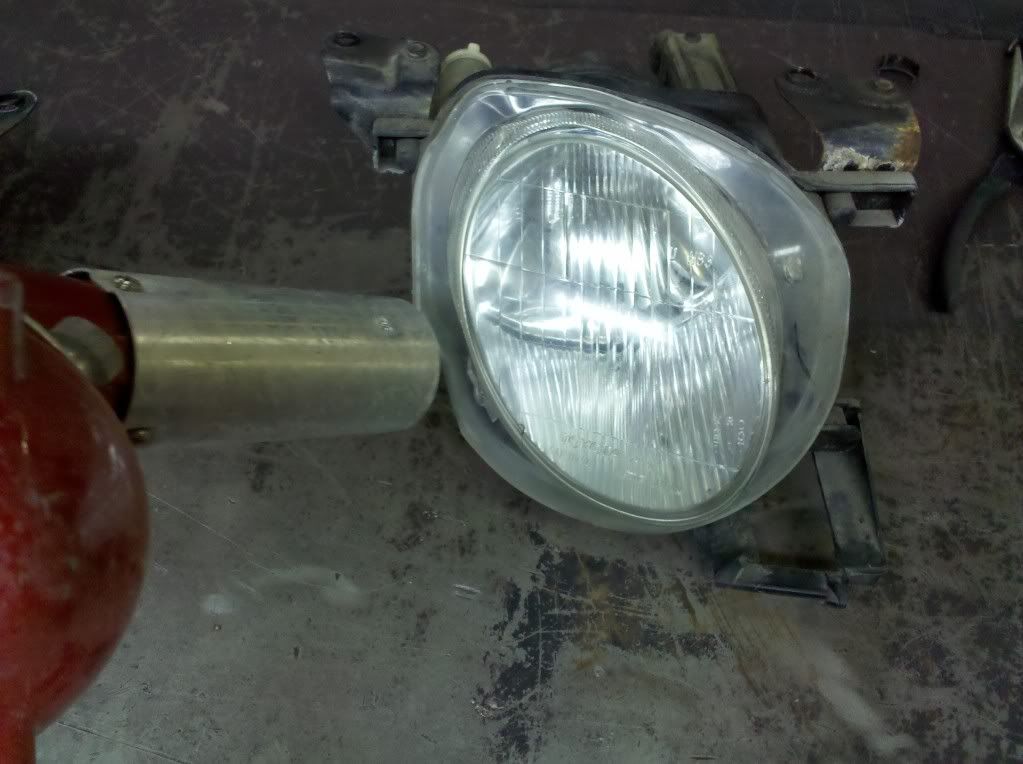
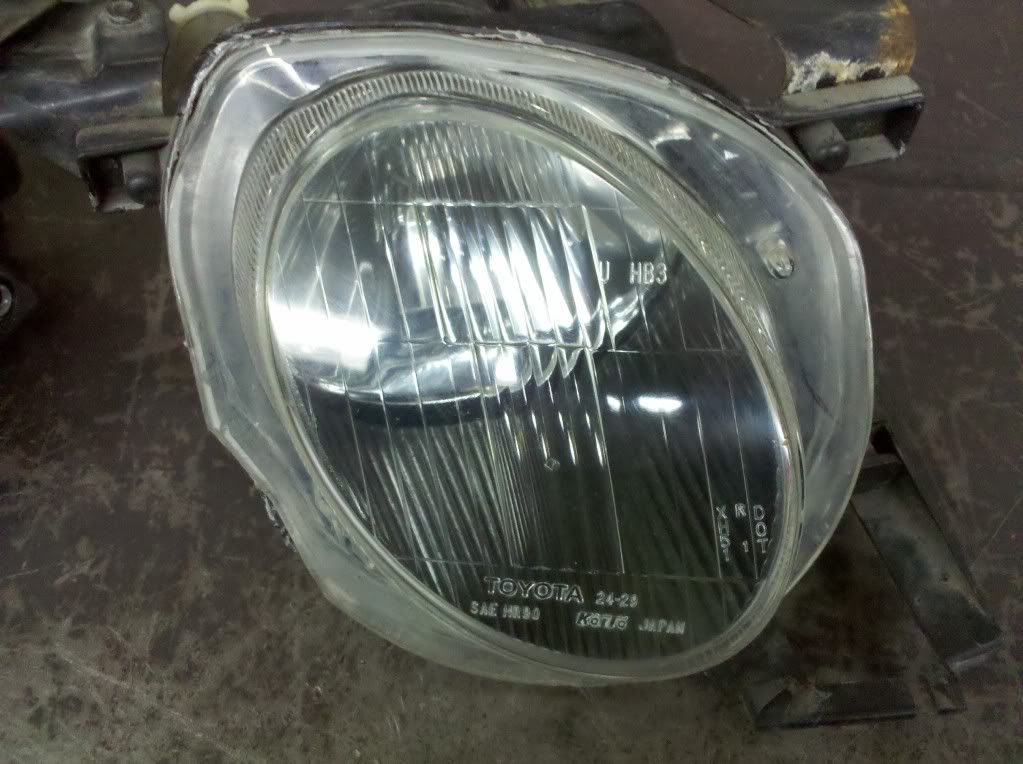
I did this purely for cosmetic reasons. The high beams, with the exception of yellowing were in great shape. Lights work. The reflector was nice and clear. These lights appear to be sealed better than the low beams. Getting them out was a bit of a PITA. Takeing the bumper cover off was not that fun, but to get em out you have to pull the cover.
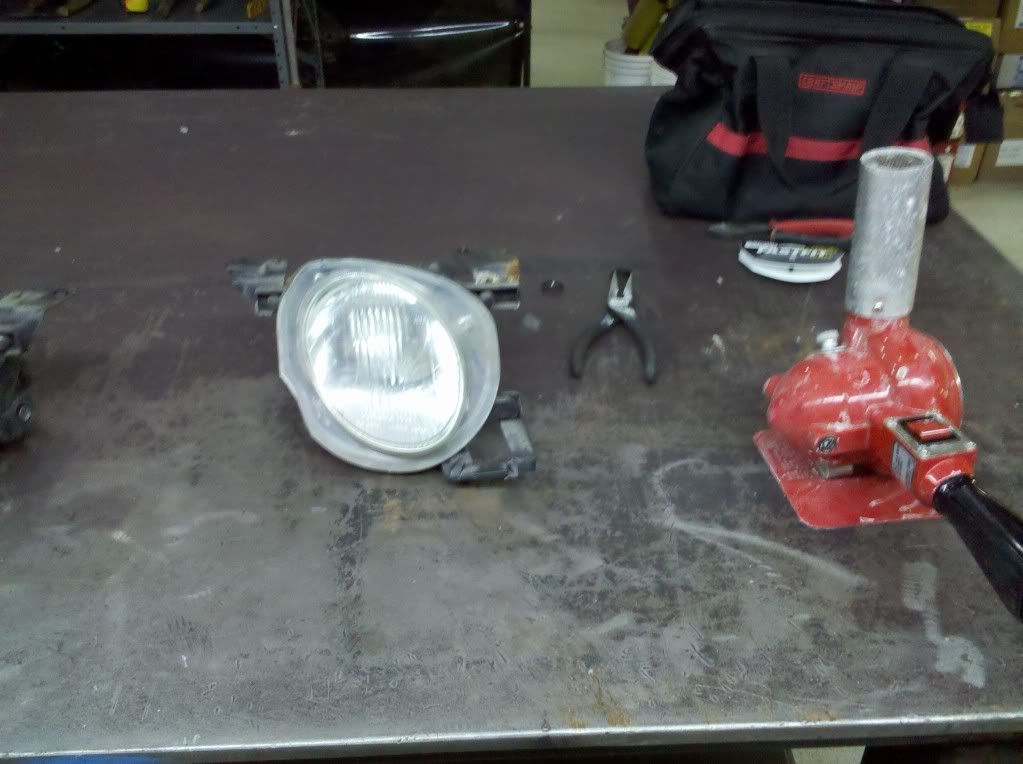
So this is what we start with.
I suppose you can use the oven method if you like. I did not have good results, plus I feel more in control with the heat gun. So heat up all of the edges evenly and dont stop otherwise you can melt the housing.
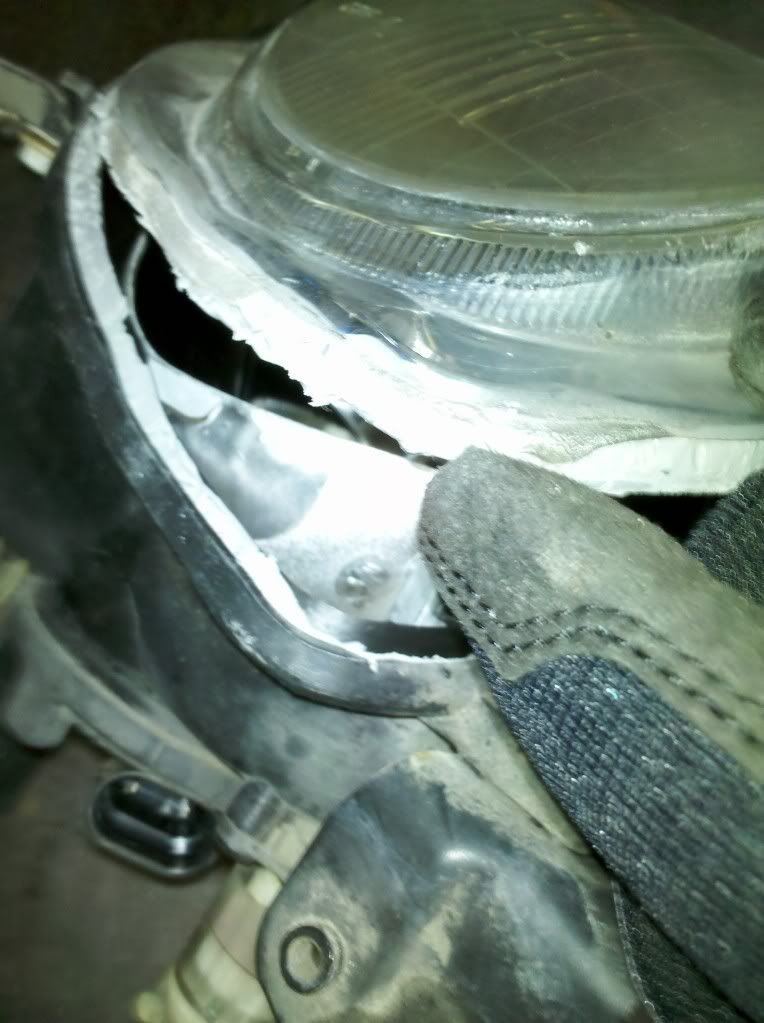
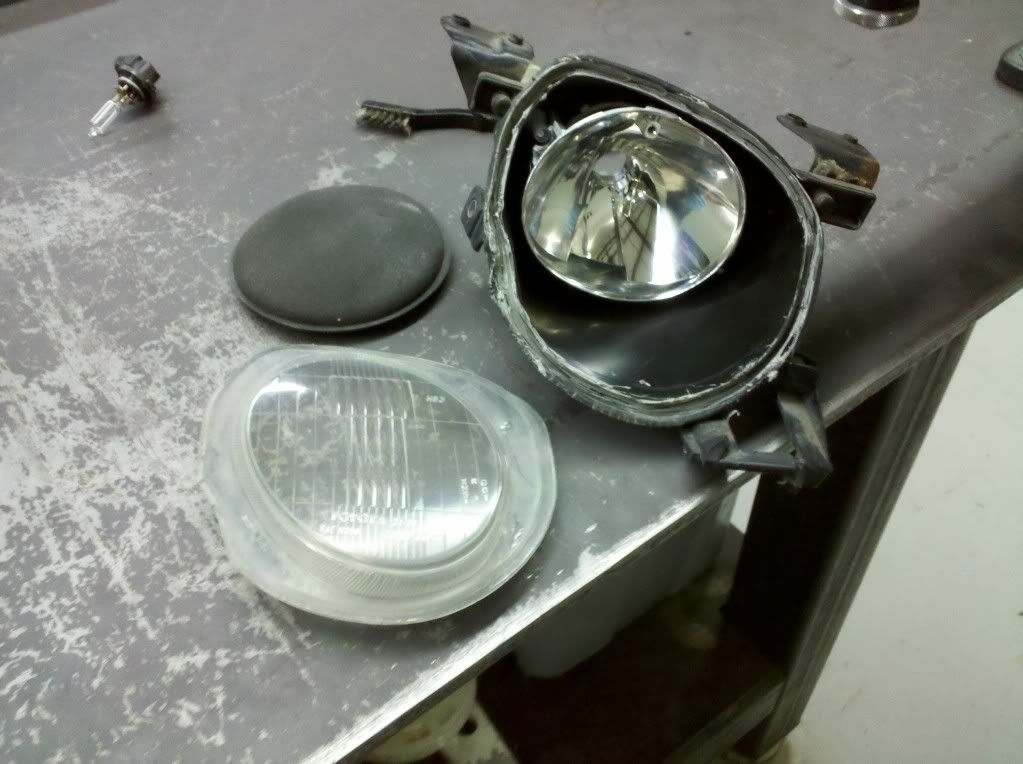
Find something with a flat blade and wedge it in between the housing and the lens. If you have expierence with the low beams, this will be a piece of cake. Peel it off.
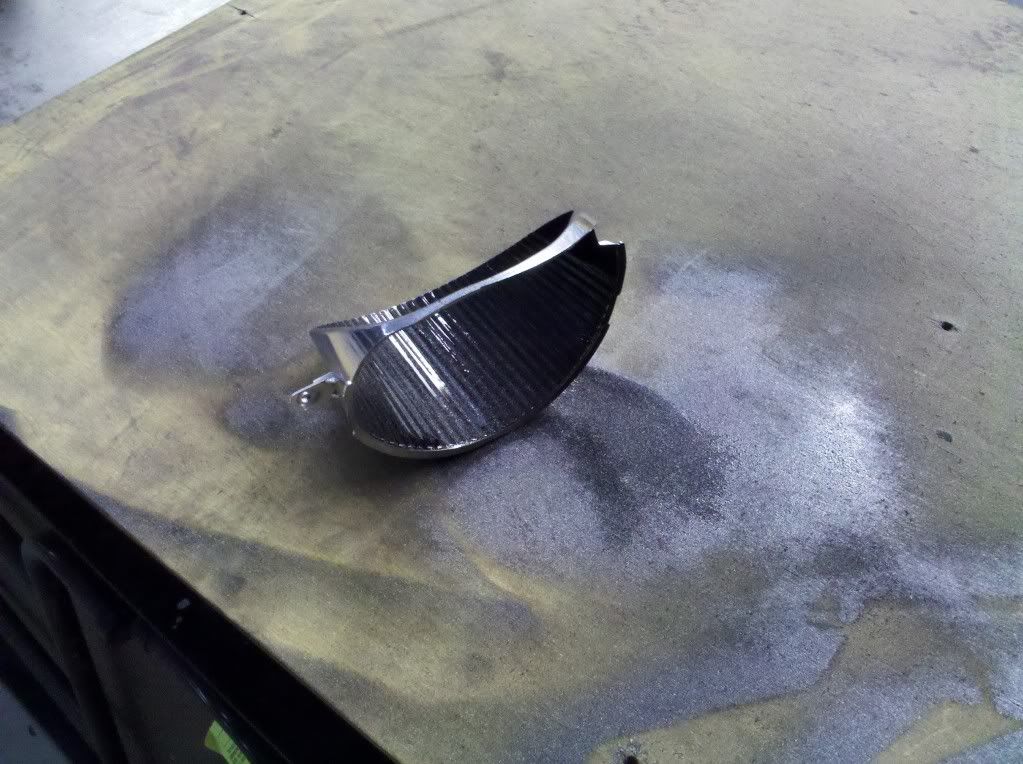
This is what the inside will look like. Two small phillips screws hold the chrome housing to the lens. Remove the screws and lift out the chrome plastic piece.

I used some sand paper to rough this piece up a bit. Be careful. The upper part of this piece is pretty thin and it looks like it could break quite easily.

I than applied the paint which went on rather nicely.
While you are waiting for your paint to dry this is a good time to get all of the sealer our of the channels of the housing and off the lens. I used the heat gun to warm it up than scraped it out.
I also took this time to refinish the lens. The 3M lens repair kit is awesome. It comes with a drill adaptor and you just use your drill. Very quick.
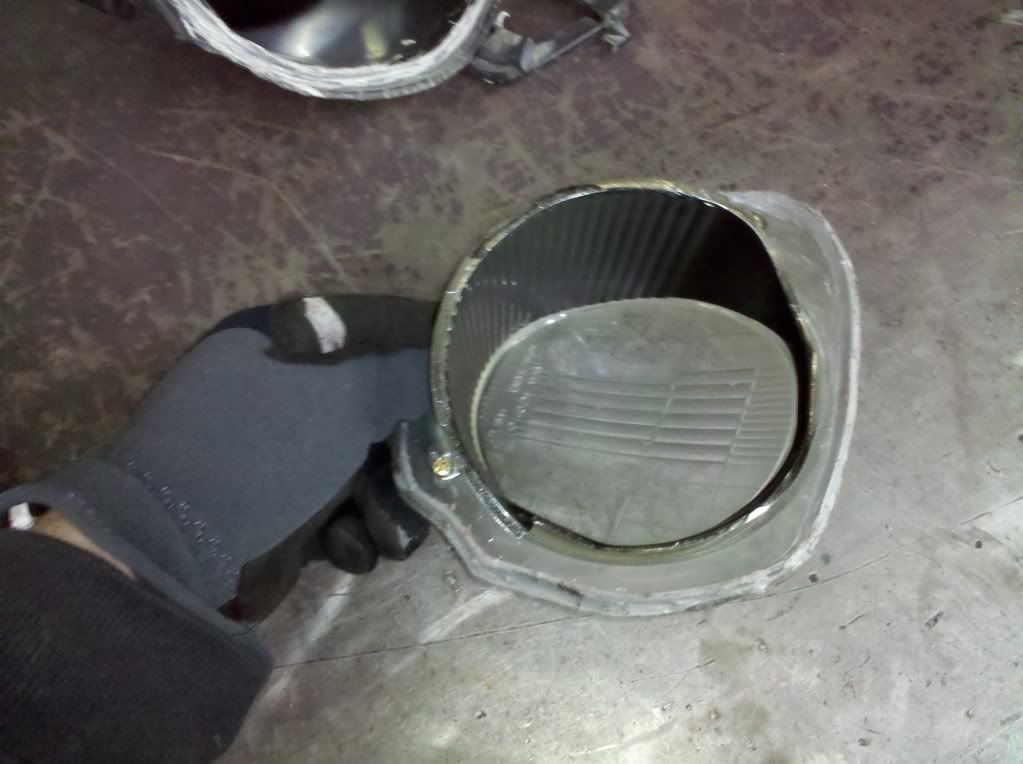
I also buffed the refelector on the inside of the housing just to be sure it was crystal clear.

Refinsihing the lens makes a huge difference.
Now that your painted piece shuold be dry, remount it into the lens.
I used O.L.T's method for refinishing the low beams. No need to stop now. Useing your 100% black silicone, glue the lens back into the housing. Reattach your clips and your done.
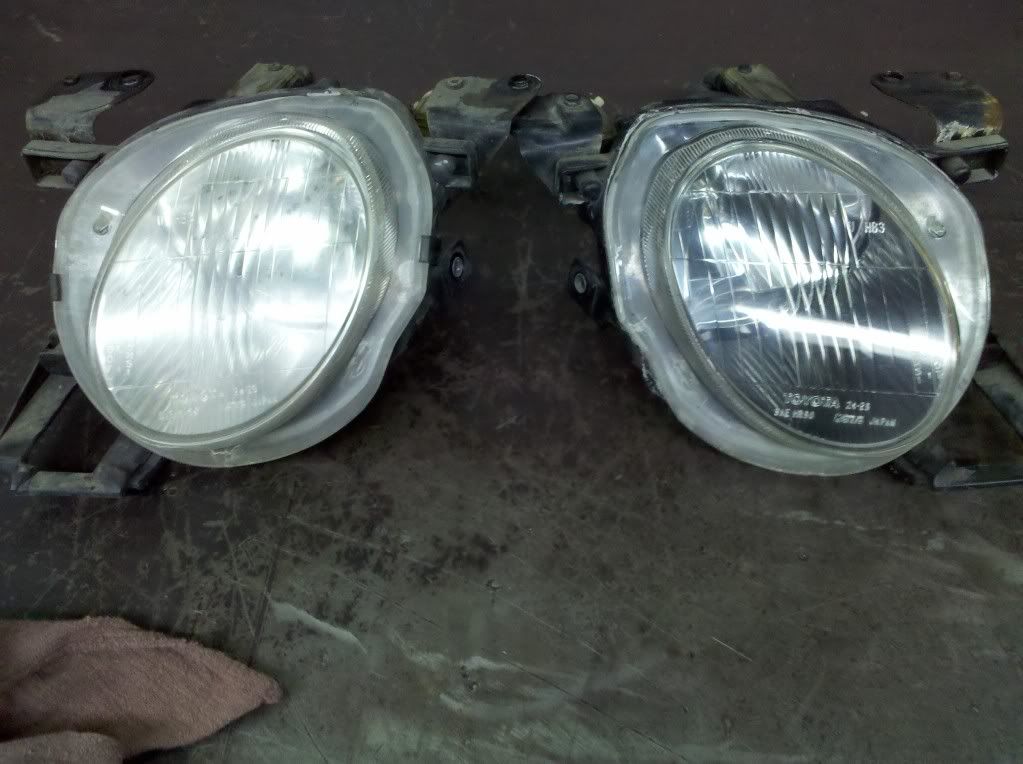
Heres the comparison of before and after.
Ill try to post some more pictures when I get them reinstalled on the car.
I am not a huge fan of blacking out the headlights, but in this case it was either buy new ones or do something about the chrome. I tried chrome paint, but that was a mess. So I settled on some nice black metallic. They lights look great, but now my high beams dont match.
I did this purely for cosmetic reasons. The high beams, with the exception of yellowing were in great shape. Lights work. The reflector was nice and clear. These lights appear to be sealed better than the low beams. Getting them out was a bit of a PITA. Takeing the bumper cover off was not that fun, but to get em out you have to pull the cover.
So this is what we start with.
I suppose you can use the oven method if you like. I did not have good results, plus I feel more in control with the heat gun. So heat up all of the edges evenly and dont stop otherwise you can melt the housing.
Find something with a flat blade and wedge it in between the housing and the lens. If you have expierence with the low beams, this will be a piece of cake. Peel it off.
This is what the inside will look like. Two small phillips screws hold the chrome housing to the lens. Remove the screws and lift out the chrome plastic piece.
I used some sand paper to rough this piece up a bit. Be careful. The upper part of this piece is pretty thin and it looks like it could break quite easily.
I than applied the paint which went on rather nicely.
While you are waiting for your paint to dry this is a good time to get all of the sealer our of the channels of the housing and off the lens. I used the heat gun to warm it up than scraped it out.
I also took this time to refinish the lens. The 3M lens repair kit is awesome. It comes with a drill adaptor and you just use your drill. Very quick.
I also buffed the refelector on the inside of the housing just to be sure it was crystal clear.
Refinsihing the lens makes a huge difference.
Now that your painted piece shuold be dry, remount it into the lens.
I used O.L.T's method for refinishing the low beams. No need to stop now. Useing your 100% black silicone, glue the lens back into the housing. Reattach your clips and your done.
Heres the comparison of before and after.
Ill try to post some more pictures when I get them reinstalled on the car.
Last edited by brad11140; 01-30-11 at 01:22 PM. Reason: Fixed typos
 01-30-11, 02:04 PM
#4
Pole Position
Thread Starter
iTrader: (3)
Join Date: Jan 2011
Location: CA
Posts: 382
Likes: 0
Received 0 Likes
on
0 Posts
Got it at pep boys. I think it was just called a headlight restoration kit. It's a small package and it has a drill bit deal and round sanding disks that are held on by Velcro. It was about $20
01-30-11, 02:13 PM
#5
Driver

Join Date: Jan 2011
Location: tx
Posts: 128
Likes: 0
Received 0 Likes
on
0 Posts
Thanks. I used some Meguiar's PlastX on my lowbeam lenses, and it made a big difference, but I did it by hand. Think I'll go for the attachments now and see if I can get a bit clearer job on them.
01-30-11, 02:21 PM
#6
Pole Position
Thread Starter
iTrader: (3)
Join Date: Jan 2011
Location: CA
Posts: 382
Likes: 0
Received 0 Likes
on
0 Posts
This was the first time I have did this. I would think doing it by hand could take awhile. The low beams have quite a bit of lens real estate. The drill makes it faster and consistent. I would say that the whole polishing process from start to finish on the high beams was about 5 minutes. Maybe a tad bit longer.

Trending Topics
 01-30-11, 05:45 PM
#9
Pole Position
Thread Starter
iTrader: (3)
Join Date: Jan 2011
Location: CA
Posts: 382
Likes: 0
Received 0 Likes
on
0 Posts
Thanks. Not on this one. They are plastic lenses. I guess it should be noted. Check your lights before you disassemble everything. Obviously if they are glass you will make a big mess and be buying new high beams.
01-31-11, 11:34 AM
#10
Pole Position
Thread Starter
iTrader: (3)
Join Date: Jan 2011
Location: CA
Posts: 382
Likes: 0
Received 0 Likes
on
0 Posts
Alright guys. Got everything put back together this morning. The body looks like crap, but at least I feel like I have did something.

Before
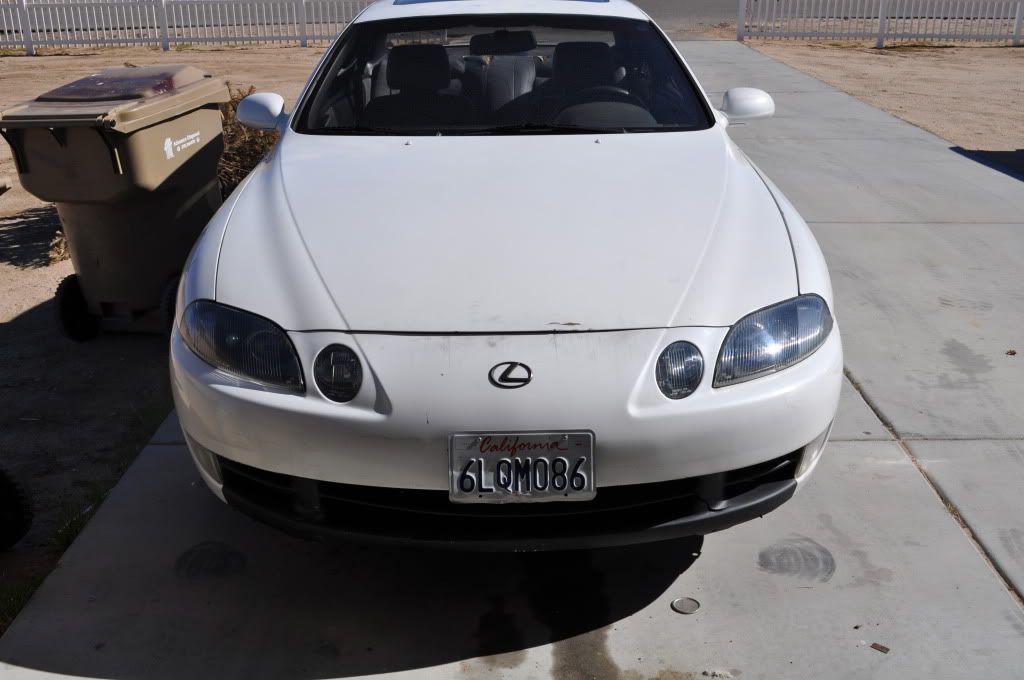
After
Before
After

 01-31-11, 03:12 PM
#14
Pole Position
Thread Starter
iTrader: (3)
Join Date: Jan 2011
Location: CA
Posts: 382
Likes: 0
Received 0 Likes
on
0 Posts
I have not even looked for glass ones. When I picked this car up I saw that something was going to have go be done about the headlights and my original plan was to pick up some of the halos off eBay. But all I have read in these forums is the horror stories with those lights. I am extremely happy with ow these came out. I think I'll focus on the tail lights next.
01-31-11, 03:16 PM
#15
I have not even looked for glass ones. When I picked this car up I saw that something was going to have go be done about the headlights and my original plan was to pick up some of the halos off eBay. But all I have read in these forums is the horror stories with those lights. I am extremely happy with ow these came out. I think I'll focus on the tail lights next.