
First attempt DIY headlight cleanup - FAIL
 05-04-11, 10:48 PM
#1

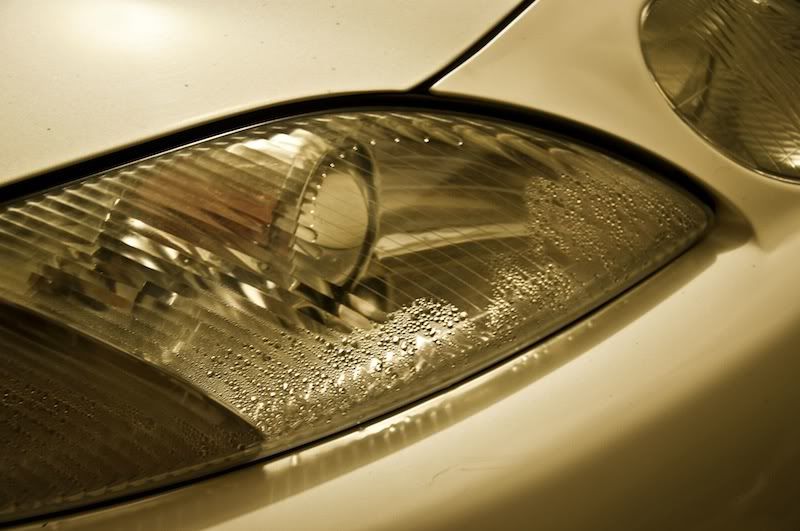
After I gave the car a good wash I had heavy condensation on the passenger side headlight. I have seen OLT's headlight DIY and it looked easy enough.
I take the headlight off and I am having no luck splitting the headlight apart. But from close inspection of my headlights I see signs of wipe marks inside the lens which suggest that the headlight may have been taken apart by the previous owner to fix it. The adhesive used may be stronger than OEM. Sticking it in the oven is not getting it to soften enough that I can split it open. It is sealed so tight that I am questioning where it should split apart.
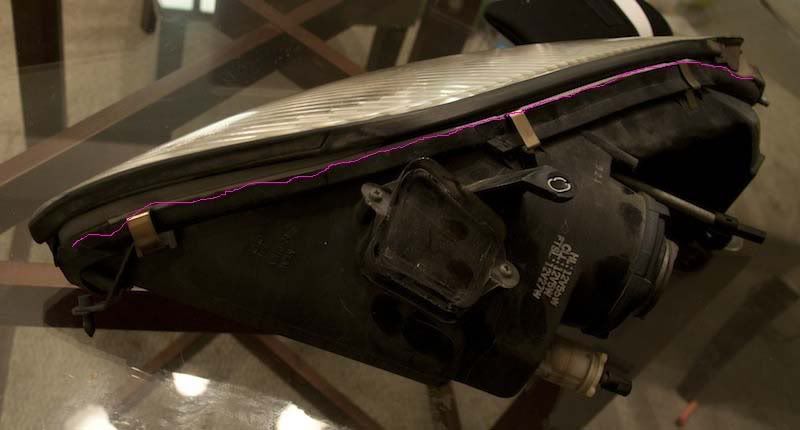
The 2nd picture I drew a pink line in the area where I think it should split apart. I need someone to in the forum to confirm.
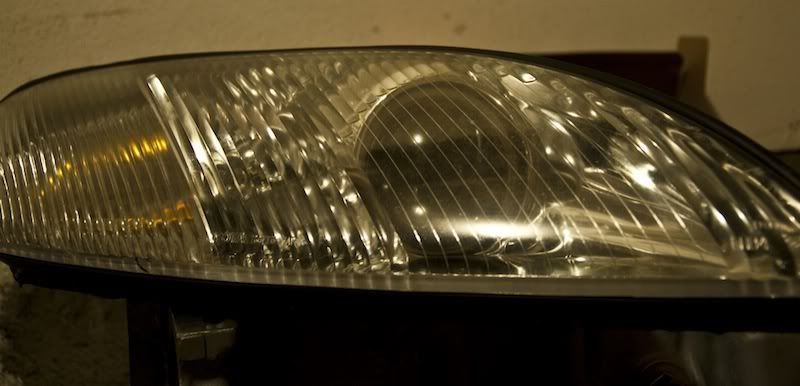
This is how it looked after the wash. It has been 2 days since, and the weather in So Cali has been nice and warm. It is not going away.
I drew a line in pink where I think it should split from the lens. Once it is split, how does the lens detach from the chrome piece? Are there scres between the black backing and the gray/chrome middle piece?
I take the headlight off and I am having no luck splitting the headlight apart. But from close inspection of my headlights I see signs of wipe marks inside the lens which suggest that the headlight may have been taken apart by the previous owner to fix it. The adhesive used may be stronger than OEM. Sticking it in the oven is not getting it to soften enough that I can split it open. It is sealed so tight that I am questioning where it should split apart.
The 2nd picture I drew a pink line in the area where I think it should split apart. I need someone to in the forum to confirm.
This is how it looked after the wash. It has been 2 days since, and the weather in So Cali has been nice and warm. It is not going away.
I drew a line in pink where I think it should split from the lens. Once it is split, how does the lens detach from the chrome piece? Are there scres between the black backing and the gray/chrome middle piece?
Last edited by booga; 05-04-11 at 10:51 PM.
 05-04-11, 10:51 PM
#2

Correct, remove those clips as well as the ones on the bottom. Then put it back in the oven. That should do the trick. Use a putty knife to pry instead of a flat head. A wider instrument will spread the force over a larger area; therefore, decreasing the chance of damaging the groove.
05-04-11, 10:58 PM
#4
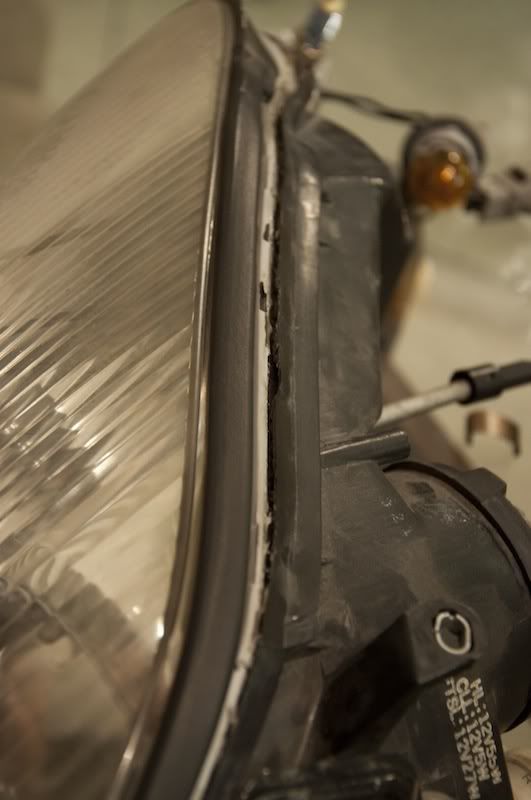
I started this some hours ago, and I don't see that I will be able to fix this anytime soon. After wedging a butter knife where the adhesive is and bending some pieces, I think I made it worst. I may have created enough wedges in the adhesive that I have created more pockets where moisture can collect and enter the headlight.
Damage I have done. Now I am looking for the plumbers tape fix posted some days ago. I will have to do that instead.
For those who have done this DIY, what color adhesive/silicone was on there? I am finding globs of grey adhesive. I'm not sure if this adhesive was done in the factory. I may be trying to pry open a headlight with stronger than expected adhesive applied to it by the previous owner.
05-04-11, 10:59 PM
#5
Lead Lap
iTrader: (6)
Join Date: Aug 2010
Location: CA
Posts: 434
Likes: 0
Received 0 Likes
on
0 Posts
once you heat it up real nice and good either with a heat gun or oven method id usually start at the pointed end of the housings and grab small metal bracket with a rag and then pull on the lens... starts to move a bit then i use a screw driver to move aside some of that glue its pretty thick in that area so it takes time but dont get frustrated... take your time and pry a bit at a time and pull a bit at a time.. im using a heat gun though...
once thats apart theres a screw holding in the reflectors just 1 and there might be some glue on the sides that make it stick in place just heat it up a bit and pull it out after you get that 1 screw

then it should all be apart
once thats apart theres a screw holding in the reflectors just 1 and there might be some glue on the sides that make it stick in place just heat it up a bit and pull it out after you get that 1 screw
then it should all be apart
Last edited by broda805; 05-04-11 at 11:11 PM.
Trending Topics
05-04-11, 11:13 PM
#8
Broda805,
Thank you for posting those pictures. Seeing it actually gives me hope. I will put the light back on tonight and will be continuing this DIY tomorrow.
I stuck it in the oven at 250 degrees. Maybe I am too nervous that I might melt it and took it out too soon. Maybe about 10 mins.
Note to self - get a putty knife.
05-04-11, 11:26 PM
#9
Lead Lap
iTrader: (6)
Join Date: Aug 2010
Location: CA
Posts: 434
Likes: 0
Received 0 Likes
on
0 Posts
you can go a little lower on the heat and a little longer. thats what my buddy does, once you get it out wear some leather gloves and go to town on it, it cools down pretty quick where the glue gets tough again but dont be in too much of a hurry you can always pop it back in. the grey glue is oem and theres ALOT thats why there is so much resistance
05-04-11, 11:35 PM
#10
I stuck it back in the oven, and got on the computer long enough to search through e-bay for headlights for sale. I found I nice deal on a pair for a little over $100.
Then got back on the headlight in the oven. This time keeping in mind "start at the pointed end". That was very helpful advise! I saw it give a little, so I wiggled it around and saw the adhesive stretch some more.
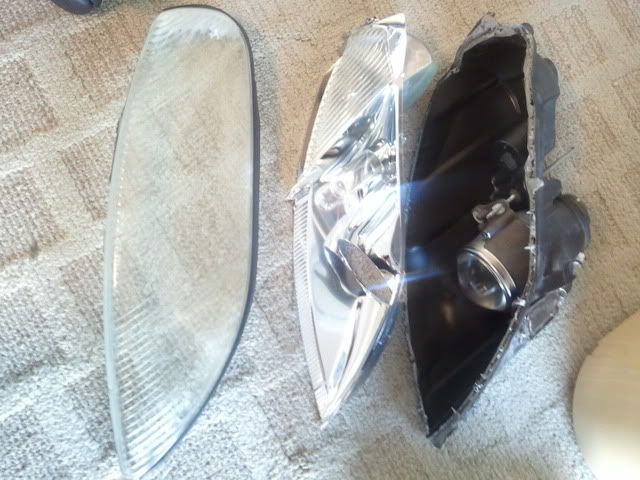
It is open!!!

Then got back on the headlight in the oven. This time keeping in mind "start at the pointed end". That was very helpful advise! I saw it give a little, so I wiggled it around and saw the adhesive stretch some more.
It is open!!!
05-04-11, 11:58 PM
#12
I'm gonna do this tomorrow! Great post! My headlights in the driver's side also have heavy condensation and since I'm picking up my HID's tomorrow I'm gonna do everything in 1 day! (Hopefully) I think this is a common problem for SC's... Or usually for headlights that experienced a bumper to bumper collision... Thanks! This is good stuff!
05-05-11, 01:43 AM
#13
Removing the OEM adhesive was messy, but I think I got it sealed back up air tight. I will find out the next time I wash the car.
The inside of the headlight was clean except for the water spots created by the condensation. There were no marks on the parabolic lens.
I just need to remove a smudge left by the adhesive which melted on the outside of the lens cover.
The inside of the headlight was clean except for the water spots created by the condensation. There were no marks on the parabolic lens.
I just need to remove a smudge left by the adhesive which melted on the outside of the lens cover.
