
Headlight Restore Challenge (free)
 08-07-12, 08:40 PM
#16
I've wet-sanded and buffed my headlights but they still look yellow from the side angles - I'm guessing because of the edges are still yellow and give off reflections. Do you guys take the headlights off the car and remove the weather stripping to really get the sides? Thanks
Last edited by Hil; 08-07-12 at 08:44 PM.

 08-07-12, 09:08 PM
#18
Driver

iTrader: (12)
Join Date: Jul 2011
Location: Florida
Posts: 131
Likes: 0
Received 0 Likes
on
0 Posts
The tapeing around the headlights took longer than polishing. I would recommend at least double if not triple layer of the blue painters masking tape to protect the paint. Keep in mind as you are spraying the headlights with water while you are sanding, the tape will begin to get soaked and loose. Try your best not to make contact with it. There is no need to remove the headlights. With each grit of sandpaper I did at least 3 slow passes lightly.
These are the parts (along with a drill) I used (and I only used one of each):
http://www.2sand.com/1140/2-and-3-in...nch-thick.html
-foam is meant to go around curves evenly and it helps you to not apply too much pressure and possibly damaging the lens.
http://www.2sand.com/92/3-inch-Micro...nch-Shank.html
http://www.2sand.com/998/Mirka-Abral...ngle-Disc.html
-500, 1000, 2000 and 4000 grit.
and these chemicals...

You should be able to do this in less than an hour, but I recommend taking your time and doing it right. Hopefully, from what I read, the mineral spirits/urethane mix will last for 1-2 years, like they say, with very little upkeep.
Last edited by dlsoul87; 08-07-12 at 09:15 PM.
08-09-12, 03:16 PM
#19
Lexus Test Driver
Join Date: Jun 2005
Location: South Bay
Posts: 1,193
Likes: 0
Received 0 Likes
on
0 Posts
Hello everyone, I am looking for volunteers to see how long restoring the SC headlights will last with the way i've been doing them at work. Wet Sand 1500, Wet Sand 3000, Buff 1800 RPM, then Wax. I did all my headlights and taillights just to get all the little scratches out and a deep scratch that was in one but for that i used 600 grit on. NOTE: this isn't just buff and good to go which is why i wanna test it, also want to do another set that gets all the wet sanding and Meguiar's PlastX instead of compound to see if ether last longer then the other. Thanks for interest the idea came up when i was telling my boss we should have a headlight restoring service.
**Also looking into a more permanent solution** Recoating headlights, more info later.
To Qualify:
-worse the condition the better
-car usually kept outside and driven
-willing to pull and ship headlights
-willing to post update pics month after month
If you are interested post up pics and send me a pm.
also to note if anything is cracked I will not be able to remove the crack.
Do you have an updated method yet for sealing the lights after all the sanding and polishing? Without sealing out the UV, it's pointless to do all the work.
Are you still interested in doing this challenge?
Thanks
08-10-12, 05:01 AM
#20
I have an extra set that I was planning on upgrading some day. We can use those.
Do you have an updated method yet for sealing the lights after all the sanding and polishing? Without sealing out the UV, it's pointless to do all the work.
Are you still interested in doing this challenge?
Thanks
Do you have an updated method yet for sealing the lights after all the sanding and polishing? Without sealing out the UV, it's pointless to do all the work.
Are you still interested in doing this challenge?
Thanks
08-10-12, 11:49 AM
#21
Lexus Test Driver
Join Date: Jun 2005
Location: South Bay
Posts: 1,193
Likes: 0
Received 0 Likes
on
0 Posts
OK. Let me know. They are in good shape, so it won't be that hard to really get them perfect. The main thing I think you want is knowing how long the restoration will last. Right? Not really the before and after the restoration comparison.
We want the restoration to last and give the members the latest information on this restoration process.
At least that is my motivation.
Give me your name and address so I can ship them if you want by PM or here.
Thanks.
Last edited by SC400DAVE; 08-10-12 at 01:27 PM. Reason: UPDATE
08-10-12, 01:17 PM
#22
Here are my results using 3M HEADLIGHT RESTORE for $30. Took me about an hour and a half all together.
I live in AZ and today we even have a heat advisory for 115 degrees. I did both mine & my buddies back in Novemeber for mine and January for his.
Tools that were used was just a basic drill, and the supplies by the 3M kit
Mine Before:
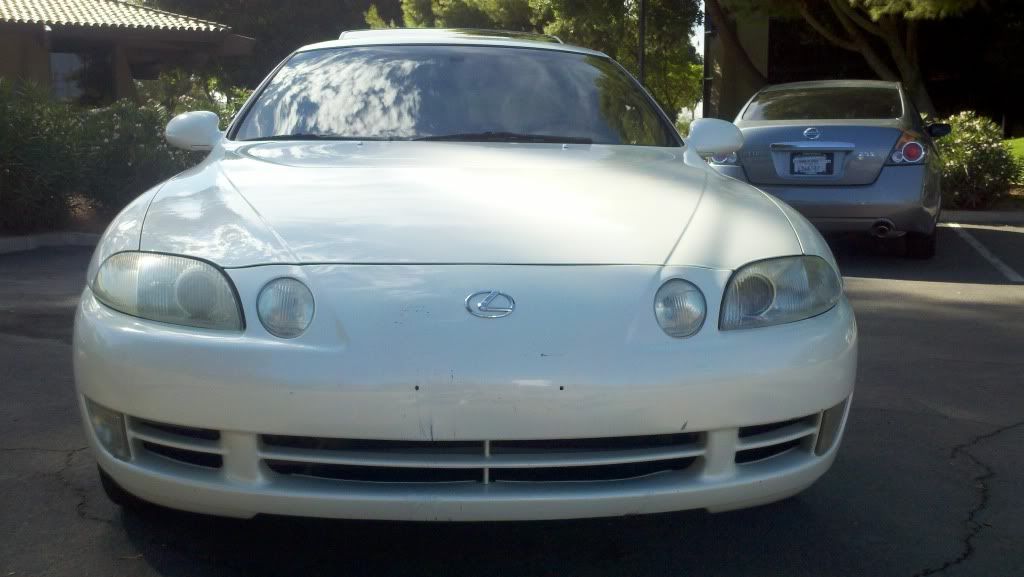
After:


Buddies Before:

After:


I live in AZ and today we even have a heat advisory for 115 degrees. I did both mine & my buddies back in Novemeber for mine and January for his.
Tools that were used was just a basic drill, and the supplies by the 3M kit
Mine Before:
After:
Buddies Before:
After:
08-10-12, 01:22 PM
#23
Driver
iTrader: (12)
Join Date: Jul 2011
Location: Florida
Posts: 131
Likes: 0
Received 0 Likes
on
0 Posts
OK. Let me know. They are in good shape, so it won't be that hard to really get them perfect. The main thing I think you want is knowing how long the restoration will last. Right? Not really the before and after the restoration comparison.
We want the restoration to last and give the members the latest information on this restoration process.
At least that is my motivation.
Thanks.
We want the restoration to last and give the members the latest information on this restoration process.
At least that is my motivation.
Thanks.
08-10-12, 01:38 PM
#24
Lexus Test Driver
Join Date: Jun 2005
Location: South Bay
Posts: 1,193
Likes: 0
Received 0 Likes
on
0 Posts
Here are my results using 3M HEADLIGHT RESTORE for $30. Took me about an hour and a half all together.
I live in AZ and today we even have a heat advisory for 115 degrees. I did both mine & my buddies back in Novemeber for mine and January for his.
Tools that were used was just a basic drill, and the supplies by the 3M kit
I live in AZ and today we even have a heat advisory for 115 degrees. I did both mine & my buddies back in Novemeber for mine and January for his.
Tools that were used was just a basic drill, and the supplies by the 3M kit
Did you coat them with anything after to keep the sun from yellowing them again. If you didn't, are you?
The intent of the OP is research and development on the different processes.
We want to do an in depth, scientific study of real world conditions on the different protective UV coatings to KEEP them looking SEXY.

Take pics on a monthly basis and post them to see how long that 3M process holds up. That would be a huge contribution!!!!
Thank you my brother from another mother!

Thread
Thread Starter
Forum
Replies
Last Post
redsoxfan6
Automotive Care & Detailing
5
05-25-18 09:33 AM
Badmittn
Automotive Care & Detailing
8
07-25-09 07:48 AM
Lexus400mn
Automotive Care & Detailing
46
08-27-07 05:25 AM