
Leatherique+++Seats repaired and redyed
 01-21-09, 12:44 PM
#1
Well i dont post here alot but i though i would share my experience with letherique product which works awsome.
Here are a few pictures before and after, in my owners manual previous owner wrote the interior color code is ivory but i came to find out it really wasnt, i got the wrong dye but after applying a few coats i decided "what the hell" i'm going to go ahead with the color change and i have no regrets.
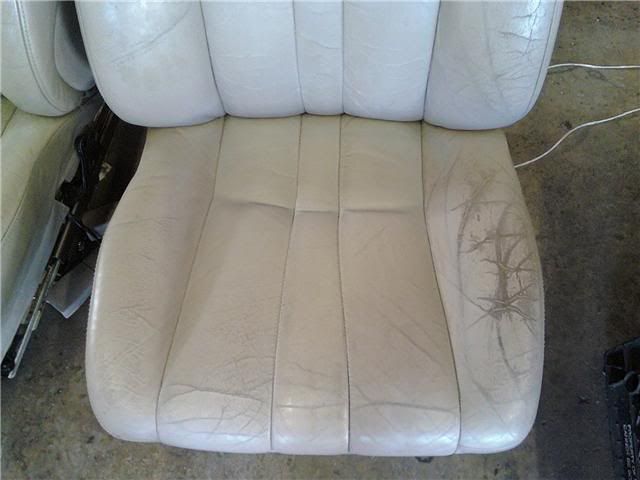
this is the driver seat buttom(picture taken while the Letherique rejuvination oil is applied)
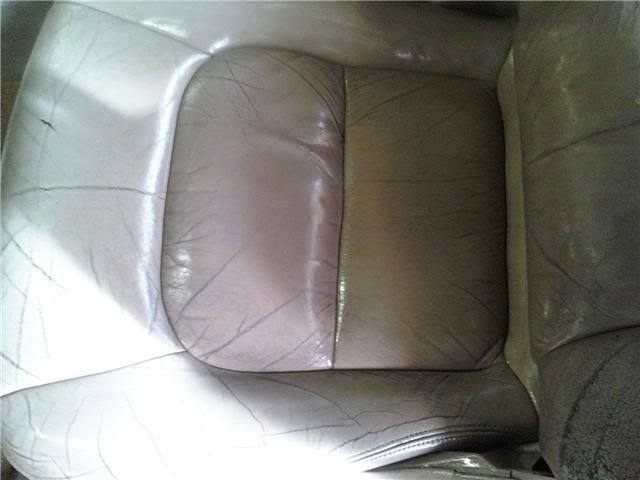
as you can see on the right side theres a small tear
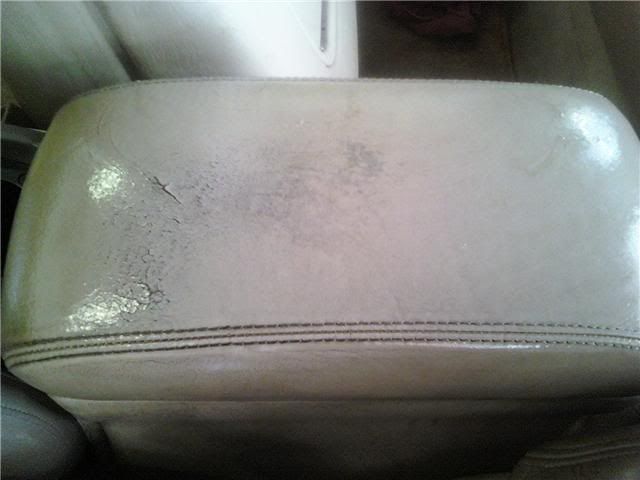
armrest
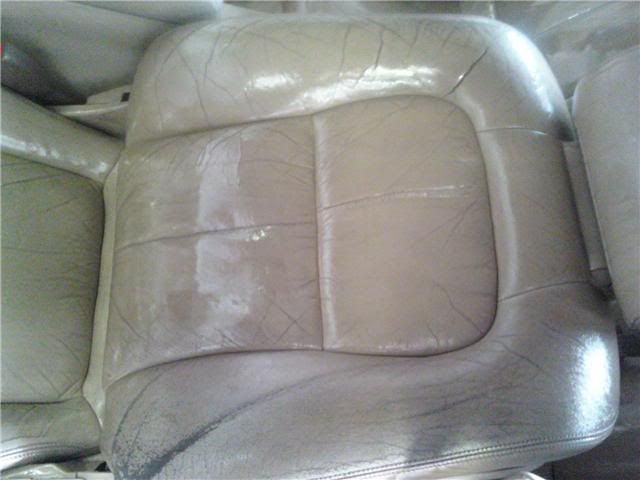
this is the driver seat top on the passenger side bulster theres 2 through and through cracks what i did was i cut out a few pices of leather and aplied glue to them and inserted the pieces into the cracks, then aplied the leatherique "crack filler" waited for it to dry and then sended it down.
Driver seat
both seats in the car the passenger seat wasnt nearly as bad but it did have some minor cracking to be expected from a 1993.

steering wheel before
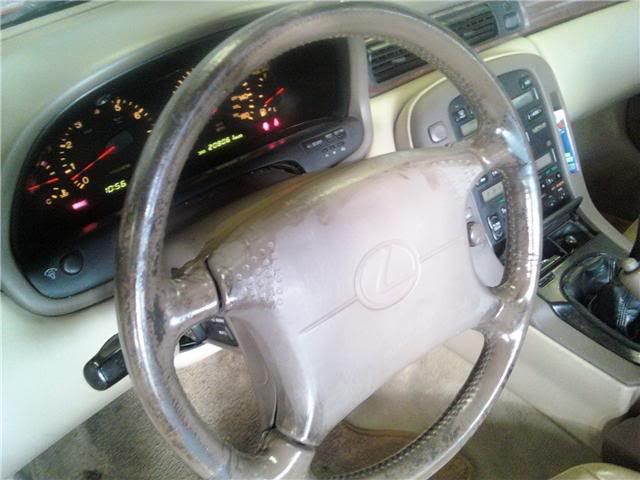
After
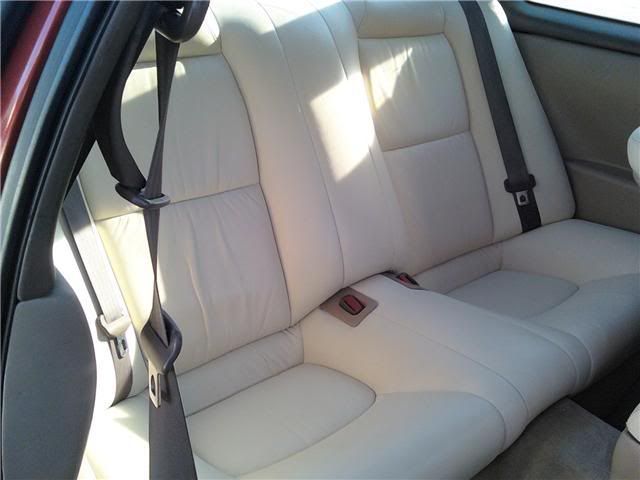
 rear seat
All in all i would rate this project very difficult for me anyways having done many things myself like engine, trans and etc (i'm a mechanic) and have painted a few thing, this by far took very long time so if you plan on doing this make sure you understand that you will be without a car for 4-5 days.
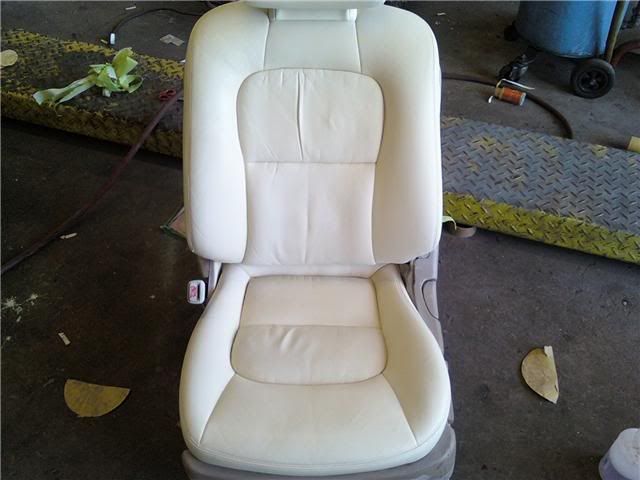
Next project is my G/Fs GS i already started this is driver seat with rejuvination oil applied and lightly sanded.
 going to apply dye tomorow and then will post pics in the first gen GS forum if anyone is intrested.
Heres a few shots of my car, nothing fancy and pics taken with cellphone camera.

Mod list is short and i like it that way since this is my daily driver i have a bike and another car that i drag race so this is my work horse.
Low beam 8k Hids
Supra TT chrome wheels
97 Tailights
Magnaflow mufflers
Espiler Springs
Here are a few pictures before and after, in my owners manual previous owner wrote the interior color code is ivory but i came to find out it really wasnt, i got the wrong dye but after applying a few coats i decided "what the hell" i'm going to go ahead with the color change and i have no regrets.
this is the driver seat buttom(picture taken while the Letherique rejuvination oil is applied)
as you can see on the right side theres a small tear
armrest
this is the driver seat top on the passenger side bulster theres 2 through and through cracks what i did was i cut out a few pices of leather and aplied glue to them and inserted the pieces into the cracks, then aplied the leatherique "crack filler" waited for it to dry and then sended it down.
Driver seat
both seats in the car the passenger seat wasnt nearly as bad but it did have some minor cracking to be expected from a 1993.
steering wheel before
After
rear seatAll in all i would rate this project very difficult for me anyways having done many things myself like engine, trans and etc (i'm a mechanic) and have painted a few thing, this by far took very long time so if you plan on doing this make sure you understand that you will be without a car for 4-5 days.
Next project is my G/Fs GS i already started this is driver seat with rejuvination oil applied and lightly sanded.
going to apply dye tomorow and then will post pics in the first gen GS forum if anyone is intrested.Heres a few shots of my car, nothing fancy and pics taken with cellphone camera.
Mod list is short and i like it that way since this is my daily driver i have a bike and another car that i drag race so this is my work horse.
Low beam 8k Hids
Supra TT chrome wheels
97 Tailights
Magnaflow mufflers
Espiler Springs


 01-21-09, 01:18 PM
#7
Yes and no, its a very long process what you get in the kit is.
Prep Agent is like a heavy duty cleaner, You use it to wet sand the seats just pretty much just taking the top layer of the dye off the seat and smothing the serface.
Once you done with this step you apply the oil massaging it in by hand this is very important step, depending on how petient you are is how soft your leather will turn out. On the SC i only left it on for 24 hours and the leather is pretty soft now, on the GS i left this stuff on now for 48hours+ i will start dying tomorow.
Third step is to use another cleaner they supply with the kit "Prestine clean" it cleans and conditions your leather, then youre to apply crack filler in my seconds project case i will not have to fix any serious holes so you just apply it with putty knife and let it dry for 20 min see what it looks like and then if you have to reapply again then i used 500 grit sand paper to go over it lightly(its very important as to how it feels when you run your hand over it if you feel improfections you will see them after you applie dye). THEn youre ready to dye,I used a cheap detail Spray gun i bought from Harbor Freight, you can also use a Paint brush the trick is to apply very thin coats so you dont get any runs with the gun same goes for the brush you will get brush marks if you not cerful. Then you have to let it sit for 48 hours and cure, you can use 500 grit sand paper to take out any runs/brush marks out and then you buff it with a clean cloth. For the steering wheel they give you clear coat i also applied it on the outside seat bolsters and armrest, but you dont really have to do this.
Trending Topics
01-21-09, 01:29 PM
#8
Registered User
iTrader: (1)
Join Date: Apr 2005
Location: NorCal *4o8*
Posts: 198
Likes: 0
Received 0 Likes
on
0 Posts
Yes and no, its a very long process what you get in the kit is.
Prep Agent is like a heavy duty cleaner, You use it to wet sand the seats just pretty much just taking the top layer of the dye off the seat and smothing the serface.
Once you done with this step you apply the oil massaging it in by hand this is very important step, depending on how petient you are is how soft your leather will turn out. On the SC i only left it on for 24 hours and the leather is pretty soft now, on the GS i left this stuff on now for 48hours+ i will start dying tomorow.
Third step is to use another cleaner they supply with the kit "Prestine clean" it cleans and conditions your leather, then youre to apply crack filler in my seconds project case i will not have to fix any serious holes so you just apply it with putty knife and let it dry for 20 min see what it looks like and then if you have to reapply again then i used 500 grit sand paper to go over it lightly(its very important as to how it feels when you run your hand over it if you feel improfections you will see them after you applie dye). THEn youre ready to dye,I used a cheap detail Spray gun i bought from Harbor Freight, you can also use a Paint brush the trick is to apply very thin coats so you dont get any runs with the gun same goes for the brush you will get brush marks if you not cerful. Then you have to let it sit for 48 hours and cure, you can use 500 grit sand paper to take out any runs/brush marks out and then you buff it with a clean cloth. For the steering wheel they give you clear coat i also applied it on the outside seat bolsters and armrest, but you dont really have to do this.
Prep Agent is like a heavy duty cleaner, You use it to wet sand the seats just pretty much just taking the top layer of the dye off the seat and smothing the serface.
Once you done with this step you apply the oil massaging it in by hand this is very important step, depending on how petient you are is how soft your leather will turn out. On the SC i only left it on for 24 hours and the leather is pretty soft now, on the GS i left this stuff on now for 48hours+ i will start dying tomorow.
Third step is to use another cleaner they supply with the kit "Prestine clean" it cleans and conditions your leather, then youre to apply crack filler in my seconds project case i will not have to fix any serious holes so you just apply it with putty knife and let it dry for 20 min see what it looks like and then if you have to reapply again then i used 500 grit sand paper to go over it lightly(its very important as to how it feels when you run your hand over it if you feel improfections you will see them after you applie dye). THEn youre ready to dye,I used a cheap detail Spray gun i bought from Harbor Freight, you can also use a Paint brush the trick is to apply very thin coats so you dont get any runs with the gun same goes for the brush you will get brush marks if you not cerful. Then you have to let it sit for 48 hours and cure, you can use 500 grit sand paper to take out any runs/brush marks out and then you buff it with a clean cloth. For the steering wheel they give you clear coat i also applied it on the outside seat bolsters and armrest, but you dont really have to do this.
01-21-09, 02:44 PM
#11
Live in Frederick work In gaithersburg, in the process of doing the GS right now, so if you want to stop by my shop and check it out between tomorow and sat youre more then welcome to, i know the GS will turn out much better not to say the SC didnt.
Last edited by MDSC; 01-21-09 at 02:48 PM.
 where did you get the kit or whats it called? Do you think it Can can work to do a color change like tan - black...
01-21-09, 02:50 PM
where did you get the kit or whats it called? Do you think it Can can work to do a color change like tan - black...
01-21-09, 02:50 PM
#13
 01-21-09, 03:04 PM
#15
yes correct take your time and do it right and you would be happier then ever, seats feel and smell like new, steering wheel does too. Biggest step is prep and oil, you have to make sure everything is wet sanded lightly and cleaned off so the dye penetrates into the leather. In the instructions they tell you to put the oil on first i found that wet sanding first does the trick since our cars come with clear coat already on the leather, the oil has very hard time penetrating through the clear coat.