When you click on links to various merchants on this site and make a purchase, this can result in this site earning a commission. Affiliate programs and affiliations include, but are not limited to, the eBay Partner Network.
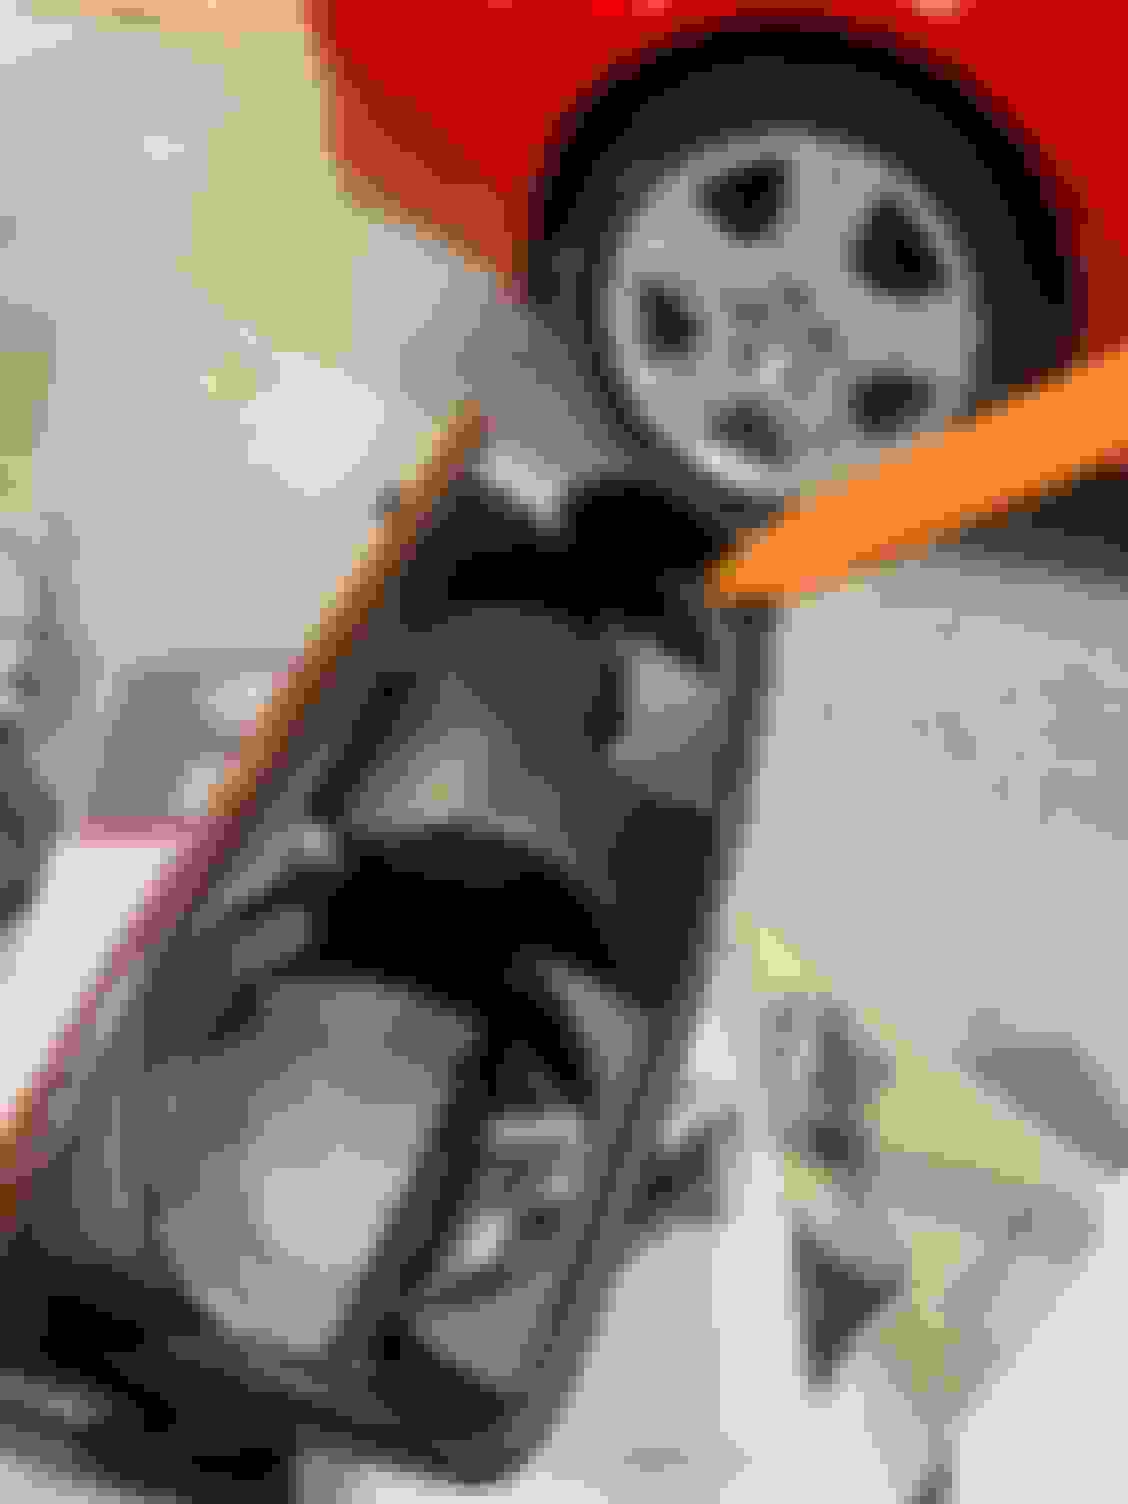
I'm trying to get my cupholder apart, 2004 if it matters. I have a full set of shop manuals and I can find no reference in there at all, searched cupholders, drink holders, center console, and console, not being sure what they might call them with no luck at all. So in the pictures below look at the end of my orange pointer, those are the parts I'm looking to remove from my extra unit and install on the one in the car.
So here is the whole part.
And these are the parts I'm trying to remove/replace.
The shop manuals won’t tell you how to disassemble the cup holder.
if I remember correctly, there should be a couple of small screws holding the brown top on place, then i think it slides off.
look on the side where the gears are located if you take that apart, you might be able to get the rest of it apart.
So both the one in my car and this extra one I have, have different problems� I was hoping to combine the two and get rid of the problems
Makes sense.
This is slightly off topic, but do you have access to a steamer? When I got mine, I had to take it out and steam it to get all the soda out of it, Once I did that, then it worked properly. Mine was so bad, I couldn't even get it to flip open. I thought it was broken, but it was just stuck
This is slightly off topic, but do you have access to a steamer? When I got mine, I had to take it out and steam it to get all the soda out of it, Once I did that, then it worked properly. Mine was so bad, I couldn't even get it to flip open. I thought it was broken, but it was just stuck
Both of my units work fine they are just broken in one way or the other , one is missing the little flip ups that I pointed out in my picture and the other one is missing the rubber cupholders things on the opposing side, But they both function just fine
I took mine out to vinyl wrap the top. At the time I didn't see there were two screws that held the top on to remove it and undid the screws at the back by mistake. Unfortunately this releases the internal mechanism all tensioned by springs and I really struggled to tension the springs back in place and the insides to put it back together. Undoing those rear screws still didn't give access the the inside mechanics and I could not work out how it came apart any further . My cup holders now don't open properly whereas they did before so I would suggest buying a preowned used one that works and is complete rather try to repair a broken one. It's fairly easy to change the top if the wood is the wrong colour. It just seems to be a very complicated fragile mechanism for something that has a simple job.
I took mine out to vinyl wrap the top. At the time I didn't see there were two screws that held the top on to remove it and undid the screws at the back by mistake. Unfortunately this releases the internal mechanism all tensioned by springs and I really struggled to tension the springs back in place and the insides to put it back together. Undoing those rear screws still didn't give access the the inside mechanics and I could not work out how it came apart any further . My cup holders now don't open properly whereas they did before so I would suggest buying a preowned used one that works and is complete rather try to repair a broken one. It's fairly easy to change the top if the wood is the wrong colour. It just seems to be a very complicated fragile mechanism for something that has a simple job.
Ha! Yes, I took those screws out of the back as well but got lucky only one of the spring tensioners came loose, fought with it forever yesterday and finally got it back together. The problem with the used ones out there is that most of them have the same problems and a new one is $200 plus!
Mine still work ok and I glued on another foam piece yesterday, I'll see how it works today sometime. Cross your fingers!
So I'm going to go a little different way with this. The original little rubber flap in there is actually slid through a slit in the plastic, if you try to glue something similar in there it just rolls off when you put a cup in there. So instead I glued a thin piece of foam in there with a much wider footprint to keep it from rolling off, I also tapered the top for easier insertion of the cup. See pics below. I put a cup in and out about a dozen times today without incident, so I'll swap out cupholders tomorrow.
The top two are the original, the bottom two are my "new and improved maybe" version.
So I cleaned up and armorall-ed/oiled the one I'm going to reinstall in the car, which is the original on that came in the car. While I had the console apart I cleaned in there... Found the broken piece off the ashtray, man there is a lot of stuff in there and harness pieces that are unplugged. I'm sure that is from the new radio install. I also wiggled around the wires going to the SRS sensor in there to see if it will effect the SRS warning light that comes on randomly. Fingers crossed
So I cleaned up and armorall-ed/oiled the one I'm going to reinstall in the car, which is the original on that came in the car. While I had the console apart I cleaned in there... Found the broken piece off the ashtray, man there is a lot of stuff in there and harness pieces that are unplugged. I'm sure that is from the new radio install. I also wiggled around the wires going to the SRS sensor in there to see if it will effect the SRS warning light that comes on randomly. Fingers crossed
That's a disgusting radio install. I would redo it with solder and heat shrink to clean it up.
 10-23-23, 10:09 AM