
Removing side marker covers?

 04-10-13, 12:22 PM
#17
Instructor
Sprayed the front marker lights last year after Talwang showed us how easy it is (just peel back the wheel arch liner).
Wanted to do the rears for ages and Talwang came up trumps again (thanks again Talwang).
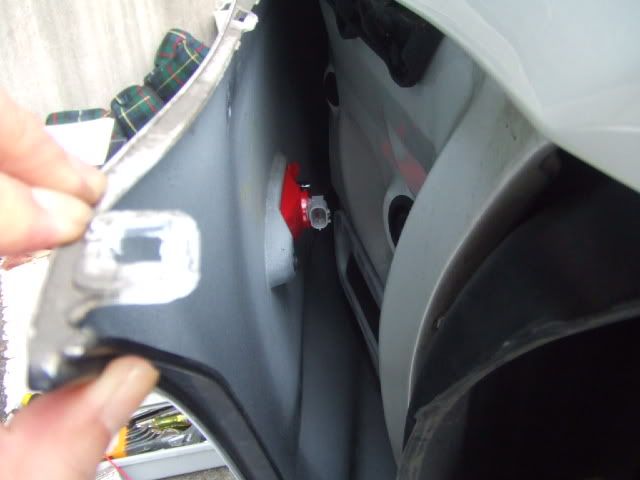
Easy as the fronts when you know how. One bolt, one clip and several screws, remove the the plastic connector between the bumper and the fender and pull the fender up and away. Thats it.
I thought that worm drive would come in useful one day. lol
Sprayed the grill body colour too while I was at it, what do you think guys?
Cheers
Steve
Wanted to do the rears for ages and Talwang came up trumps again (thanks again Talwang).
Easy as the fronts when you know how. One bolt, one clip and several screws, remove the the plastic connector between the bumper and the fender and pull the fender up and away. Thats it.
I thought that worm drive would come in useful one day. lol
Sprayed the grill body colour too while I was at it, what do you think guys?
Cheers
Steve
 04-10-13, 01:54 PM
#19

Steve! Good to see your car again. I must not have the worm drive!
I never tire of looking at your SC.
Mandy
I never tire of looking at your SC.
Mandy
04-10-13, 05:22 PM
#20
Sprayed the front marker lights last year after Talwang showed us how easy it is (just peel back the wheel arch liner).
Wanted to do the rears for ages and Talwang came up trumps again (thanks again Talwang).
Easy as the fronts when you know how. One bolt, one clip and several screws, remove the the plastic connector between the bumper and the fender and pull the fender up and away. Thats it.
I thought that worm drive would come in useful one day. lol
Sprayed the grill body colour too while I was at it, what do you think guys?
Cheers
Steve
04-11-13, 04:52 AM
#21
Lead Lap
04-11-13, 11:06 AM
#22
Instructor
Thanks Guys
I really appreciate your comments.
Cheers
Steve
I really appreciate your comments.
Cheers
Steve
03-07-23, 10:52 AM
#23

I saw in another thread that someone had an issue with replacing the bulb by going through the trunk (the method VVtiBob suggests).
Has anyone successfully removed the rear side market bulb by going through the trunk as opposed to having to remove the rear bumper? Either way, it seems like a ton a work for a seemingly minor bulb replacement.
Has anyone successfully removed the rear side market bulb by going through the trunk as opposed to having to remove the rear bumper? Either way, it seems like a ton a work for a seemingly minor bulb replacement.
Under rear corner of bumper, remove plastic push in rivet. I removed the 10mm screw that is holding the inner liner so I could bend it in more. The screw head faces the front of the car. I found it by finding the easy to see white plastic captured nut.
I bent the bumper cover out from the forward bottom edge and reached up to twist and remove the bayonet fitted bulb socket. Tight fit, remove jewelry and watch on the arm you are using to reach in there. There is enough wire to pull the socket out to daylight to change the bulb. Turn the light on to test new bulb and leave it on to make it easier to find the hole when reinstalling.
Last edited by GregMN; 03-07-23 at 10:59 AM.

Thread
Thread Starter
Forum
Replies
Last Post
FireCode
SC- 1st Gen (1992-2000)
12
08-28-10 05:47 AM