DIY 06+ Tail Light Conversion *PICS INSIDE*
 03-21-11, 02:27 PM
#1

So I received my 06+ tail lights and also my gen4 nav so I decided to install and do a DIY guide for anyone else interested. below you will find the guide.
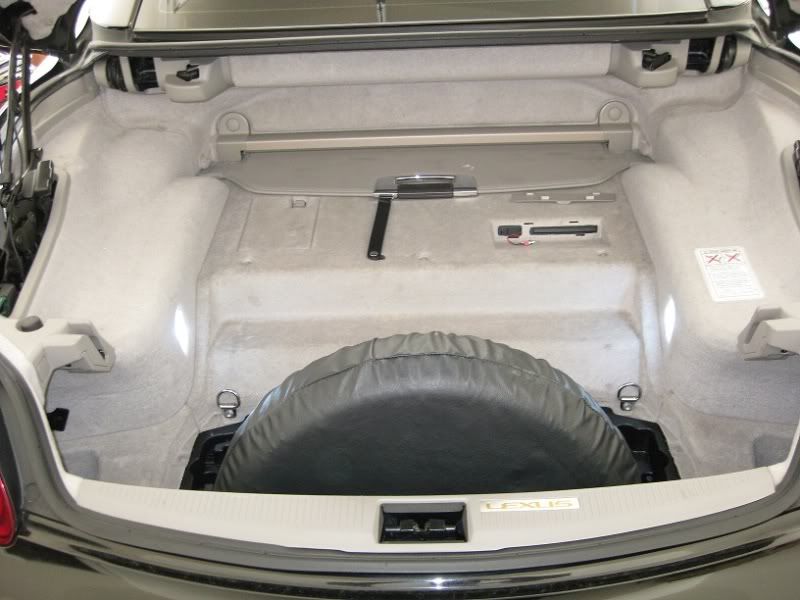
Here is a pic of the trunk before removing anything.
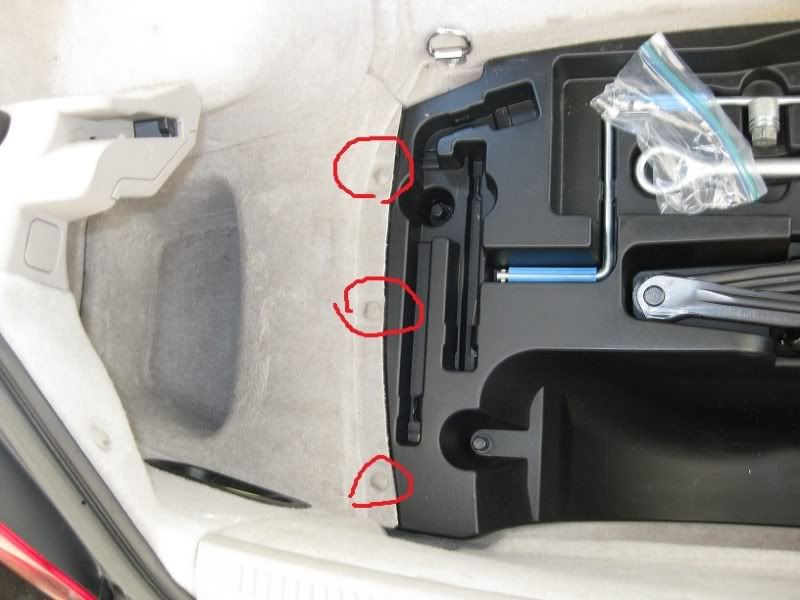
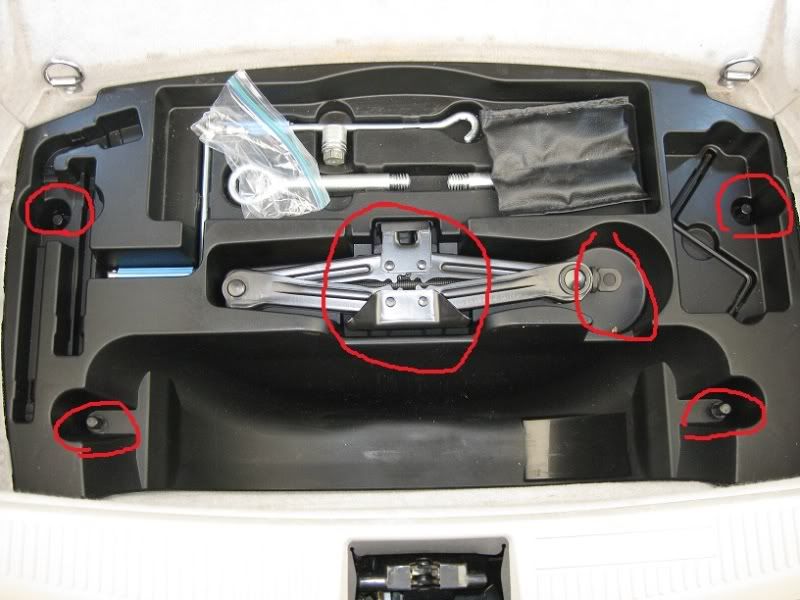
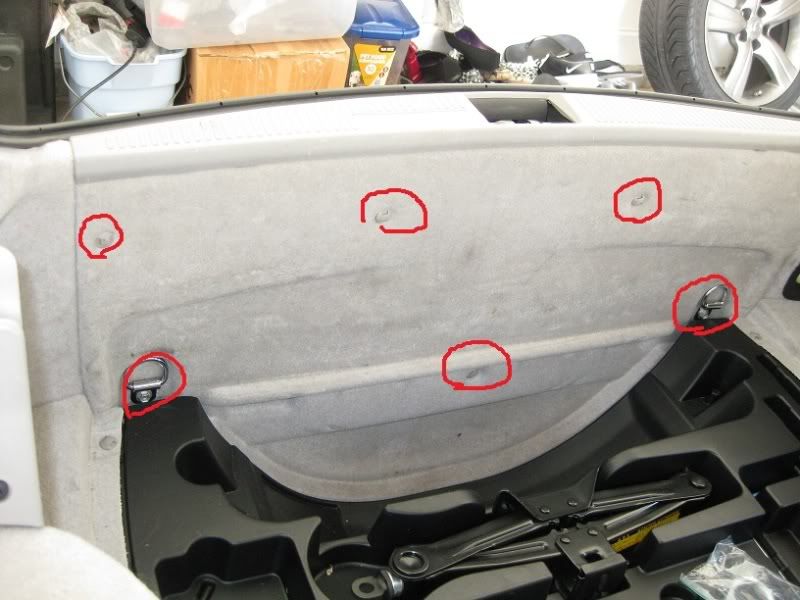
Now you want to go ahead and remove your spare tire if you have one and then remove the 3 clips circled.
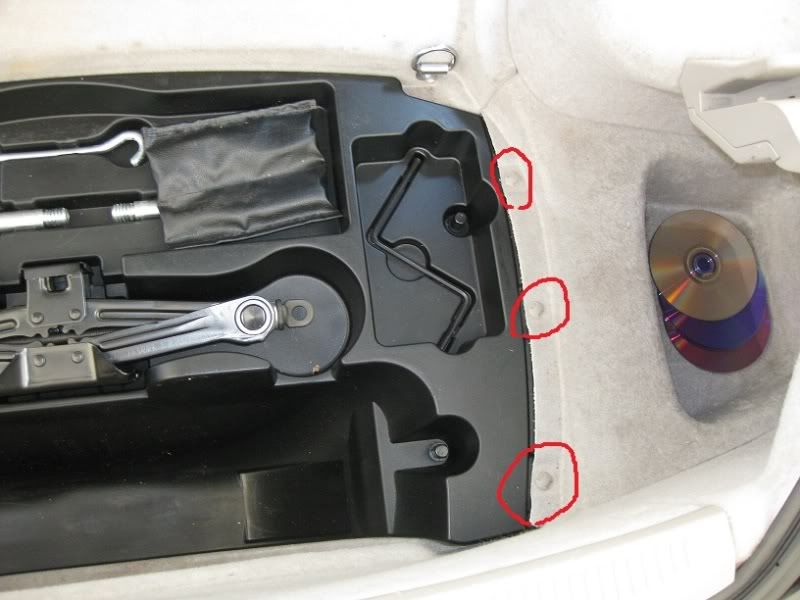
Same thing for the other side.
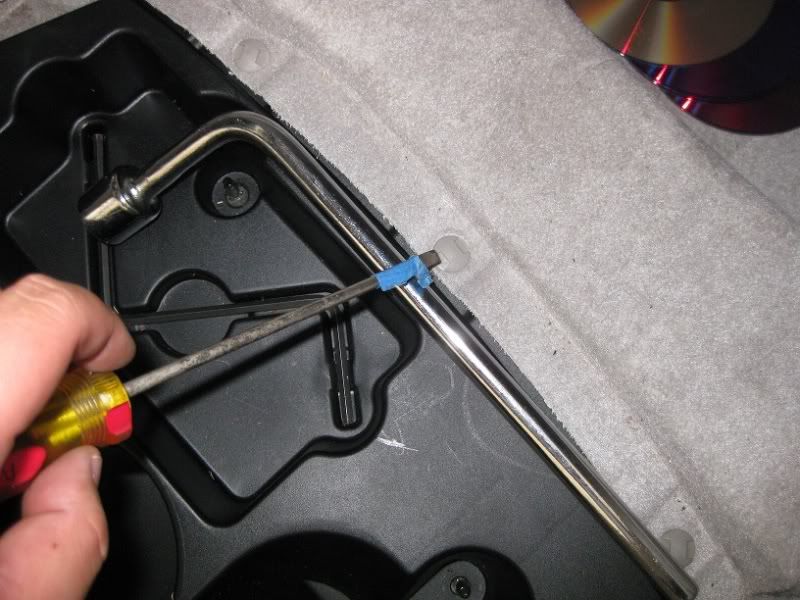
It helps to use your tire iron as leverage to pop these suckers out like below.
Now you will find the tool carrier for the spare. You will want to remove the two black clips on each side. Once those are removed then you want to turn your spare jack counter-clockwise to break free from the mount. You will see what I mean when you turn it counter-clockwise.
Next you will want to remove the left panel.
Then remove the right panel.
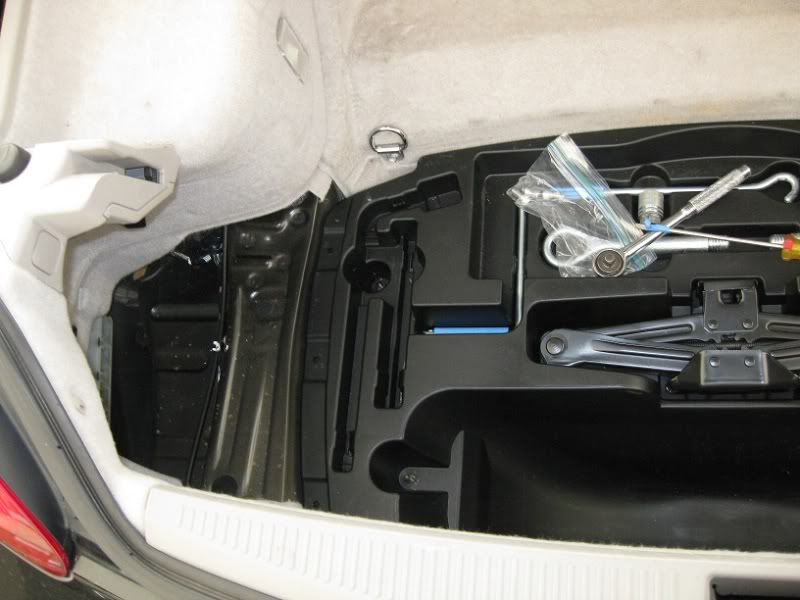
Then remove the spare tire tray and your trunk should look like this. Pop off the plastic piece circled at the bottom. It should pop out if pulled straight up. it is held on by clips. You DONT need to unscrew the two circle bolts on top of this pic. I used this pic from a different guide.
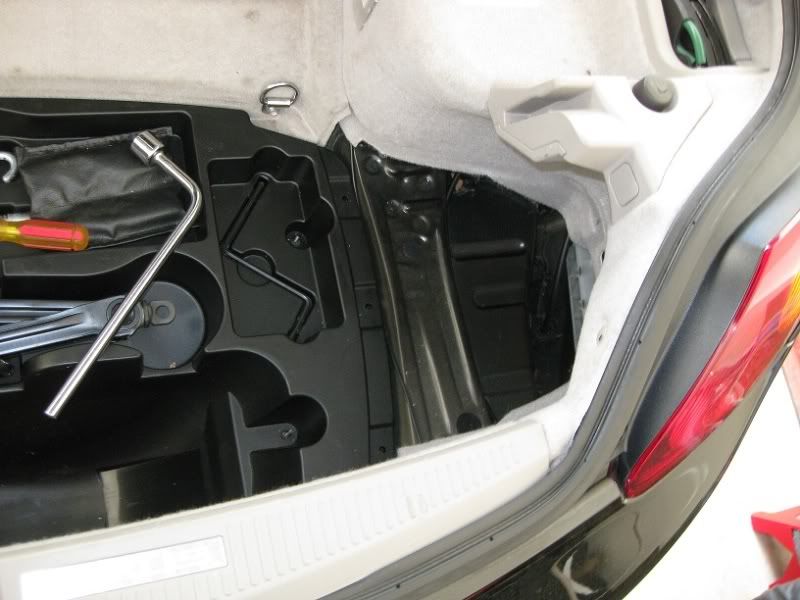
Then go ahead and remove the panel in the back of the trunk. Two bolts at bottom and the rest are clips. Once again you can use the tire iron to help you remove the clips. **DISREGARD THE PICTURE OF THE TOOL TRAY STILL BEING THERE. IT SHOULD OF BEEN REMOVED FOR THIS PICTURE**
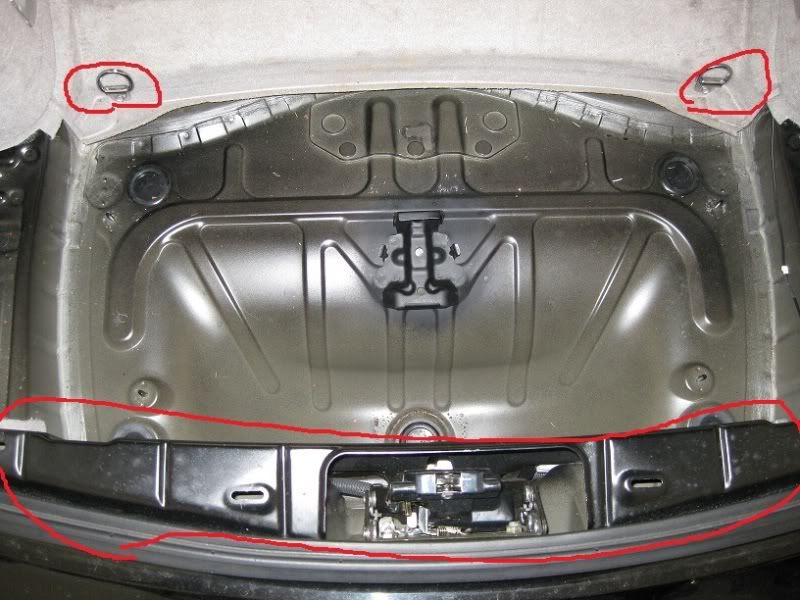
Now you will need to remove the plastic holder for the tonneu cover. On the side there you will see a plastic cover that needs to be popped off as well as on top where arrow is which you cant see in the picture. Once you pop those covers off then you will remove a the 10mm screw under each cover. Now underneath that rubber piece will be a t-40 Torx head. Make sure you get one of these at your parts store.
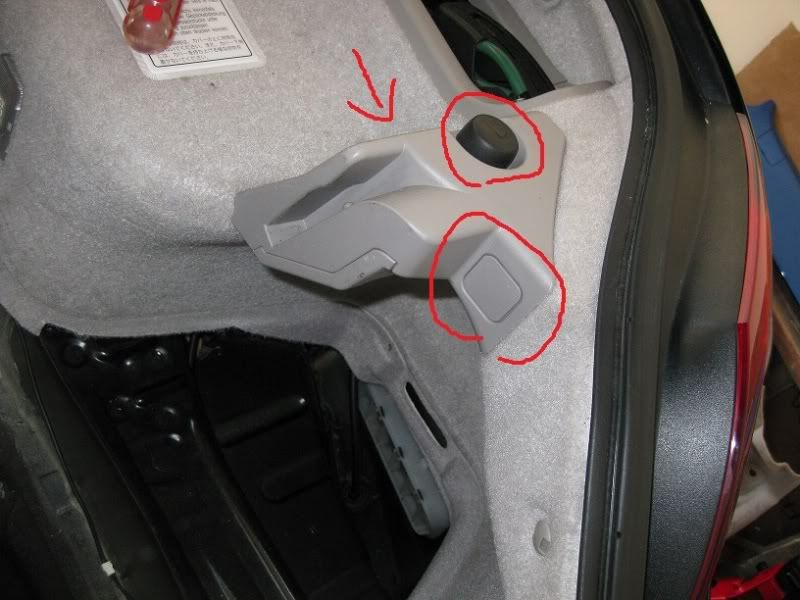
You will need to remove the otherside as well. You can see where I pretty much removed the screws already.
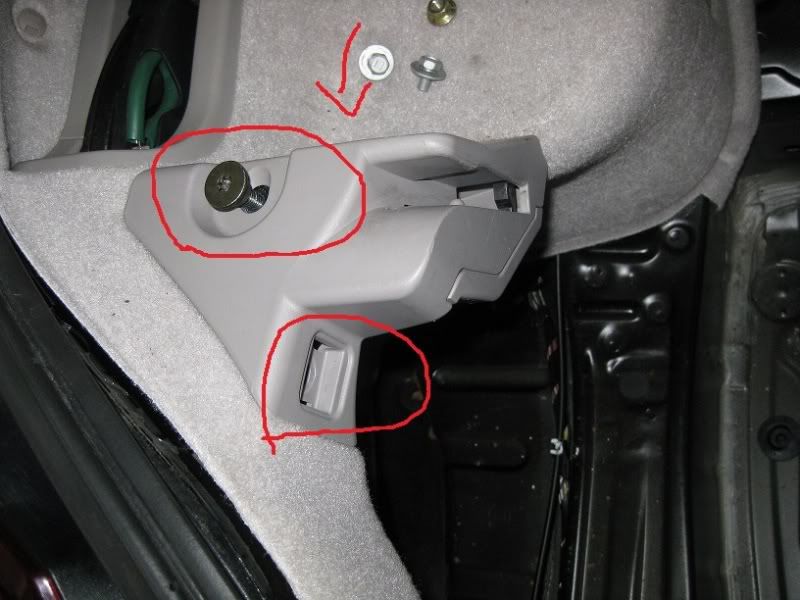
Now on the left side it looks like there a sensor that needs to be unplugged. I think it is the sensor that tells that computer that the tonneu cover is in place and the roof can be retracted. Once you remove this then you will also need to remove the black rubber weatherstrip to get it out of the way Just simply pull it straight up. You can see the black weatherstrip im talking about in the next step.
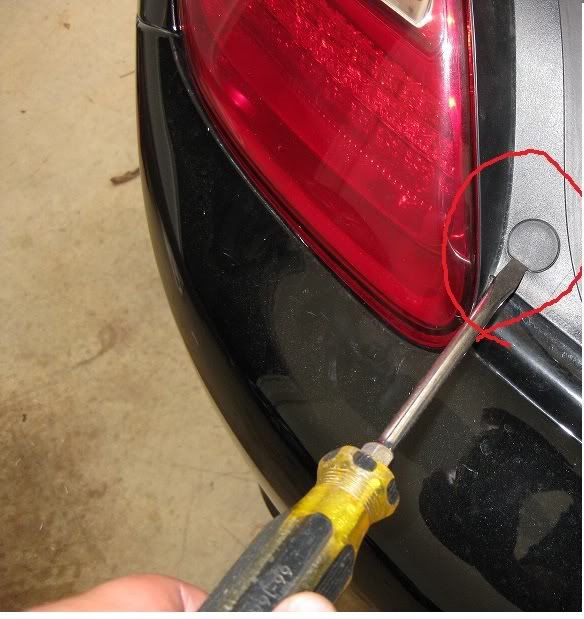
Now you need to remove the one screw that holds the tail light in. You will see a little plastic cover that needs to be popped off and is held on by a 10mm bolt.
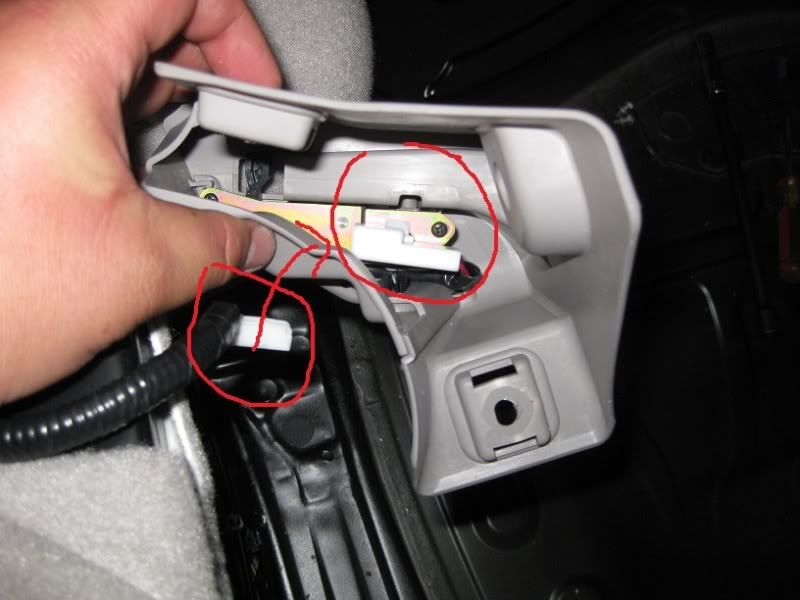
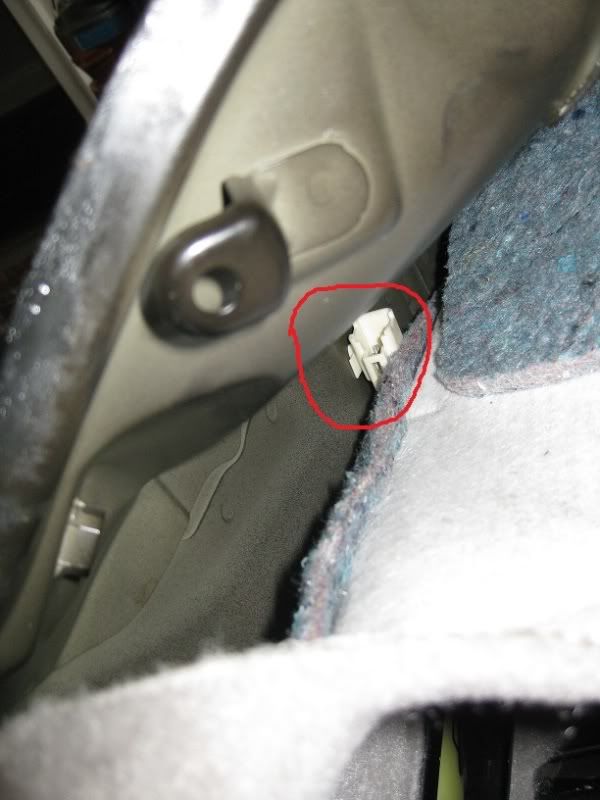
Next you need to disconnect the power harness to the tailight. pull back the carpet and unplug it. It is a tight fit.
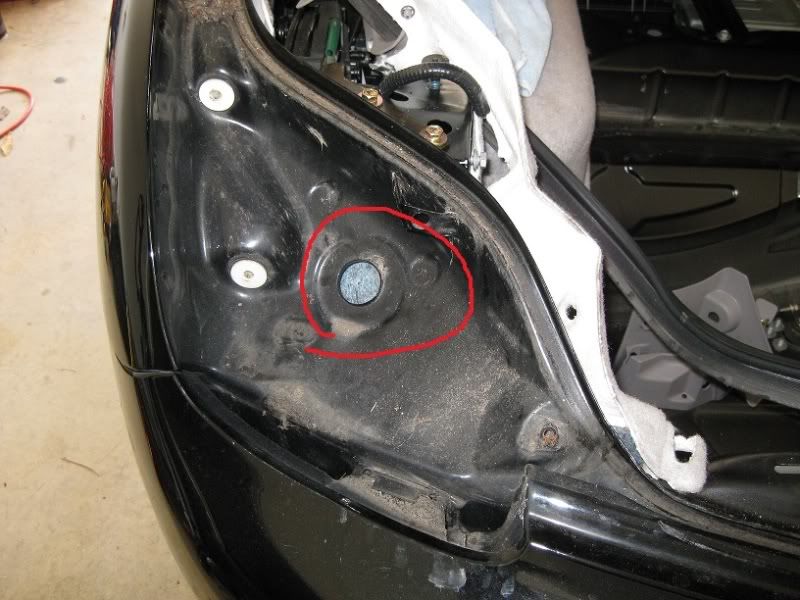
Next is removing the tailight. I found the easiest way of doing this is to lift the bottom of the tail light up a bit and pull it straight out towards you. Once it comes loose then you will see the rubber seal. I just used needle nosed pliers and pulled it straight out. This is what it should look like when the taillight is removed.
You will do the same thing on the other side.
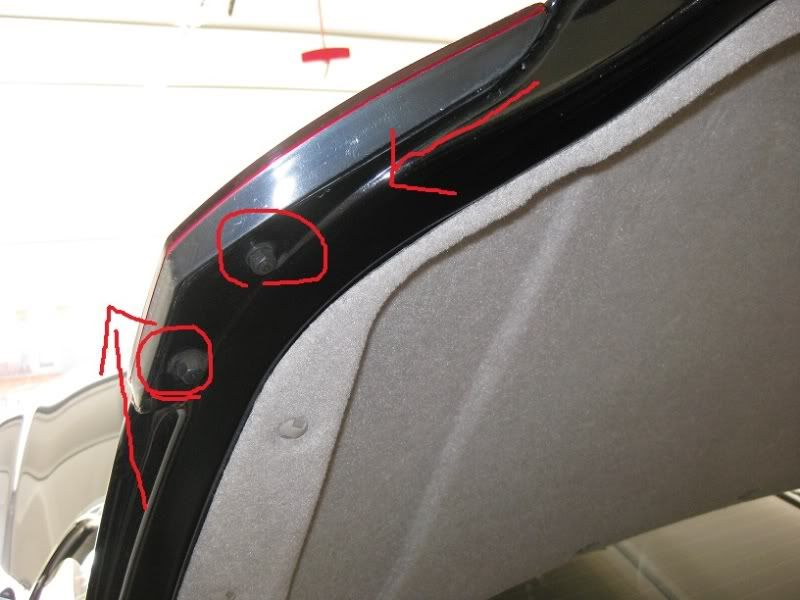
Moving on to the trunk reflectors. It is simply held on by (2) 10mm caps. Underneath the reflector there is a sticky foam that is holding on to the trunk pretty good. You will need to use a little force. Once you see that break lose then lift it to clear screws from the hole and pull it towards the side of the car.
Now make sure the new bulbs are in your 06+ tail lights and reinstall everything in reverse order.
FINISHED PRODUCT.
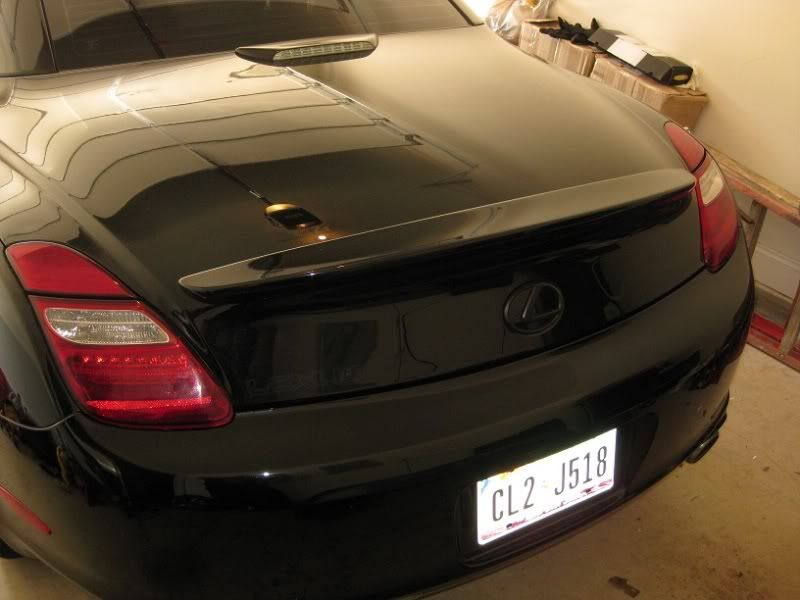
Here is a pic of the trunk before removing anything.
Now you want to go ahead and remove your spare tire if you have one and then remove the 3 clips circled.
Same thing for the other side.
It helps to use your tire iron as leverage to pop these suckers out like below.
Now you will find the tool carrier for the spare. You will want to remove the two black clips on each side. Once those are removed then you want to turn your spare jack counter-clockwise to break free from the mount. You will see what I mean when you turn it counter-clockwise.
Next you will want to remove the left panel.
Then remove the right panel.
Then remove the spare tire tray and your trunk should look like this. Pop off the plastic piece circled at the bottom. It should pop out if pulled straight up. it is held on by clips. You DONT need to unscrew the two circle bolts on top of this pic. I used this pic from a different guide.
Then go ahead and remove the panel in the back of the trunk. Two bolts at bottom and the rest are clips. Once again you can use the tire iron to help you remove the clips. **DISREGARD THE PICTURE OF THE TOOL TRAY STILL BEING THERE. IT SHOULD OF BEEN REMOVED FOR THIS PICTURE**
Now you will need to remove the plastic holder for the tonneu cover. On the side there you will see a plastic cover that needs to be popped off as well as on top where arrow is which you cant see in the picture. Once you pop those covers off then you will remove a the 10mm screw under each cover. Now underneath that rubber piece will be a t-40 Torx head. Make sure you get one of these at your parts store.
You will need to remove the otherside as well. You can see where I pretty much removed the screws already.
Now on the left side it looks like there a sensor that needs to be unplugged. I think it is the sensor that tells that computer that the tonneu cover is in place and the roof can be retracted. Once you remove this then you will also need to remove the black rubber weatherstrip to get it out of the way Just simply pull it straight up. You can see the black weatherstrip im talking about in the next step.
Now you need to remove the one screw that holds the tail light in. You will see a little plastic cover that needs to be popped off and is held on by a 10mm bolt.
Next you need to disconnect the power harness to the tailight. pull back the carpet and unplug it. It is a tight fit.
Next is removing the tailight. I found the easiest way of doing this is to lift the bottom of the tail light up a bit and pull it straight out towards you. Once it comes loose then you will see the rubber seal. I just used needle nosed pliers and pulled it straight out. This is what it should look like when the taillight is removed.
You will do the same thing on the other side.
Moving on to the trunk reflectors. It is simply held on by (2) 10mm caps. Underneath the reflector there is a sticky foam that is holding on to the trunk pretty good. You will need to use a little force. Once you see that break lose then lift it to clear screws from the hole and pull it towards the side of the car.
Now make sure the new bulbs are in your 06+ tail lights and reinstall everything in reverse order.
FINISHED PRODUCT.
Last edited by VIPNiSS; 03-21-11 at 02:35 PM.
 03-21-11, 03:26 PM
#2
Instructor
Great DIY VIPNiSS, I have just done exactly that for the Megan install. Your explanation and picures are very impressive.
Best Steve
Best Steve
03-21-11, 03:50 PM
#4

Hi VIP,
That is the best & most complete DIY write-up I have seen on any forum yet. You have set the bar quite high.
Kudos to you!!!!
If everyone wrote things up in that detail & with the pics, it would put a lot of shops out of business.
Jerry Baumchen
That is the best & most complete DIY write-up I have seen on any forum yet. You have set the bar quite high.
Kudos to you!!!!
If everyone wrote things up in that detail & with the pics, it would put a lot of shops out of business.
Jerry Baumchen
03-22-11, 04:18 AM
#9
Instructor
iTrader: (1)

Join Date: Mar 2009
Location: Formerly Easton, Pa. Bradenton FL, now Osprey Fl.
Posts: 877
Likes: 0
Received 6 Likes
on
6 Posts
When you take off the rubber caps on the roof stablizer rubbers (forget the proper name) to expose that t40 tork screws, don't loose them. The guy that put in my tein s springs lost them and said that they never were on. I knew better because I had looked under the one and saw the tork screw and figured I didn't have one so I stopped. I did have one. Anyway they cost $11.98 a piece. Could only get the from stealership. To get them on use a little rubber lubricate and twist on. Go on real easy then.
03-22-11, 06:43 AM
#10

My hats off to you VIPNiSS!
I am completely floored with what you did.
Great job.
My goal is to be able to suggest 1 or 2 tips. But I doubt it, you got it all.
Thanks a lot.
I am completely floored with what you did.
Great job.
My goal is to be able to suggest 1 or 2 tips. But I doubt it, you got it all.
Thanks a lot.

 03-22-11, 10:02 AM
#14
I almost forgot, you did have the ECU that stops that light on the dashboard. Great!
03-23-11, 01:59 PM
#15
Got a question VIPNiSS:
Then go ahead and remove the panel in the back of the trunk. Two bolts at bottom and the rest are clips. Once again you can use the tire iron to help you remove the clips.
Do I really need to remove this panel? in the back of the trunk? Just asking.