When you click on links to various merchants on this site and make a purchase, this can result in this site earning a commission. Affiliate programs and affiliations include, but are not limited to, the eBay Partner Network.
Hi all,
Here is a short DIY to replace your radiator. The pics are not so good since my phone died and couldn't take as many pics as I planned:
Step 1. First buy the correct radiator. This Denso was $91 shipped from Amazon and is a perfect fit.
Steps 2 and 3. Use ramps to get under your car. Fully disconnect your battery. I usually dissconnect both black and red.
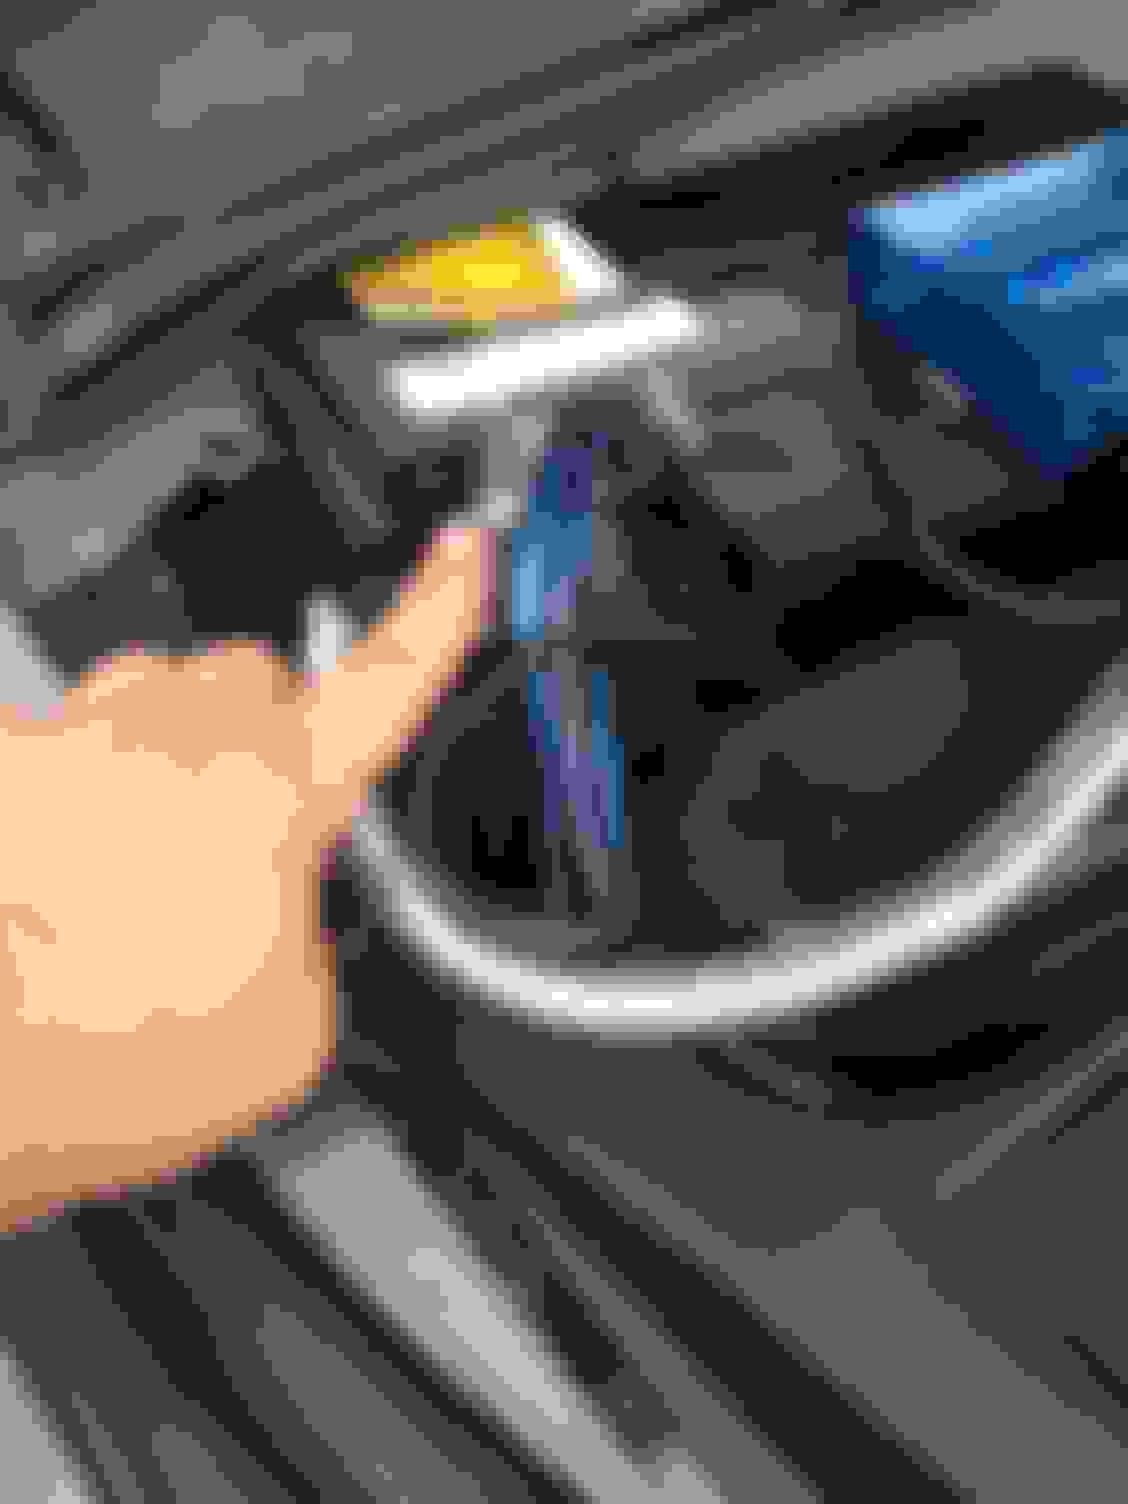
Step 4: Apply lubricant to bolts and remove the 10 mm and 12 mm bolts. Dissconnect air box or intake from throttle body. Clean the throttle body with a little carb cleaner while you are there. Do not spray to much only on rag or will flood engine. dissconnect plugs for fan.
Step 5: Get under car and remove bottom cover. Lots of 10 mm bolts, quite a pain. Then find the drain plug. It's ussually white color and plastic. Drain coolant into container.
Step 6: Remove your fan. There are a couple clips that are a pain, but are doable. Here is a pic of the removed fan and the engine bay without the intake or fan. You will probably need to get under the car at some point to remove the fan.
Thanks for the post, Brett!
Without it, I would have never tackled this project, which I completed tonight in much less than 2 hours. I have a few different approaches and some details to add.
Most comments are in-line, but my main one is that I didn't remove the upper brackets until the last step, after I had all the hoses removed.
This wasn't a hard job at all, and considering the dealership wanted > $700, I think I came out on top. I could have replaced the hoses and clamps, but the radiator cost less than 2 hoses, and also less than 4 clamps!!
Will keep monitoring and keep motoring...
1. Bought the same radiator (Denso 221-3175) from Amazon for $97.31 shipped.<br/>Tack on a 5% discount from Discover, and it was $92.44.
2. Decided to remove the air box and left the throttle body alone. Box has to be removed to allow clearance for the fan when the radiator is taken out. Take the top off, as you'll need to release the O2 sensor harness before removing the base.
3. You need a long socket extension to reach the bolts for the air box. Note the clip that holds the harness for the O2 sensor. Get that before you yank it out.
4. Inserted a small flathead screwdriver and it popped loose.
5. In the center, note that the fan plugs on the right are left in place (see Brett pic #7 for a closer shot). Only the two on the left have to be removed. Brett points to them, but you can see in his fan pic that they're still attached.<br/><br/>There are two clips on the top right fan that hold the harness for the connectors that have to be removed. One of mine was broken, so I was lucky I guess. But don't forget them.
6. Post-radiator removal. Note that my rubber bushings came out with the radiator vs. Brett's pic 8. If they do the same for you, pull them from the old unit. See my #12 for base after installation.<br/><br/>Brett was also smart here: use a tarp. I made a mess, especially during the burp phase. Power washer this weekend.
7. Old radiator + fan unit. See fan plugs (now on left from this view). Only 6 bolts to remove and it comes off. You can see the two clips for the harness on the top of the left fan.
8. Ah, the reason for the replacement -- the crack runs from the inlet, over the fan bolt, then under the resevoir bolt and across. Stupid composite b*ll***** -- did the same thing to my SC400.
9. Fan removed and ready to bolt into the new radiator.
10. Note that the foam didn't make the trip. No matter, the rubber bases and upper brackets hold it securely. Probably some air inefficiency here, but unavoidable.
11. Assembled with shiny, non-cracked plastic, ready for burping.
12. Underside showing bushing in place around plastic shaft bottom of new radiator.
13. Underside shot.
Good job and so glad I could help. Never thought changing a radiator could be so easy, but it really is not bad at all. Actually the hardest part for me was reinstalling the aftermarket transmission cooler I had attached to the AC condenser. Also getting off the clamps on big hoses was a bit challenging, but only because I didn't have the correct tools. Have heard of dealers charging as much as 1K for this job, what a joke. It's also nice to get a feeling for the cooling system in our cars, so if there is a leak or overheating you'll know exactly where to look and test. I use my pressure tester very often..
Lex Brett- Sorry to hear about your car. Are you planning on getting another SC430?
I am about to undertake the radiator replacement task, I am so glad you took the time to document.
I have changed my suspension to coilovers so I'm not too afraid to take things apart and put them back together but I am afraid of that "burping process". I just don't want my car to over heat.
I ordered the radiator and hope to get started next weekend.
Thanks for the great pictures and informational tips!
Wow- this was one of the easiest DIYs I have done. It took me about one hour and most of that time was removing the bottom plastic cover and the 20 or so screws that attaches it to the car.
Thank you to both of you for taking time to document, it makes it a great pleasure to work on my with all this help!
Great write-up and/or thread with photos! I purchased the radiator from RockAuto this week for $77 and both the upper and lower radiator hoses for a combined total of $109, only $8 for shipping and it arrived the next day, incredible, I must be near one their warehouses. I'm either going to do this job myself or have someone else do it, not sure yet. Removing the splash guard is a pain, no doubt. I do not have an after market transmission cooler, but isn't there a small hose from the transmission that connects to the bottom of the radiator or has to be disconnected from somewhere and if so do you plug it or put vice grips on it with cloth so that you don't lose too much fluid? I vaguely recall my mechanic where I used to live disconnecting a small hose that had transmission fluid in it when he replaced the radiator. Unfortunately the radiator that was installed has a pin hole leak around the top seam that isn't leaking much at all, but too frustrating to let it be. Thanks
Great write-up and/or thread with photos! I purchased the radiator from RockAuto this week for $77 and both the upper and lower radiator hoses for a combined total of $109, only $8 for shipping and it arrived the next day, incredible, I must be near one their warehouses. I'm either going to do this job myself or have someone else do it, not sure yet. Removing the splash guard is a pain, no doubt. I do not have an after market transmission cooler, but isn't there a small hose from the transmission that connects to the bottom of the radiator or has to be disconnected from somewhere and if so do you plug it or put vice grips on it with cloth so that you don't lose too much fluid? I vaguely recall my mechanic where I used to live disconnecting a small hose that had transmission fluid in it when he replaced the radiator. Unfortunately the radiator that was installed has a pin hole leak around the top seam that isn't leaking much at all, but too frustrating to let it be. Thanks
Yes, there two hose's that connect to the radiator from the transmission inlet and outlet. You can stick a 12mm bolt in the hose to stop it from leaking.

 08-17-15, 10:56 AM