When you click on links to various merchants on this site and make a purchase, this can result in this site earning a commission. Affiliate programs and affiliations include, but are not limited to, the eBay Partner Network.
Ceramic coating? We all know that a Ceramic coating will make our cars literally look brand new, super shiny and offer a ton of protection...but to have it done professionally could cost $1000 to $1500. Well, there's a better answer. I'm a huge fan of Adam's Polishes products and they offer a product called Graphene Ceramic Spray Coating Advanced. It's a much easier, spray application that offers the same benefits of the more costly ceramic solutions.
Now let me be upfront - the paint correction steps MUST be done before applying this Ceramic coating. You MUST remove as many of the imperfections in your paint as possible otherwise this Ceramic coating will only exaggerate those imperfections even more. Let me also say, that its time consuming. I worked on my Lexus over a 3 day period - several hours each day. So if you're not willing to put the time into compounding, polishing, and surface prepping - than this Ceramic product is not for you.
STEP #1: Wash & Clay - Of course before starting any work on your paint, the car needs to be fully washed. I suggest using a power washer and a foam cannon. It cleans the car while reducing the amount of surface scratching. Once clean - you MUST remove all the surface contaminants in your paint. Even if your paint "looks" great - if you rub your hand over the paint and you can "hear" your hand moving...then it needs to be clayed.
STEP #2: Compound - To get your clear coat to look new, you must remove the top layers of scratches, swirls and haze we all have on cars. FYI - Car washes cause more damage to your clear coat than driving in snow and rain. I use Adam's Compound (its blue) and works great on all surfaces. I strongly suggest you invest in a DA Polisher - you can get a really good one for $100 at any Harbor Freight. They also sell pads. They offer Course (for removing alot of swirls and scratches), Medium (for normal wear), Fine (for lite wear) and Finishing (for waxes and polishes). For 90% of you, I would get a Medium pad and a Polishing Pad unless you know your paint is really bad. Apply (4) dime-size drops on the Medium pad, set your polisher to #4 speed and SLOWLY move up & down then side to side 3 to 4 times. Let the polisher do the work - not alot of downward pressure on the polisher. Work on a 3ft by 3ft square - then move to the next section, put (4) more drops on the pad and continue. Make sure you use a plush/soft microfiber towel to remove the compound.
STEP #3: Polish - When you use Compound on your paint, it actually uses an abrasive liquid that basically (safely) "sands" your clear coat. So to now get back the ultimate shine, you need to polish your paint. I use Adam's Polish (its white) and you would now use a Polish pad. Again, (4) dime-size drop on the pad - working in the same pattern but you don't have to go as slow with polish (but don't rush it either). Working a 3ft x 3ft section, then wiping off with a plush/soft microfiber towel.
STEP #4: Surface Prep - You've done all this work to get your paint ready for the Ceramic coating, but don't forget...you have left behind alot of dust and finger prints or elbow impressions. You need to remove them or you will ceramic over them and will be seen. I use Adam's Surface Prep - its actually distilled water and rubbing alcohol. This will remove any grease, finger prints, etc.
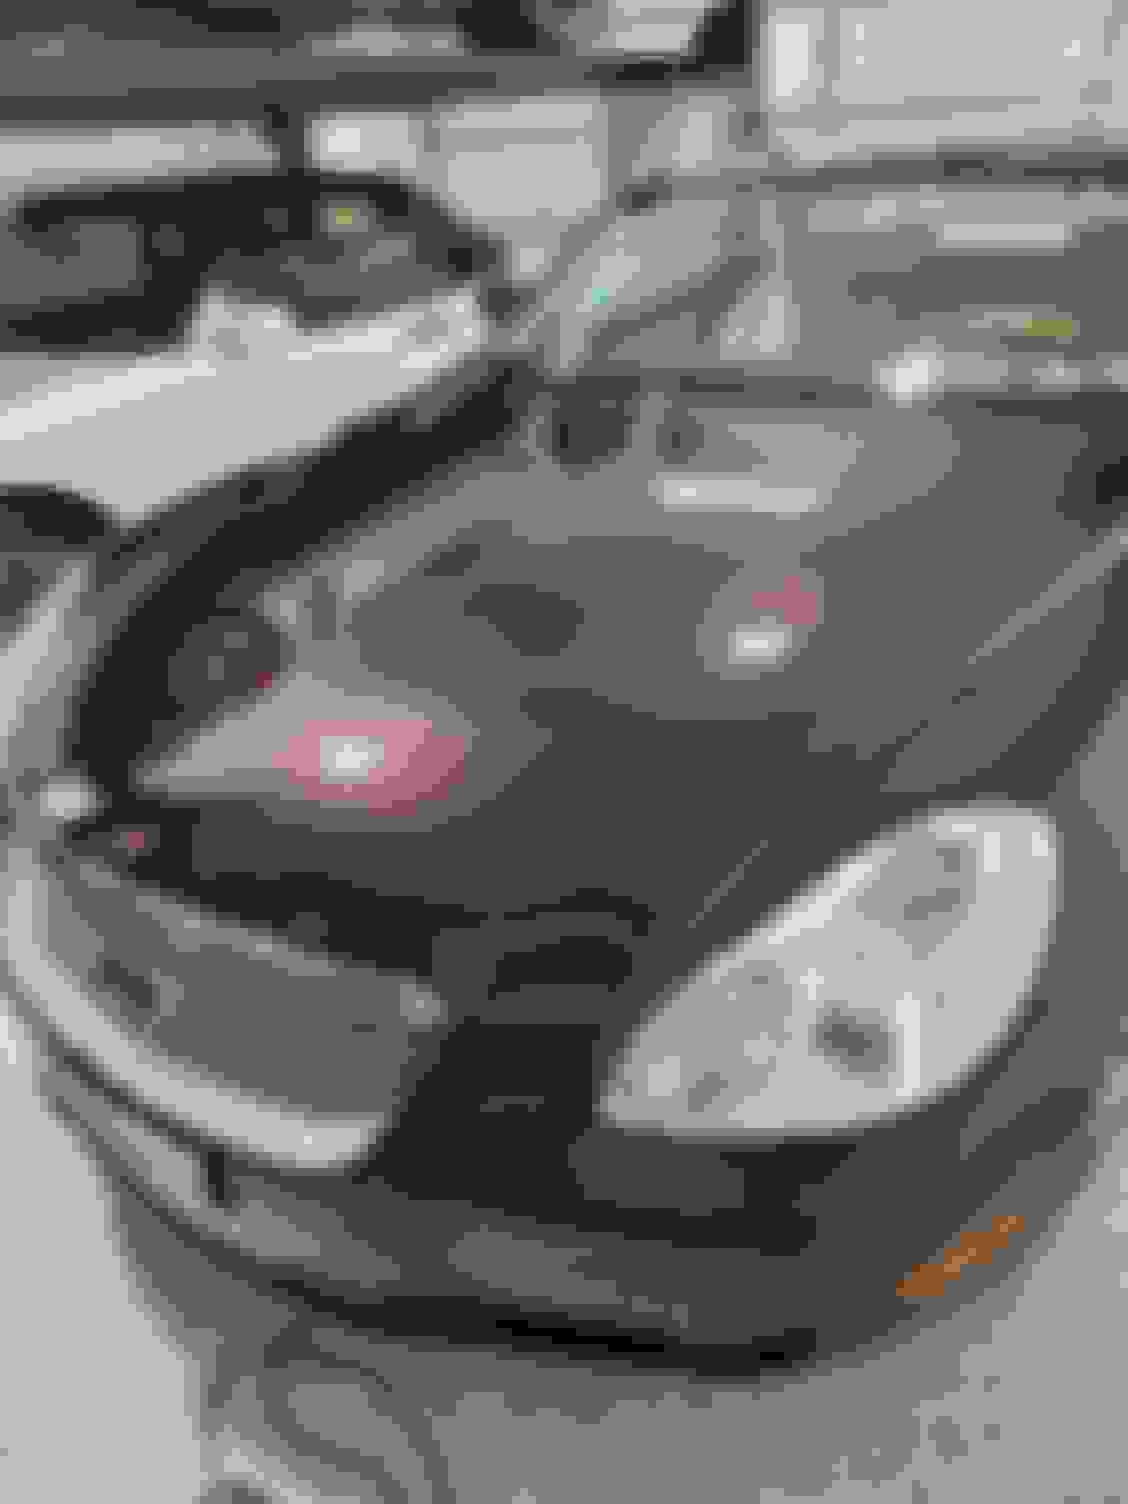
STEP #5: Ceramic Coating - Ok believe or not - this is the easy step in this entire process but you have to take your time. Using a microfiber block applicator, you spray 3 or 4 times into the applicator and work a 3f x 3ft section. Wipe the Ceramic coating around the section (almost making a border) and then wipe inside that border - this will ensure you don't miss any section. You will notice that the ceramic coating will start to "rainbow" (see picture). That means the ceramic is bonding with your paint. When you notice the "rainbow" starting to fade, its time to wipe that section with a plush/soft microfiber towel. It will require several wipes to get all the ceramic off - take your time because you don't want to leave any behind. Make sure you work on one section of the car at a time (from start to finish). In other words, work on the hood first and don't work on any other section until the hood is complete finished (ceramic coated and wiped down).
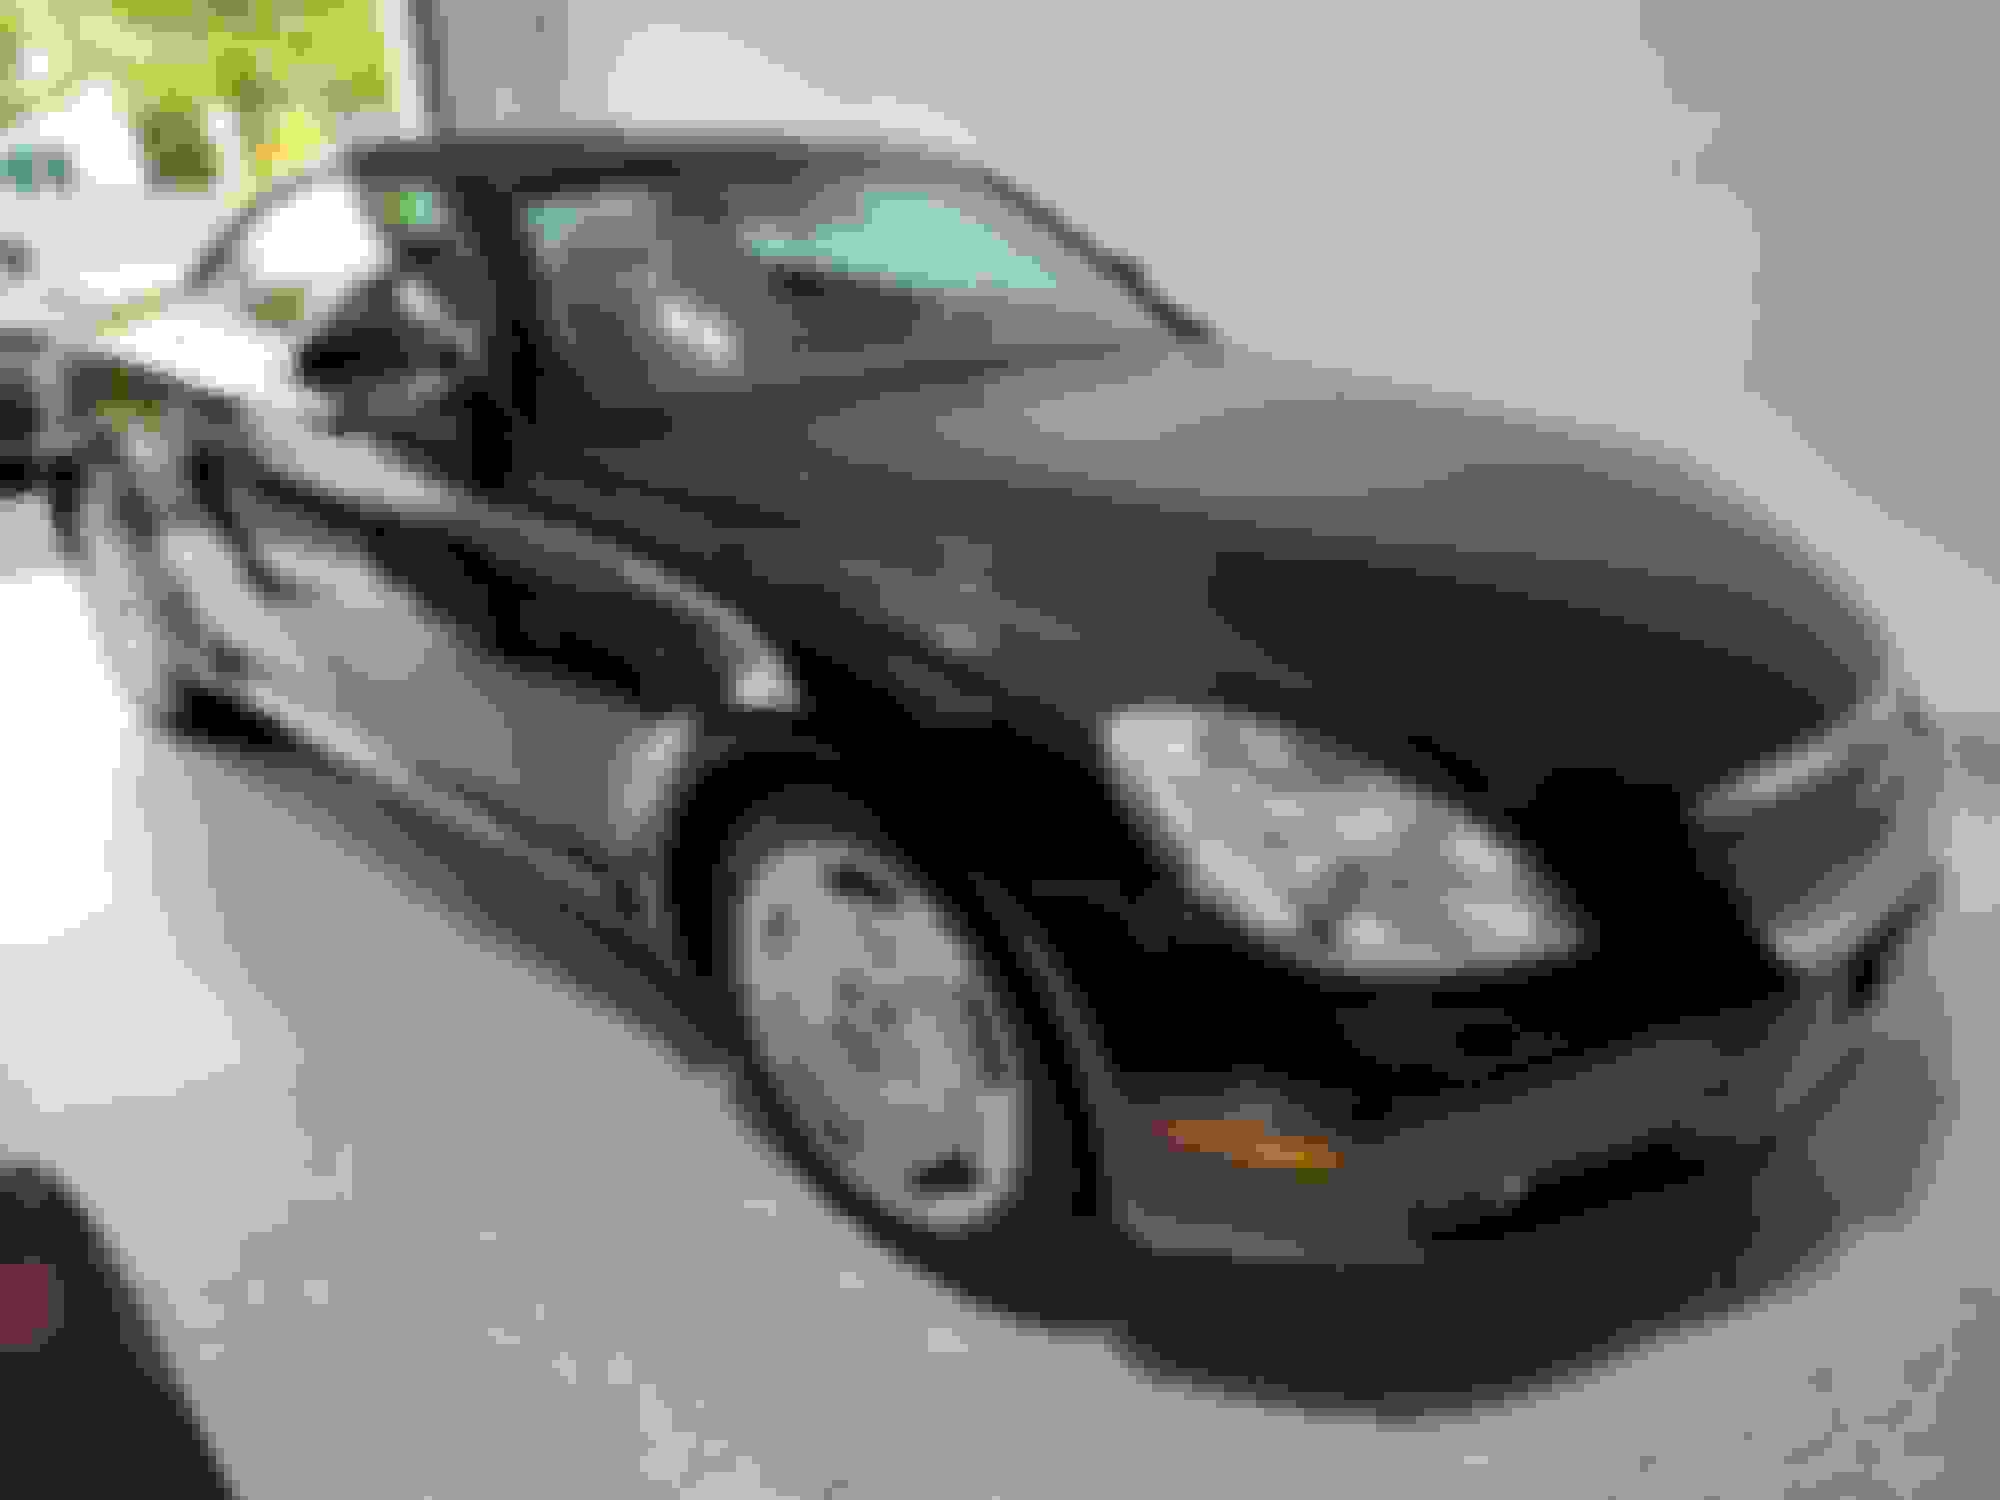
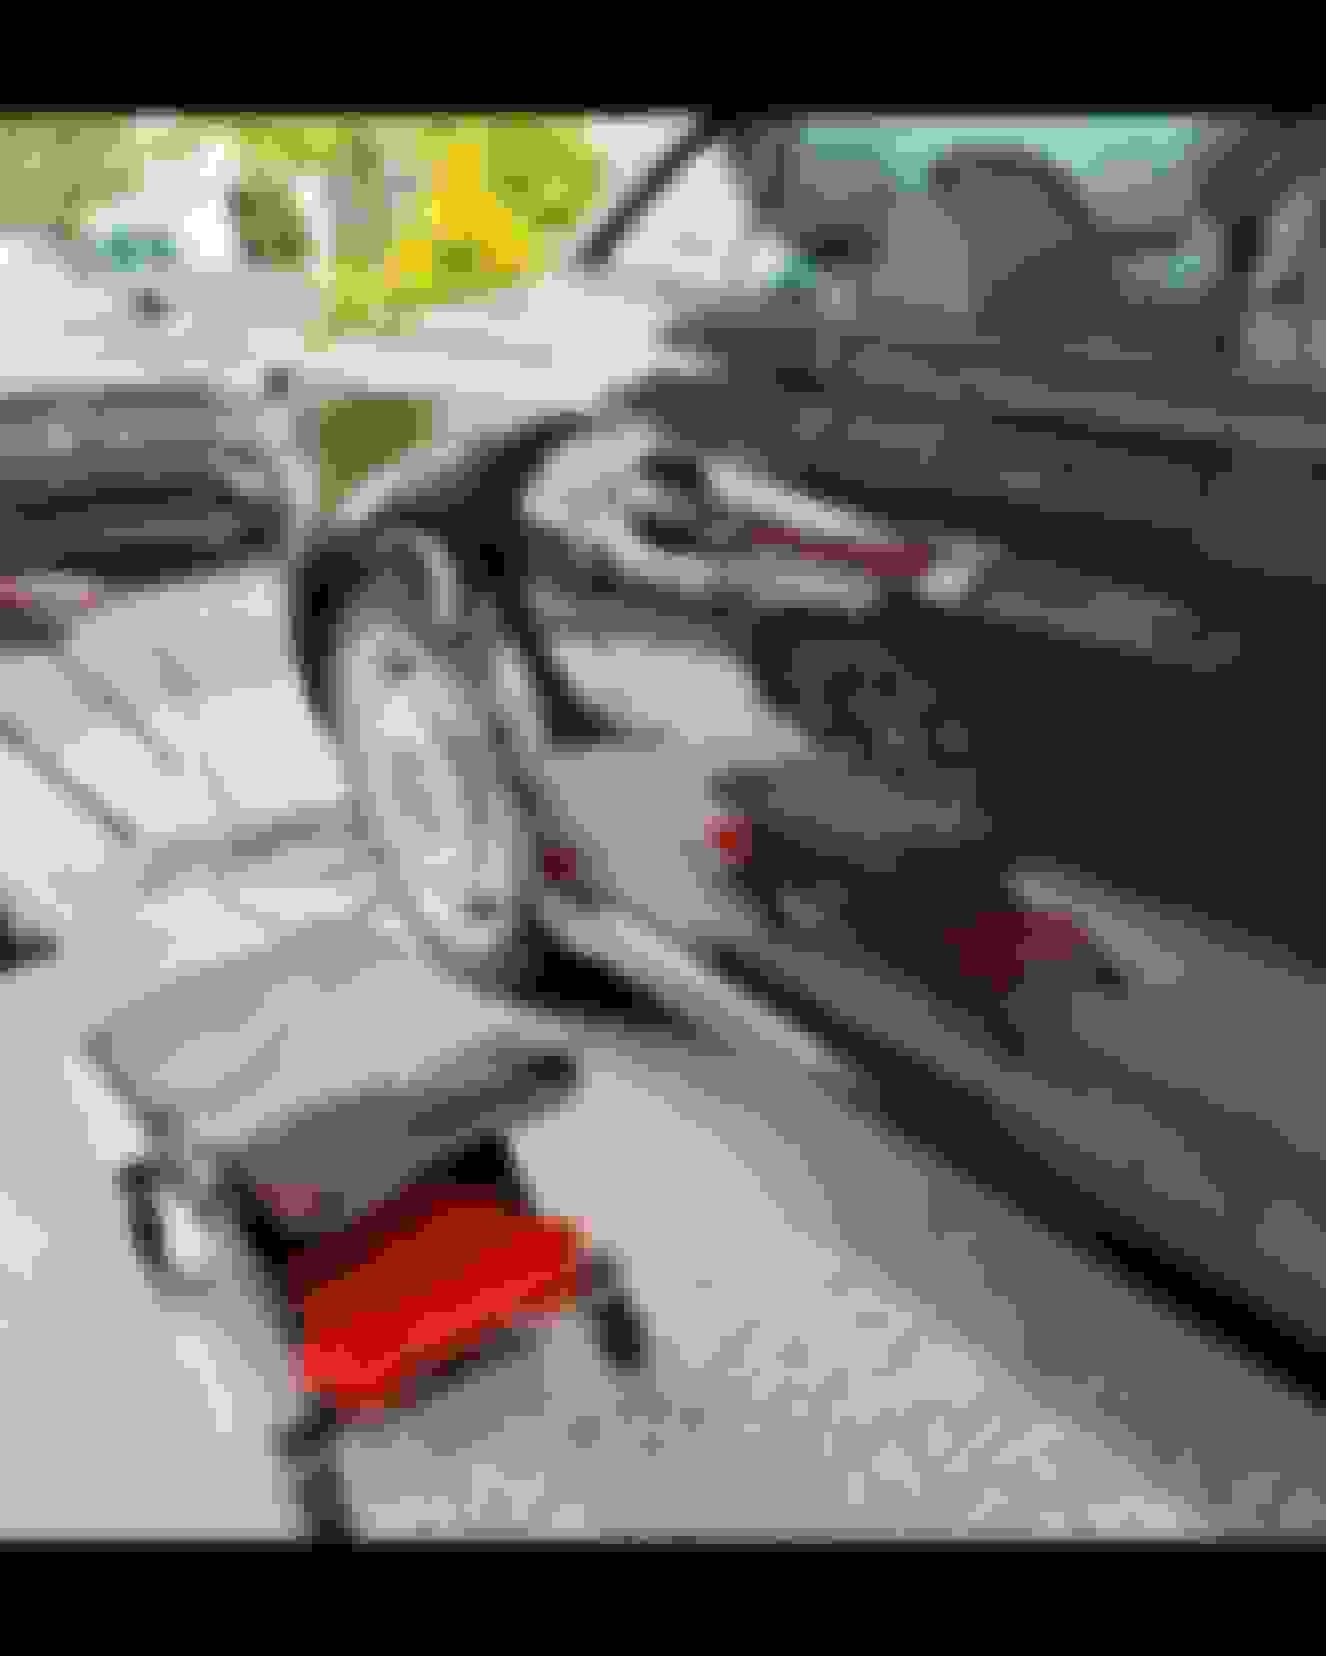
Hopefully this helps you with getting your car to look amazing - below are pictures of the final result - you be the judge if you think ceramic coating is something you want to do. Look at the reflection of my Detailing Chair in the side of the car (pic below).
You obviously do this professionally or pretty good amaturely. Perhaps we could see some photos of 1/2 of a hood and trunk so as to compare the both.
I have done a paint correction on my 2015 IS350c and it looks like new. I used all Griot's Garage items. I have had Xpel installed on the front for rock protection, but the rest is factory. That's probably where the ceramic coat would be most appreciated.
--
I'm actually a Car Show "addict" who gets his Corvettes judged quite often throughout the summer seaon...so clean cars are my passion / therapy. Sorry I dont have before & after or side by side photos. You can ceramic over your Xpel (it's actually suggested to help it from aging). Ceramic can be applied to every section of the exterior. Plenty of videos on Adam's website to show you proper techniques...
Wow, that paint job looks amazing! Plus, I really love the deep metallic purple color. Thanks for writing that up. I have been learning how to clean up my paint and was missing a lot of pieces to the puzzle. My paint has thousands of tiny pine sap dots on it from being under trees for years uncovered. You can feel them with your fingertips. I have been hand washing the car and used wax once, but only with a terry cloth towel. I had a feeling a polisher with different pads was what I really needed to get the clear coat completely free of sap and other contaminants. Your results are just ace.
Wow, that paint job looks amazing! Plus, I really love the deep metallic purple color. Thanks for writing that up. I have been learning how to clean up my paint and was missing a lot of pieces to the puzzle. My paint has thousands of tiny pine sap dots on it from being under trees for years uncovered. You can feel them with your fingertips. I have been hand washing the car and used wax once, but only with a terry cloth towel. I had a feeling a polisher with different pads was what I really needed to get the clear coat completely free of sap and other contaminants. Your results are just ace.
--
It's not the polisher that removes most of the protruding specs of contaminate, but a clay. You can use a natural clay or synthetic clay and stroke it in parallel strokes. Important to keep it wet. Use this before the D(double) A(action) sander so you don't end up just swirling the dirt around and making more scratches.
 07-02-22, 06:47 AM