When you click on links to various merchants on this site and make a purchase, this can result in this site earning a commission. Affiliate programs and affiliations include, but are not limited to, the eBay Partner Network.
Well this is a strange one.... go to the gas station to fill up the LS (been sitting for about 6 months at a family members house being driven periodically) and gas starts coming out from under the car. I shut off the pump... run to tell the gas attendant, not happy of course, and roll the car forward to make sure the exhaust doesn't ignite the fuel on the floor. Get it home... get the rear in the air.... struggle to see where it may have come from and then see this.
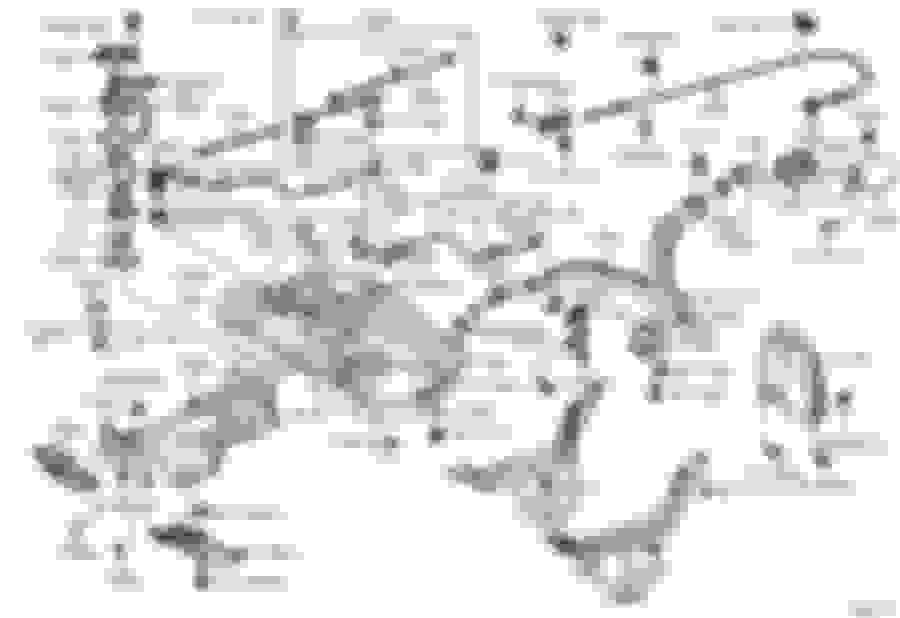
look it up on a diagram comes up as77213-06010
EDIT CORRECT PART NUMBER IS 77213-50020
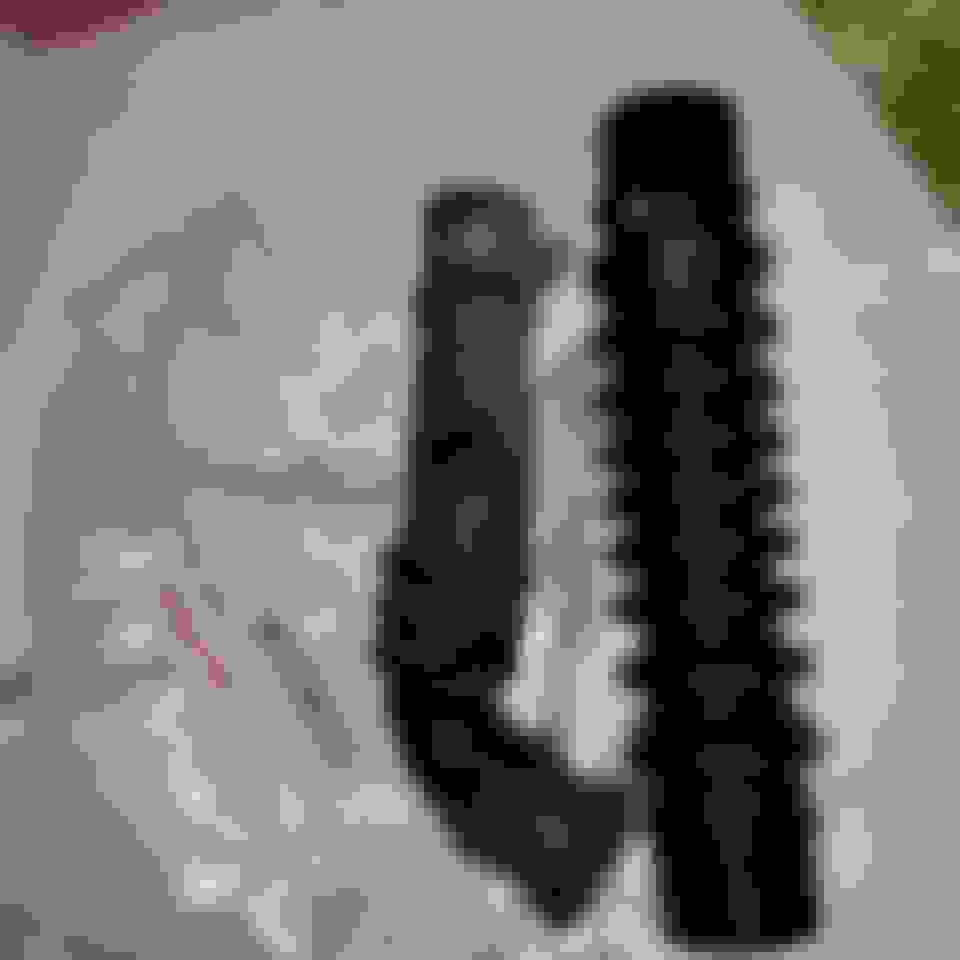
fuel tank to filler pipe hose. No friggen clue how that could happen the location of that pipe is extremely hard to see let alone get to. It looks like something took a bite out of it.
Ordered the new part but i have no idea how to get to it. Anyone have a FSM that can shed some light on it. On a budget right now and don't want to shell out the money for a FSM until our jetta sells. Adds to the big list of things I need to do to start driving it again such as rear power shade stuck up, drivers side mirror swings freely, Battery seems to drain too fast, and one of the air shocks isn't holding air very long. All of those are pretty expensive but this is the most pressing one to do first.
At first glance the conventional hose clamp led me to believe this was a previous repair that finally went south. Conventional hose clamps are rather uncommon on Lexus vehicles.
Then I searched the part # 90460-37003 shown on the diagram on each end of the hose itself. No actual images came up but this one does appear to be a regular hose clamp.
It does make sense a little more torque can be applied, as opposed to the popular spring type clamp, on a fuel related component.
I'm stumped....
The lower part of your back seat is easily removable. There is a port under it to access the fuel pump. I would try that route first and see if you can somehow reach it through there...
Then loosen the liner in the wheel well... could remove it but I found just taking all the nuts/screws out and having it loosened gave me enough room and taking it out wouldn't actually give me anymore and just add another step.
you need to remove 1 phillips head screw, 2 hex screws (sorry forgot to write down the number on the allen wrench) 9 10MM nuts and one plastic clip.
I forgot to take pics of the hex screws but they are pretty easy to see when you get your head in there.
Next remove this plastic shield from under the car. It is 3 10mm nuts
remove this bracket that holds the filler neck in place on the body 2 10mm nuts and 2 12mm nuts.
Then loosed the clamps on both end of the hose and slide it off the filler neck first. (this will be easier if you have smaller hands at 6'8 my hands are on the large side)
I managed to do it from the side instead of the bottom.
Note I had first tried this without loosening the filler neck and the hose was impossible to remove.... came off fairly easy after that the hard part was getting my huge hand in position to take it off the fuel tank MM by MM.
Then after all that I found out the part number I pulled from the parts diagram is actually the wrong part number. The diagram on Partsouq was the wrong one.
So I now have the correct part ordered, 77213-50020 not 06010 which I posted earlier. Just a reminder to double check part numbers you find on the internet... they may be wrong

 10-21-17, 11:48 AM