Question about changing cam seals on 98 with VVT-i
#76
First I want to say Thanks to Sha4000 for undertaking such an adventurous and complex repair and for asking the critical questions!
I also have a 98 VVTi in my GS and will be tackling this same Cam Seal replacement very soon I too have the FSM from Toyota / Lexus and I agree that the head removal portion, that explains the cam removal process, leaves much to be desired in some of the key details that were brought up in this thread. I have read this portion of the FSM a number of times and had wondered if both cams were in proper servicable alignment when the 50deg past TDC. Now that I know this ahead of time I won't be caught when I attempt to complete this project over a weekend as this is my DD.
I still am a little fuzzy about the drivers cam and the process of turning it CW or CCW to get the arrows aligned to place the service bolt? I would really love to speak with you over the phone about your experience.
Please text me at your earliest opportunity at 6787709017 or leave your number here and I will reach out.
Best, David
#77
this thread is golden! should be a sticky
#78
Hey Scraape ask your questions in this thread and I'll try to help you out as much as possible. I just got back in the house because I was outside trying to work on some issues with the 430 I just bought. Don't remove that front bearing cap until you have the service bolt in the Cam and then remove it in the sequence with the other bearing caps. Read the pdf that I posted in the first post VERY carefully and don't rush.
#79
Hey Scraape ask your questions in this thread and I'll try to help you out as much as possible. I just got back in the house because I was outside trying to work on some issues with the 430 I just bought. Don't remove that front bearing cap until you have the service bolt in the Cam and then remove it in the sequence with the other bearing caps. Read the pdf that I posted in the first post VERY carefully and don't rush.

Last edited by Scraape; 12-21-17 at 10:49 AM.
#81
Lexus Champion
Ok let me explain. I never aligned the cams once I took the valve covers off.
1. I did the timing belt job and replaced the water pump and both Idler pulleys.
2. I did not put the new timing belt on since I knew I had to change the cam seals.
3. At this point both cam pulleys and the crank pulley are set to 50 degrees past TDC
4. I unbolt the bolts on the cam pulley using my cam pulley holder tool which worked great. Here's the link.
Amazon.com: OTC 6613 Variable Pin Spanner Wrench: Automotive
5. I removed the cam pulleys.
6. I removed both Valve covers.
7. Everything is still set at 50 degrees past TDC.
8. I check the right side cam ( passenger side ) and see that it is already lined up with the markings and service bolt hole so I place the bolt in the hole. I never moved the exhaust cam because it was already lined up.
9. I check the left side cam ( drivers side ) and see that the markings and the hole are not lined up so I'm going to have to do it myself. This is where I stopped initially and contacted you by email.
10. While waiting for you I built a little courage lol and start to turn the left side exhaust cam little by little with a 24mm hex wrench which is the correct size for the hex shaped part of the camshafts. I felt some resistance before I could get the cams lined up so I stopped.
10. I went to a PTA ( Parent Teacher Association ) meeting at my sons school and now I'm back trying to get some clarification on what you did and what I need to do next.
Sorry for the long details because I hear my phone email notifying me that you have probably replied to my post while I'm writing this post. I'm a slow 2 finger typist and I want to be absolutely clear about what I've done and what I need to do. You have already done the job so I would appreciate clear and precise instructions on how you did it if you would be so kind. Remember this write up will probably get stickied since no one else has done a write up and I'm taking lots of pictures to help out all future ppl that dive into this job. This scares more ppl than a timimg belt job that's why I'm being so cautious.
If the tool slips you risk damage to valvetrain or cam phasers (VVTI)
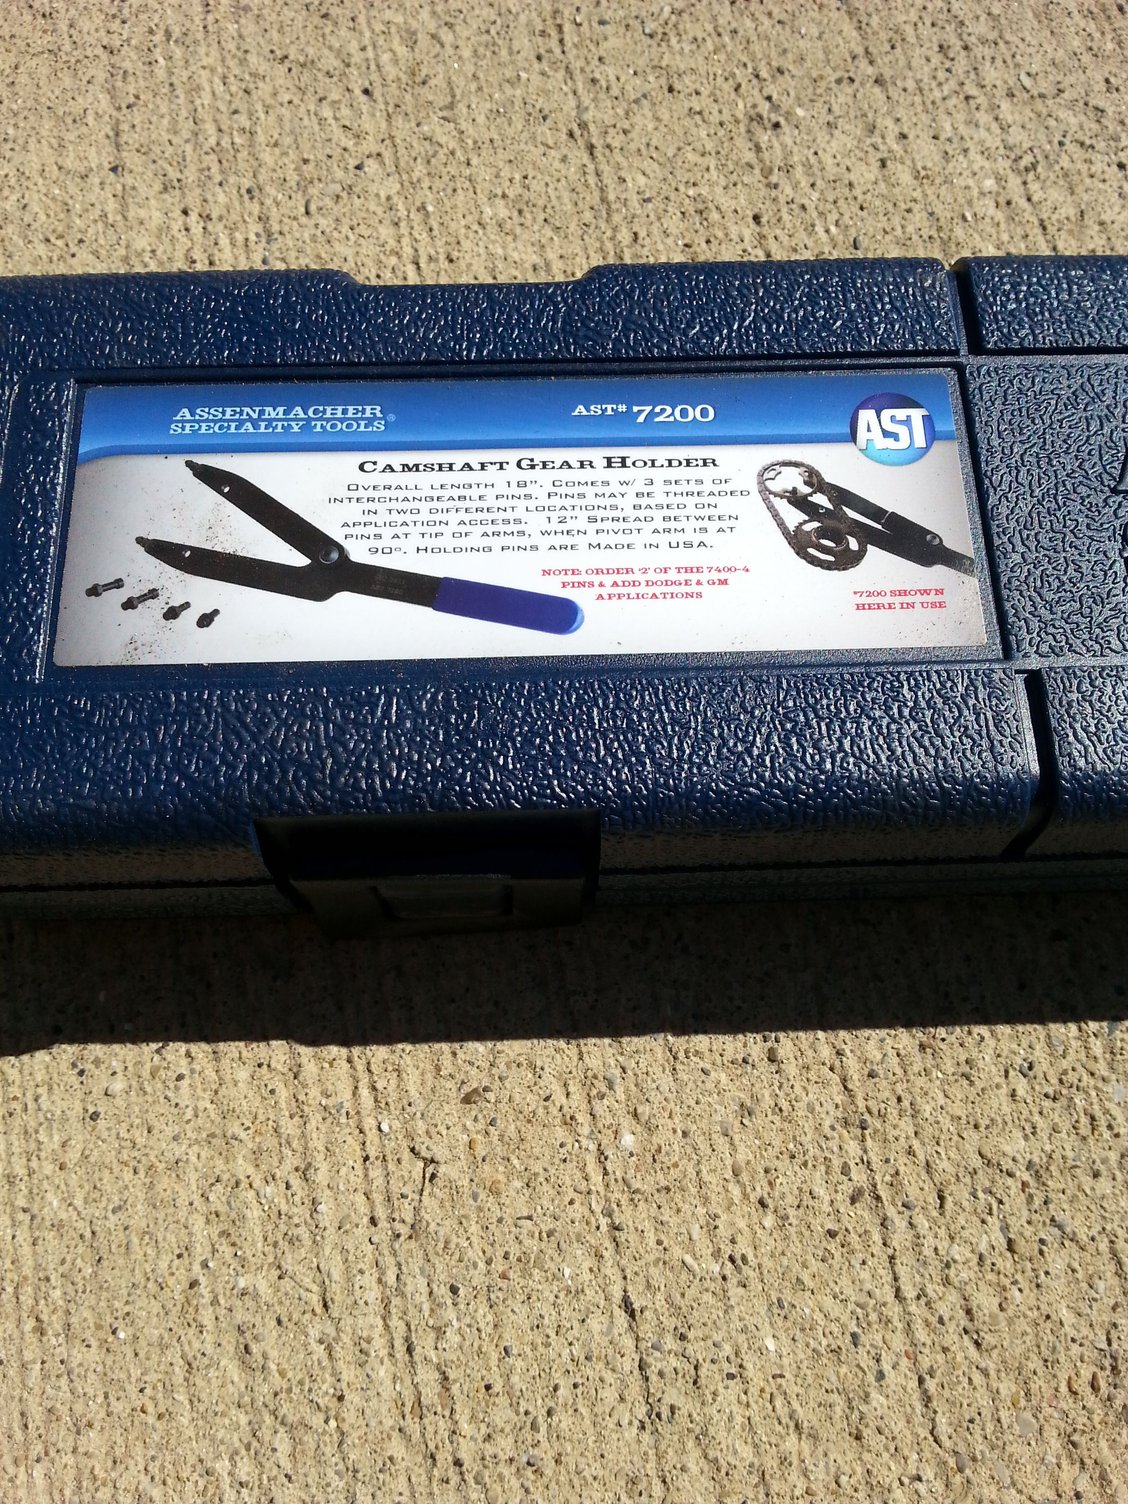
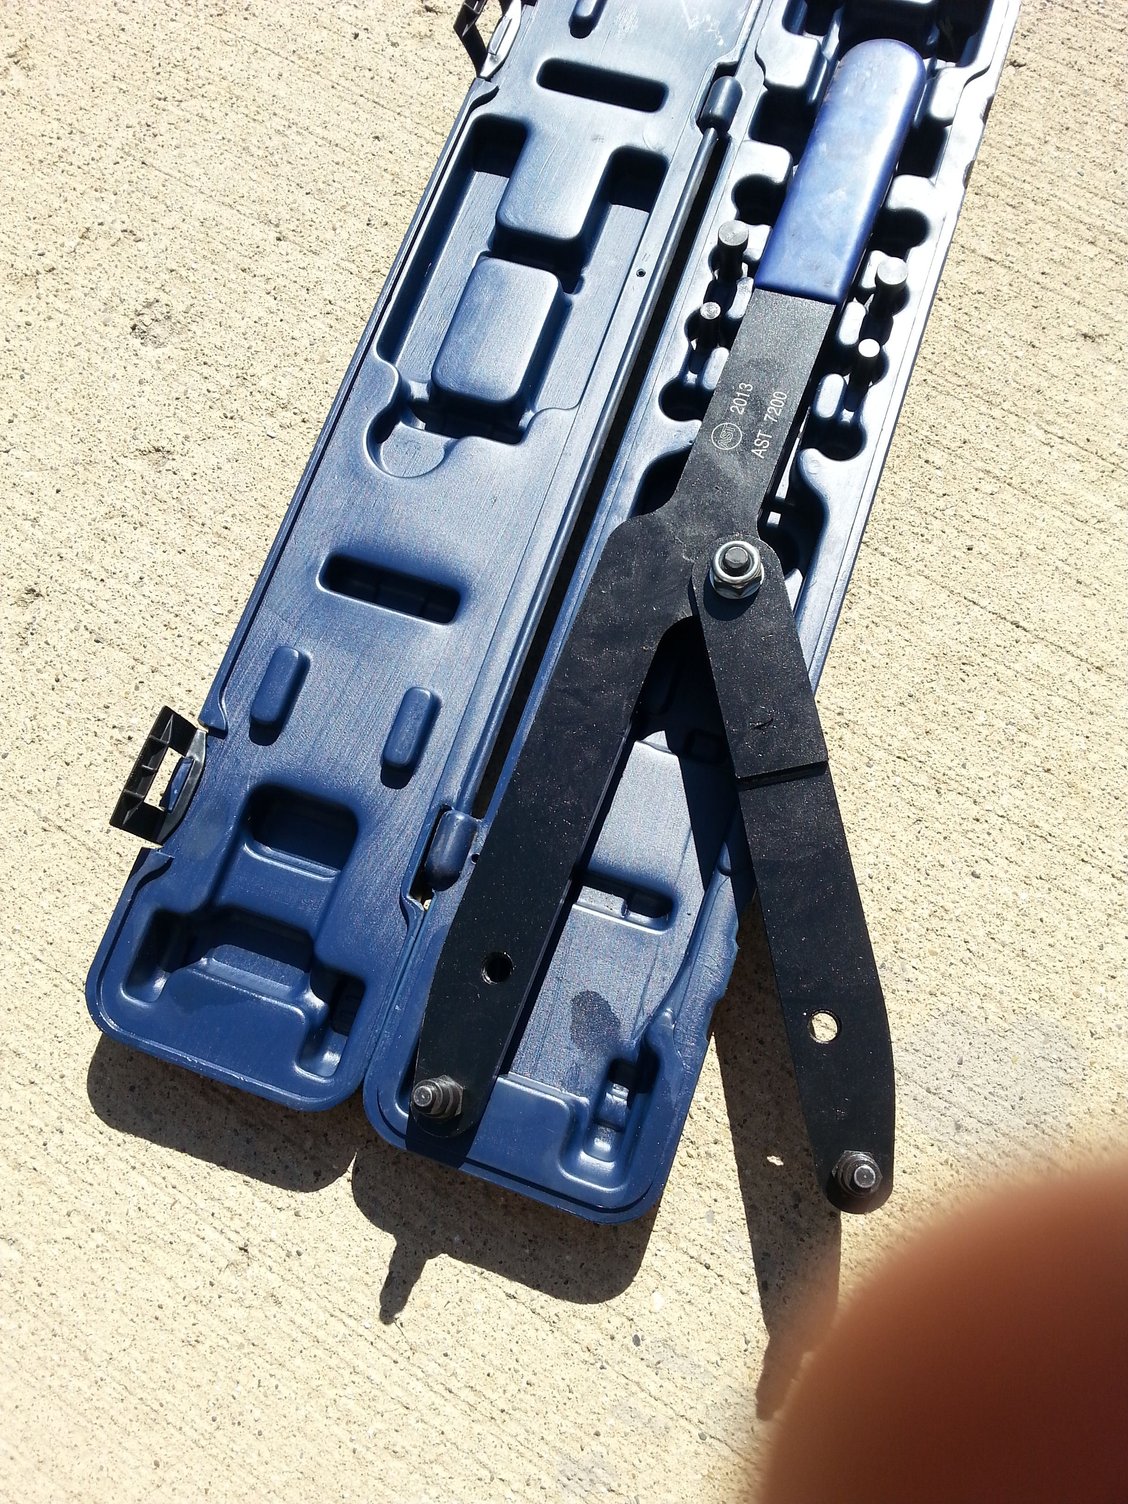
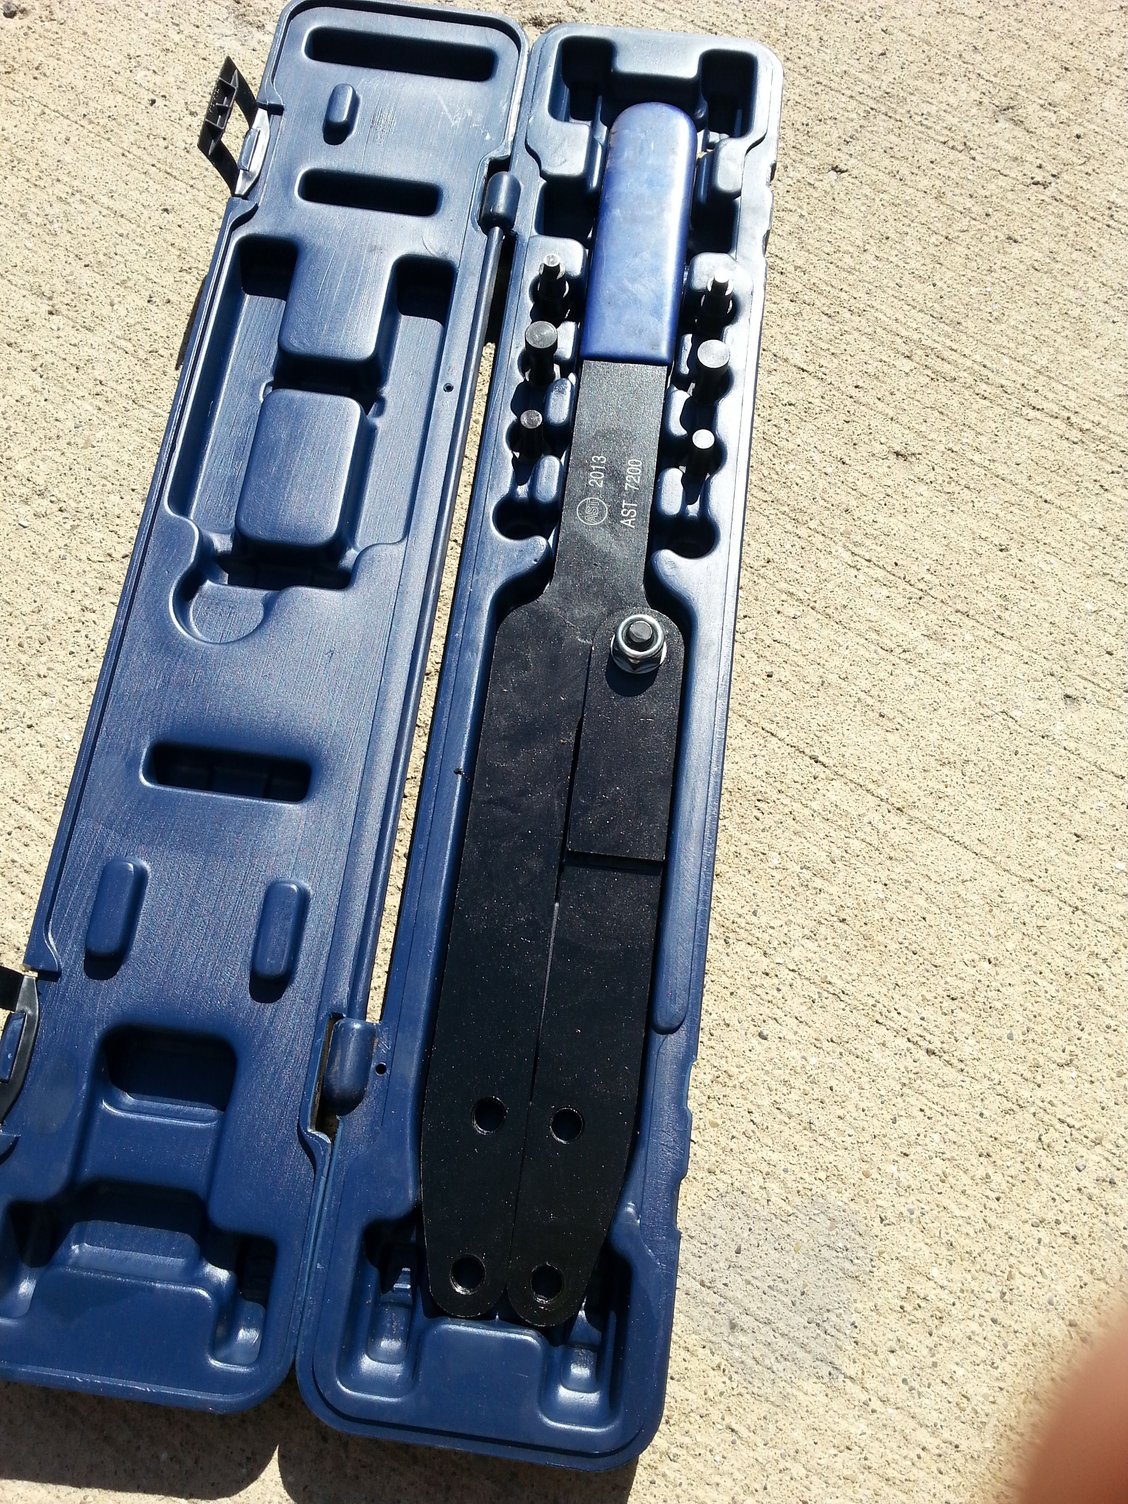
AST TOOL is a US. manufacturer of a more durable tool...#7200
Can also be used for holding AC clutch, power steering pulley during disassembly and reassembly
#82
The tool did it's job but I did have to set it just right on the cam pulley to make sure it did not slip. To be honest that AST tool would have had the same problem because of the way the notches are positioned on the pulley if I remember correctly. I have not used the tool since doing all that work.
#83
Lexus Champion
The tool did it's job but I did have to set it just right on the cam pulley to make sure it did not slip. To be honest that AST tool would have had the same problem because of the way the notches are positioned on the pulley if I remember correctly. I have not used the tool since doing all that work.
The exhaust cam on 1UZ-FE used a scissor gear, subgear which reduces the gear backlash to zero, thereby considerably reducing gear noise..
Some images of AST TOOL #7200 in use...worked beautifully for resetting the subgear so service bolt could be installed for reassembly..the tool pins fit like a glove in the subgear
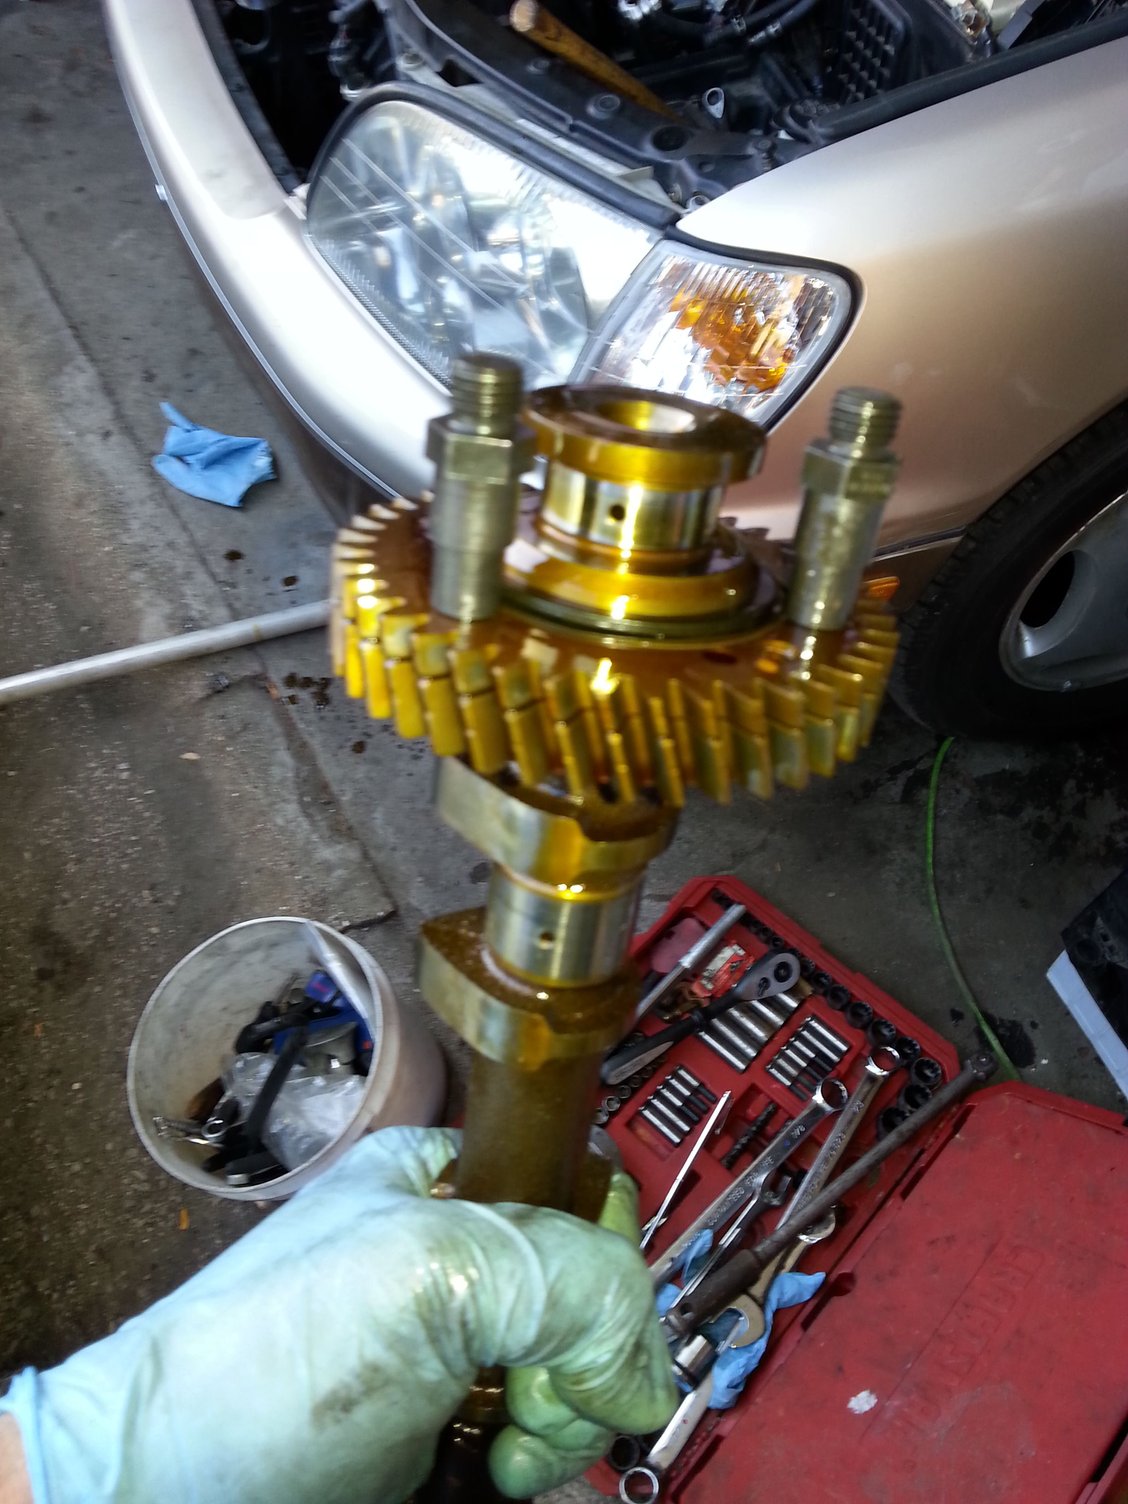
This image depict Exhaust Scissor Gear with AST Tool pins in place before they are threaded into the arms of tool
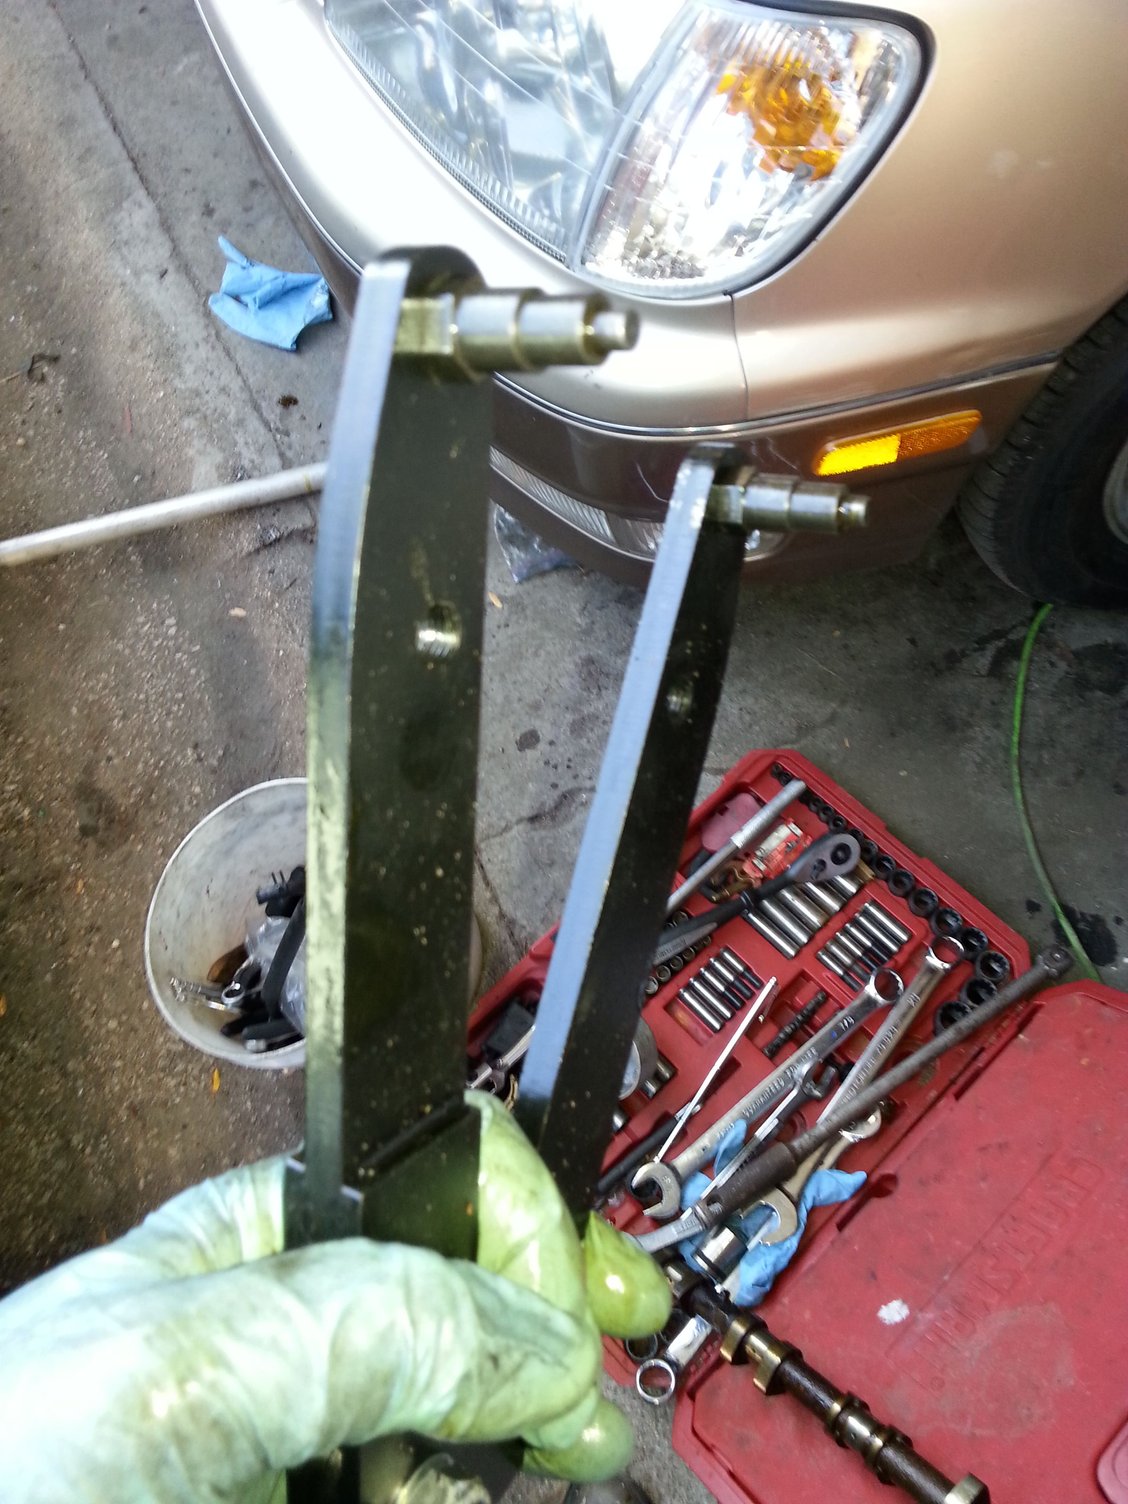
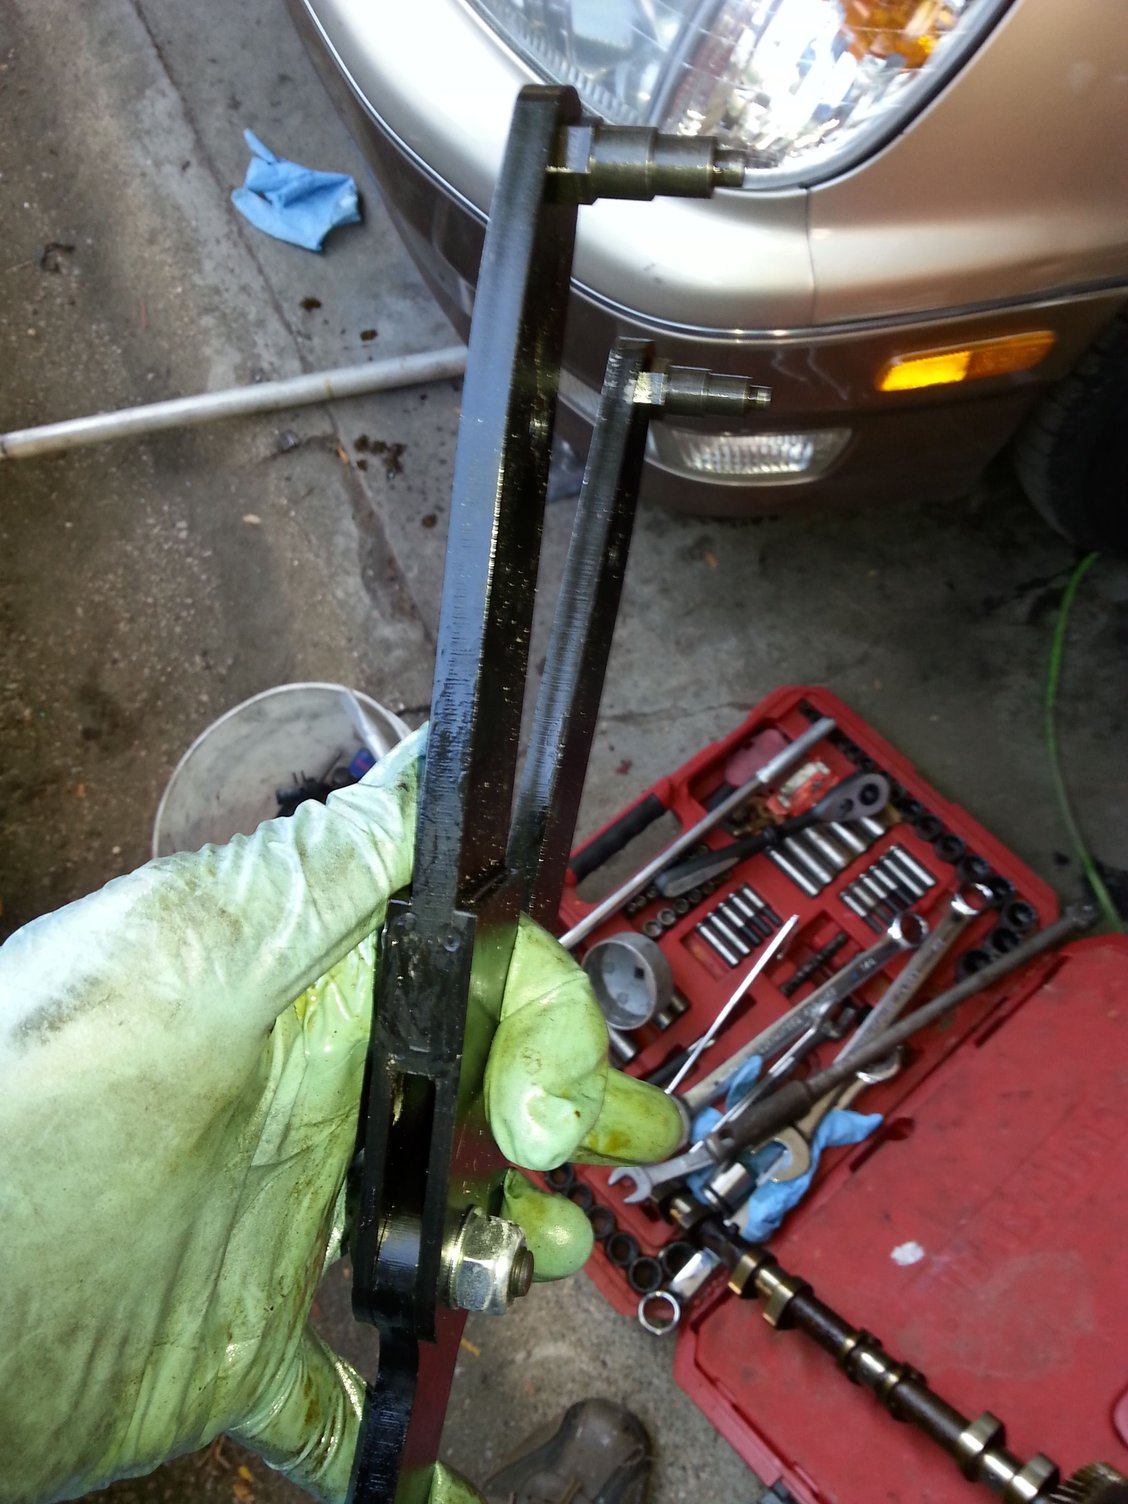
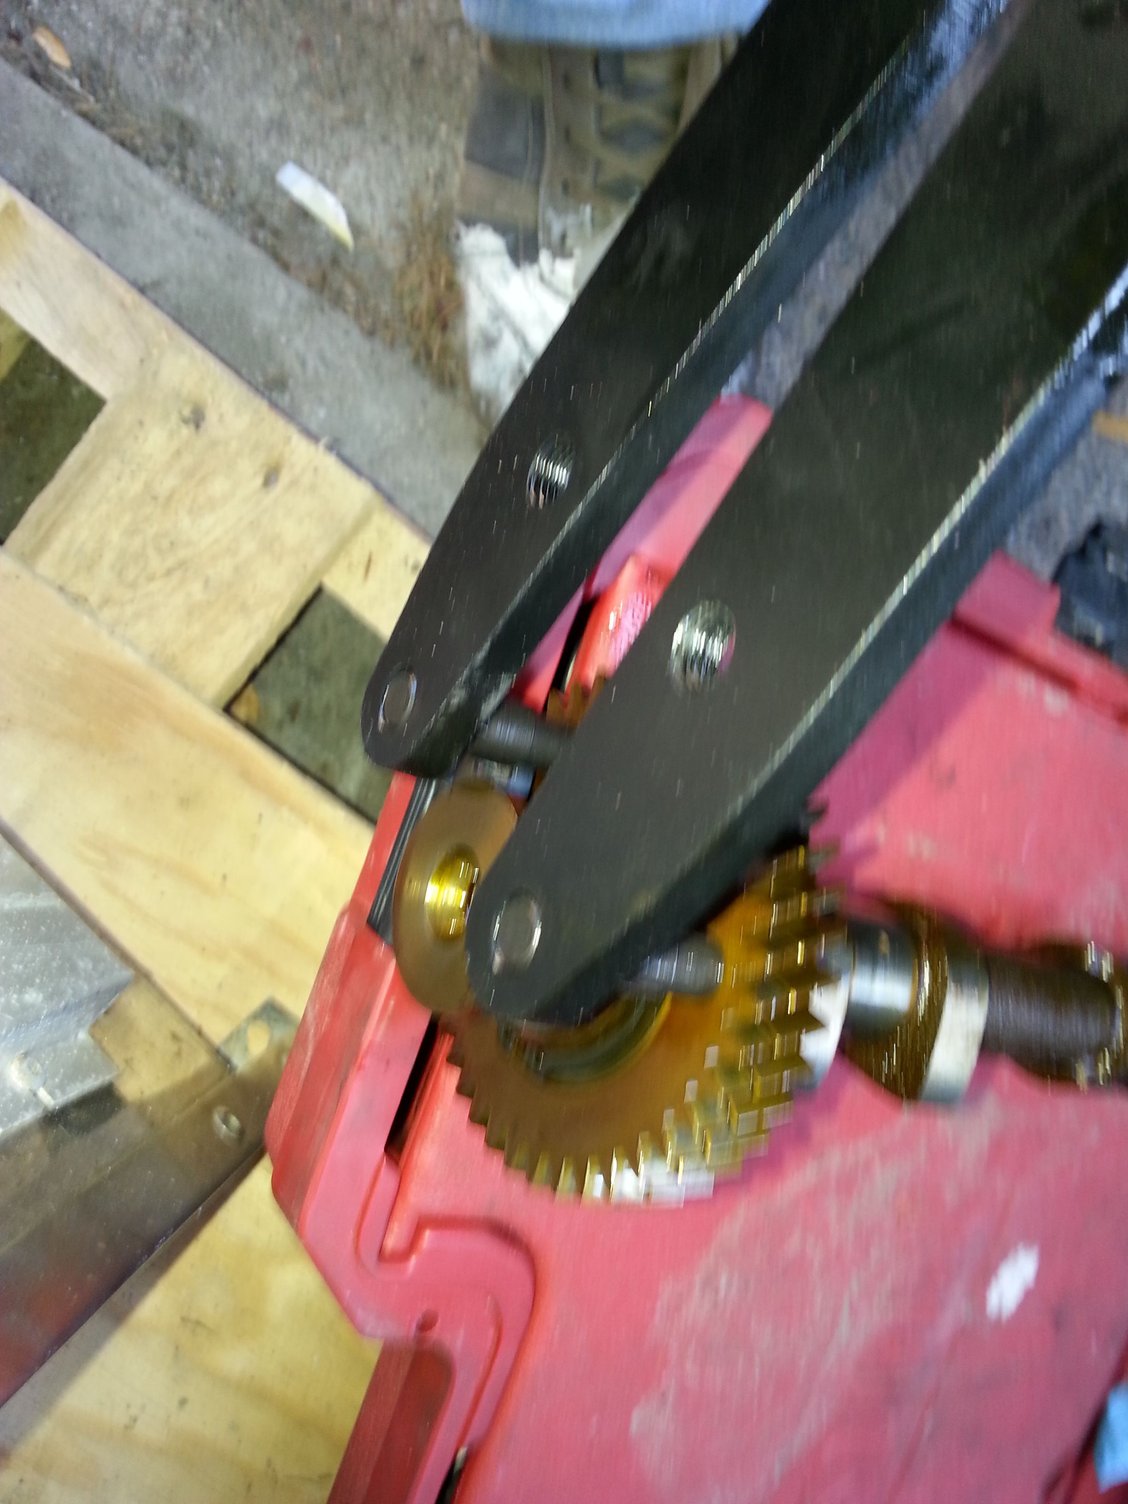
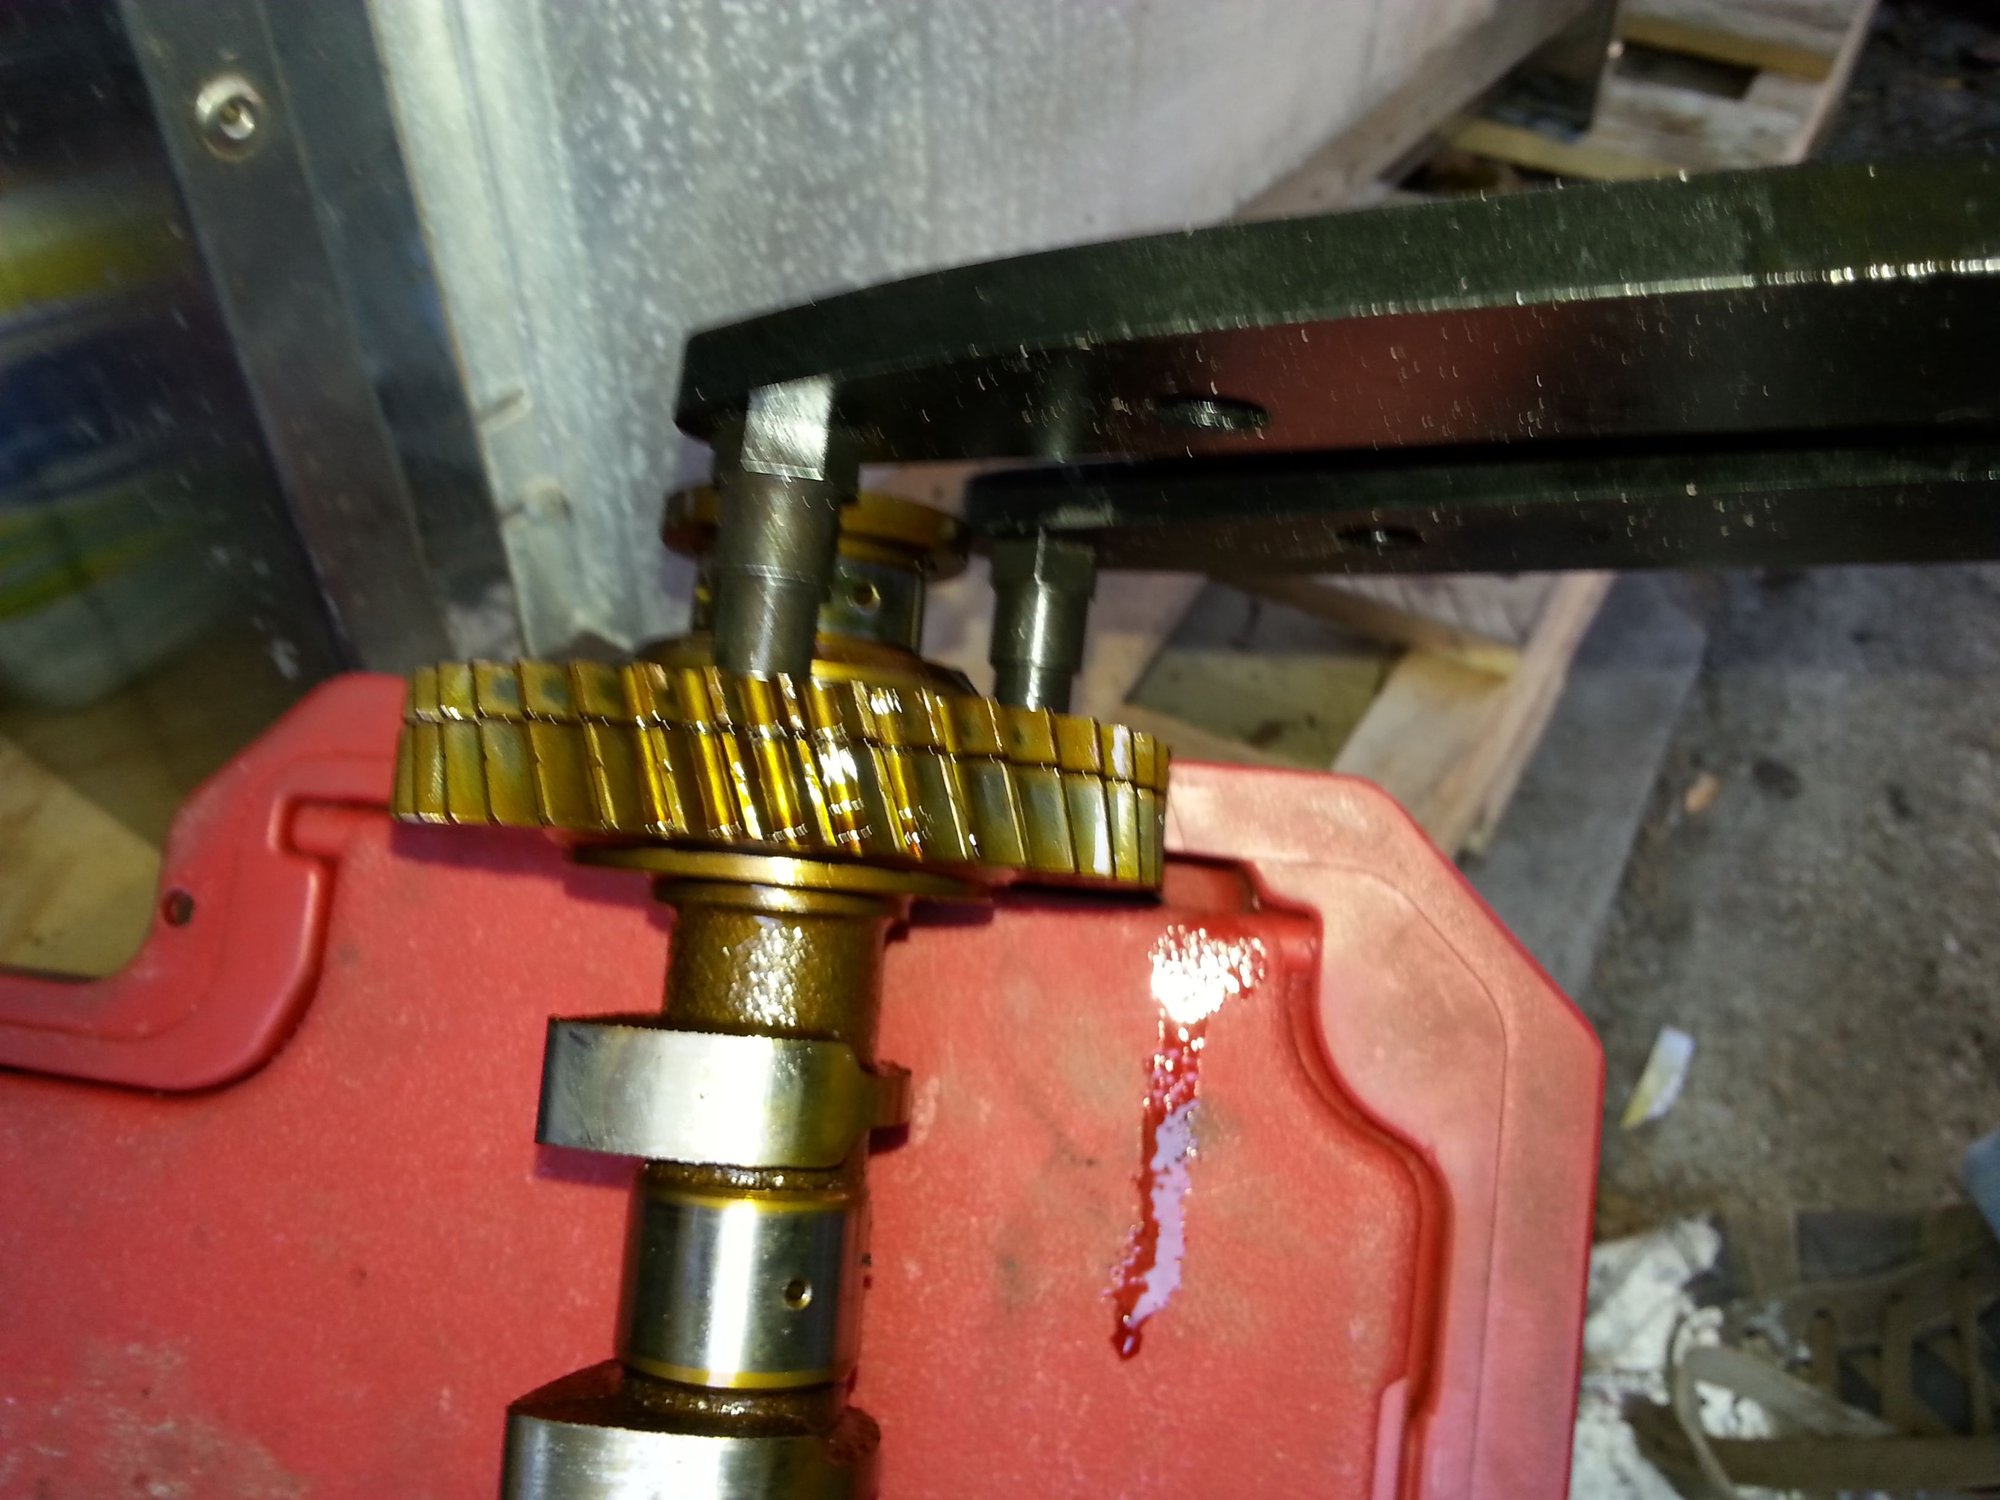
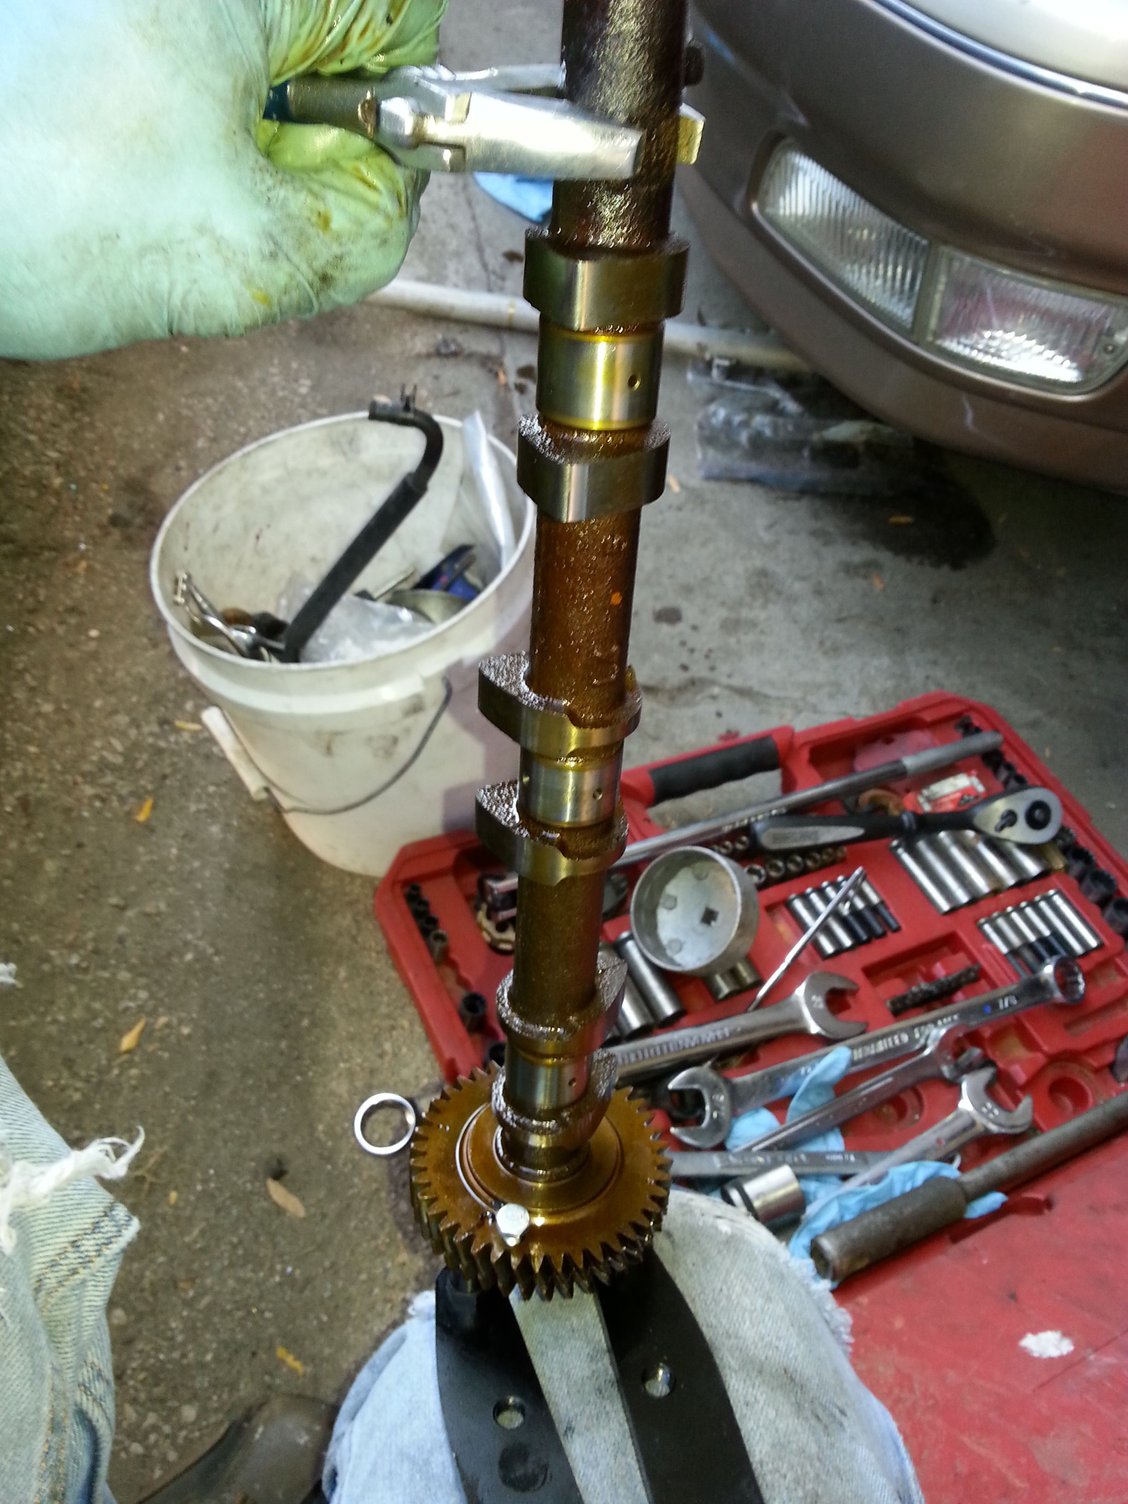
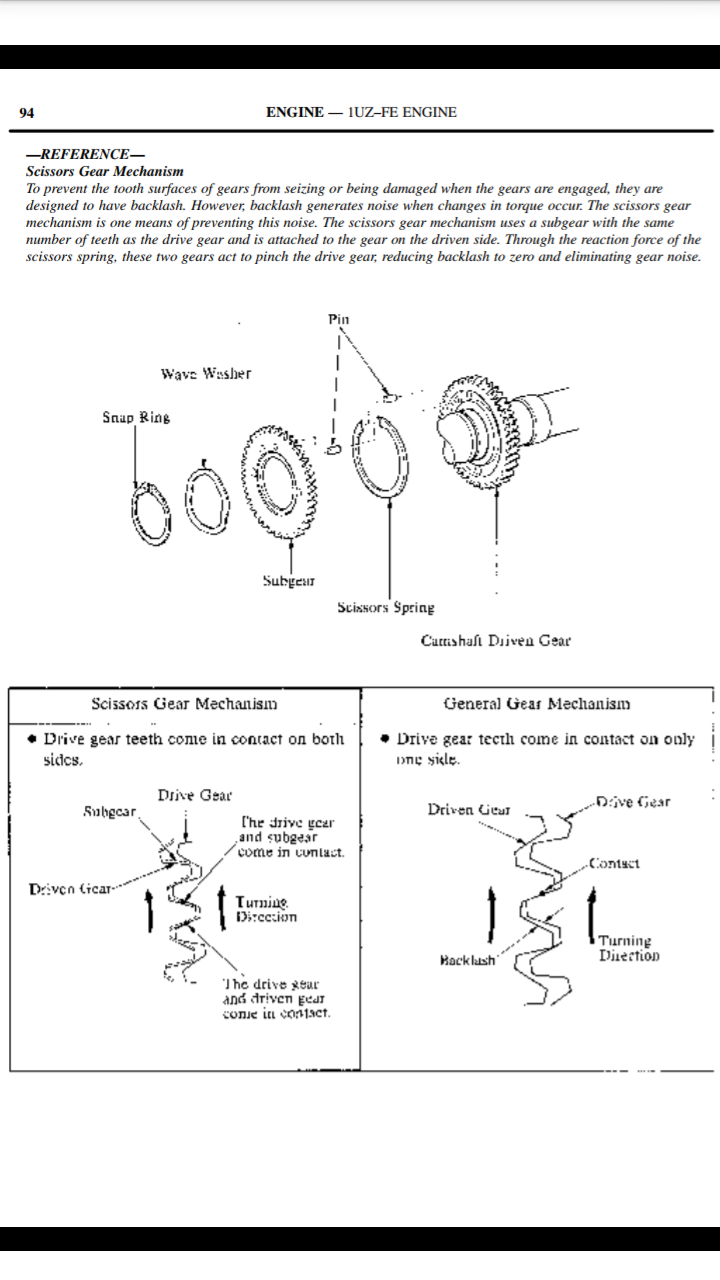
Pretty impressive engineering...and very effective at reducing noise.
Last edited by YODAONE; 10-30-17 at 09:04 PM.
#84
Nice work but that's not what I used the tool for in my application. I used it to hold the camshaft pulleys so I could loosen and then tighten the bolts when removing and then reinstalling them. Installing the service bolt was pretty simple using a size 24 wrench once I got over my angst. Once the cams were removed everything else was pretty simple. This job gave me lots of stress at the time.
Thread
Thread Starter
Forum
Replies
Last Post
FrankT
GS - 2nd Gen (1998-2005)
6
03-12-12 10:13 PM
sivikvtec
GS - 2nd Gen (1998-2005)
20
11-03-09 03:51 PM


