When you click on links to various merchants on this site and make a purchase, this can result in this site earning a commission. Affiliate programs and affiliations include, but are not limited to, the eBay Partner Network.
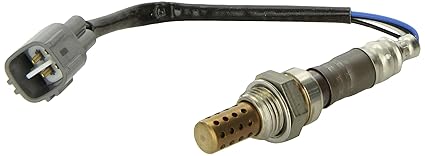
I got the dreaded Bank 2 Sensor 2 code on my 2007-8 ES 350 so keep an eye out in the next few days for a "do-it-yourself" tutorial with pics...already ordered the part # Denso 89465-33360 for V6 3.5L engine. Already know the wrench used is 7/8's will update when the part arrives. Dealer wanted $280 for the job and so far the part cost me $80
I got the dreaded Bank 2 Sensor 2 code on my 2007-8 ES 350 so keep an eye out in the next few days for a "do-it-yourself" tutorial with pics...already ordered the part # Denso 89465-33360 for V6 3.5L engine. Already know the wrench used is 7/8's will update when the part arrives. Dealer wanted $280 for the job and so far the part cost me $80
Should be a pretty straight forward job. Just make sure you either use a box wrench or the special O2 socket. Also make sure you don't get the thread anti-seize on the sensor tip. Have fun.
Should be a pretty straight forward job. Just make sure you either use a box wrench or the special O2 socket. Also make sure you don't get the thread anti-seize on the sensor tip. Have fun.
Alright everything is complete and the VSC light is gone. I'm by no means a tech of any sort just trying to get by without the help of dealerships and their prices....also note, It is very dangerous if you're not careful. You do not want the vehicle falling on you so use your discretion take every precaution necessary and perform at your own risk!
What you will need
-Phillips screwdriver
-flathead screwdriver
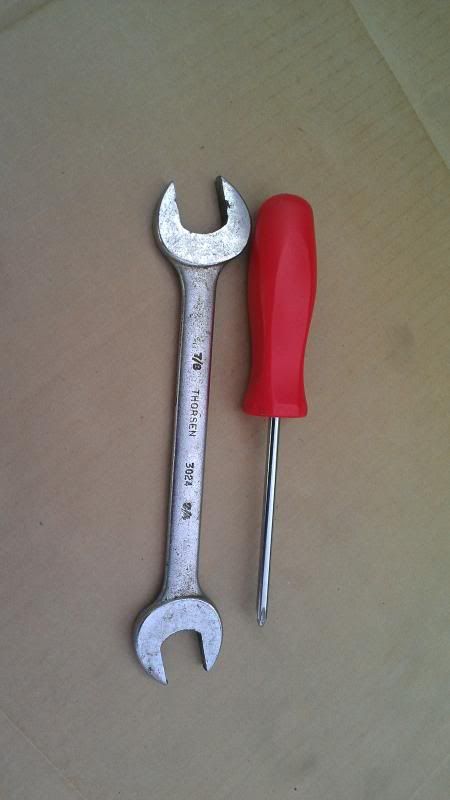
-7/8 wrench
-Denso sensor part #89465-33360 also known as part #89465-06250
-car jack or jackstands
-gloves if you choose to use them and something for your back since you will be spending most of your time in that position...I used a piece of cardboard from an empty box.
First thing before I did anything else was disconnected the battery, you don't have to do this but I felt since I was changing the sensor and it is connected to the ECU, I figure it would be best as a "just in case" precaution.
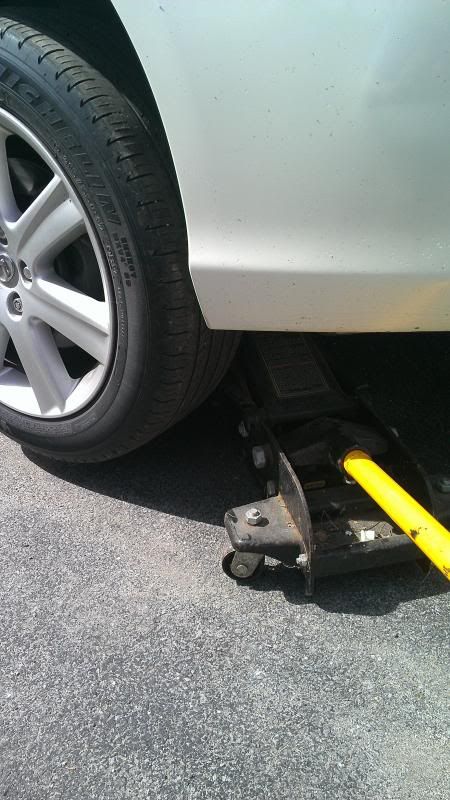
Proceed to jack car up, I have a 10 ton hydro jack that i used. The sensors, where I was working, are toward the middle of the car under the area where the front license plate is located just past the radiator. I chose to mount the jack under the frame by the passenger front tire where the sensors are essentially located (middle right side)
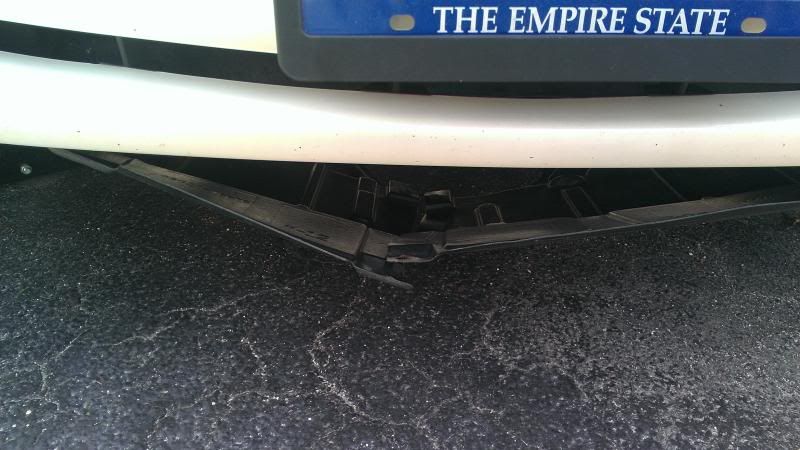
Next, you will use your flathead to remove the plastic brackets that hold the protective plastic covering from under the vehicle...they are the same type of brackets that hold the covers in place on top of your vehicle covering the engine bay. Pop the center tabs and remove them...I did three so this way i had a nice opening to reach under and access the area where I'm working.
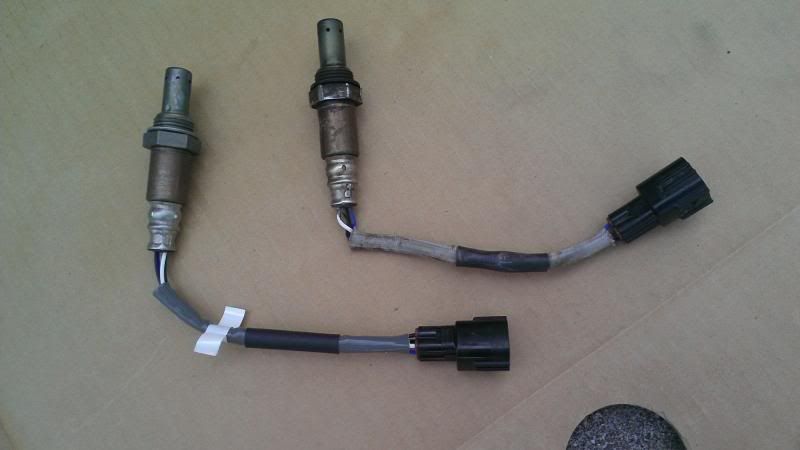
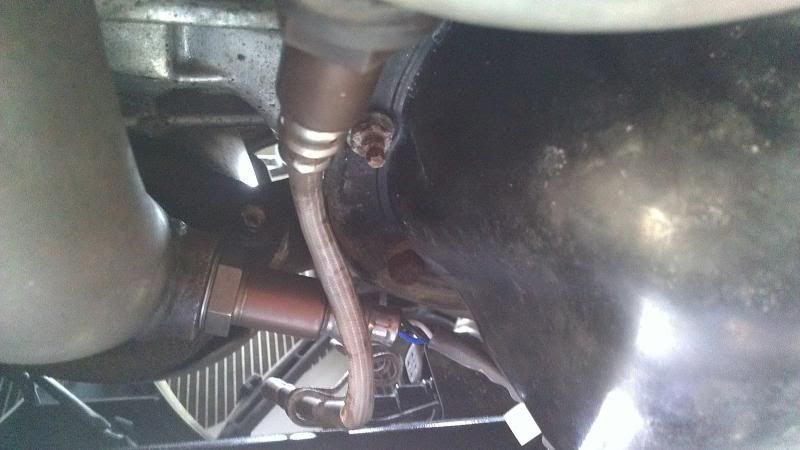
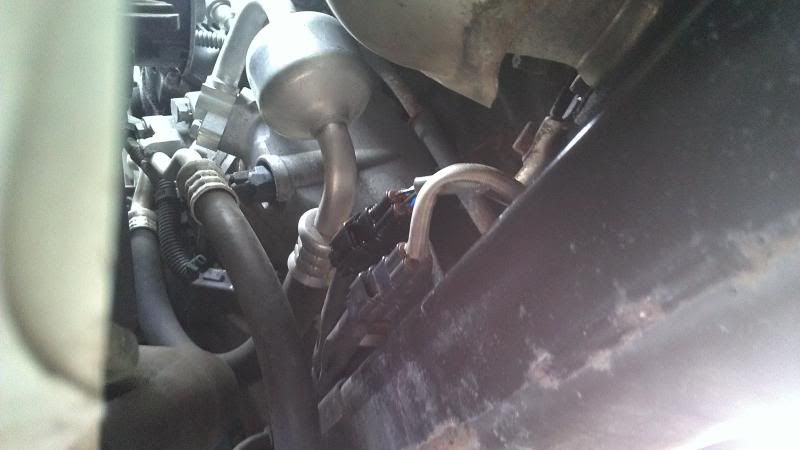
Next enter vehicle from the bottom and go down until you locate the sensors, as stated earlier, they are located where the front license plate is just past the radiator on the opposite side of the frame. There are two sensors in that general area. I'm removing the one to the left as pictured and you'll also notice the second sensor is on top.(take notice of the radiator fan in the backround)
Next, you'll follow both sensors until you find the harness which they are connected to. They are toward the front of the vehicle closest to the radiator. Each sensor has a thumb tab to the left side so you will have to grab ahold (with both hands) and pull at the same time to remove from the harness. I already removed the one sensor and you can clearly see the empty space where the connection is made and the other is removed in the photos below.... also notice the proximity of the harness/sensor. The radiator fan is to the left side used as a reference point, just so you know where they're located in the engine bay.
connected sensors
removed sensor
Next, using the 7/8's wrench...you will be turning the sensor toward the ground to loosen things up....watch out for knuckles while performing this task. It is on tight so give it one really good hard turn grabbing either the frame or something to give you that extra leverage. Once it's loose, remove by hand turning the sensor like you would removing a spark plug. That's pretty much it. Insert the new sensor in reverse order, tighten sensor and then run new sensor wires into harness and you're in business. Make sure to listen for the audible "click" when you insert the new sensor into the harness to make sure its connected. I also wanted to add I kept the hood open the whole entire install for the most light because it does get very dark under the vehicle, even on a sunny day. Now celebrate with the money you just saved by not going to the dealer.
This is an awesome write up along with a few other links found here. I had my mechanic removed the part (which looks exactly like the ones listed here). However, my denso part#234-4260 which is meant to replace 89465-06250 looks totally different here on the sensor part (has way more holes). So my mechanic was a little reluctant to change it. I have crossed check everything and I seem to be have the right part and it is for Bank2 Sensor2. For those who had changed the part recently, let me know if this would work.
Ok, answering my question here. I contacted Denso and confirmed that the new OEM part ##89465-06250 (which replaces 89465-33360) is Denso #234-4260. So the new Denso O2 sensor will look different than your old part.
Originally Posted by TLPLEXUS
This is an awesome write up along with a few other links found here. I had my mechanic removed the part (which looks exactly like the ones listed here). However, my denso part#234-4260 which is meant to replace 89465-06250 looks totally different here on the sensor part (has way more holes). So my mechanic was a little reluctant to change it. I have crossed check everything and I seem to be have the right part and it is for Bank2 Sensor2. For those who had changed the part recently, let me know if this would work.
Many thanks @carcass29 . Will try this project soon.
Here in northern Cal, dealers wanted $ 600 (quoted both from Lexus and Toyota). Goodyear wanted $ 400. They all asked for $ 200 for part and were not happy when I asked if I can bring my own part.
I'm so disappointed that they wanted to charge 3 hours of labor for this task.
Nice job. O2 sensors are notoriously difficult to remove.
It makes it a little more difficult to work on, but easier to remove the sensor, if you let the car run and heat up for 5 minutes first. This will kind of unstick things. I worked at a shop for a couple years and whenever we had an O2 job scheduled we'd throw it right on the lift as soon as it got there...in and out in less than 30 minutes.
Just got it done today. The most difficult task is to remove the old sensor.
My old sensor looks the same as in carcass29's post (mine is 2008 ES) and the new one (bought for $ 55 from Amazon) looks exactly the same as in TLPLEXUS' post.
Few more tips that help:
- penetrating oil
- for sensor # 2 (both in bank 1 and 2) I find out that a box-end and fairly long wrench is much better.
I bought an O2 socket but it didn't fit the tight space at all.

 04-02-14, 04:03 PM