When you click on links to various merchants on this site and make a purchase, this can result in this site earning a commission. Affiliate programs and affiliations include, but are not limited to, the eBay Partner Network.
Nice. As mentioned, I trimmed part of the inside of the plastic lens to get it to fit. The cover fits back on perfectly as if nothing happened. Ive left the trunk open for 15 minutes and the light gets pretty warm to the touch but nothing that would melt anything.
I like the foam idea. I need to try that. Where did you get the foam? stuff lying around?
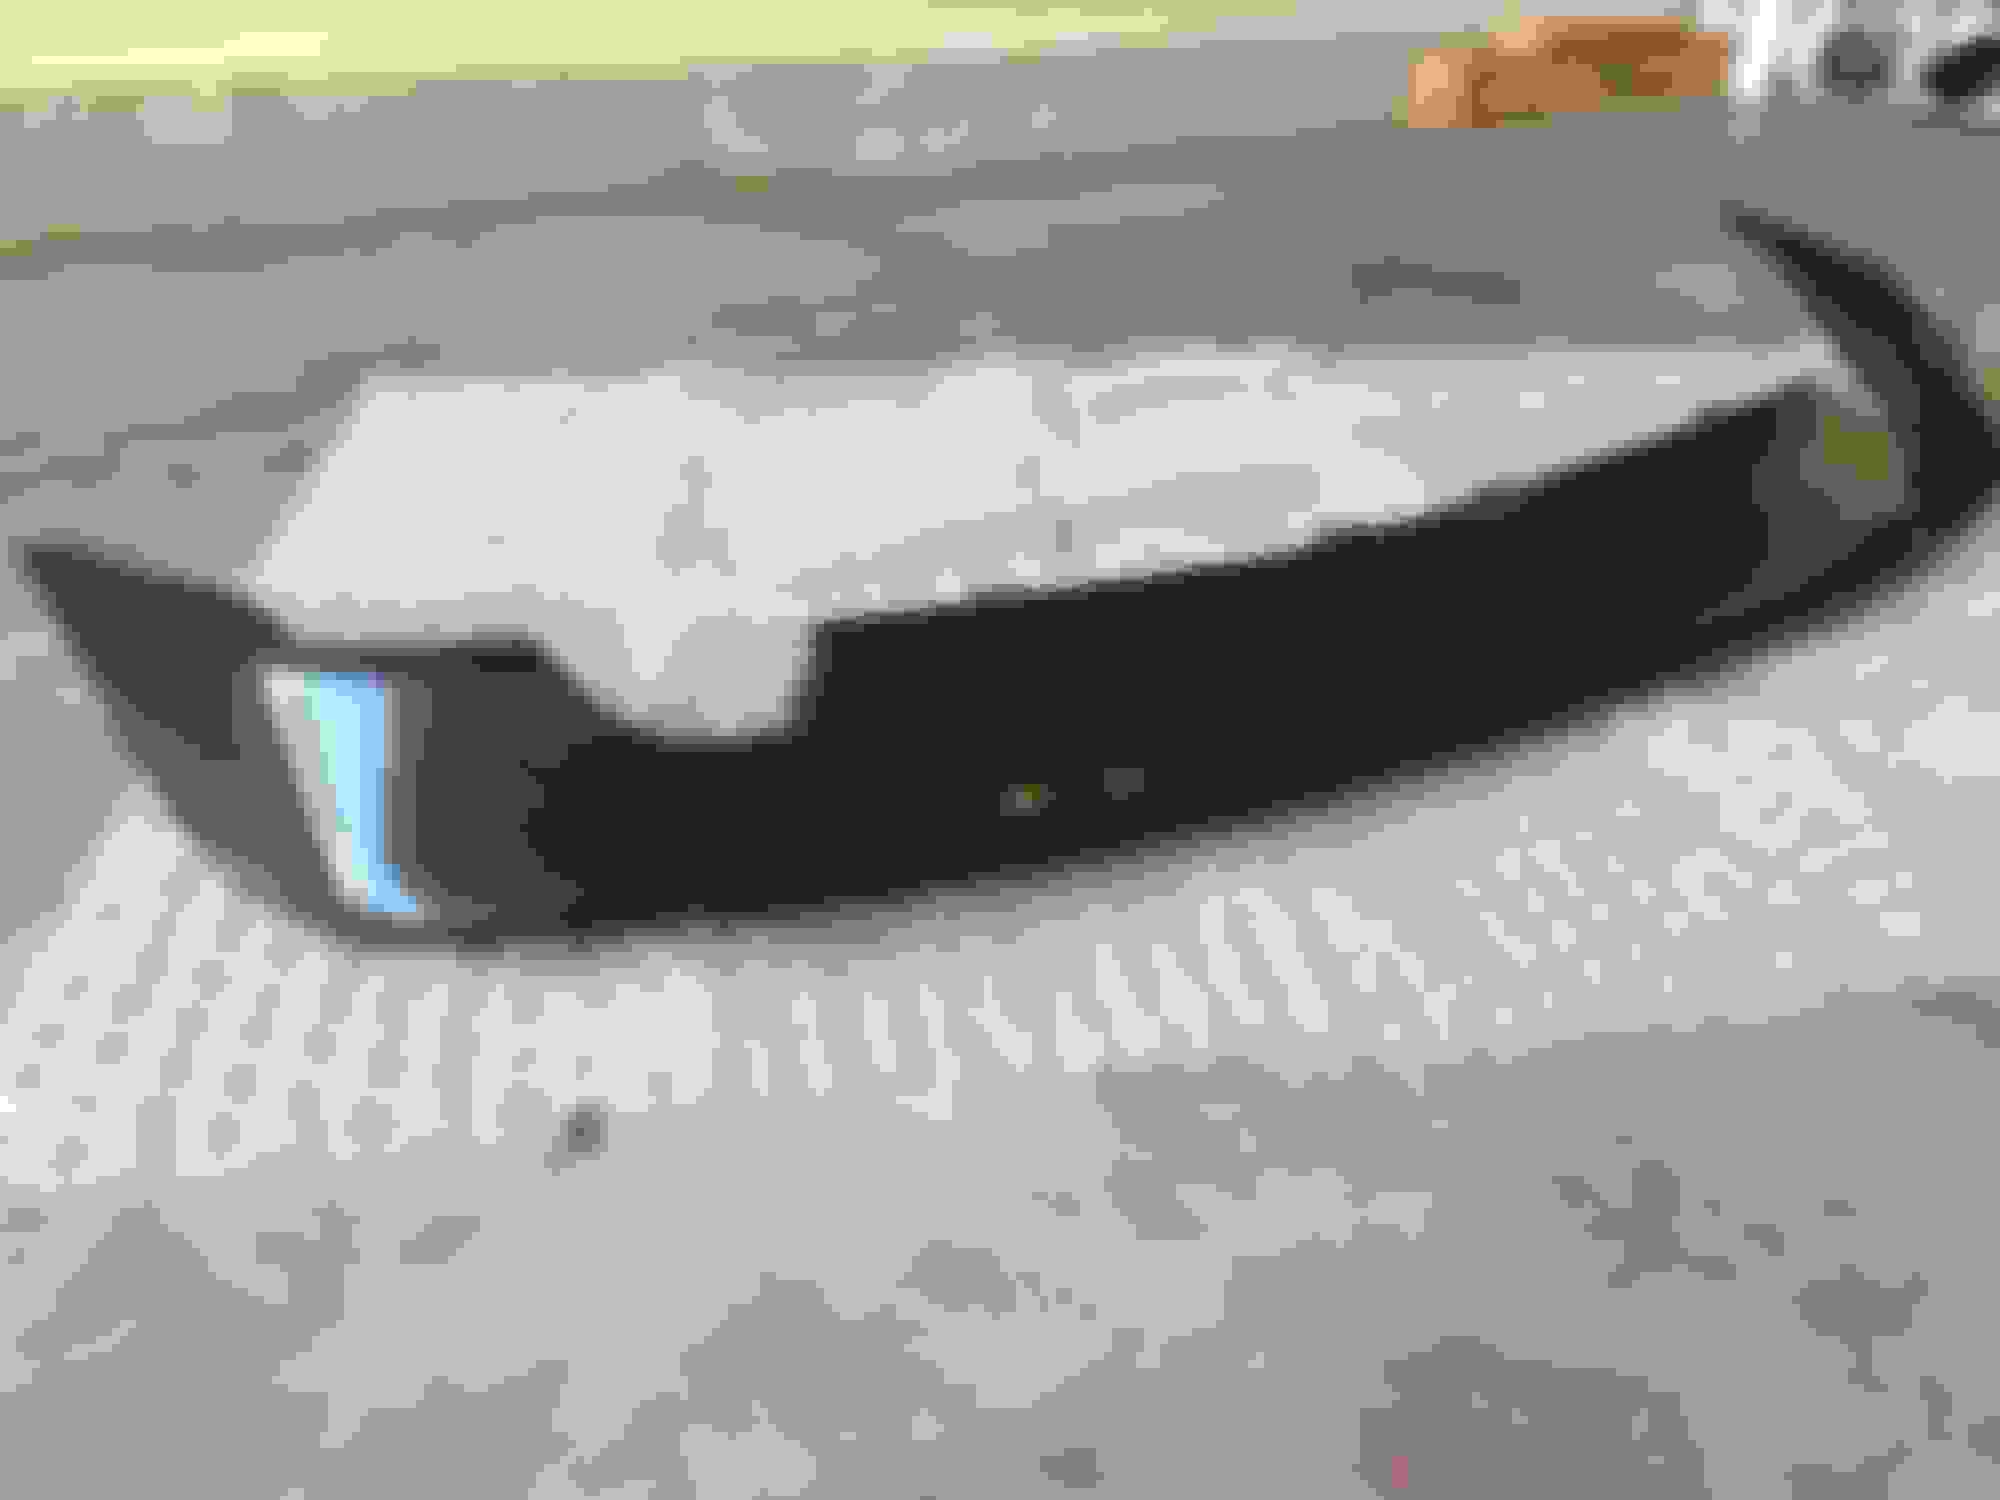
Look what arrived today?! Just wanted to share some pre install pics. This is the SEIBON OE Style rear diffuser. I ordered from Stillen. Looks and feels like a quality piece!
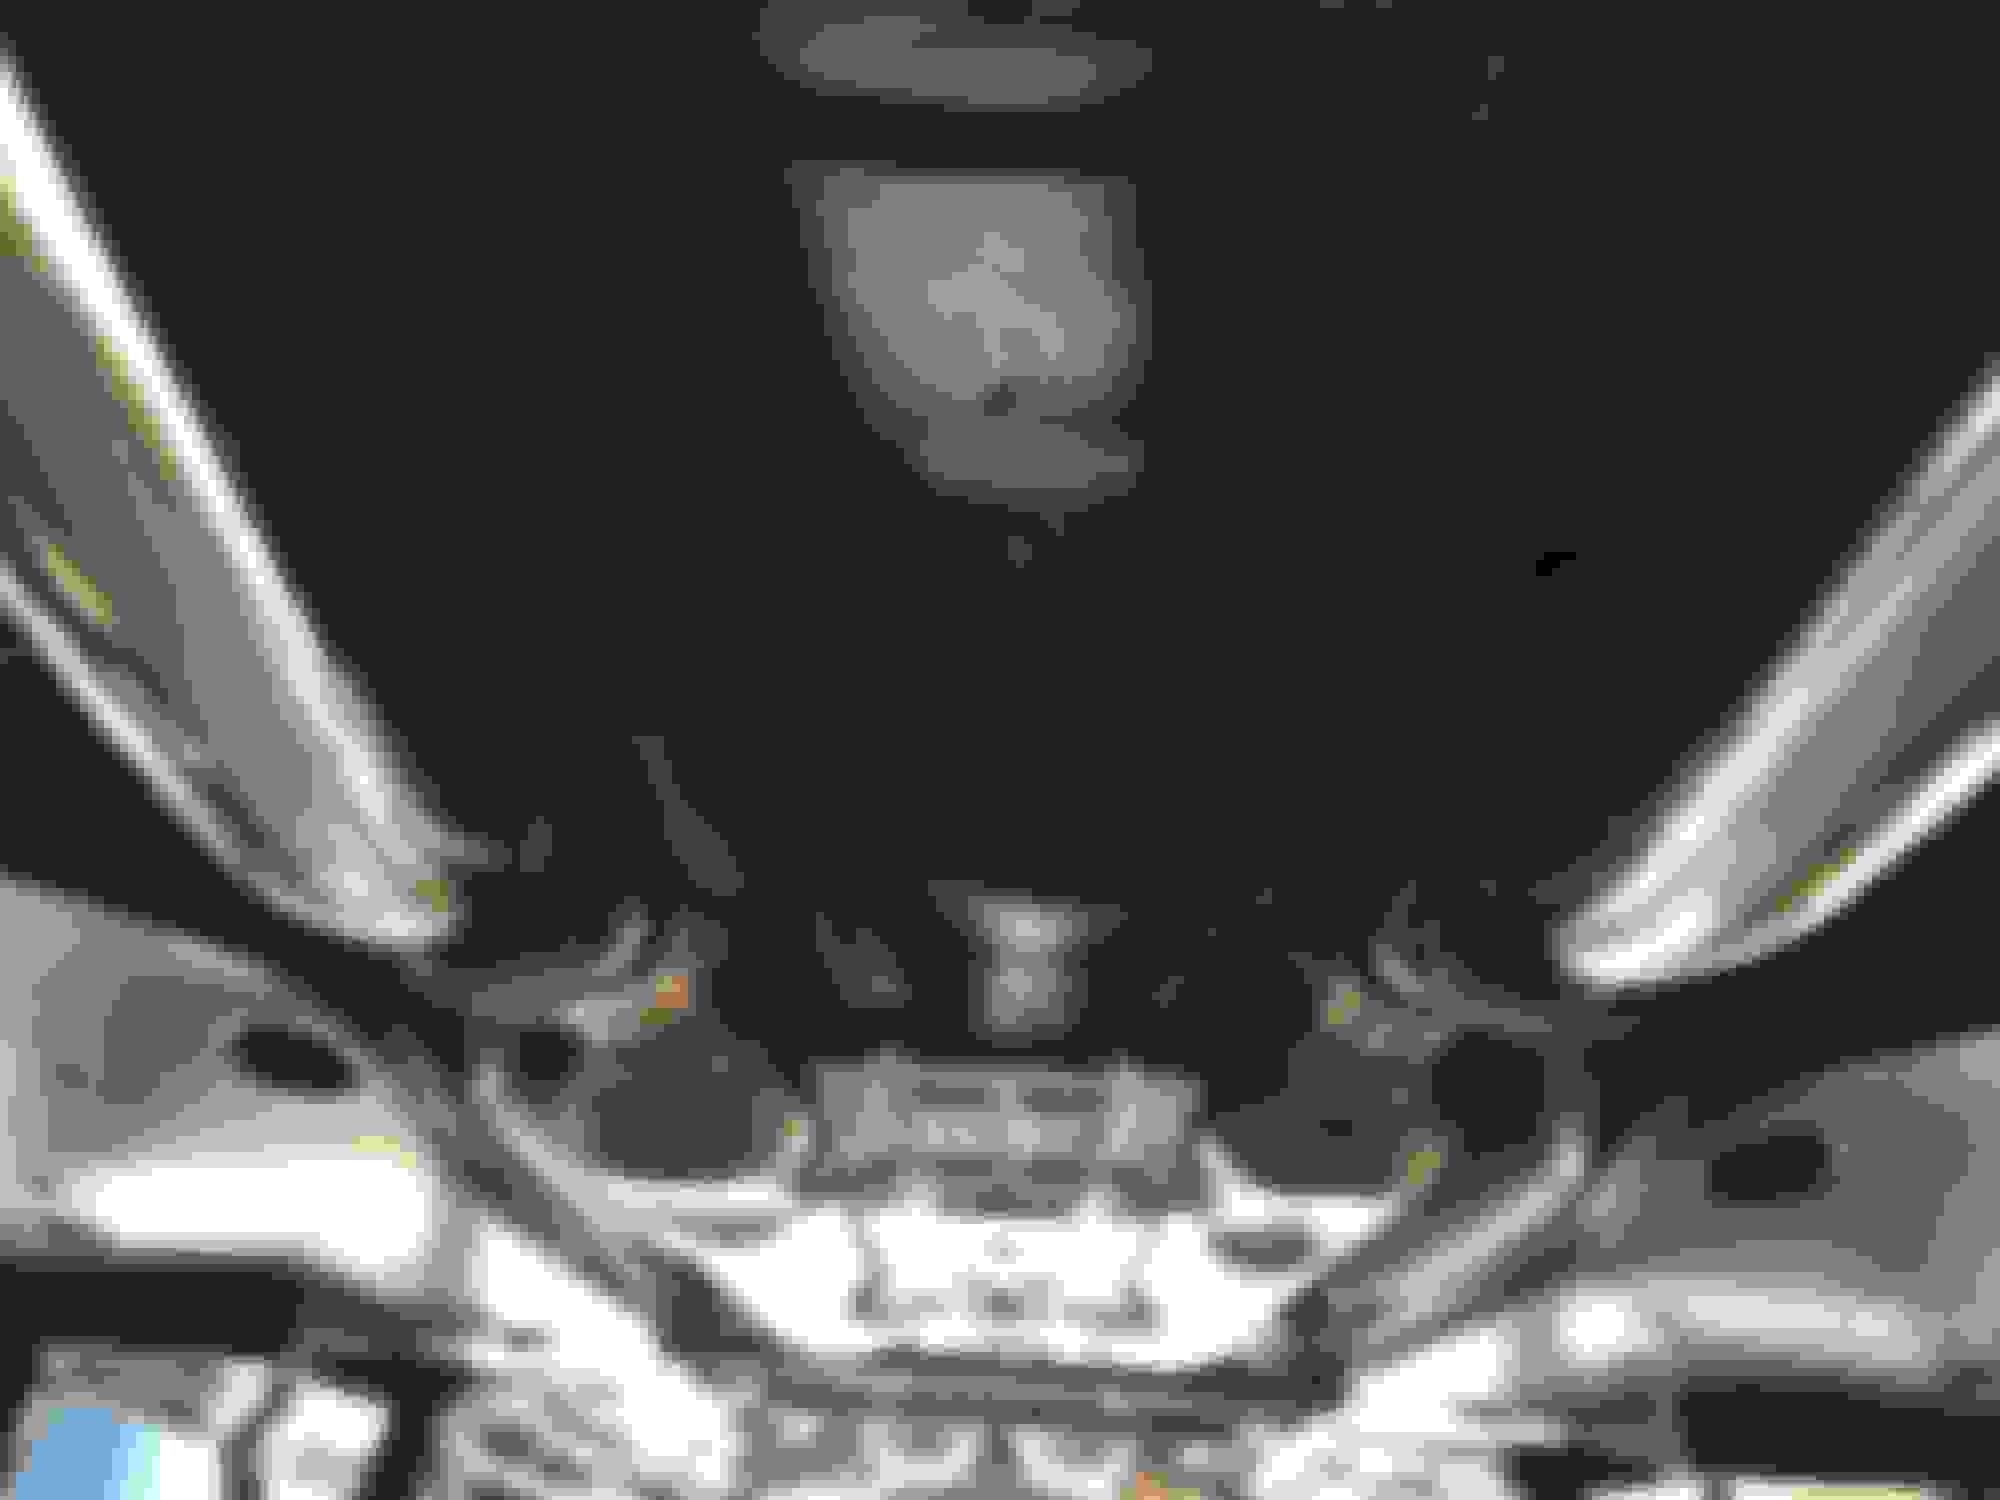
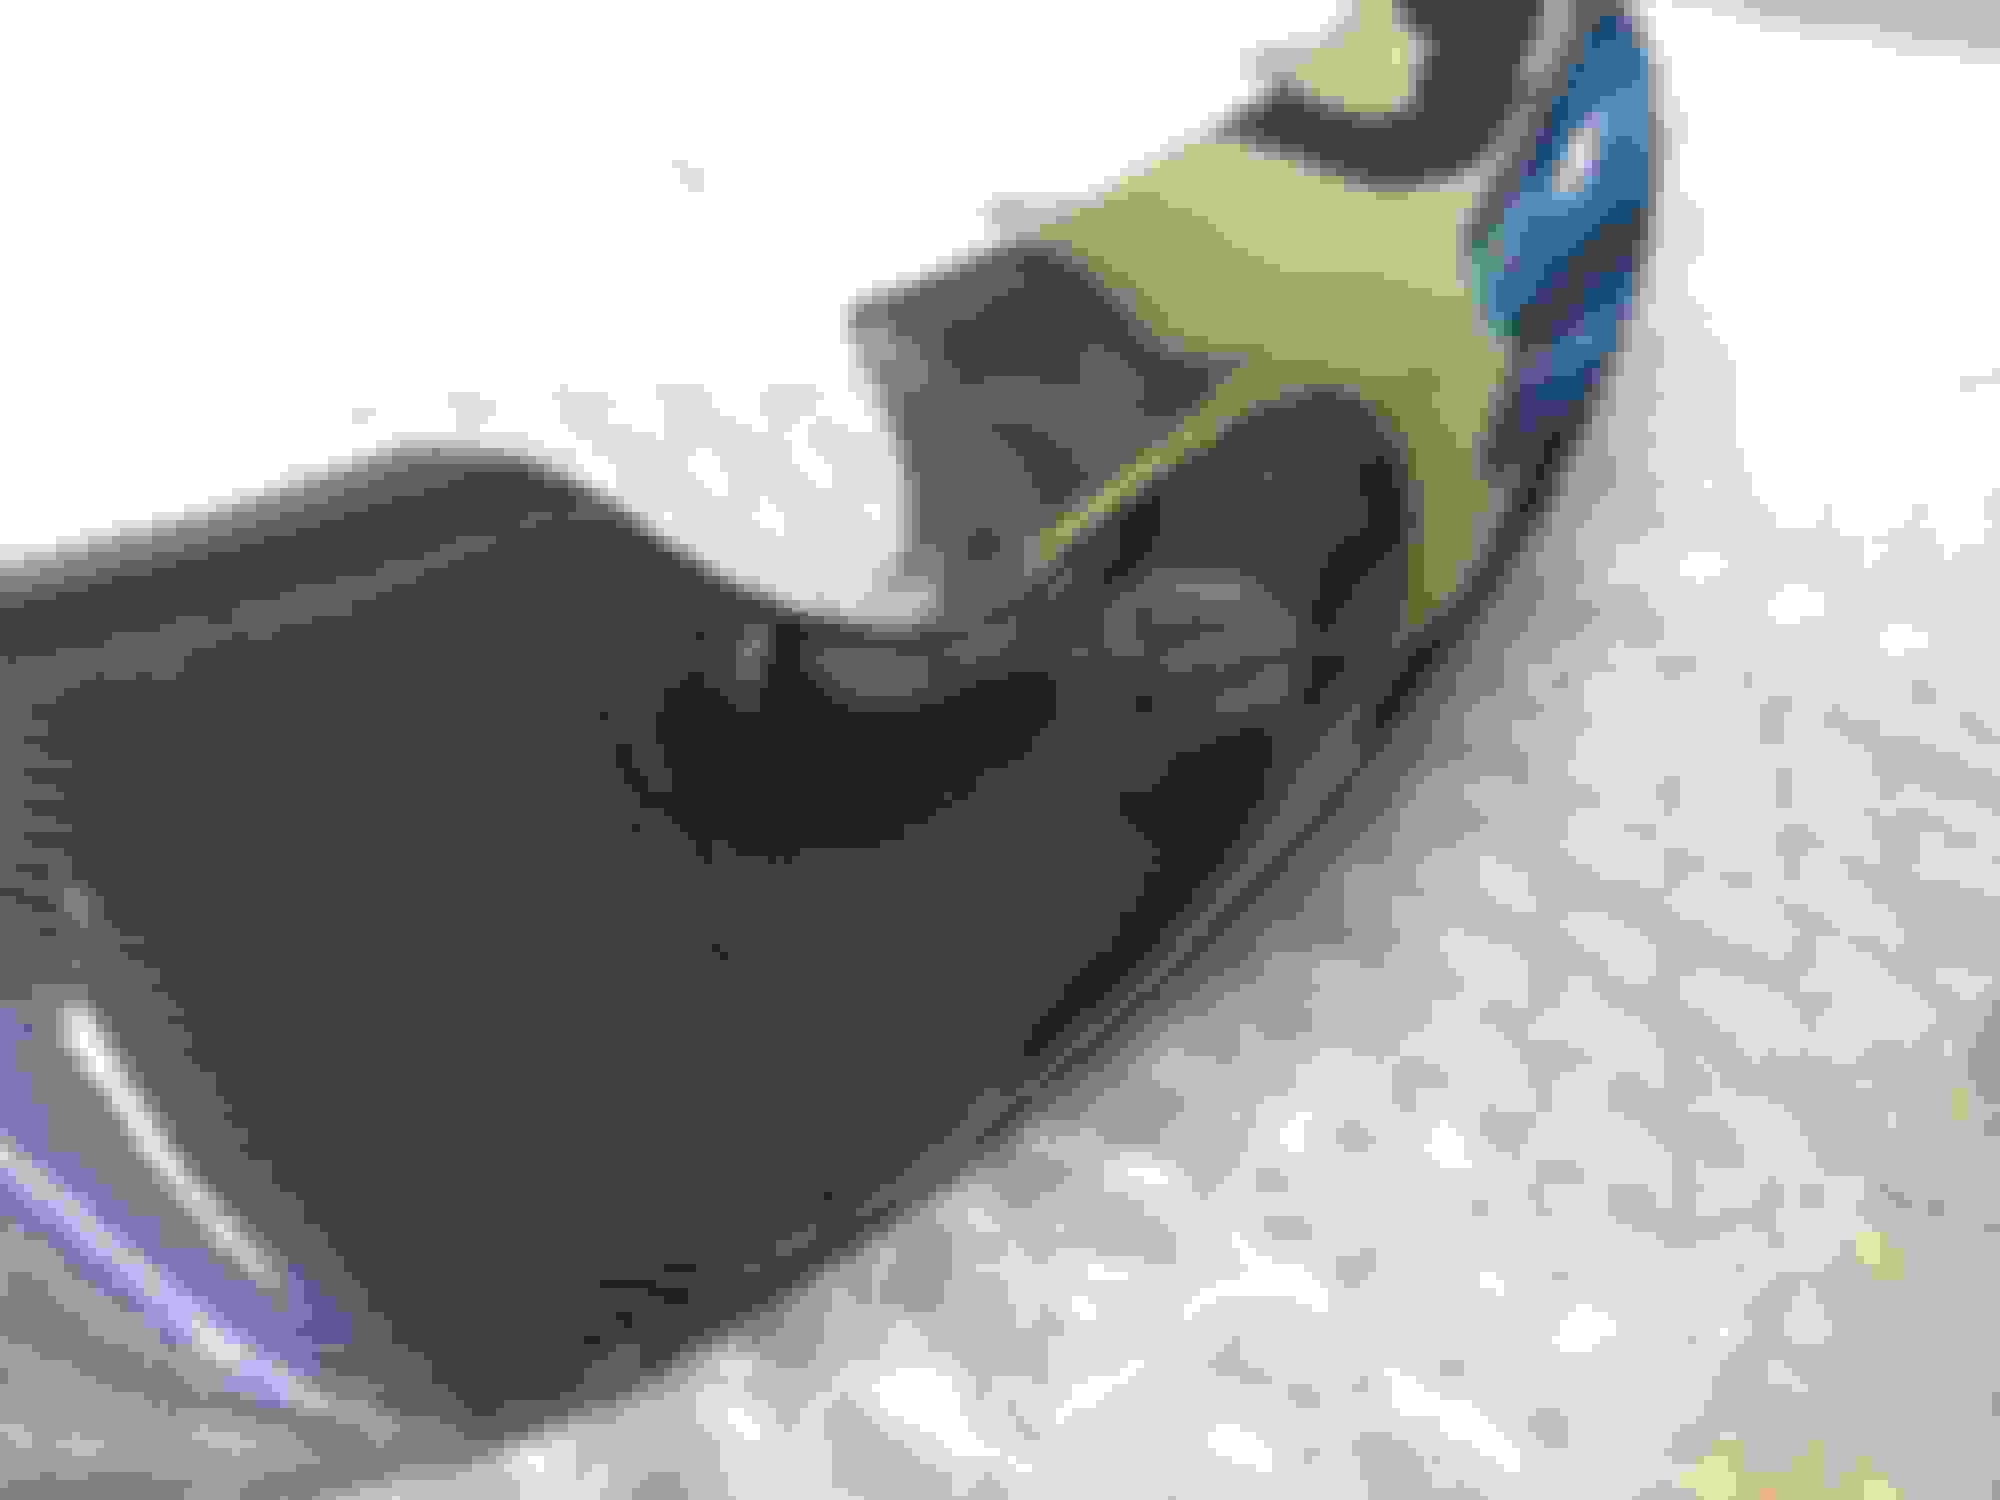
Scoring some brownie points with the wifey and installed some courtesy light projectors. I got this idea from @geigerbran's build thread.
Totoro is one of her favorite Japanese cartoon characters.
I got the projectors directly from Amazon and the custom logo chips directly from Wind & Fire. I simply uploaded the graphic as a png file and had the custom logo shipped in about 10 days. We're very happy with the quality of the projection!
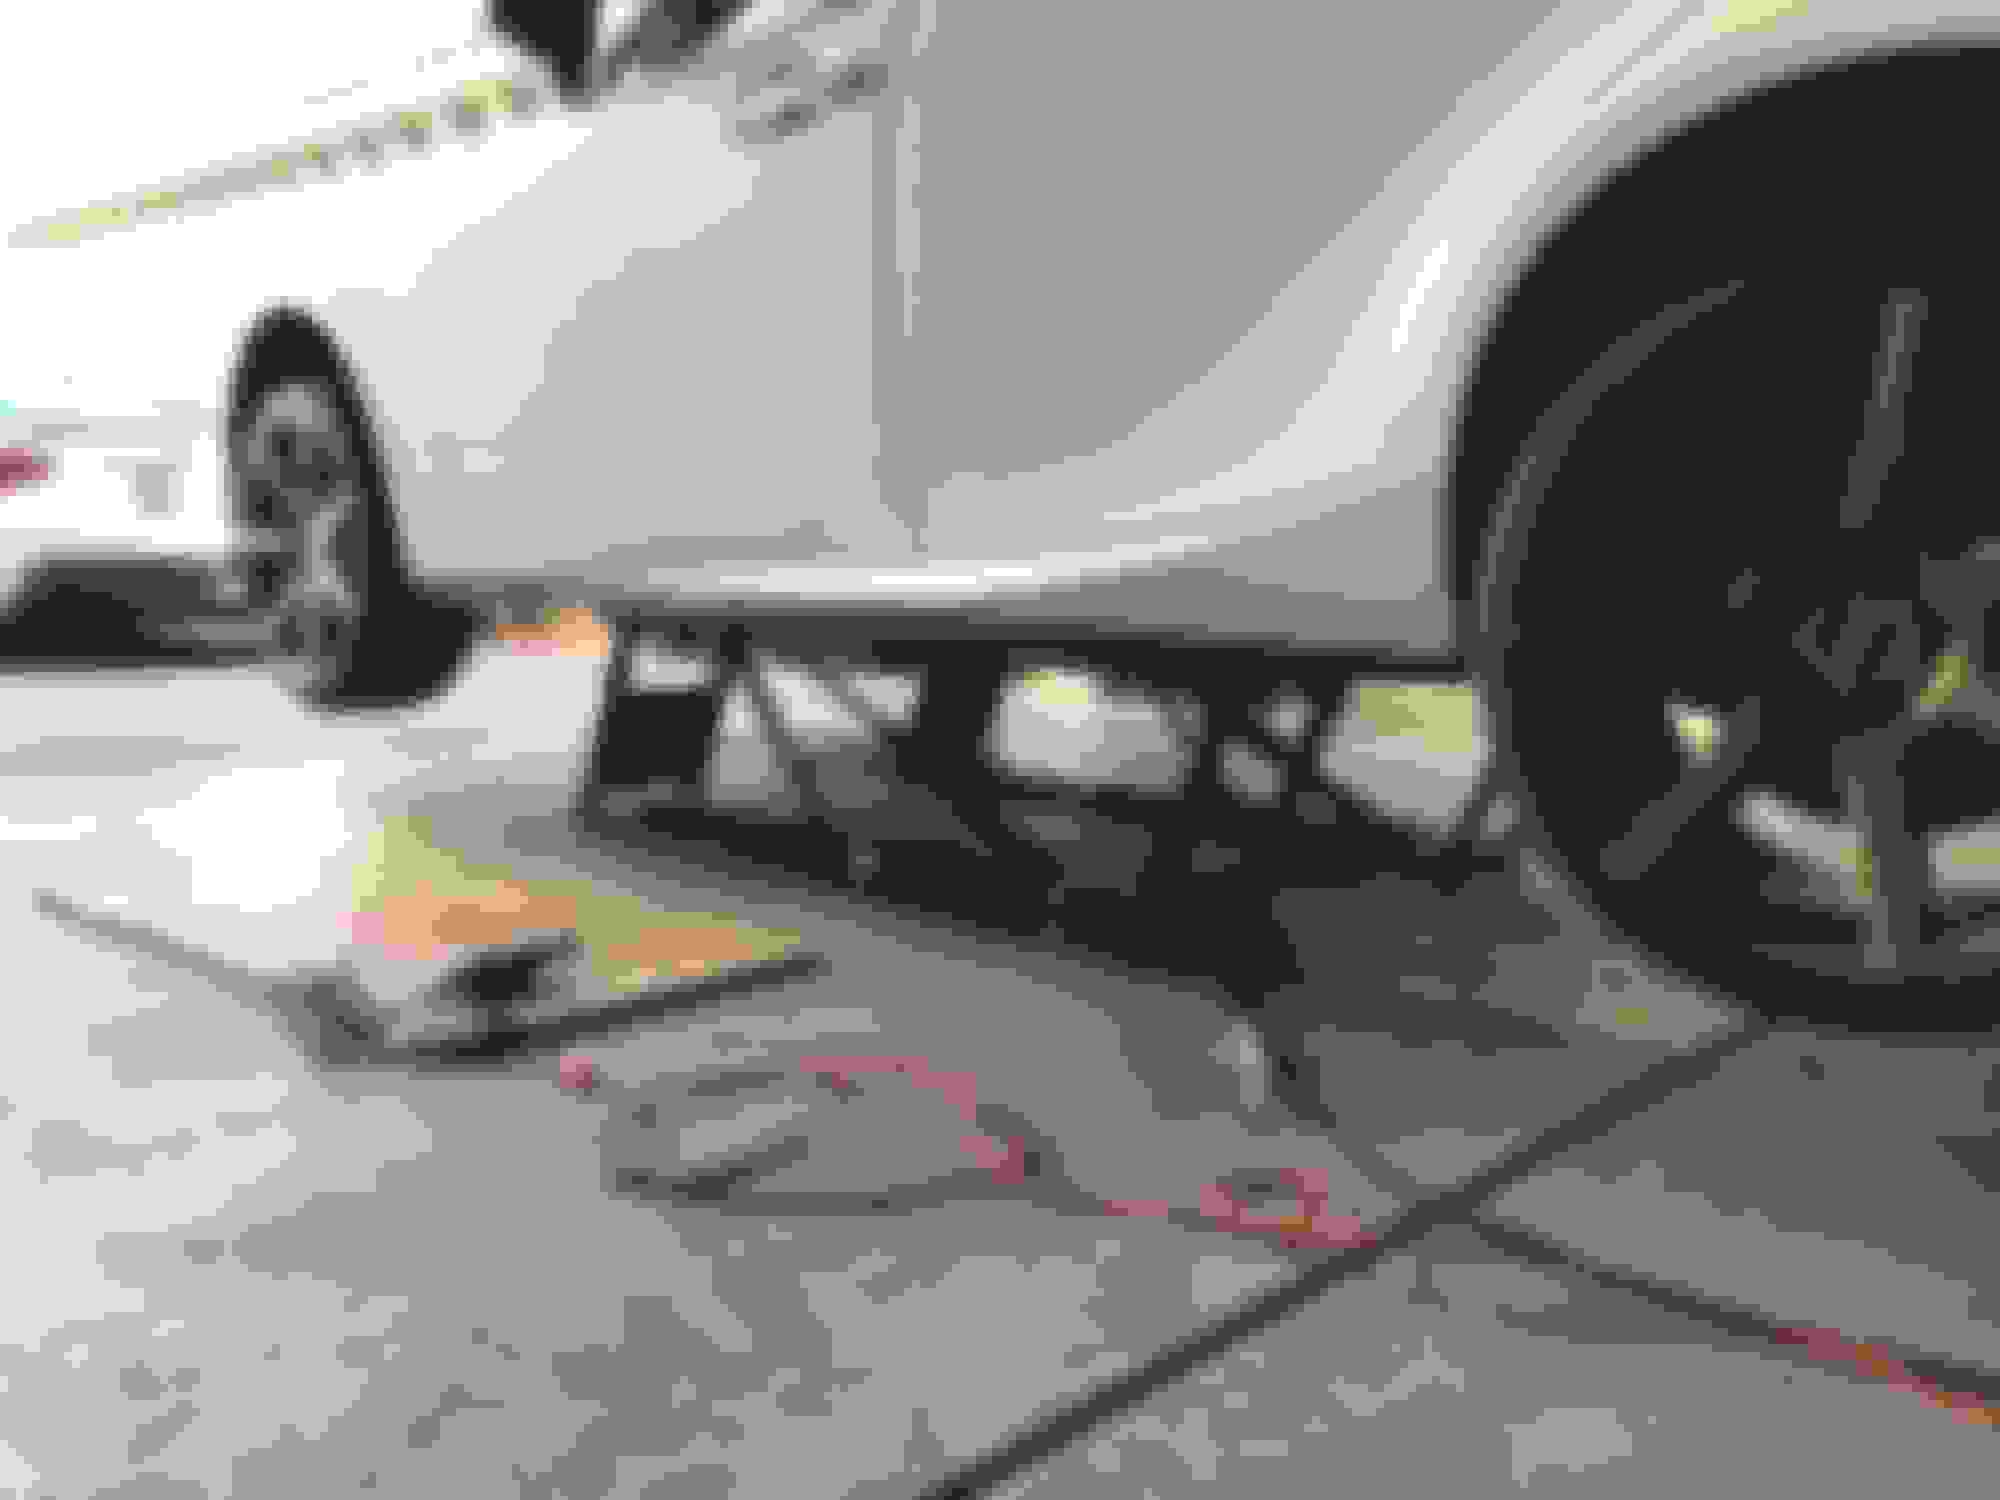
Finally the Seibon OE Style rear diffuser is installed. I followed this RC350 rear bumper removal thread. Thank you @Pearlrider. The only difference with the 2016 IS350 is there is no wiring harnesses that have to be detached from the rear bumper. Note that the two rear red reflectors need to be removed after the bumper is off before you can remove the OE diffuser. I also had to remove the rear wheels to get to the two wheel well 10mm bolts holding the bumper cover to the metal quarter panel.
Once the Seibon piece is put on, you will note that there are two OE screws that secure the diffuser ends to the bumper that cannot be reused. I simply used two plastic pop clips I had left over from past projects to secure the ends of the rear diffuser to the bumper cover. The Seibon piece is also lacking two attachment posts found in the OE rear diffuser piece...because of this, there is a slight gap between the carbon diffuser and bumper cover. I'll try and show with photos below: Plastic pop clips used to replace OE screw.
Plastic pop clip installed at end of diffuser to bumper cover.
Slight gap between carbon diffuser and bumper cover.
Also, the 4 OE plastic pop clips that hold the bottom of the rear diffuser to the plastic under tray could not be reused because the carbon piece attachment points are angled wrong. I attempted to bend the attachment points but they seem pretty brittle so I did not push it. Any of you guys have any ideas I can use to bend the 4 attachment points without breaking them, i.e. heat gun, hair dryer? Carbon rear diffuser underside attachment points angled wrong. Unable to reuse OE plastic pop clips to attach to plastic underbody tray.
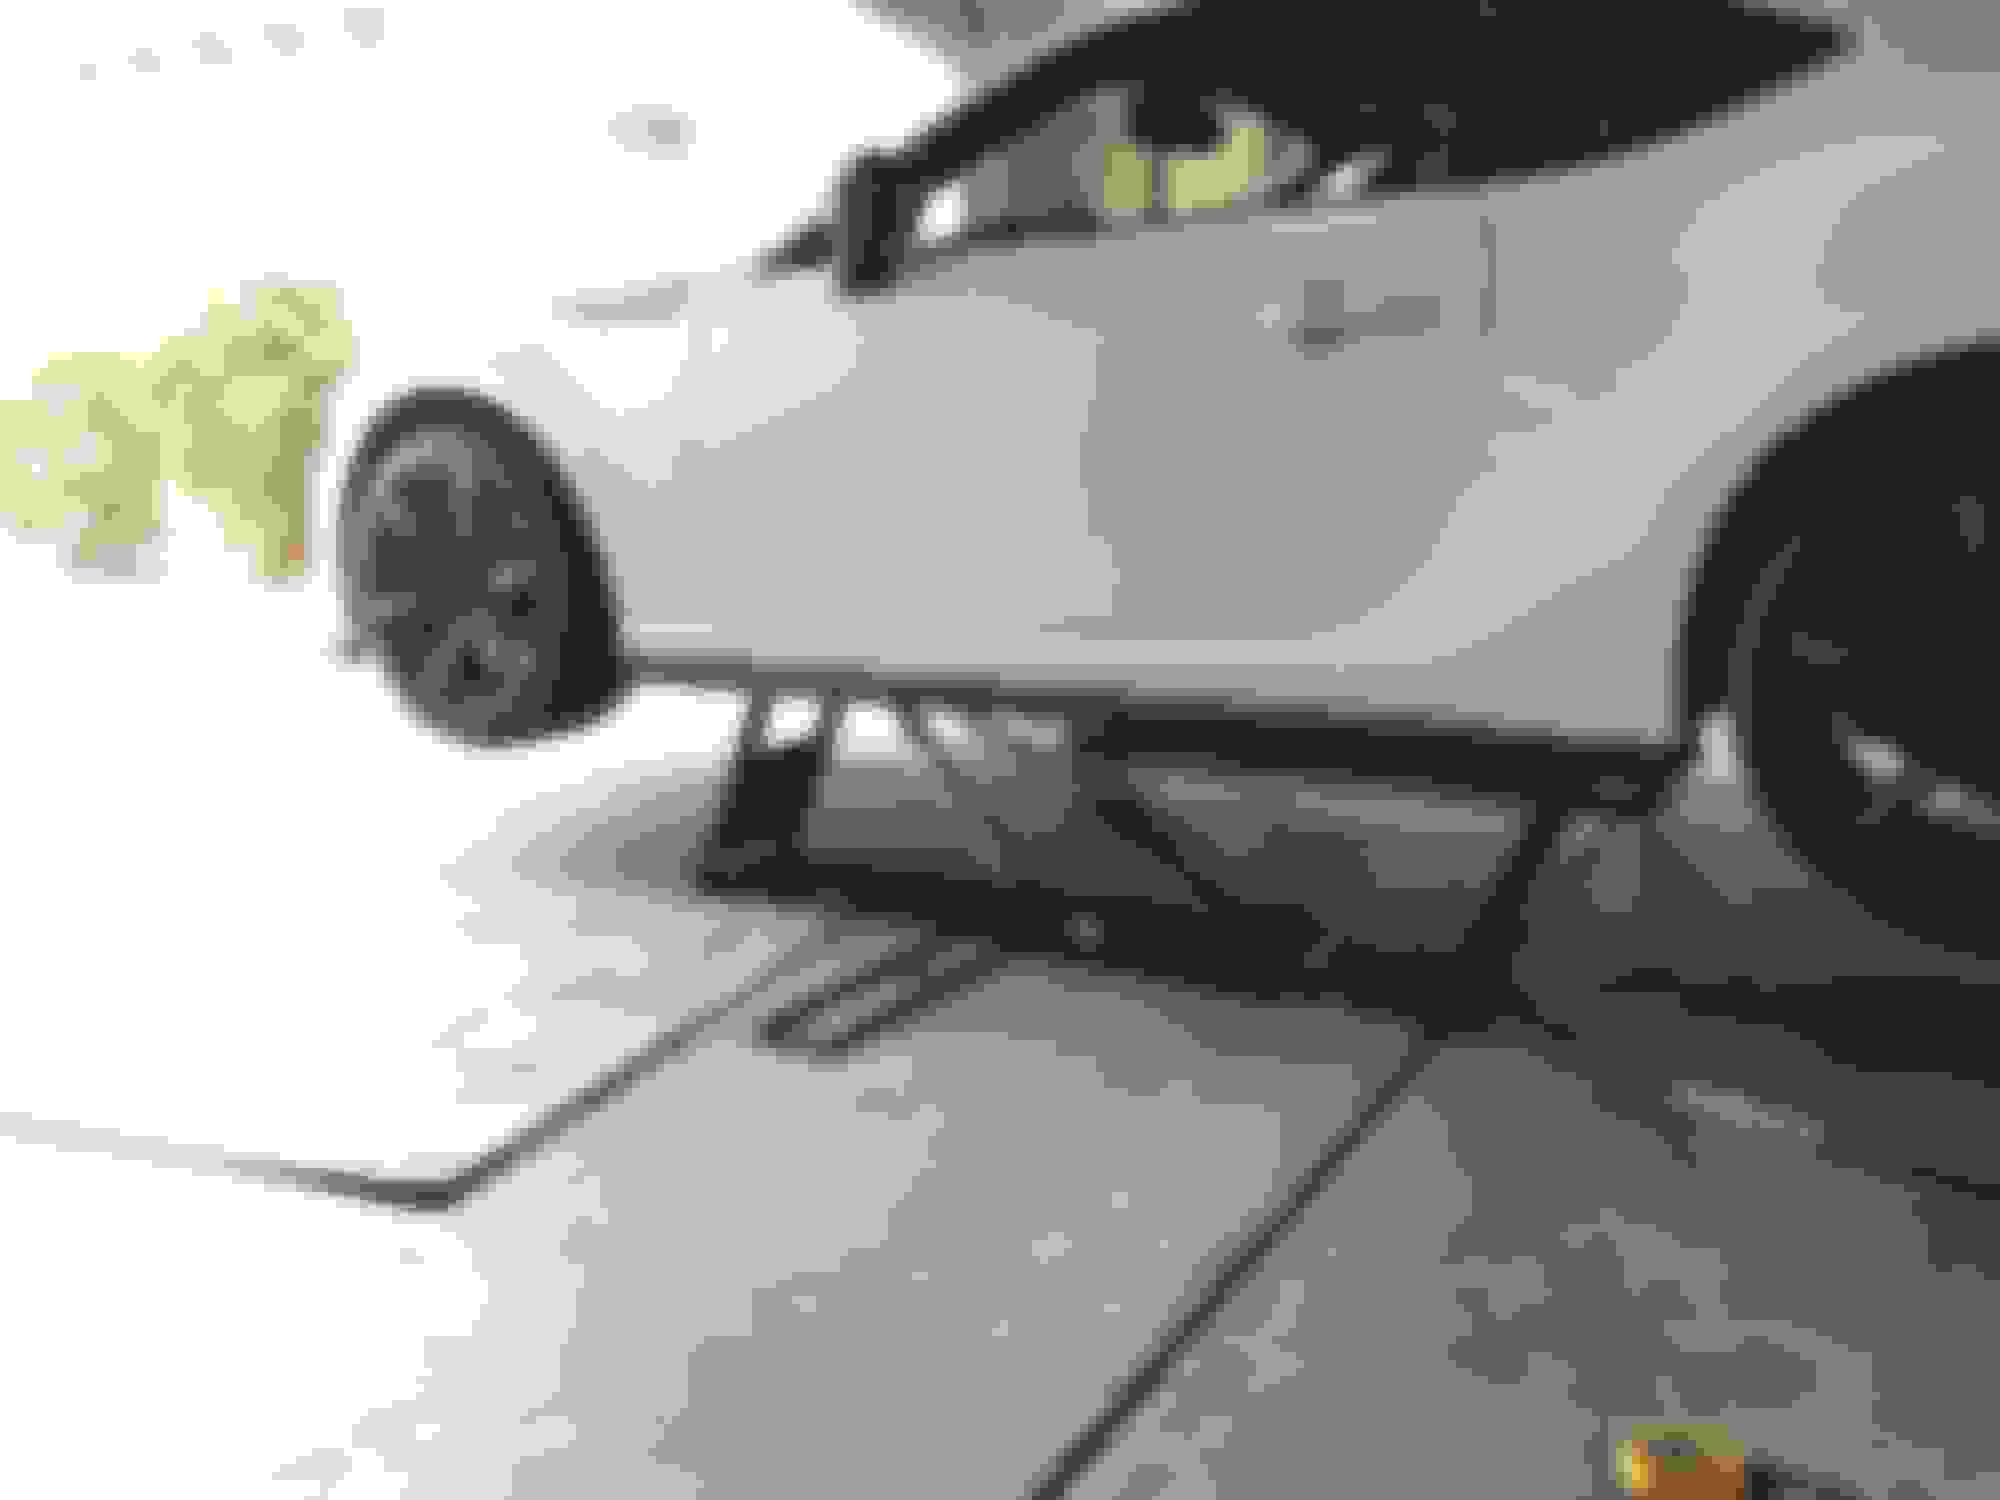
However, even without the 4 plastic pop clips fastened, the rear diffuser is very secure and does not seem to be going anywhere. I would rate the fitment of this Seibon OE style rear diffuser as 8 out of 10 because of the slight side gap and inability to reuse the 4 OE plastic pop clips at the bottom.
Here are some photos of the installed product: Small side gap between diffuser and bumper cover.
Overall, still very happy with the look. It's a subtle dress piece that flows with the carbon side skirts and carbon front lip. Next mod will be the Invidia Q300 axle back to fill out the exhaust hole openings and give the car a little more aggressive tone when giving it the beans!
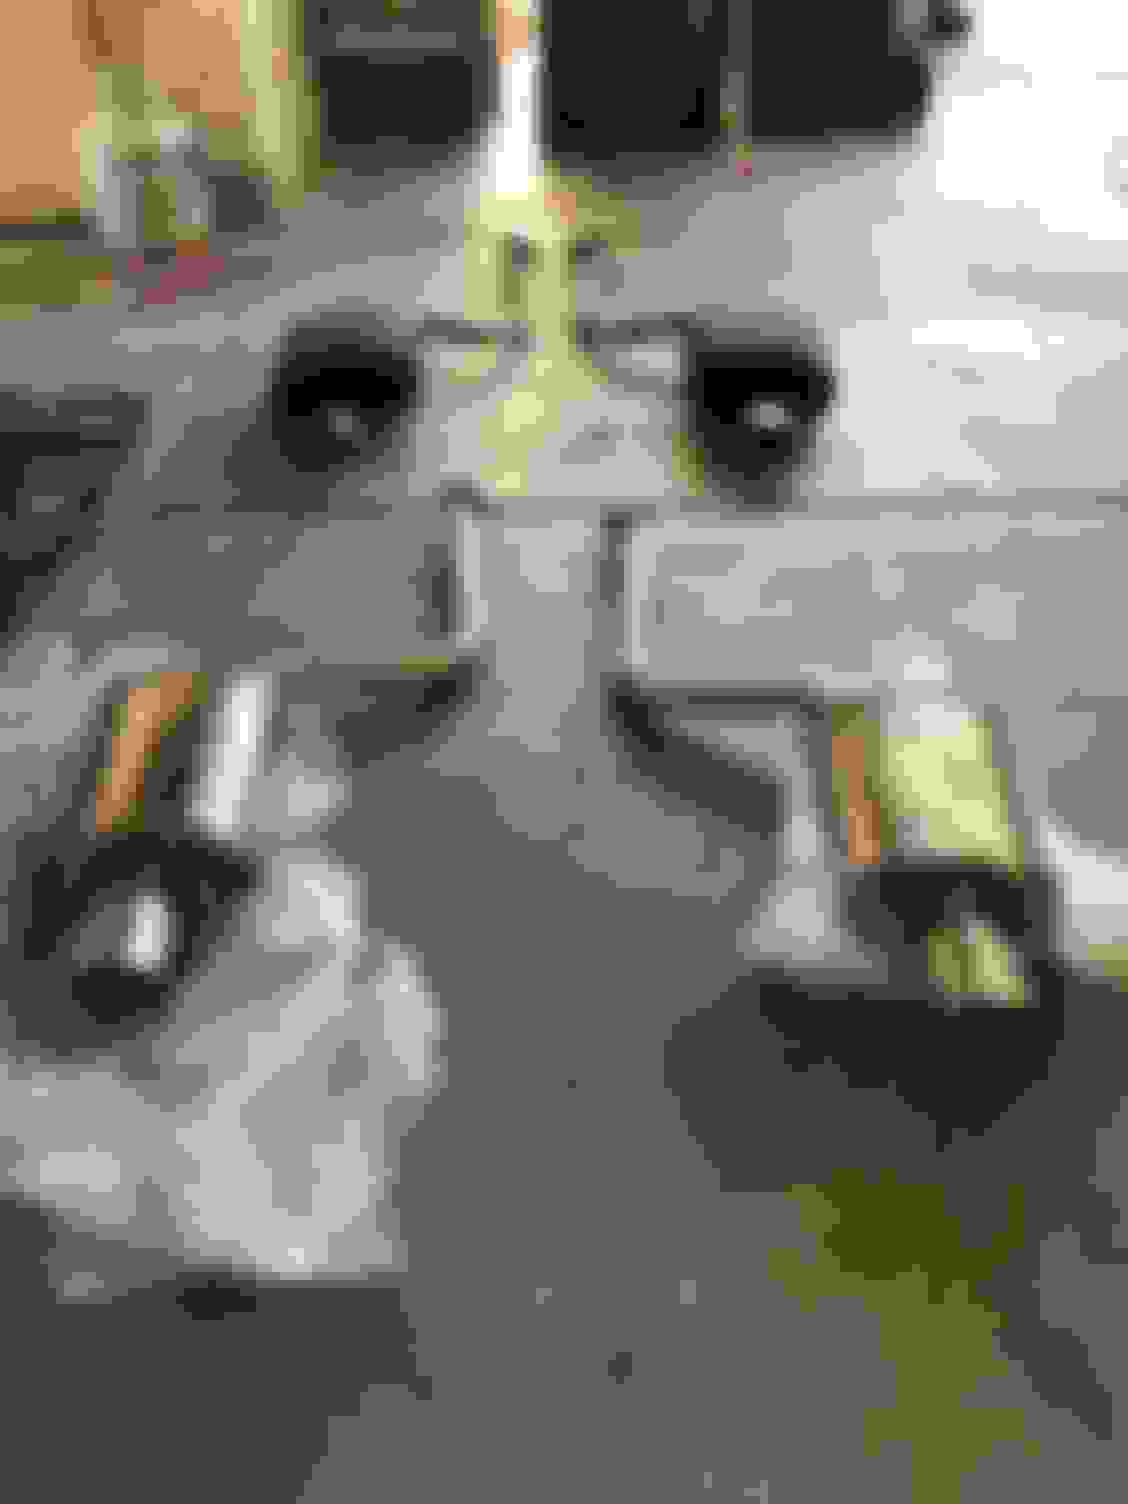
Boring update here: I realized that the carbon fiber side skirts block the pinch weld jack points for the in-trunk jack. The jack would damage the side skirts if we had to lift the car to change a flat! So I "notched" the side skirts at all four corners with a dremel. Luckily we did not have to remove the skirts to do this. Front side skirt notch. Rear side skirt notch.
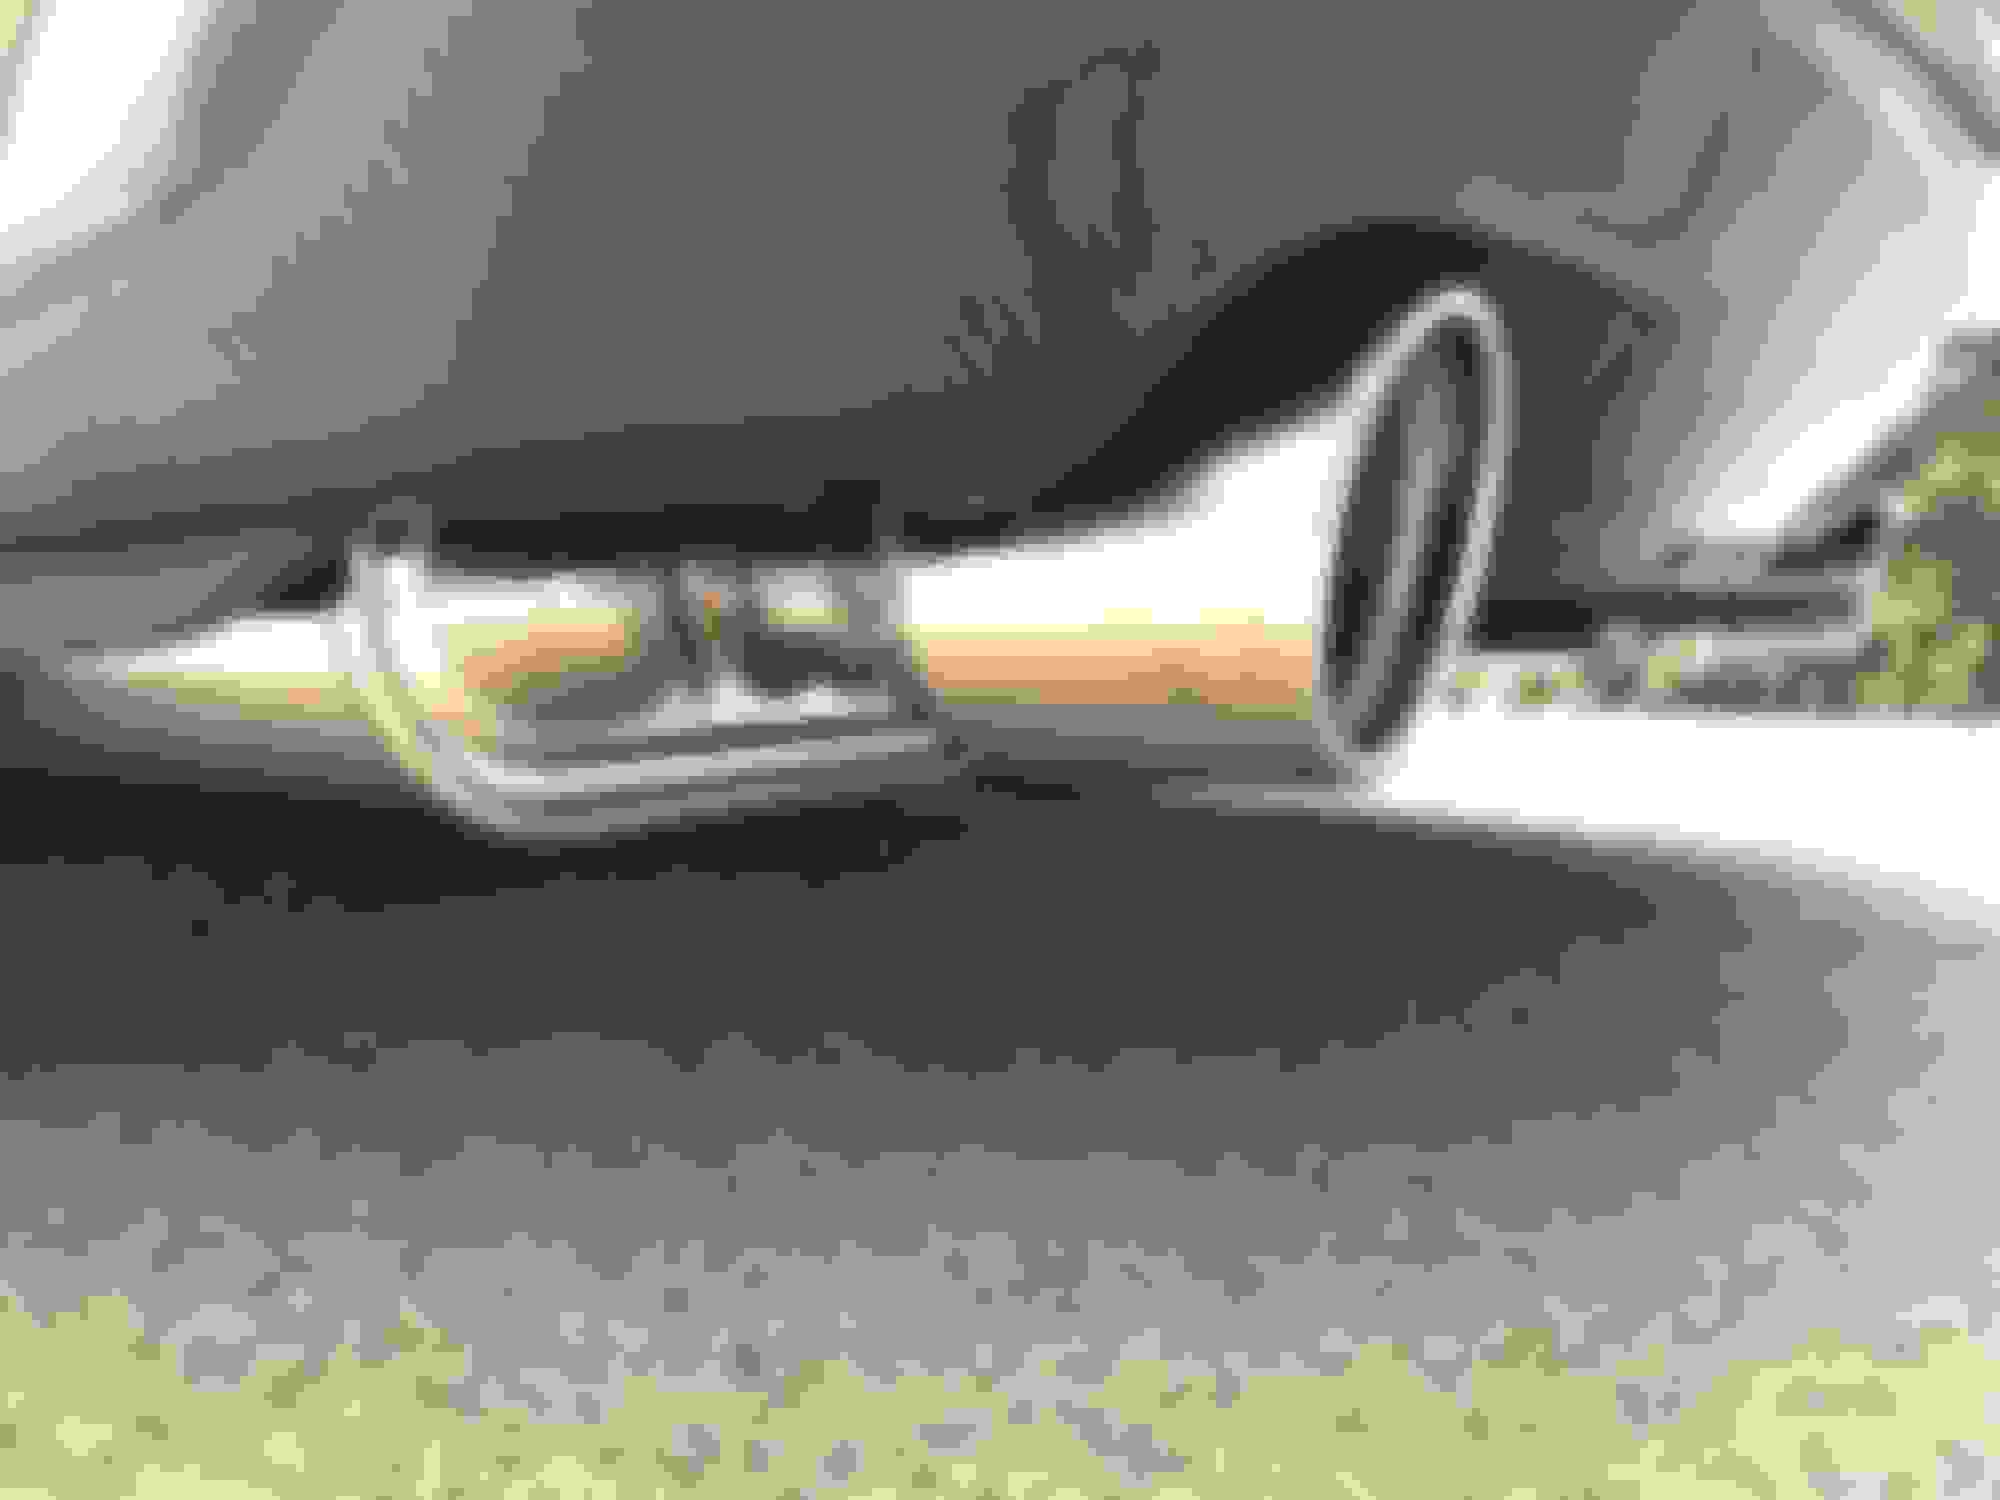
Finally got around to installing the Invidia q300 axleback. Fitment was perfect and I didn't really have to fiddle too much with the exhaust hangers to get everything aligned. Interestingly enough, the donut gaskets that came with the Invidia q300 do fit a little more loosely than the OE gaskets. But once everything was bolted down, the axleback to mid pipe seal seemed good. There's no obvious large exhaust leak I can hear or feel at least. Since we still have all the cats, this exhaust is only slightly louder than stock. No drone and wife is happy it's not loud. Now for the obligatory pics!
How are you safely using the quick jack? I bought the same model but I've found that the pinch welds are a few inches too far away to use the stock jack points.
Originally Posted by dj2020
The notching of the side skirts was also an excuse to use my new toy. Wifey got it for me for our anniversary.
This is the QuickJack from BendPak Ranger. It's the BL-5000SLX model that has a 5000 lb lifting capacity.
This is is going to make installing the Invidia axle back exhaust so much easier.
Does anyone know what the torque specs are for the axle back and midpipe junction? The spring loaded bolt/nut.

 09-20-16, 03:24 PM


 Thanks for sharing man


 :
: