When you click on links to various merchants on this site and make a purchase, this can result in this site earning a commission. Affiliate programs and affiliations include, but are not limited to, the eBay Partner Network.
While Iˇm working on the boost cut controller, here is a picture of the rims I put on the car last summer. They are Work Emotion with 245/40R18 tyres. The paint job is quite bad on the car. The hood has bondo cracks. The car was crashed in USA before it was brought to Europe, nothing too major though. But Iˇll deal with the paint last.
Also another thing that might interest you guys. This info is probably somewhere on these forums but Iˇll add it here too. When using a JDM ECU with JOBD the simple OBDII readers cant connect to the ECU.
I used the Torque Pro app. Under vehicle profile there is a very advanced section for ELM327 custom configuration. Under there put: ATIB 96 \n ATIIA 13 \n ATSH8213F0 \n ATSP4 \n 0100
And it should work, atleast it did for me.
Small update.
Decided to try porting the wastegate in the hopes of not having to use the boost cut controller. Here are the results: Unmodified
Nicely ported and polished
After putting it back together I went for a test drive and I could tell immediately that the boost didnt climb as fast as it did before. But it still hits boost cut. Only the cut is now much softer and I gained some rpm. So all-in-all it was a days work with not much to show for it. It is quite cold right now, who knows maybe in the summer I dont have boost cut.
I also tested the BCC on the bench and everything seems to work fine, so next weekend I will hopefully have better news. This is the thread I found about the BCC: https://www.clublexus.com/forums/per...minator-2.html
I installed the boost cut controller by splicing it into the factory engine harness. Took a while to get it right with the trimpot while constantly monitoring the afr and boost values but it is working well.
Since the engine harness is not as clean as I want it and the BCC is a temporary solution I am looking for a standalone ECU with a new harness. After shopping around I got the best offer from a a guy that does Megasquirt 3 and he will also do the harness for almost the same money as others will do ecu+tuning without the harness (MS3 is quite cheap). He has also done my friends car so I know the quality. This should happen at the end of summer.
I also plan on installing 540cc injectors from a 3sgte st215 (still need to make sure they are compatible, there is different info on these injectors). And then I will get rid of the stock igniter and coils in favor of Yaris COPs. I am not sure they are an upgrade in terms of spark but this way I can delete the igniter and then I dont have to use wasted spark any more. Plus the Yaris coils are cheap and readily available.
Below is picture of a bracket I made. Turned out pretty good. I looked at brackets online but why not make your own, maybe not as pretty but functional. The picture is just a mock-up on my old 2JZ-GE motor. The plan is to test them on the stock ECU before switching to the standalone. My attempt at a bracket for the Yaris coils.
Finally had time to test the Yaris coil on plug setup on the stock 1JZ ECU. The install went pretty smooth. I removed the igniter and wired in the COPs. The IGF signals of coils 1, 2 and 3 were joined together and fed back to ecu. T1, T2 and T3 (markings on the igniter) were used to drive the COPs, just like the normal setup.
There are some videos and diagrams floating around that suggest to use the same IGF signal from the three coils to make the tach work, but it didnt work for me. Luckily the 1JZ ECU has a TACH output so I used that signal and in combination with the tach mod (jumpered resistor R2) it worked perfectly.
Pretty easy mod to get rid of the stock igniter and coils. And the cover fits on nicely although the COPs sit much higher.
Almost a year since my last update. A lot has happened. Some of it not good unfortunetely.
I did manage to get a new engine harness and a Megasquirt installed and tuned. The stock turbo (chinese CHRA inside) was the major limitation. It started to fall of at higher rpm and the intake temps where a little high because the small turbo had to work hard. But it did good and managed a 238 kW/320hp at the wheels 480 Nm/353 ? foot pounds of torque at 18 psi. 540cc injectors had a duty cycle of 70%.
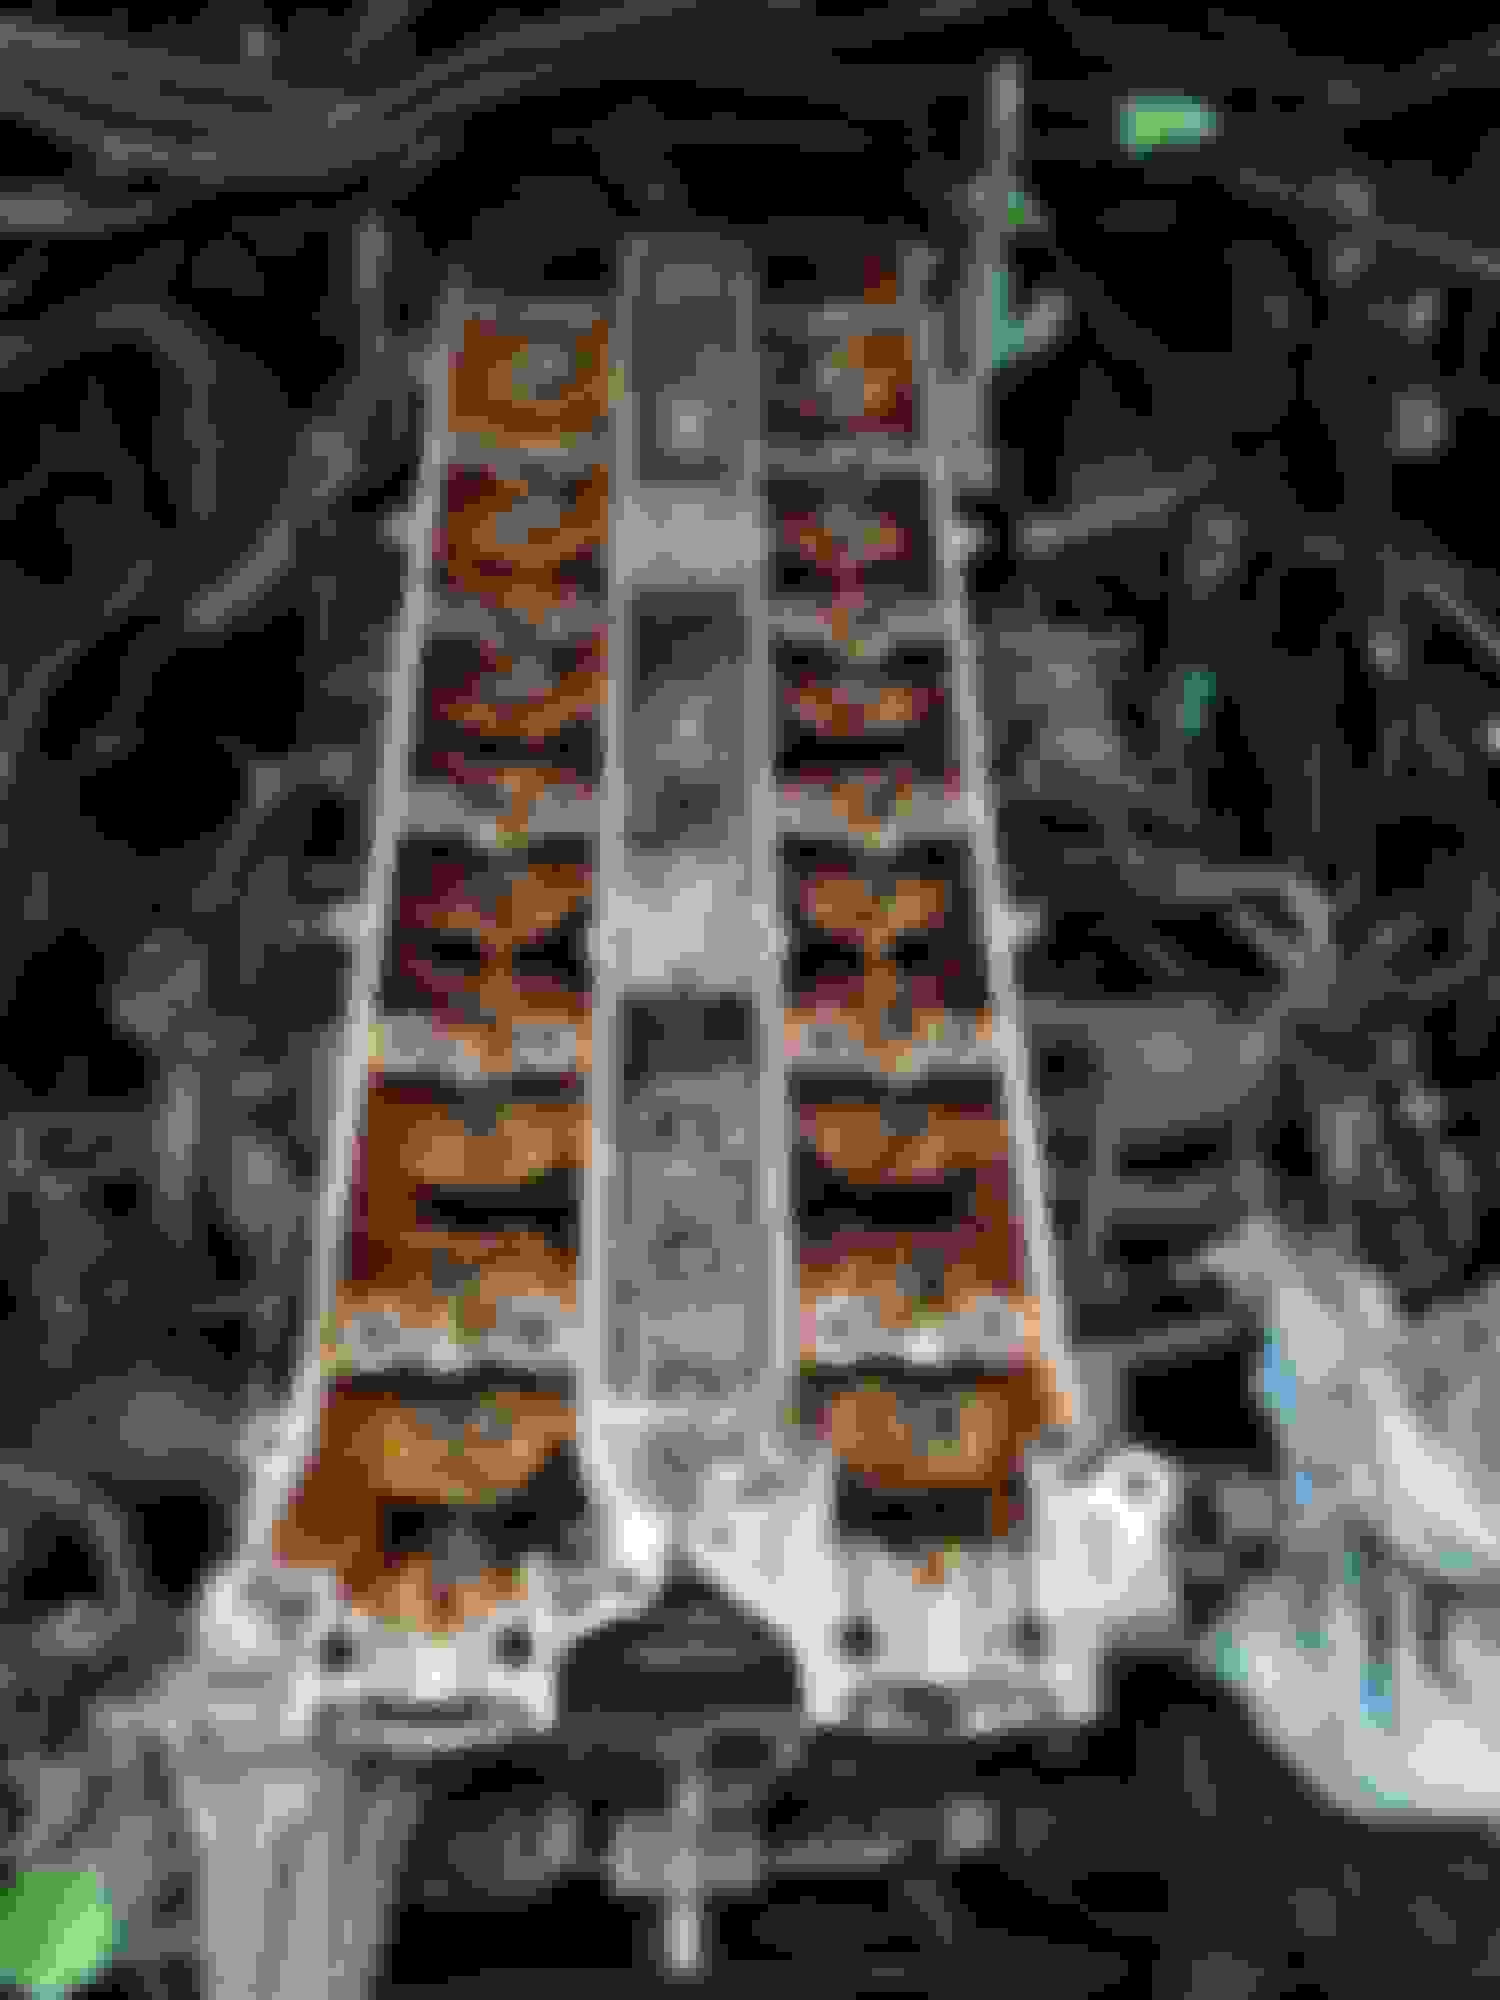
A few weeks later I noticed some white gunk in the coolant reservoir. A lot of it. The oil seems clean. So looks like my head gasket is gone. Barely got to drive it. I guess the turbo or oil cooler can also be blamed for this symptom but it is unlikely. The engine wasnt overheating and wasnt detonating so hopefully all is well inside. Driving it I realized straight away that 320hp for this car is not enough . So while im doing the head gasket im also going to be installing a GTX3076R.
I ordered a Cometic head gasket and ARP head studs. I will also be changing the valve stem seals, valve cover gaskets and cam seals. I will post the part codes once everything has arrived and I can confirm they are correct. Also I will add pictures of the gunk once Iˇll get to the garage.
Also I am on the fence about changing the injectors. In theory 540cc should be good for another 100 hp at 90% duty.
That's not fun news at all about your head gasket. I'm so sorry you've had this setback. And already hit a ceiling with the rebuilt CT15B turbo. On the positive side this is a good opportunity to set the engine up well with a fresh GTE head gasket and ARP head studs for some added strength.
The GTX turbo should be a big jump over the upgraded CT15B. I've always been curious about the bolt-on Tomei Arms 1JZ-GTE VVT-i turbochargers as well but I'm guessing that they cost much more than the GTX series.
540cc injectors should do well safely and conservatively up to 430hp at only 80% of their maximum duty cycle.
I have also observed that 320hp or so is plenty good in these cars if just left at that but I agree that I'd also prefer about 80-130hp more over that figure. However low end response balanced with very usable midrange power and good high end are also just as important IMO. In your case I hope the combination of the VVT-i intake cam, better breathing and still very responsive turbo upgrade and possibly a Quick Spool Valve can preserve good low end pull while opening up your mid and high end with your 2.5L.
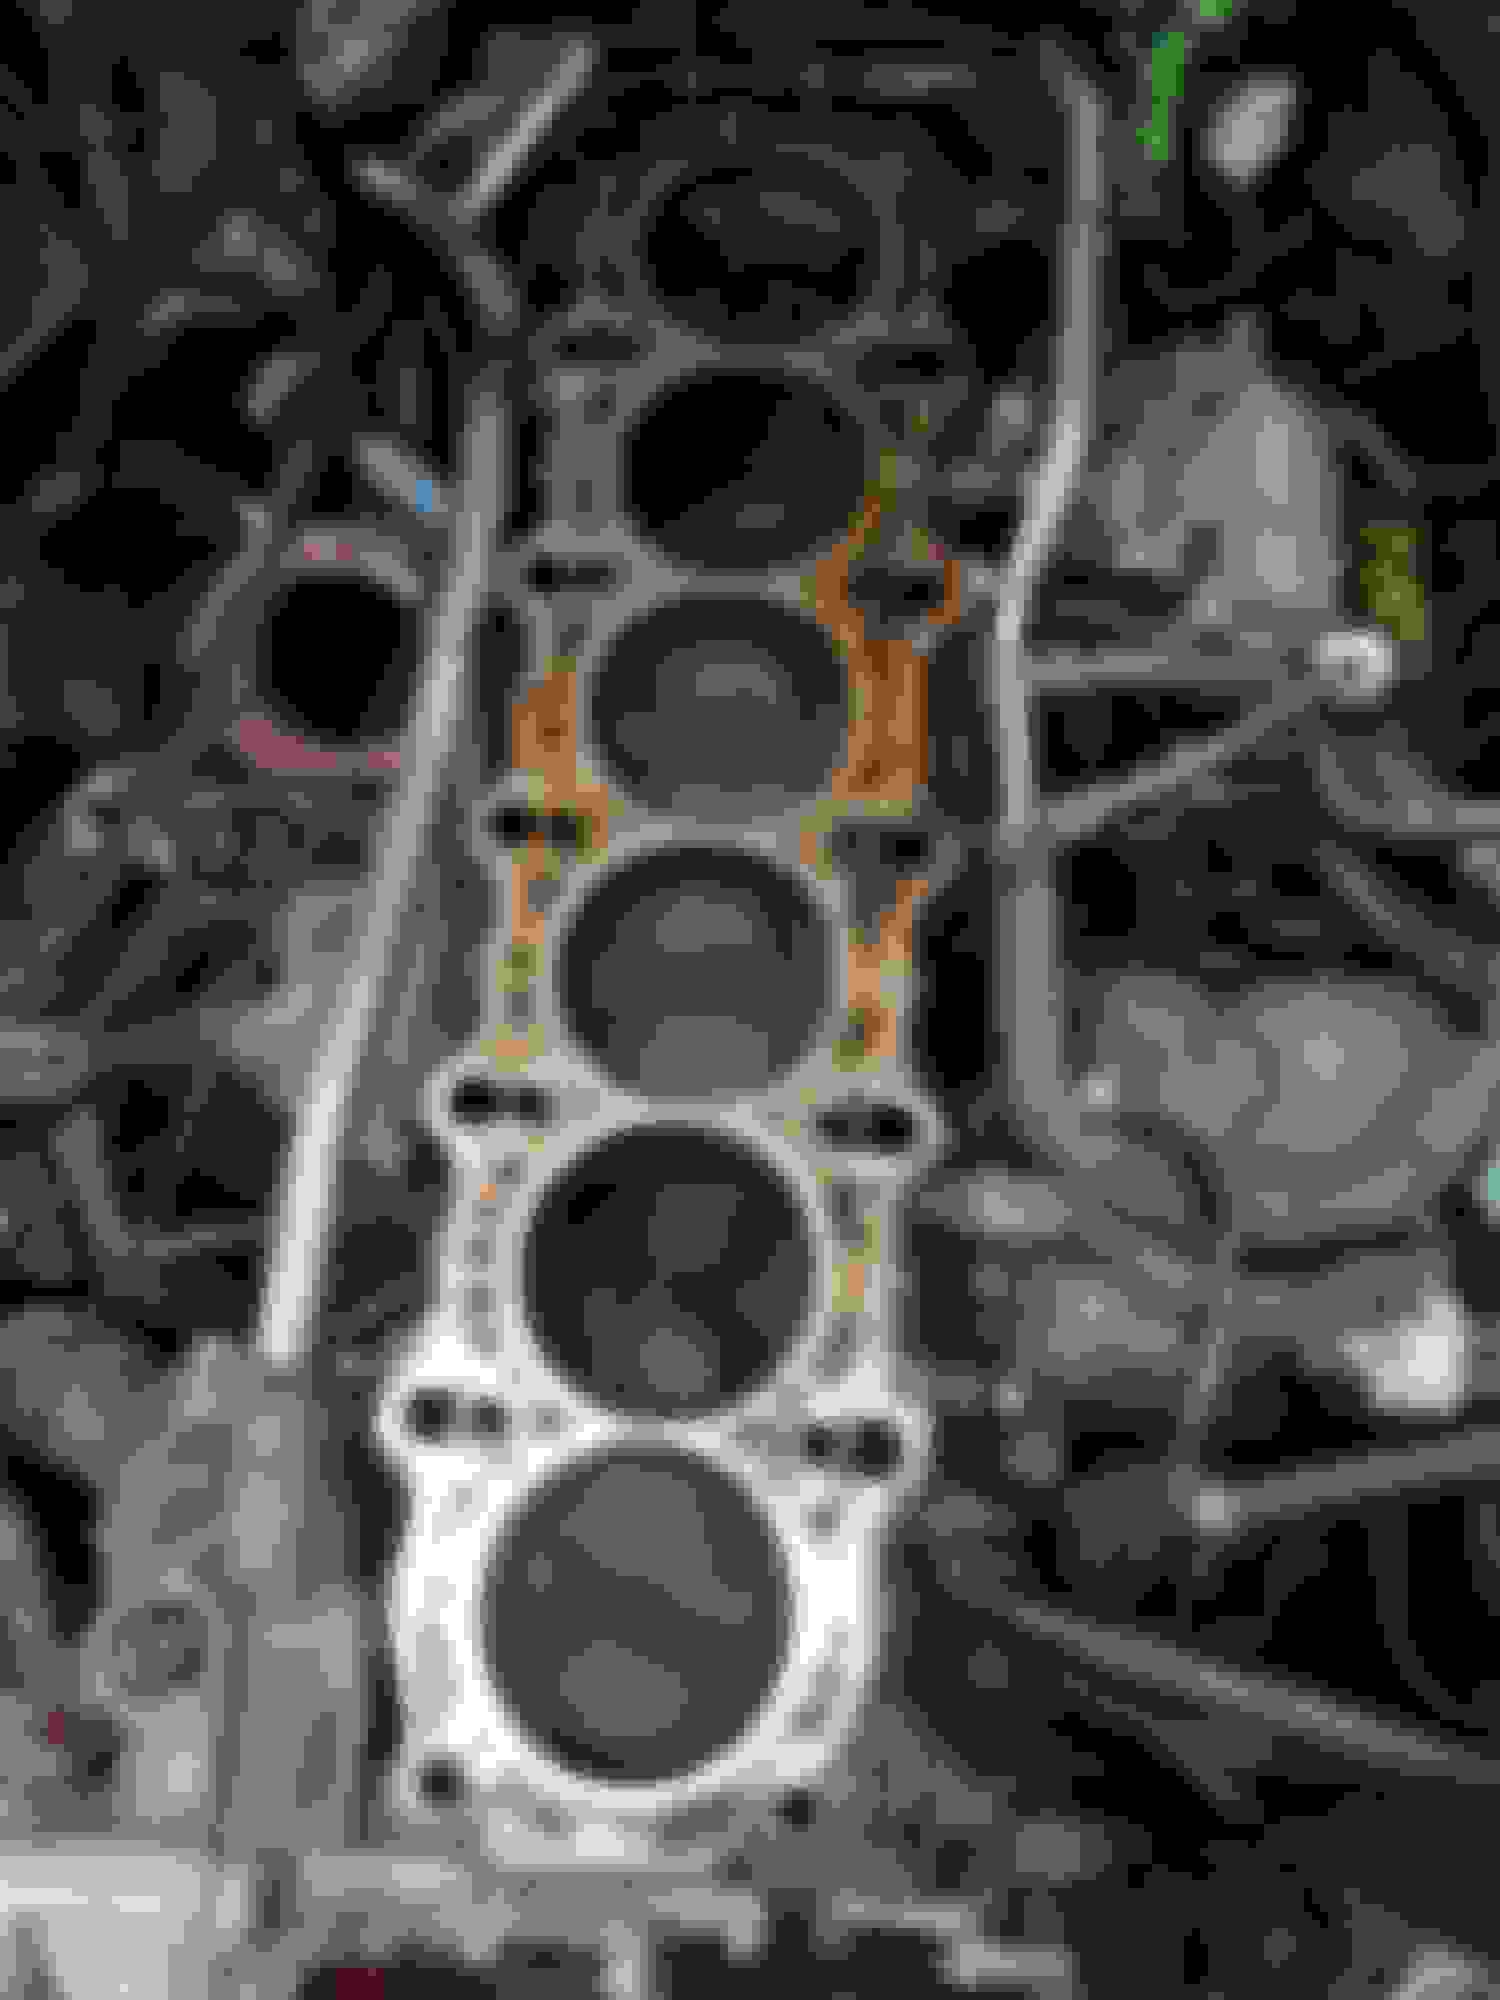
My Cometic head gasket, ARP studs arrived and the head gasket is swapped. Here are a few pictures. The japanese are not well known for their oil changes but its not that bad.
I used the following parts for the rebuild:
- Supertech valve stem seals VS-TS6E and VS-TS6I for exhaust and intake respectively.
- Valve cover gaskets 11214-88410 and 11213-88410
- Cam seals 90311-38056 and 90311-40020 (remember this is for the 1JZ-GTE VVTI)
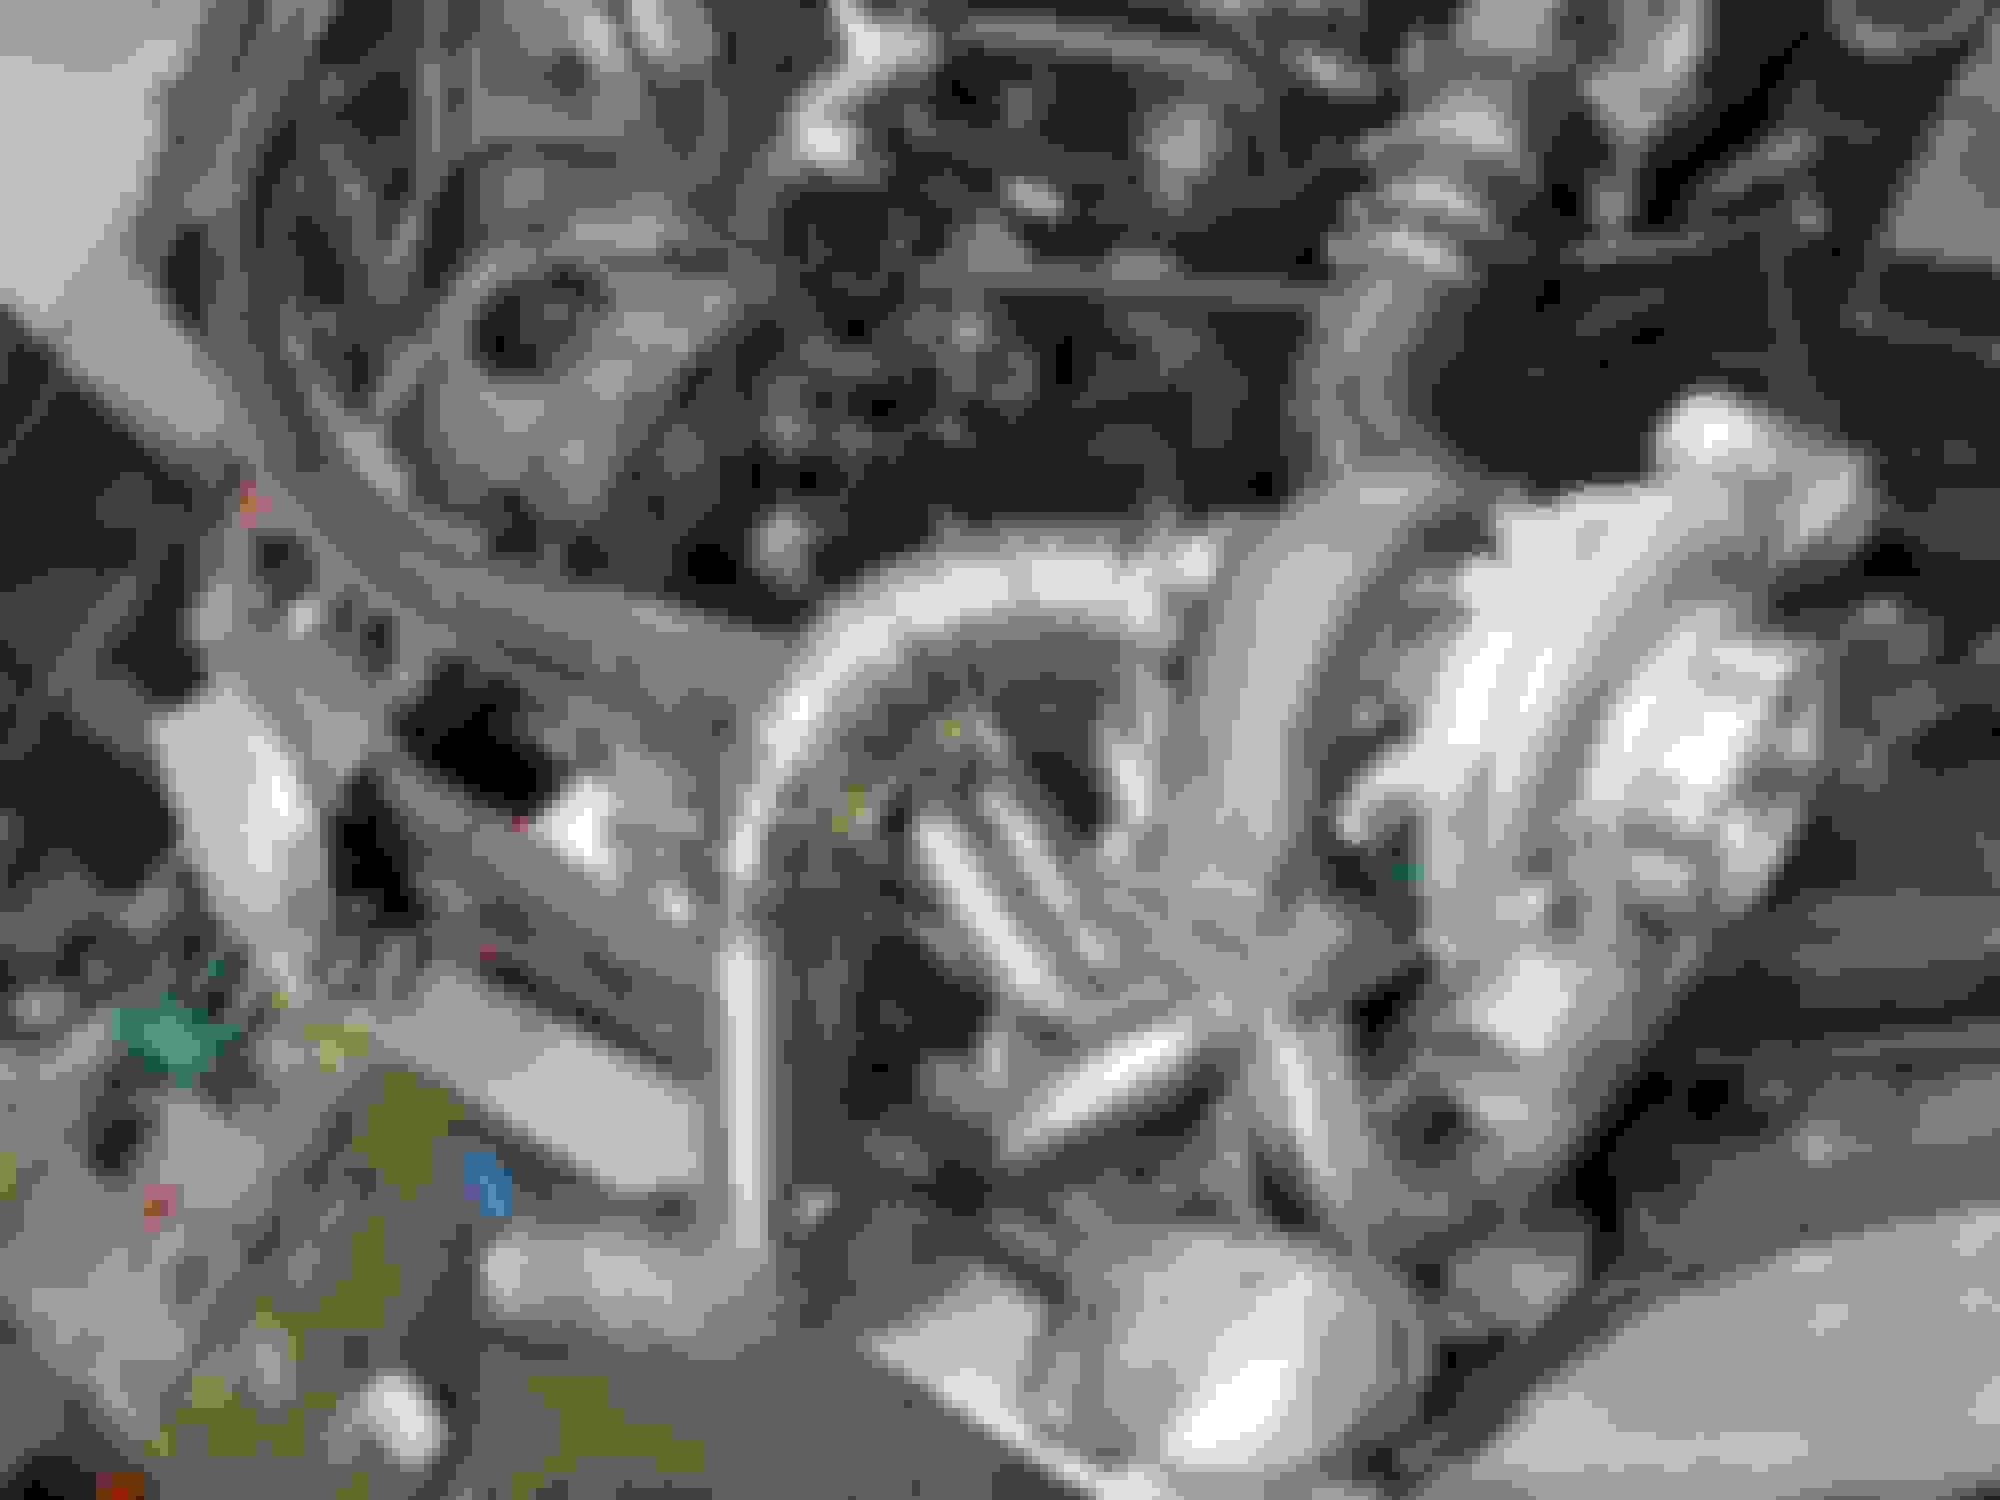
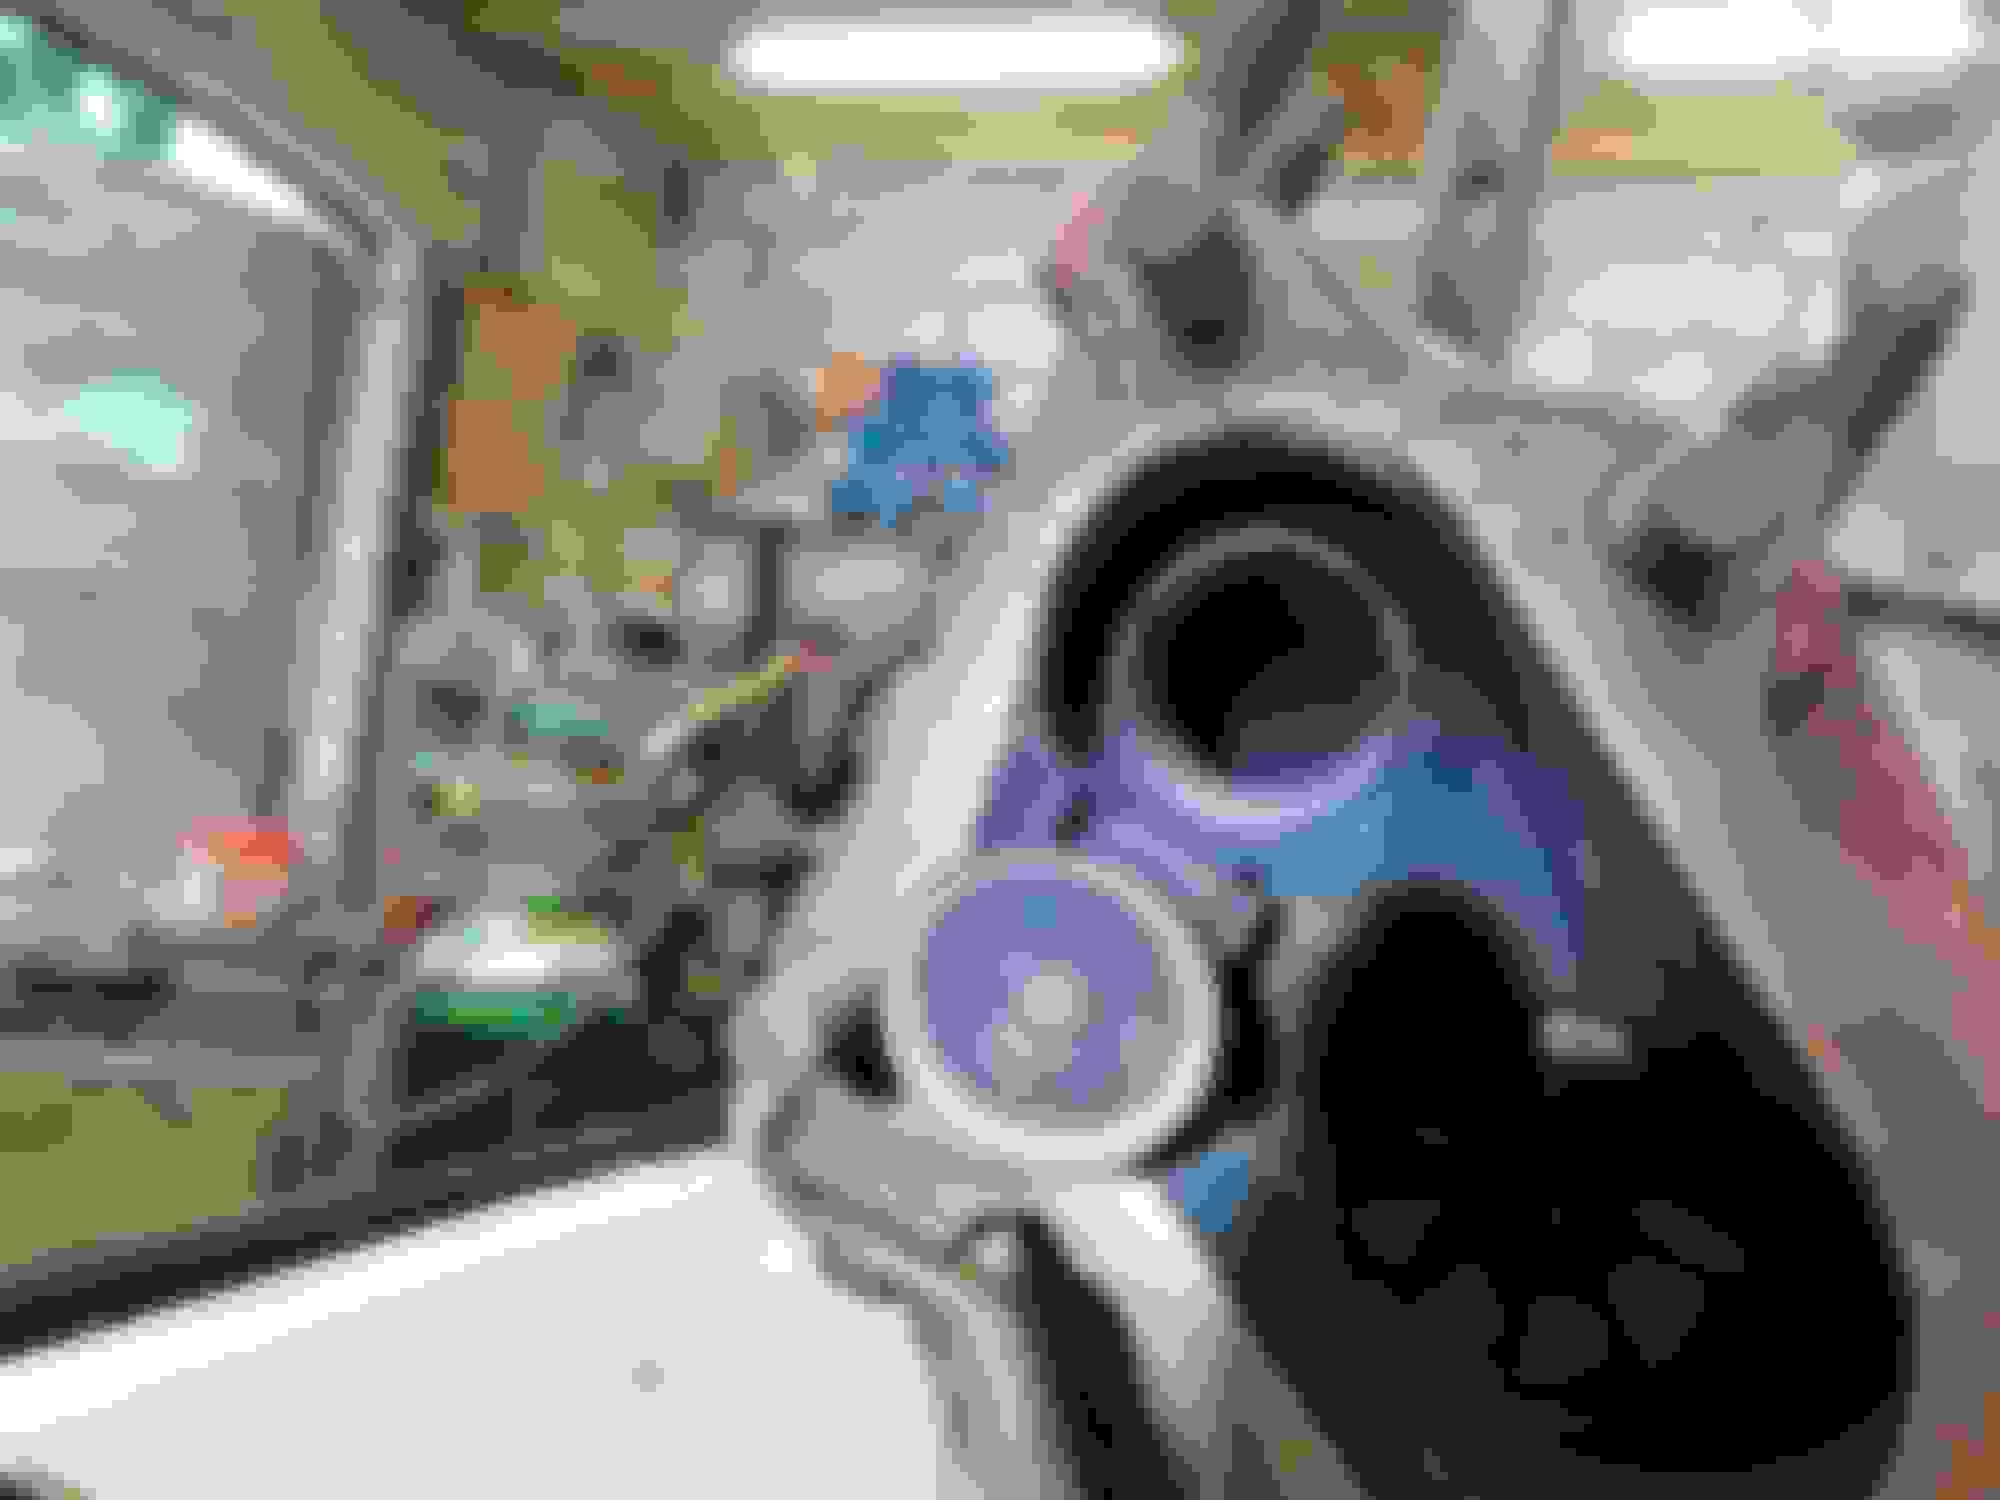
Now for the best part. Head gasket changed and test-fitting the GTX30 turbo.
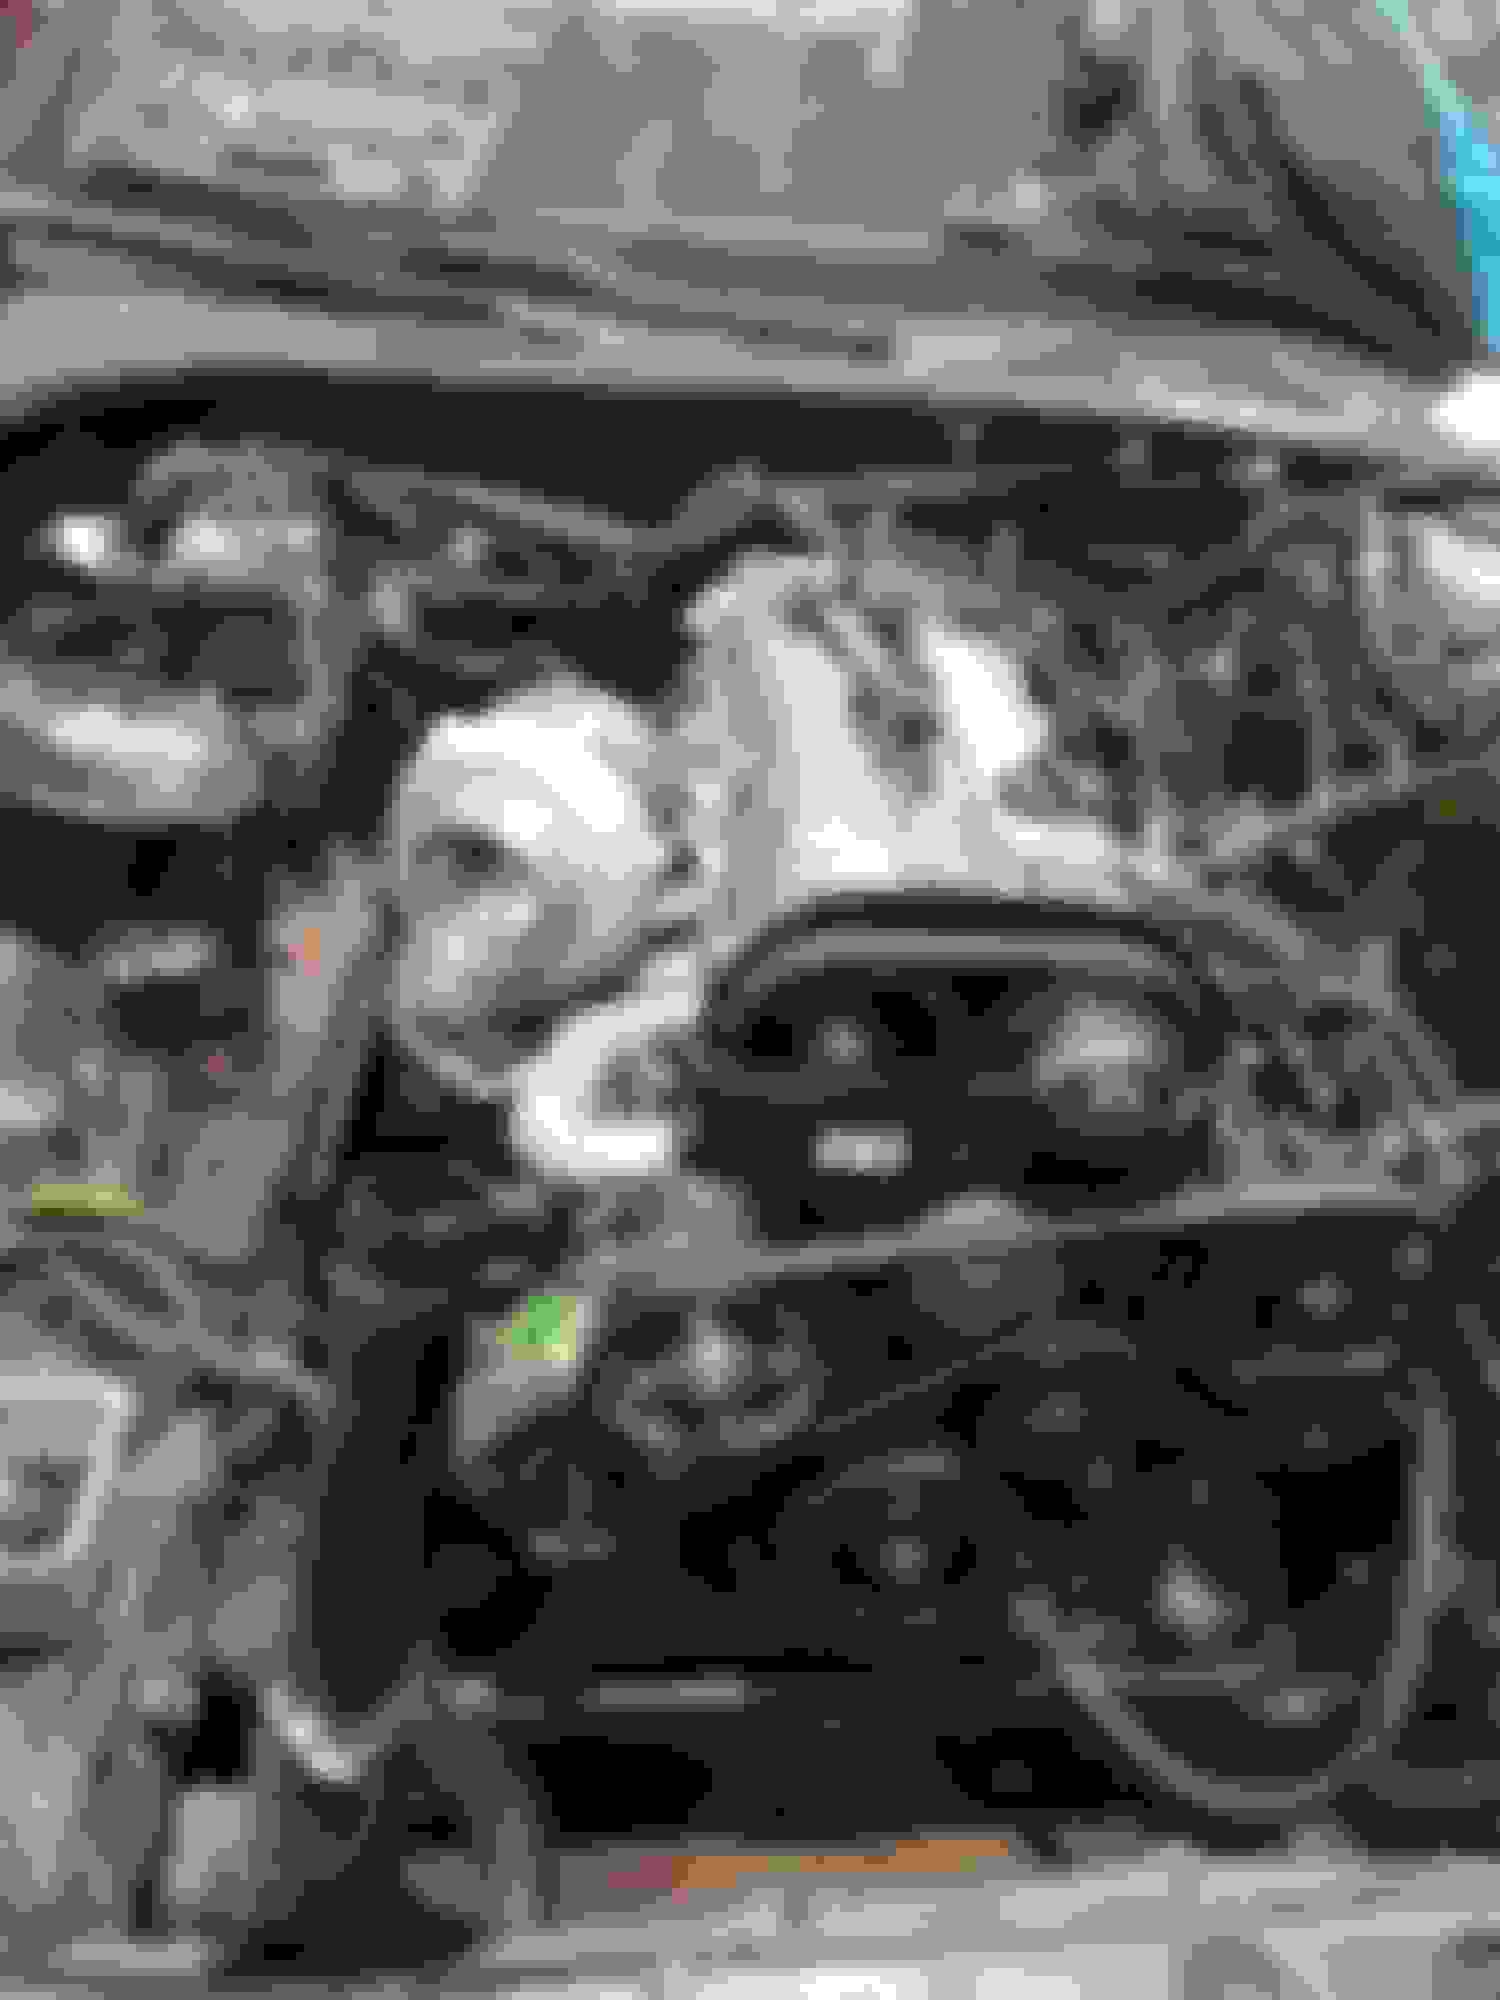
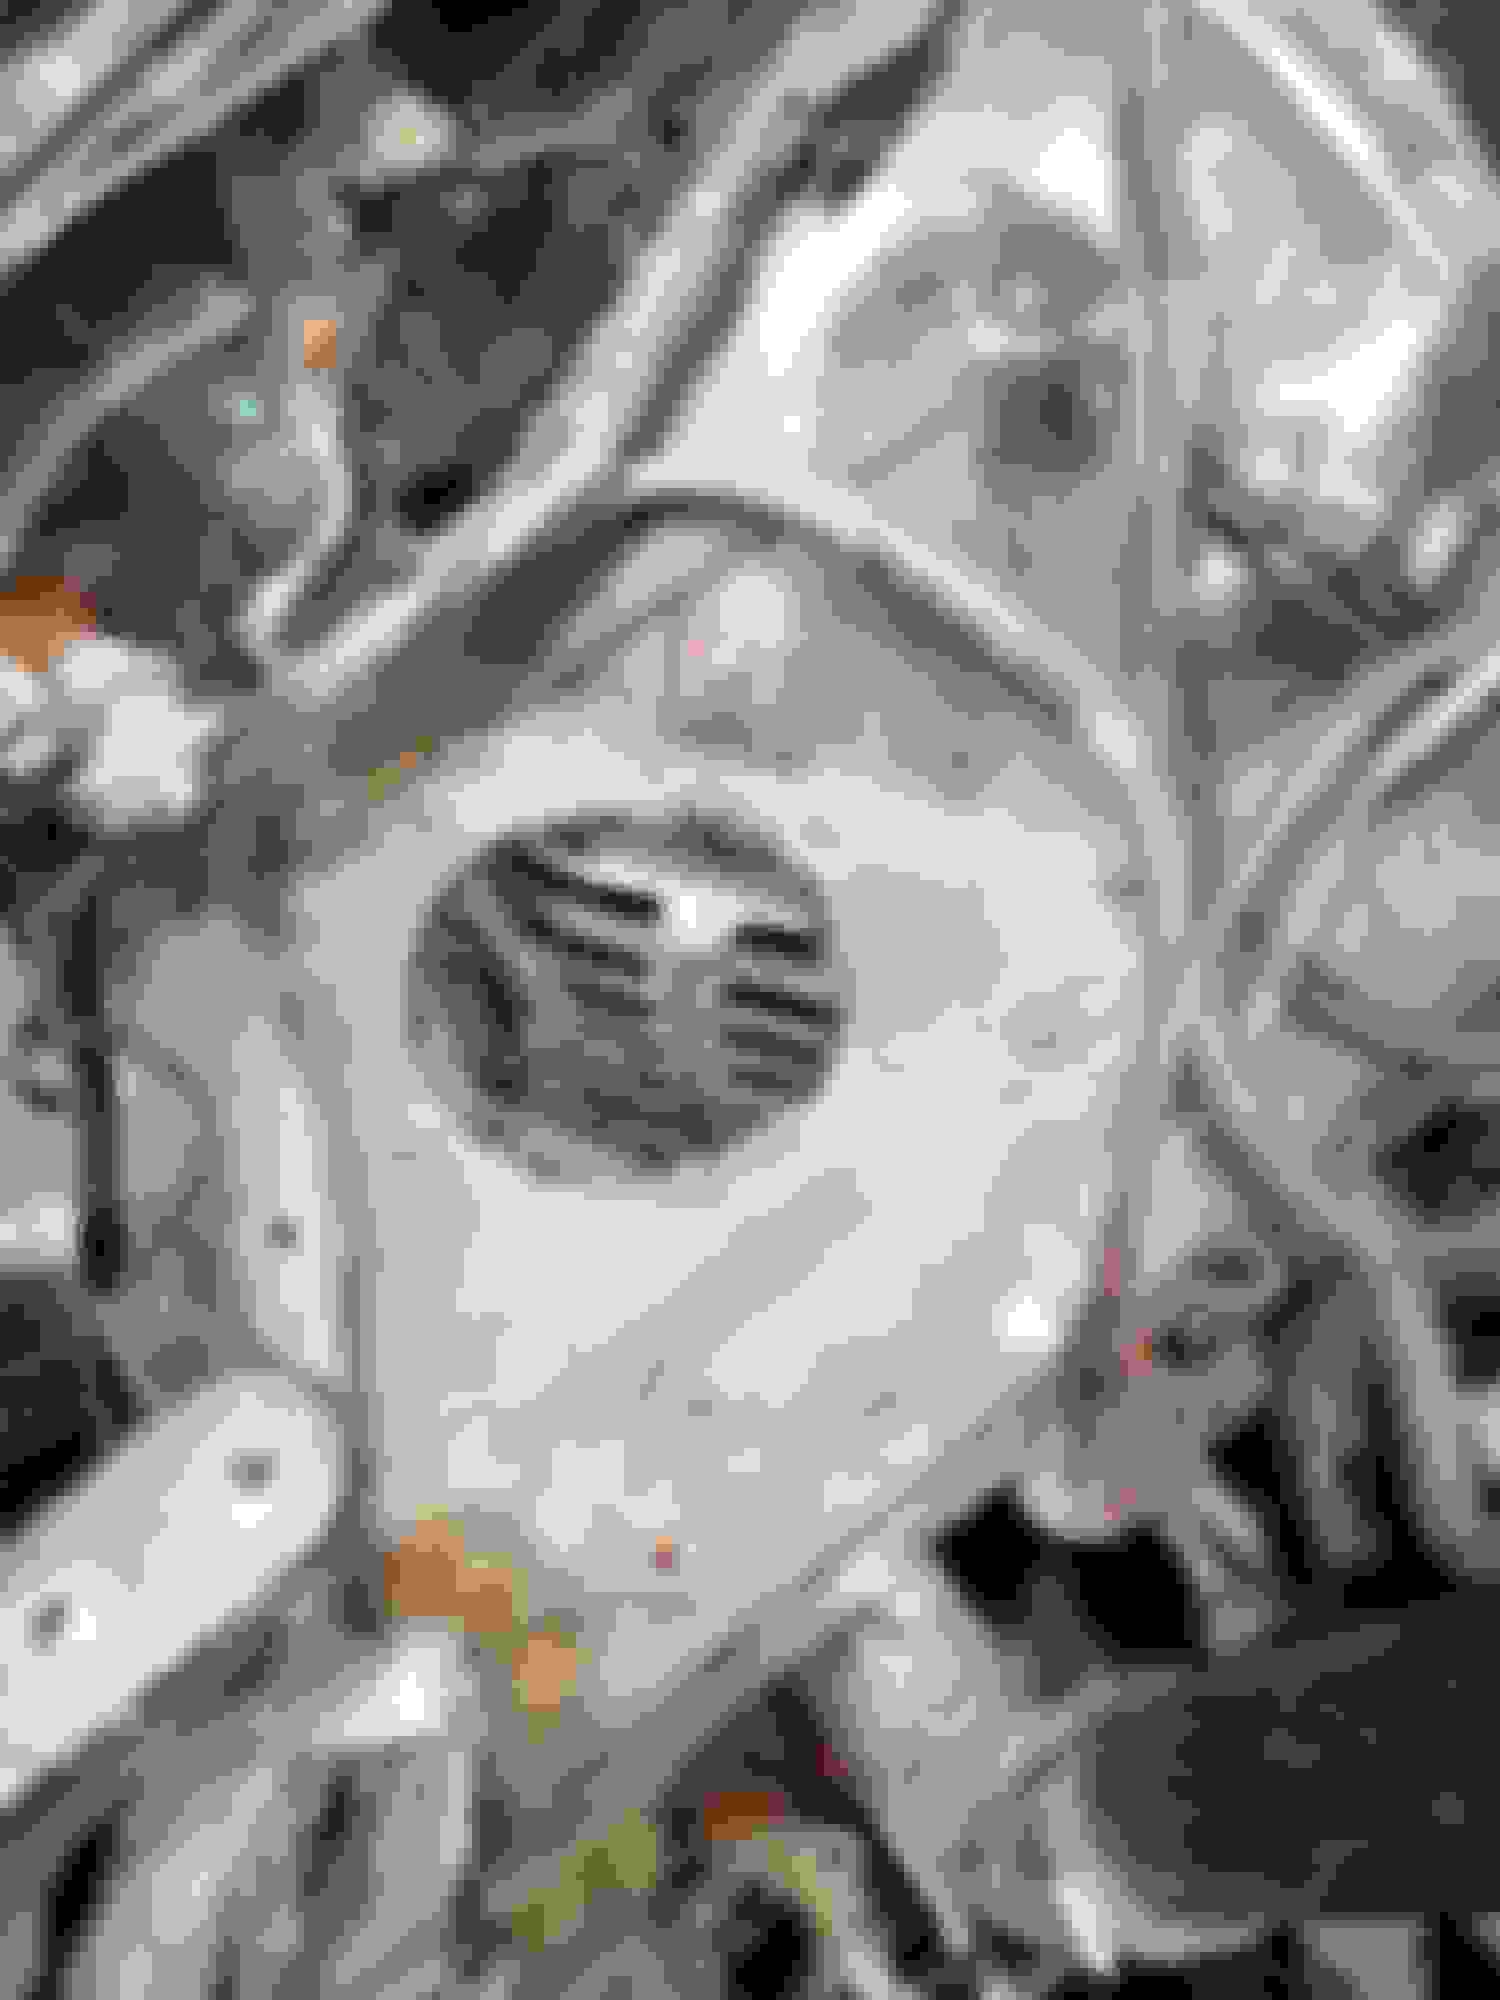
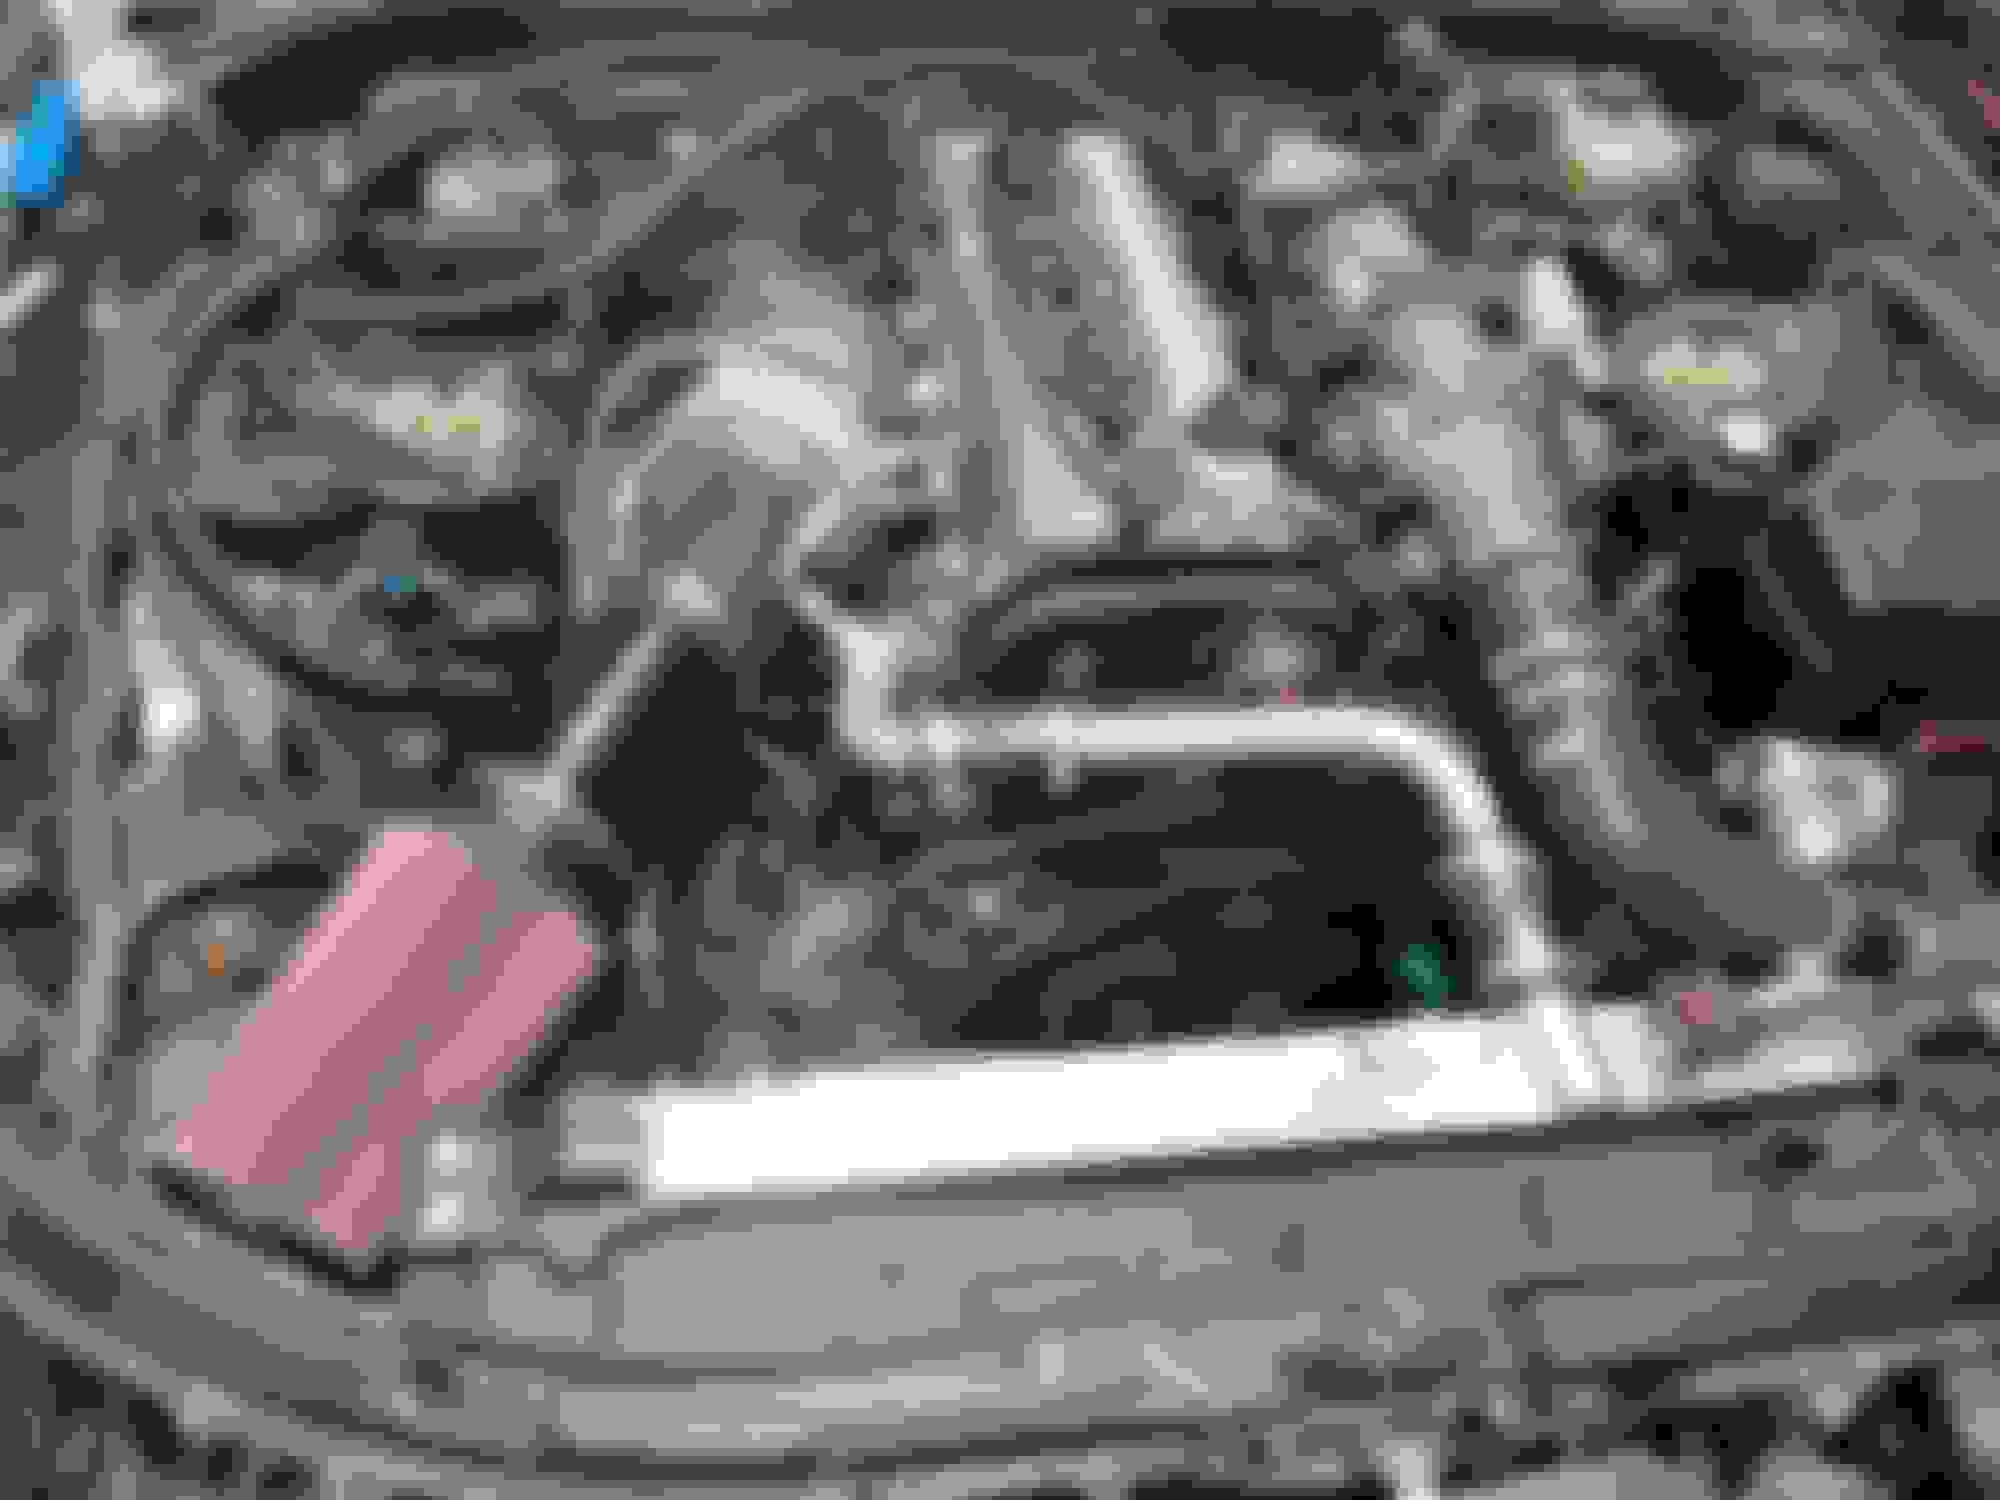
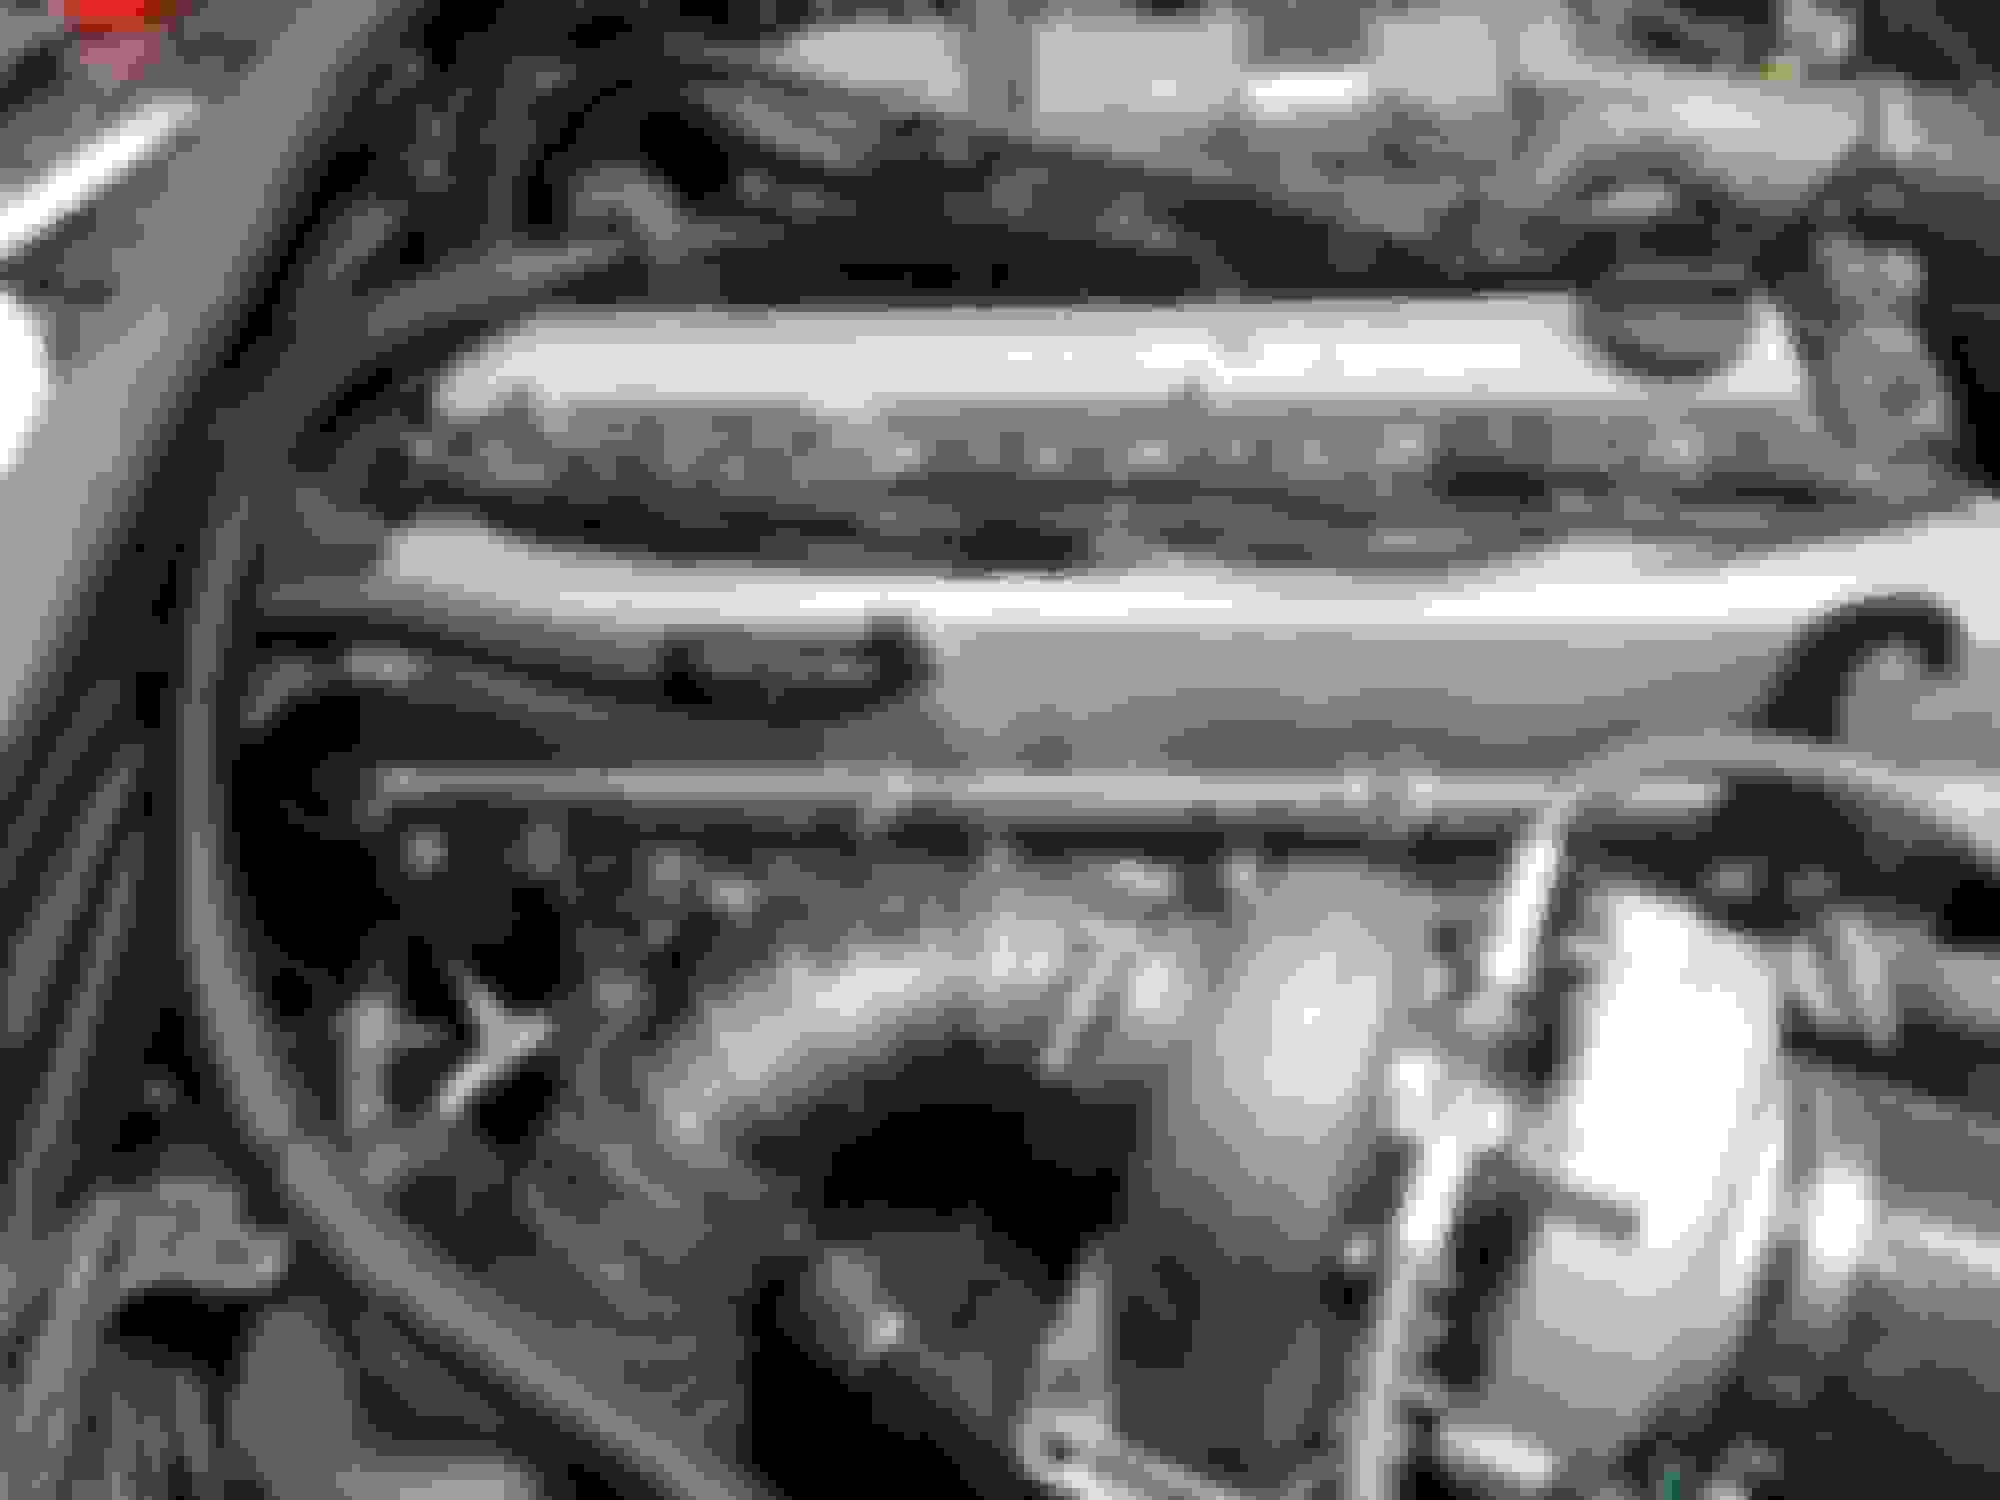
Alright, most of the hard work done. The new turbo is in, exhaust is welded, new oil and coolant lines for the turbo. New breather lines for the catch can. It seemed like a good idea to increase airflow to the new massive air filter. Beautiful KN air filter, right corner is HKS SSQV. Sounds really nice. The air filter still needs an airbox. Manifold in. Let me tell you, its almost impossible to do up the lower manifold nuts. I took studs from my original 2jz-ge block and put studs in the lower bolt holes. Because the bolts just will not fit. It was still very tight to even get a nut on. But somehow I did it. Hopefully I wont have to do that again. DEI titanium exhaust wrap. The valve covers now have felded 10AN fittings with full-flow 90 degree fittings for the catch can. And the third line goes to the intake before the turbo. So a closed system. Which I am told is much better than an open one venting to the atmosphere. The catch can has baffles inside and also a bronze filter.
First start after the head gasket change, everything looks great. Engine sounds good. But just when I think im home free I notice an oil leak from the lower pan. Stay tuned for a rant about bronze filters in (cheap?) catch cans.
Thanks Rudy. Cant wait to get it dynoed again with the new turbo and be finally able to drive it.
But anyway I wanted to say a few words about catch cans. Most come with some sort of bronze filter and as I have only tested one I can say it had the opposite of the desired effect.
At idle the filter actually created pressure in the crankcase which in my case was evident from an oil leak from the lower pan. Luckily I caught it quick and removed the bronze filter from the catch can and everything is fine.
Wondering if anyone else has any experience with this?
 01-14-21, 04:00 AM


 . So while im doing the head gasket im also going to be installing a GTX3076R.