
Daizen GS front control arm bushings - review thread (final)


 09-30-05, 01:15 AM
#93
Lexus Test Driver
The teeth are required if you have a rubber bushing, as it will try to twist back and forth. Of course in that location you only have say 40% contact area holding the sleeve in place so it's pretty brutal on a sleeve if it was in a rubber bushing and had no teeth.. These don't need it because the sleeve pivots inside the bushing, so there is no tension per se. It just sits there. The movement for alignment with the eccentric bolt is not really affected by this, you'll understand more once you actually get it in there.
Be SURE to grease the faces of the bushings well, and also clean and grease the areas of the car that contact the faces.
Here's some very helpful hints I've learned already so far:
On the strut rod, you will have a *#**&$&^@*@ of a time putting it back in when you try to bolt it to the lower #1 control arm.
I have discovered that the best way is to jack up the #1 arm a ways, maybe 1/2 way up before the whole weight of the car is on it. Then slide the strut rod up onto the stud on the car but without the inner sleeve on it. Put the nut on to try to keep it from falling back down and smacking you in the head. Note that this hurts a lot if it happens - don't ask me how I know this This will give you the 3/8" play or so you need. Then you can have a good chance to get the 2 bolts hand started through the #1 arm. Be VERY careful as these are easily stripped or mangled with the weird tension going on and the totally screwed up angles going on.
Once you get the bolts hand tight in, put them most of the way in. Then with a mallet or something tap the sleeve in for the strut rod bushing. Also be sure here not to screw up the threads on the way in. as soon as you can see some threads, you can pop the nut on and hit it with an impact wrench to push it the rest of the way in. Then pull the nut off and put the rest of the bracketing back on.
Another tip is on the upper arm. The inner walls or whatever you would call them that contact the faces of the bushings on the inner side, might catch on the bushing a little on the way in. You can just tap or pry them a tiny bit so they are bent outwards just a little. Just a tiny bit on the lip facing right at you. This will give a little bit more room to slide them in. They will then go in with no problem at all.
This probably makes no sense reading it, but just take this with you and read it while staring at it and it will make more sense. It it still makes no sense let me know and I can point this stuff out for you.
Hope this helps, I've done like 5 already so I'm still learning more tricks.
I have some other tricks to get the old bushings out if you don't have a press, you need an air saw and some punches and a hammer, let me know if you need some pointers on that also.
The only thing you pretty much need a press for sure is to put in the new strut rod bushings, you have to put them in dead square and with a lot of force and very slowly.
Be SURE to grease the faces of the bushings well, and also clean and grease the areas of the car that contact the faces.
Here's some very helpful hints I've learned already so far:
On the strut rod, you will have a *#**&$&^@*@ of a time putting it back in when you try to bolt it to the lower #1 control arm.
I have discovered that the best way is to jack up the #1 arm a ways, maybe 1/2 way up before the whole weight of the car is on it. Then slide the strut rod up onto the stud on the car but without the inner sleeve on it. Put the nut on to try to keep it from falling back down and smacking you in the head. Note that this hurts a lot if it happens - don't ask me how I know this
This will give you the 3/8" play or so you need. Then you can have a good chance to get the 2 bolts hand started through the #1 arm. Be VERY careful as these are easily stripped or mangled with the weird tension going on and the totally screwed up angles going on.Once you get the bolts hand tight in, put them most of the way in. Then with a mallet or something tap the sleeve in for the strut rod bushing. Also be sure here not to screw up the threads on the way in. as soon as you can see some threads, you can pop the nut on and hit it with an impact wrench to push it the rest of the way in. Then pull the nut off and put the rest of the bracketing back on.
Another tip is on the upper arm. The inner walls or whatever you would call them that contact the faces of the bushings on the inner side, might catch on the bushing a little on the way in. You can just tap or pry them a tiny bit so they are bent outwards just a little. Just a tiny bit on the lip facing right at you. This will give a little bit more room to slide them in. They will then go in with no problem at all.
This probably makes no sense reading it, but just take this with you and read it while staring at it and it will make more sense. It it still makes no sense let me know and I can point this stuff out for you.
Hope this helps, I've done like 5 already so I'm still learning more tricks.
I have some other tricks to get the old bushings out if you don't have a press, you need an air saw and some punches and a hammer, let me know if you need some pointers on that also.
The only thing you pretty much need a press for sure is to put in the new strut rod bushings, you have to put them in dead square and with a lot of force and very slowly.
09-30-05, 01:28 AM
#94
Lexus Test Driver
Oh yeah and also be very sure to radius or round the inside edges on the strut rod. If not, the arm will cut the bushing and cause some serious bushing failure.
Ok I have to stop typing and go lie down, I actually just made myself on the verge of yakking after breaking in a stoptech brake kit on a car. BLEHHHHHHHH
Let me know how it goes or if you need more help.
Ok I have to stop typing and go lie down, I actually just made myself on the verge of yakking after breaking in a stoptech brake kit on a car. BLEHHHHHHHH
Let me know how it goes or if you need more help.
09-30-05, 04:25 AM
#95

Originally Posted by DoubleWhoosh
The teeth are required if you have a rubber bushing, as it will try to twist back and forth. Of course in that location you only have say 40% contact area holding the sleeve in place so it's pretty brutal on a sleeve if it was in a rubber bushing and had no teeth.. These don't need it because the sleeve pivots inside the bushing, so there is no tension per se. It just sits there. The movement for alignment with the eccentric bolt is not really affected by this, you'll understand more once you actually get it in there.
Be SURE to grease the faces of the bushings well, and also clean and grease the areas of the car that contact the faces.
Here's some very helpful hints I've learned already so far:
On the strut rod, you will have a *#**&$&^@*@ of a time putting it back in when you try to bolt it to the lower #1 control arm.
I have discovered that the best way is to jack up the #1 arm a ways, maybe 1/2 way up before the whole weight of the car is on it. Then slide the strut rod up onto the stud on the car but without the inner sleeve on it. Put the nut on to try to keep it from falling back down and smacking you in the head. Note that this hurts a lot if it happens - don't ask me how I know this This will give you the 3/8" play or so you need. Then you can have a good chance to get the 2 bolts hand started through the #1 arm. Be VERY careful as these are easily stripped or mangled with the weird tension going on and the totally screwed up angles going on.
Once you get the bolts hand tight in, put them most of the way in. Then with a mallet or something tap the sleeve in for the strut rod bushing. Also be sure here not to screw up the threads on the way in. as soon as you can see some threads, you can pop the nut on and hit it with an impact wrench to push it the rest of the way in. Then pull the nut off and put the rest of the bracketing back on.
Another tip is on the upper arm. The inner walls or whatever you would call them that contact the faces of the bushings on the inner side, might catch on the bushing a little on the way in. You can just tap or pry them a tiny bit so they are bent outwards just a little. Just a tiny bit on the lip facing right at you. This will give a little bit more room to slide them in. They will then go in with no problem at all.
This probably makes no sense reading it, but just take this with you and read it while staring at it and it will make more sense. It it still makes no sense let me know and I can point this stuff out for you.
Hope this helps, I've done like 5 already so I'm still learning more tricks.
I have some other tricks to get the old bushings out if you don't have a press, you need an air saw and some punches and a hammer, let me know if you need some pointers on that also.
The only thing you pretty much need a press for sure is to put in the new strut rod bushings, you have to put them in dead square and with a lot of force and very slowly.
Be SURE to grease the faces of the bushings well, and also clean and grease the areas of the car that contact the faces.
Here's some very helpful hints I've learned already so far:
On the strut rod, you will have a *#**&$&^@*@ of a time putting it back in when you try to bolt it to the lower #1 control arm.
I have discovered that the best way is to jack up the #1 arm a ways, maybe 1/2 way up before the whole weight of the car is on it. Then slide the strut rod up onto the stud on the car but without the inner sleeve on it. Put the nut on to try to keep it from falling back down and smacking you in the head. Note that this hurts a lot if it happens - don't ask me how I know this
This will give you the 3/8" play or so you need. Then you can have a good chance to get the 2 bolts hand started through the #1 arm. Be VERY careful as these are easily stripped or mangled with the weird tension going on and the totally screwed up angles going on.Once you get the bolts hand tight in, put them most of the way in. Then with a mallet or something tap the sleeve in for the strut rod bushing. Also be sure here not to screw up the threads on the way in. as soon as you can see some threads, you can pop the nut on and hit it with an impact wrench to push it the rest of the way in. Then pull the nut off and put the rest of the bracketing back on.
Another tip is on the upper arm. The inner walls or whatever you would call them that contact the faces of the bushings on the inner side, might catch on the bushing a little on the way in. You can just tap or pry them a tiny bit so they are bent outwards just a little. Just a tiny bit on the lip facing right at you. This will give a little bit more room to slide them in. They will then go in with no problem at all.
This probably makes no sense reading it, but just take this with you and read it while staring at it and it will make more sense. It it still makes no sense let me know and I can point this stuff out for you.
Hope this helps, I've done like 5 already so I'm still learning more tricks.
I have some other tricks to get the old bushings out if you don't have a press, you need an air saw and some punches and a hammer, let me know if you need some pointers on that also.
The only thing you pretty much need a press for sure is to put in the new strut rod bushings, you have to put them in dead square and with a lot of force and very slowly.
heres a pic of it


on the putting back arm part , when i changed my lower control arm (the camber adjusting one) i bolted the caster arm to it first then used a second jack to move the susp assembly just into the right spot so the angle was there to re connect but i will try your way first
thanks again
next week i will do the upper a arms and then the week after the lower arm.. i feel that the castor arm bushing replacement will do the most good then the a arm next so hence why i am doing the caster arm first
09-30-05, 06:10 PM
#96
well heres the run down impressions
i did the install of the new bushings into my spare arms last night, as stated before the workmanship and quality is top shelf , but then again i would expect nothing less from daizen..
i swapped the arms out today (todd thanks for that piece of advice for the damm arm fell down and just missed my forehead ) arms are in all faces of bushings greased beyond your imagination..
driving impressions this afternoon
all i can say is

these bushings were designed well.. they removed all the slop in the front end.. rominl was right , after changing this bushing all remaining vibration shimmy i had is permantly gone, i say permantly because i am not even getting the slight tire warm up shimmy.. car tracks truer, steering is on the money or should i say turnin response.. just touch the wheel and i am in the next lane
i am soooo surprised more have not been flodding todds emails with orders as yet.. this kit is the cure for the dredded on and off vibration/shimmy issues and is the answer for all us perf minded drivers out there..the oem bushing was designed with tooo much comfort in mind ,, to much play = too much distortion... Daizen and todd have answered our prayers
get this guys , i only did the castor arms so far, i have not even touched the upper a arm or lower control as yetbut will have those done after next week
now i have a extra set of lower control arms and castor arms , i sense many are on the fence because of the high labor costs they want to do the bushing swap, maybe i could do a swap program for you guys , i send you a completed arm and you send me back your old arms...it would eliminate down time and all you would do is swap the arms which does not take more then 20 mins each side... just a thought to help out
i did the install of the new bushings into my spare arms last night, as stated before the workmanship and quality is top shelf , but then again i would expect nothing less from daizen..
i swapped the arms out today (todd thanks for that piece of advice for the damm arm fell down and just missed my forehead
) arms are in all faces of bushings greased beyond your imagination..driving impressions this afternoon
all i can say is
these bushings were designed well.. they removed all the slop in the front end.. rominl was right , after changing this bushing all remaining vibration shimmy i had is permantly gone, i say permantly because i am not even getting the slight tire warm up shimmy.. car tracks truer, steering is on the money or should i say turnin response.. just touch the wheel and i am in the next lane
i am soooo surprised more have not been flodding todds emails with orders as yet.. this kit is the cure for the dredded on and off vibration/shimmy issues and is the answer for all us perf minded drivers out there..the oem bushing was designed with tooo much comfort in mind ,, to much play = too much distortion... Daizen and todd have answered our prayers
get this guys , i only did the castor arms so far, i have not even touched the upper a arm or lower control as yetbut will have those done after next week
now i have a extra set of lower control arms and castor arms , i sense many are on the fence because of the high labor costs they want to do the bushing swap, maybe i could do a swap program for you guys , i send you a completed arm and you send me back your old arms...it would eliminate down time and all you would do is swap the arms which does not take more then 20 mins each side... just a thought to help out
The following users liked this post:
tiguy99 (08-11-17)
 09-30-05, 07:23 PM
#98

Originally Posted by lexforlife
now i have a extra set of lower control arms and castor arms , i sense many are on the fence because of the high labor costs they want to do the bushing swap, maybe i could do a swap program for you guys , i send you a completed arm and you send me back your old arms...it would eliminate down time and all you would do is swap the arms which does not take more then 20 mins each side... just a thought to help out
Hey Ed sign me up.
TM Eng. notified me that the bushings for 98-00 are in. I'm expecting them anyday now.
My biggest fear with this whole thing is getting the bushings switched out.
Ivan
3dog
09-30-05, 11:36 PM
#100
hey todd, thanks so much for the info, and sorry about teh brakes break in  go lie down, another long trip for you coming up.....
and ed, i am so glad you got teh bushings and loving it!!!! so now you know what i mean on the new bushings taking away the little shimming and vibration once and for all? it's really amazing. it's really hard to describe in some sense!
go lie down, another long trip for you coming up.....and ed, i am so glad you got teh bushings and loving it!!!! so now you know what i mean on the new bushings taking away the little shimming and vibration once and for all? it's really amazing. it's really hard to describe in some sense!
09-30-05, 11:45 PM
#101
Lead Lap
Join Date: Dec 2003
Location: California
Posts: 566
Likes: 0
Received 0 Likes
on
0 Posts
Originally Posted by lexforlife
now i have a extra set of lower control arms and castor arms , i sense many are on the fence because of the high labor costs they want to do the bushing swap, maybe i could do a swap program for you guys , i send you a completed arm and you send me back your old arms...it would eliminate down time and all you would do is swap the arms which does not take more then 20 mins each side... just a thought to help out
I'd be defintiely down for this as well...
 10-01-05, 01:27 AM
#102
Lexus Test Driver
Originally Posted by rominl
hey todd, thanks so much for the info, and sorry about teh brakes break in go lie down, another long trip for you coming up.....
go lie down, another long trip for you coming up.....
10-01-05, 01:28 AM
#103
Lexus Test Driver
Originally Posted by 3dog
Hey Ed sign me up.
TM Eng. notified me that the bushings for 98-00 are in. I'm expecting them anyday now.
My biggest fear with this whole thing is getting the bushings switched out.
Ivan
3dog
TM Eng. notified me that the bushings for 98-00 are in. I'm expecting them anyday now.
My biggest fear with this whole thing is getting the bushings switched out.
Ivan
3dog
10-01-05, 06:15 AM
#104
Originally Posted by DoubleWhoosh
The year break is 2000, only the 98-99 are available at the present time.
todd question for you
how come the picture on your site showing the kit has 2 large metal sleeves and the one i rec'd does not, also the lower control arm bushings look different
10-01-05, 07:38 AM
#105

Originally Posted by lexforlife
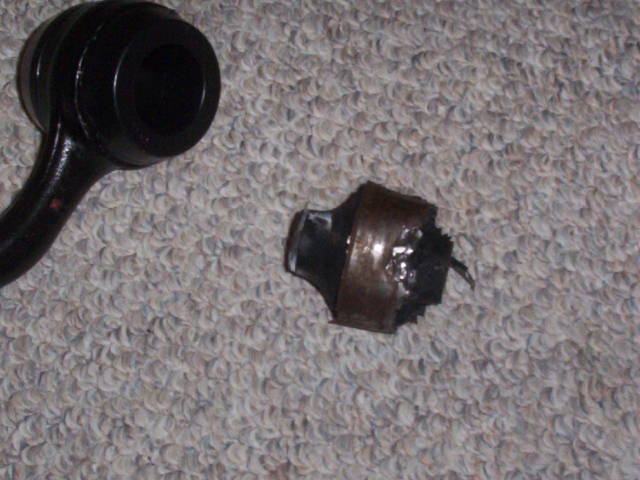
thank you kind sir , todd for the info , the removal of the old bushings i actually used my own air chisel and carefully went around the circumfrance of the metal sleeve and squahed it.. then by the force of the chisel kinda acting like a jack hammer and using the weight of my car on the arm to hold it in place and some liquid wrench the whole thing just came out in one piece
heres a pic of it
on the putting back arm part , when i changed my lower control arm (the camber adjusting one) i bolted the caster arm to it first then used a second jack to move the susp assembly just into the right spot so the angle was there to re connect but i will try your way first
thanks again
next week i will do the upper a arms and then the week after the lower arm.. i feel that the castor arm bushing replacement will do the most good then the a arm next so hence why i am doing the caster arm first
Wow Ed I'm impressed, oh not with the bushings but the fact that you got away with taking pics of them on the carpet and live to post another day day, I would be shot on sight.
