
my suspension and ignition project
 01-10-09, 04:12 PM
#1
my car is a 93 with 155k on it. my rear bushing were shot from age...and drifting too lol
i bought a full set of prothane polyurethane bushings from ebay. front and rear bushing kits cost 165 shipped.
FYI: daizen bushings are nothing more then renamed and upmarked prothane products. i have both sets of front control arm bushings and the daizen ones even have the same part number cast in them.
i bought another subframe from my old boss, may be rest in peace, out of a 92 sc400 with 70K. i got the whole subframe with differential and brakes for 175 bucks.
now i have all the gear ratios available for the SC. 3.78 from sc400, 4.08 from sc300 mt, and 4.28 from sc300 auto. different gearing for different tracks? lol
the stock subframe bushings are very soft and after all that age are worn out. i installed the new subframe with stock bushings because i ran out of time and the metal supplier by me wasnt able to get steel 4.5" diameter round stock in time.
i will be machining my own subframe bushing/inserts like they have available for the nissan community.
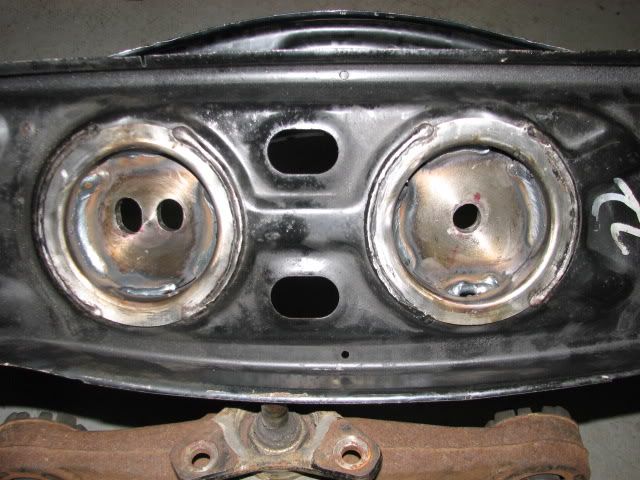
i did make solid differential mounts though. the stock ones are rubber and extremely soft and worn out. i machined the disks and had my dad weld them in. i believe titan motorsports offers same type of upgrade but they want 100 bucks for the parts. it took about 1 hour of work and free steel to machine them on the lathe.
here it in the subframe:
the whole subframe was painted after all the welding.
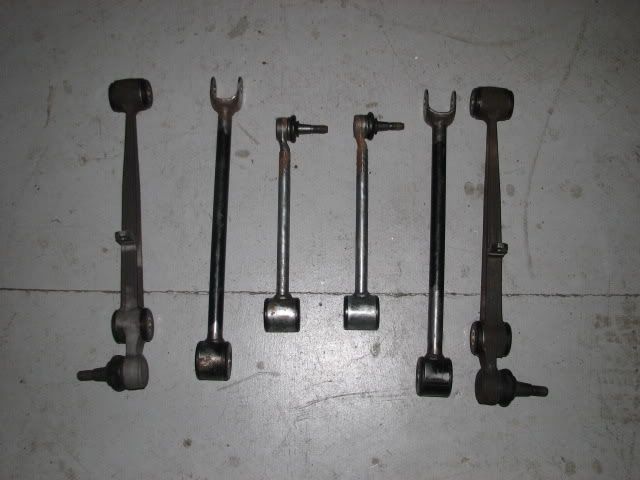
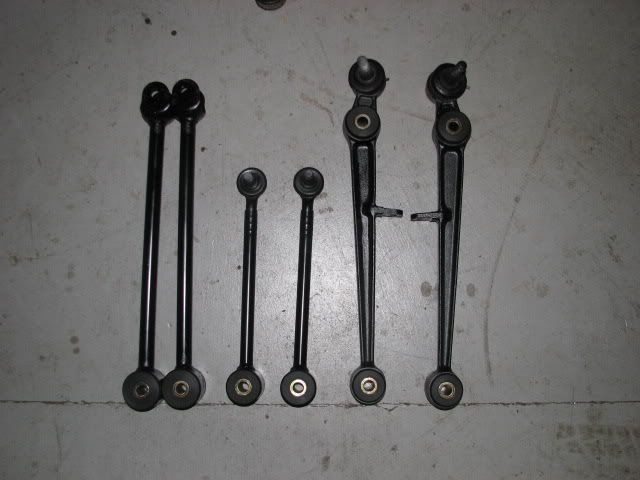
i installed all the bushing in the control arms and painted them. mmm pretty.
prior to sandblasting and paint
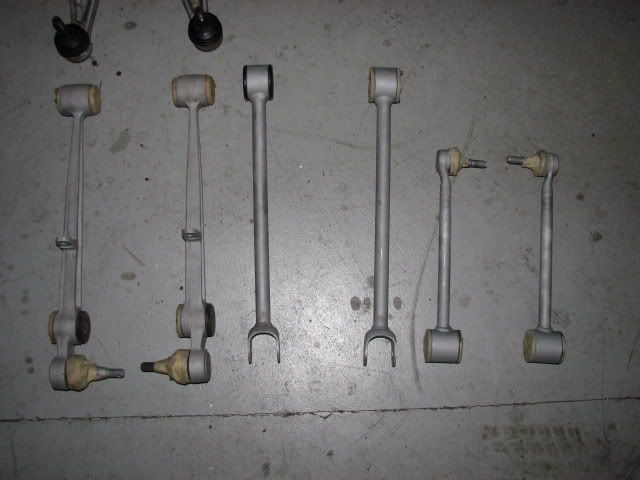
sandblasted
afterwards
look!!! car with no subframe, wheels, or exhaust. the old girl was naughty so i had to take her bottom off
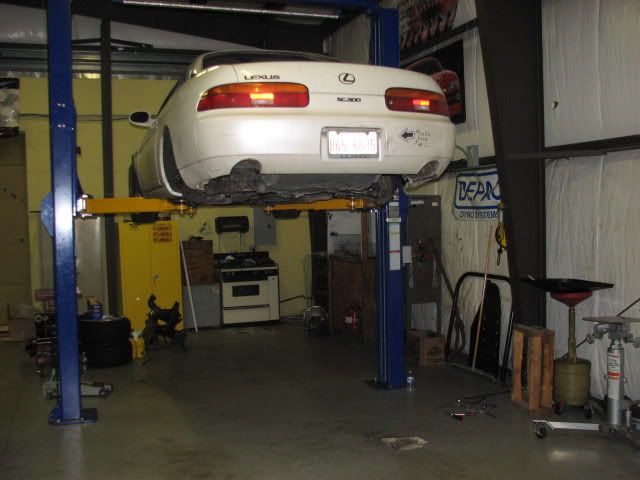
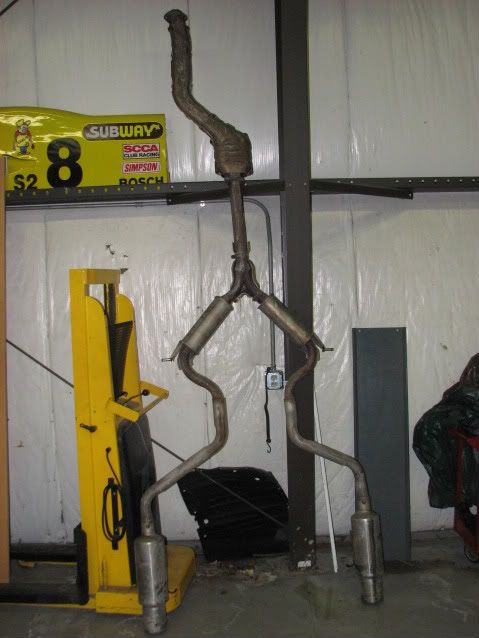
took the exhaust off in one piece from the header...on my own. pretty easy actually
oh and i also did a spark plug wire conversion. if you look under the hood of your car you will see that toyota/lexus use a really thin wire with a retarded looking clip. the point is i wanted upgrade to a different ignition coil like an MSD
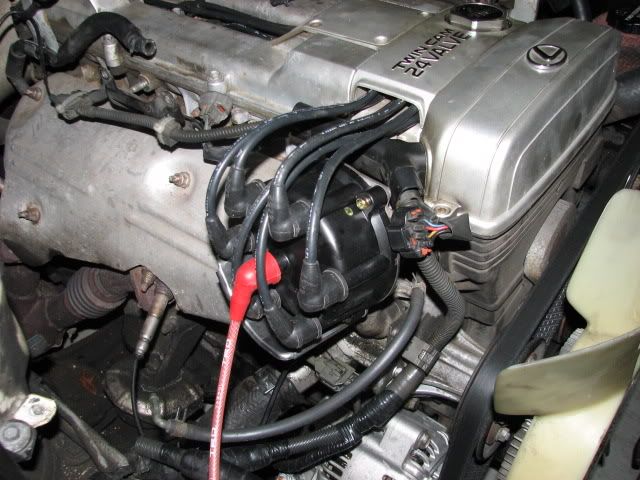
guess what car/motor this wire setup is from...
then i wanted to also COMPLETELY get rid of the EGR system
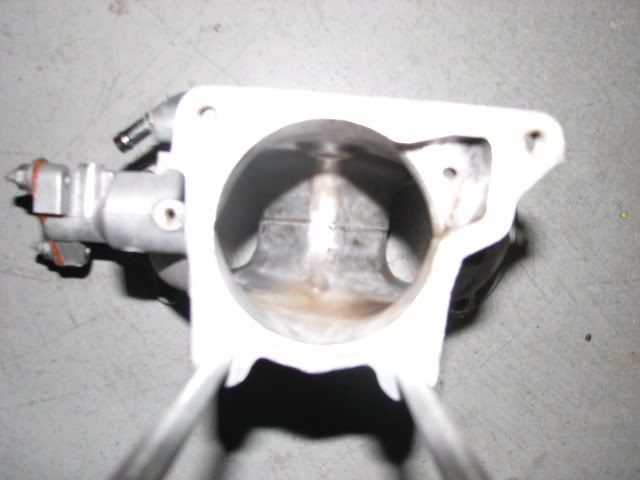
this is what my throttle body and middle y-pipe looked like after 5000 miles. i did my plugs again in end of october.
disgusting
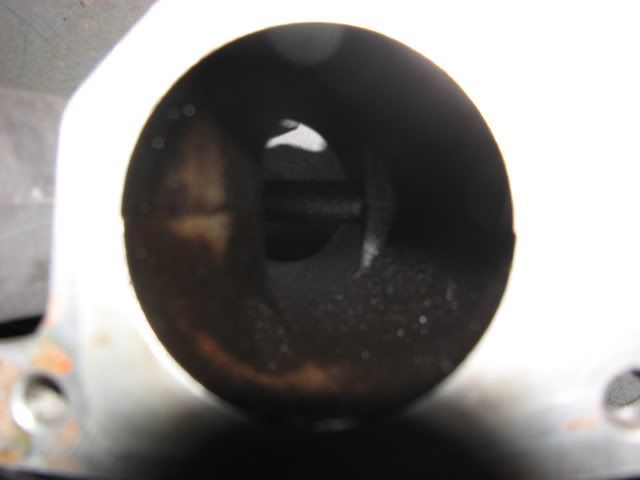
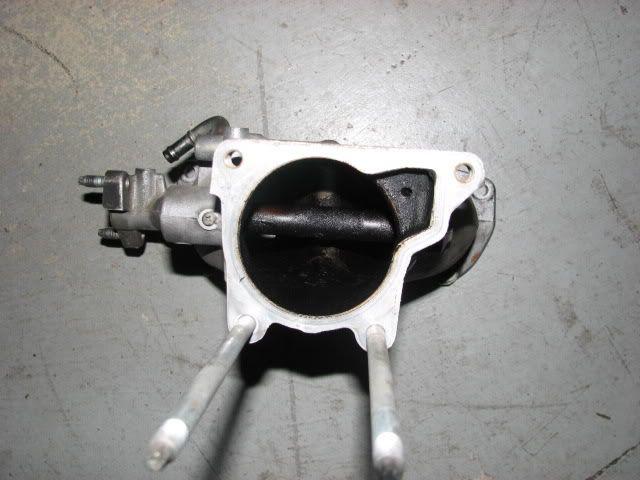
note the pipe going horizontally across the y-pipe in the last picture. this is what the egr system feeds the gasses through and into the intake system
i bought a full set of prothane polyurethane bushings from ebay. front and rear bushing kits cost 165 shipped.
FYI: daizen bushings are nothing more then renamed and upmarked prothane products. i have both sets of front control arm bushings and the daizen ones even have the same part number cast in them.
i bought another subframe from my old boss, may be rest in peace, out of a 92 sc400 with 70K. i got the whole subframe with differential and brakes for 175 bucks.
now i have all the gear ratios available for the SC. 3.78 from sc400, 4.08 from sc300 mt, and 4.28 from sc300 auto. different gearing for different tracks? lol
the stock subframe bushings are very soft and after all that age are worn out. i installed the new subframe with stock bushings because i ran out of time and the metal supplier by me wasnt able to get steel 4.5" diameter round stock in time.
i will be machining my own subframe bushing/inserts like they have available for the nissan community.
i did make solid differential mounts though. the stock ones are rubber and extremely soft and worn out. i machined the disks and had my dad weld them in. i believe titan motorsports offers same type of upgrade but they want 100 bucks for the parts. it took about 1 hour of work and free steel to machine them on the lathe.
here it in the subframe:
the whole subframe was painted after all the welding.
i installed all the bushing in the control arms and painted them. mmm pretty.
prior to sandblasting and paint
sandblasted
afterwards
look!!! car with no subframe, wheels, or exhaust. the old girl was naughty so i had to take her bottom off
took the exhaust off in one piece from the header...on my own. pretty easy actually
oh and i also did a spark plug wire conversion. if you look under the hood of your car you will see that toyota/lexus use a really thin wire with a retarded looking clip. the point is i wanted upgrade to a different ignition coil like an MSD
guess what car/motor this wire setup is from...
then i wanted to also COMPLETELY get rid of the EGR system
this is what my throttle body and middle y-pipe looked like after 5000 miles. i did my plugs again in end of october.
disgusting
note the pipe going horizontally across the y-pipe in the last picture. this is what the egr system feeds the gasses through and into the intake system
 01-10-09, 04:15 PM
#2
i cleaned everything up
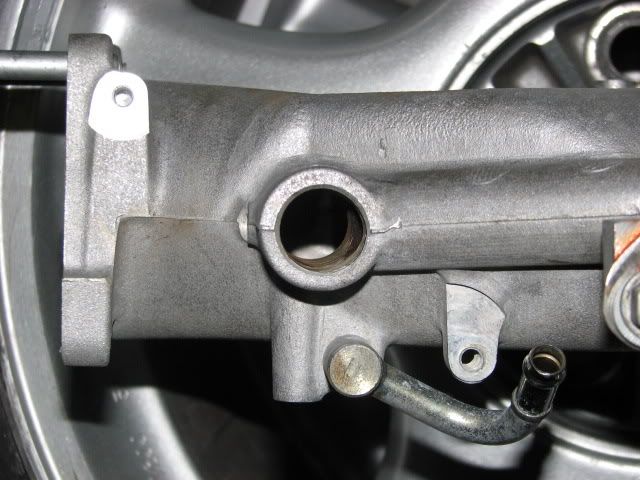
this is where the fun starts. i took out the freeze plug on the side of the manifold and used a drill press to drill out the egr pipe that use to be in the intake pipe.
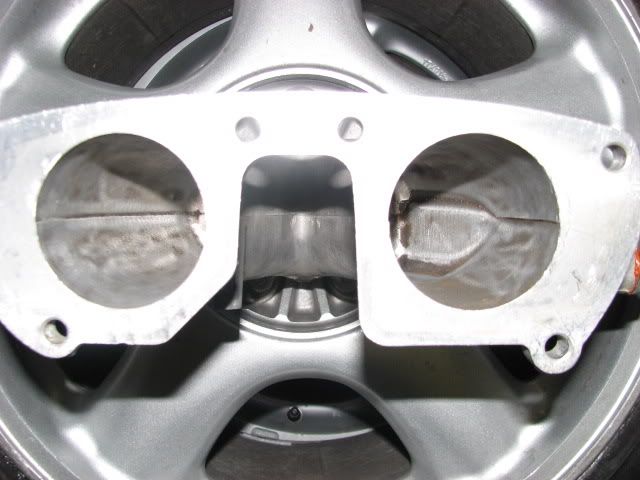
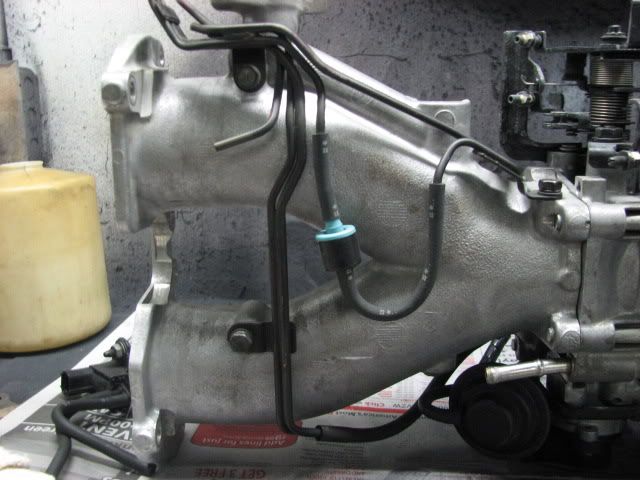
y-pipe with no horizontal egr pipe
since all the rg stuff was gone i got rid of most of the vacuum lines. the only ones left are for the FPR and heater valve lol
the metal vacuum lines on the bottom of the y-pipe are gone
now the y-pipe removal takes 20 minutes because i can get a really ong extension with a socket from the passanger side by the throttle body all the way to the bottom bolts by the plenum. finally scored
this is where the fun starts. i took out the freeze plug on the side of the manifold and used a drill press to drill out the egr pipe that use to be in the intake pipe.
y-pipe with no horizontal egr pipe
since all the rg stuff was gone i got rid of most of the vacuum lines. the only ones left are for the FPR and heater valve lol
the metal vacuum lines on the bottom of the y-pipe are gone
now the y-pipe removal takes 20 minutes because i can get a really ong extension with a socket from the passanger side by the throttle body all the way to the bottom bolts by the plenum. finally scored
Last edited by 5sp_jzz30; 01-10-09 at 04:21 PM.
01-10-09, 04:18 PM
#3
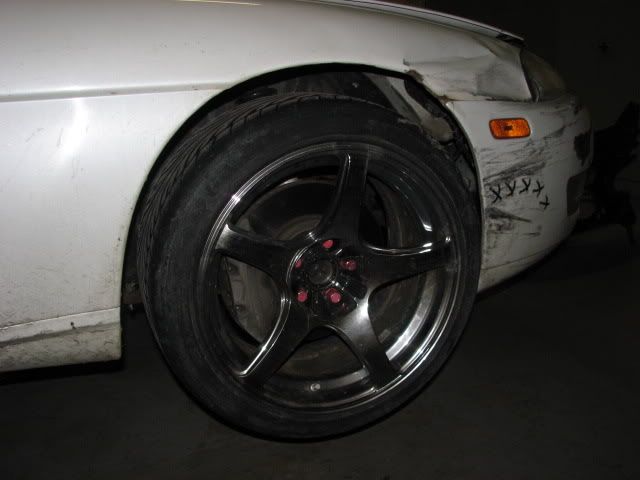
last step was to unslam the car for the winter. my 18x10 enkei rp03 went into the garage and the supra tt winter wheels went on.
this is the first time in a long time i have been able to get on and off the lift without wood blocks or a low profile jack
4x4 status
oh and also bought ANOTHER set of wheels. got some 17x9 and 17x10 bbs track wheels for less then i paid for 1 of my enkei rp03's lol
this is the first time in a long time i have been able to get on and off the lift without wood blocks or a low profile jack
4x4 status
oh and also bought ANOTHER set of wheels. got some 17x9 and 17x10 bbs track wheels for less then i paid for 1 of my enkei rp03's lol
01-10-09, 06:18 PM
#5
thats why i removed it. no reason to keep it if the egr is disabled anyways. i made the block off plates and then decided to mod the manifold.
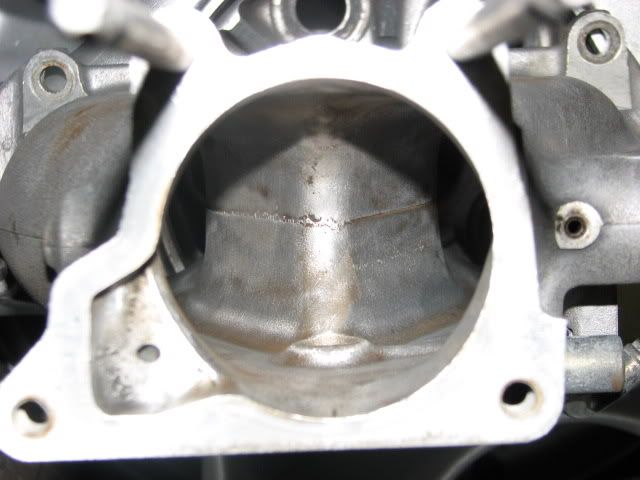
there is also a butterfly that is vacuum activated in the plenum. it is usually closed but i guess at higher rpm it opens up. i think it is made to distribute the air better at high rpm but it dont see it that much help since our manifold is a symmetrical design anyways compared to the 2jzgte or the 1jzgte.
i think i will remove the plenum at one point or another and remove that butterfly as well or at least mod it so it always stays closed.
Trending Topics
 01-11-09, 10:18 AM
#9
the distributor cap and the spark plug wires are from a mk3 supra. the motor is 7m-ge. the cap bolts up right to the stock distributor. the 7m-ge wires fit almost perfect. i had to do a minor trim on the boot to get it to fit perfect. trimming all wires took a total of about 5 minutes
01-11-09, 02:00 PM
#10
Pole Position
iTrader: (1)
Join Date: Jun 2008
Location: Florida
Posts: 317
Likes: 0
Received 0 Likes
on
0 Posts
I am with ya there i bought the same ones of eBay about 4 months ago.
I bought a full set of prothane polyurethane bushings from ebay. front and rear bushing kits cost 165 shipped.
FYI: daizen bushings are nothing more then renamed and upmarked prothane products. i have both sets of front control arm bushings and the daizen ones even have the same part number cast in them.
 01-14-09, 06:53 AM
#15
Lexus Test Driver
iTrader: (5)
Join Date: Jan 2008
Location: New York
Posts: 838
Likes: 0
Received 0 Likes
on
0 Posts
It was done on my 97 maxima with a 3.5 motor when I removed my EGR system...