Adjustable Sway Bar End Links


 04-11-12, 09:47 PM
#32
Lexus Test Driver
Thread Starter
iTrader: (4)

Join Date: Sep 2010
Location: DE
Posts: 875
Likes: 0
Received 0 Likes
on
0 Posts

Those end links look good, but, your rears are facing backwards at a flat angle, I thought they were supposed to be up and down in tandem with the coil overs basically angle wise.
04-12-12, 12:30 AM
#34
I gotta play with bushing sizes. I bought the wrong ones so its hard to swivel the bar into place but regardless, in theory as long as the bar is attached to the chassis as well as the control arms and nothing is loose then it is functional. But then again suspension geometry gets out of whack once u lower the car past a reasonable height.
04-12-12, 07:29 AM
#35
Lexus Test Driver
iTrader: (5)
Join Date: Jan 2008
Location: New York
Posts: 838
Likes: 0
Received 0 Likes
on
0 Posts
I gotta play with bushing sizes. I bought the wrong ones so its hard to swivel the bar into place but regardless, in theory as long as the bar is attached to the chassis as well as the control arms and nothing is loose then it is functional. But then again suspension geometry gets out of whack once u lower the car past a reasonable height.
Also, how does one determine - visually - the ends links are putting preload on the LCA's?
04-12-12, 02:54 PM
#36
YEa my front bushes are 30 something mm the rears are 22 i think but they appear to be too small i got them from energy suspension. maybe ill just buy the daizen ones since they are exact fit but i was just experimenting. Visually speaking if u had stock suspension and remove ur end links, the car would rise up a just a smidge, sine the bar isng pulling it down, since the bar sits higher than the LCA's. In a lowered car though the suspension geometry is all out of whack, suspension arms start pointing up when they are supposed to be flat or pointing down. So even though the bar may now sit lower than the LCA, the bar will still be in effect because at the end of the day it is still attached both sides together, the chassis, and both LCA's, providing that preloaded effect, since the bar in ways acts as a giant spring.
 04-15-12, 06:43 PM
#44
Lexus Test Driver
iTrader: (14)
Join Date: Jun 2009
Location: CA
Posts: 1,072
Likes: 0
Received 0 Likes
on
0 Posts
I got the rod ends from mcmaster-carr, 4 male-threaded shanks and 4 female-threaded shanks, since each corner needs 1 male and 1 female threaded shanks.
http://www.mcmaster.com/#catalog/118/1187/=h4fxss
I personally went for 3/8-24 for the thread-size, just b/c the "self lubricating" enticed me since it sounded less maintenance-needing, but you could still go to any hardware store or something to see what the stock endlink's threading is and order the same metric size.
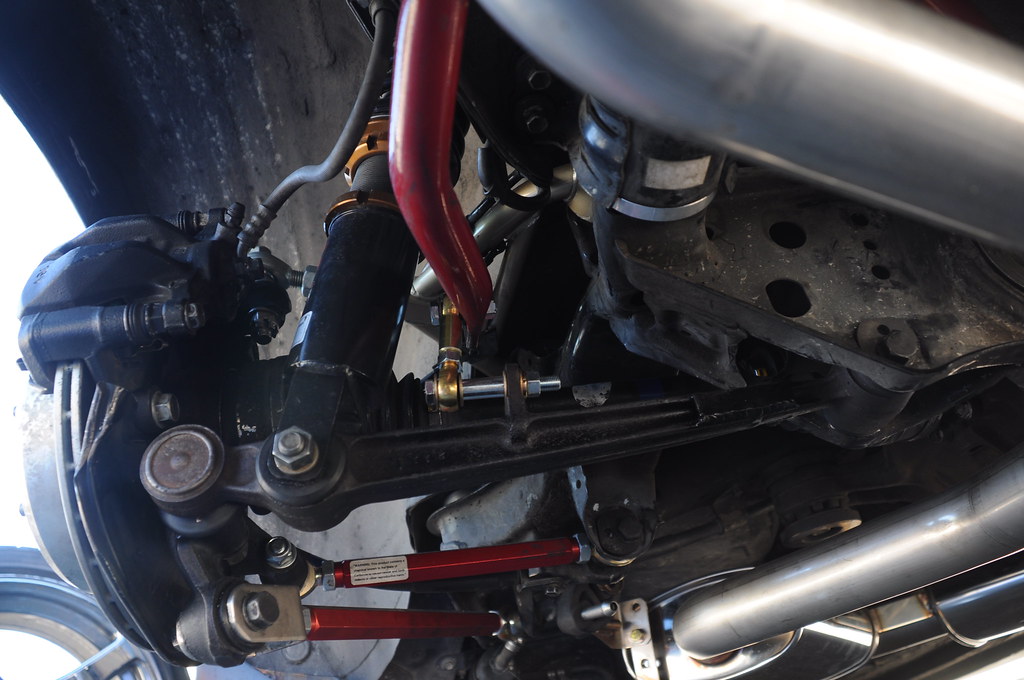
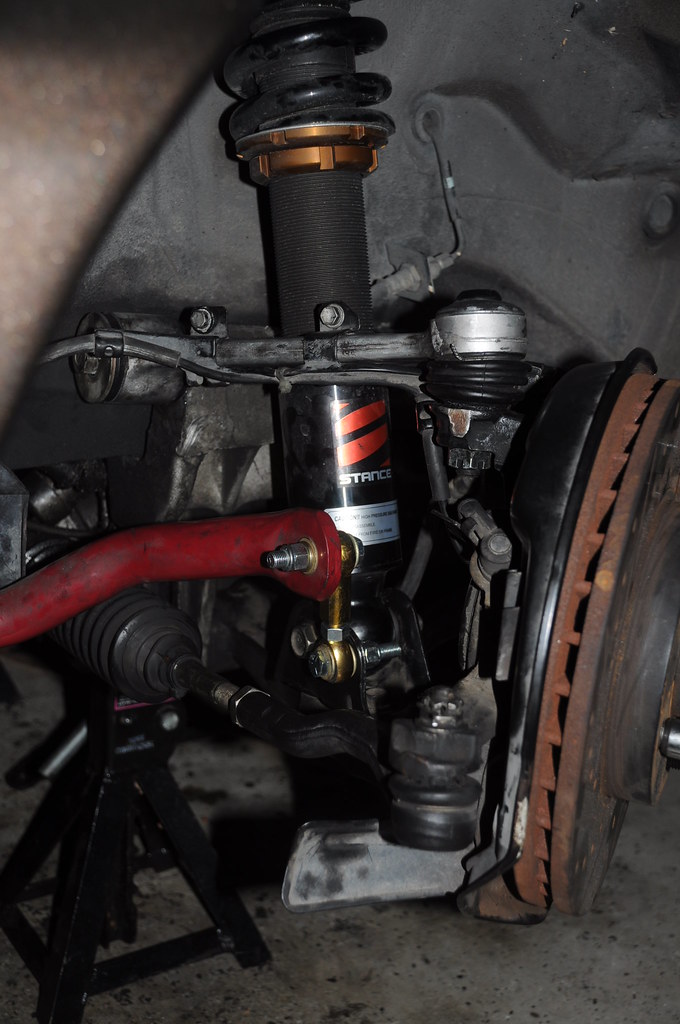
The sc's endlinks are pretty damn short, so there's no need to buy long threaded rods or anything, which is why i decided to just thread together a male and female.
Then, the rest are just washers(a bunch), bolts (they should be the same threading as the "shank" or whatever, you'll need 8, but you'll have to do some mocking up and test fitting to determine the length), lock nuts, spacers if necessary, and nuts to lock the rod ends together.
Looks somethin like this w/o the spacers.

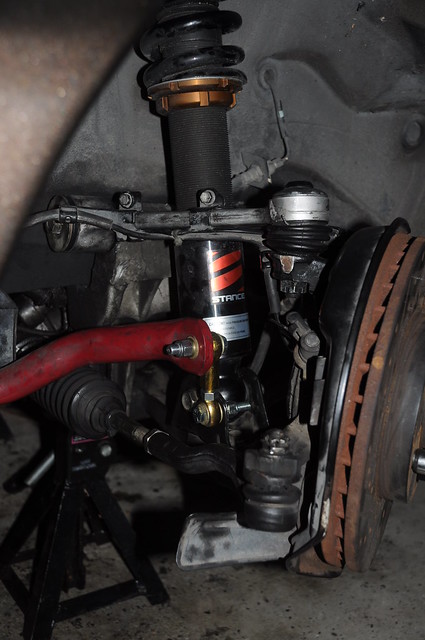
i think i replaced the bolts with shorter ones after that pic was taken.
As for the subframe bushings, battleversion's kit replaces all 4 subframe bushings. The front 2 get pried out. For the rear 2, you'll have to unbolt the bushing from the subframe and burn it out.
I'm pretty there's no way around dropping the subframe to do replace the bushings, as access is terrible with it raised up into the chassis.
http://www.mcmaster.com/#catalog/118/1187/=h4fxss
I personally went for 3/8-24 for the thread-size, just b/c the "self lubricating" enticed me since it sounded less maintenance-needing, but you could still go to any hardware store or something to see what the stock endlink's threading is and order the same metric size.
The sc's endlinks are pretty damn short, so there's no need to buy long threaded rods or anything, which is why i decided to just thread together a male and female.
Then, the rest are just washers(a bunch), bolts (they should be the same threading as the "shank" or whatever, you'll need 8, but you'll have to do some mocking up and test fitting to determine the length), lock nuts, spacers if necessary, and nuts to lock the rod ends together.
Looks somethin like this w/o the spacers.

i think i replaced the bolts with shorter ones after that pic was taken.
As for the subframe bushings, battleversion's kit replaces all 4 subframe bushings. The front 2 get pried out. For the rear 2, you'll have to unbolt the bushing from the subframe and burn it out.
I'm pretty there's no way around dropping the subframe to do replace the bushings, as access is terrible with it raised up into the chassis.