Control Arm Bushings ... Install
 11-24-02, 12:11 AM
#1
Lexus Champion
Thread Starter

Join Date: May 2002
Location: California
Posts: 1,742
Likes: 0
Received 0 Likes
on
0 Posts
I purchased the DAIZEN control arm bushings from TMEngineering last week and installed them today.
Installation was straight forward and simple to accomplish.
It required a torch, long socket wrench, ball joint separator, and other standard sockets and wrenches.
It took a total of 5 hours to complete from start to finish. However, I took a 1 hours lunch break and then spent 1 hour in prep and another hour to clean up.
The bushings fit perfectly into the arms once they were cleaned properly using a $2 drill bit wire brush from Home Depot. The only difficult step in the installation is separating the ball joints from the steering knuckle. This required the use of a special tool that was ~$16 from handsontools.com. I used this method to prevent damage to my ball joint boots from a pickle fork.
The performance difference is instantly noticable. No more tramlining, clunk, and squishy steering. I am very impressed with the product and would recommend them to EVERY SC owner. They are a must have and I would suggest installing them into every SC built. Even if you ordered a brand new set of control arm, I would suggest pulling out the inferior rubber setup for the Daizens. I will detail more reasons in my How-2 but the simple reason is because the stocks suck.
MW
 11-24-02, 01:37 AM
#2
Racer
Glad to hear it went so smoothly. I wonder why so many other posts mention how hard it is and how long it takes to clean out the old bushings- where yours really fused to the metal, or new enough so that the torch melted them right off?
You might have inspired me to consider beginning to think about exploring the possibility of maybe doing the same thing to my 10 year old bushings! But I don't think mine have deteriorated yet- I don't get any clunks, and I think the steering is tight. But since it is the only car I ever drive, I have no basis for comparison.
You might have inspired me to consider beginning to think about exploring the possibility of maybe doing the same thing to my 10 year old bushings! But I don't think mine have deteriorated yet- I don't get any clunks, and I think the steering is tight. But since it is the only car I ever drive, I have no basis for comparison.
11-24-02, 02:17 AM
#3
Lexus Champion
Thread Starter
Join Date: May 2002
Location: California
Posts: 1,742
Likes: 0
Received 0 Likes
on
0 Posts
Perry,
My car is a 92 SC300 and the bushings have never been replaced or worked on. I found them to come out very quickly with the proper technique. Here's the method I followed and had excellent success with.
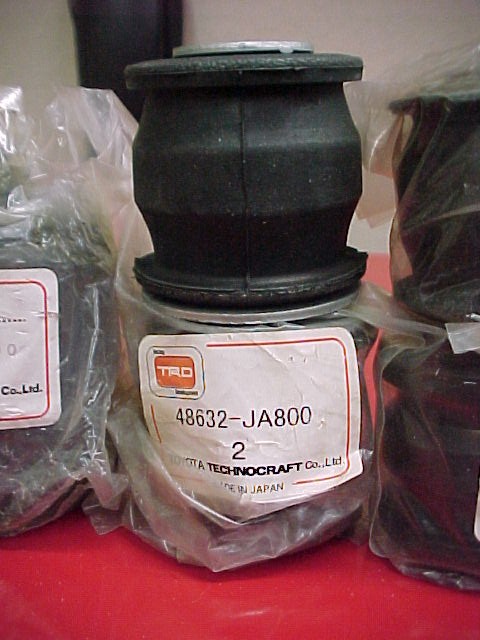
Torch out the centers by applying heat down the center of the inner sleeve. Takes about 3-5 minutes before the sleeve just falls out to the floor. Next, heat one spot on the outer shell for about 3 minutes and then pry a large flathead screwdriver between the shell and the bushing. It will take little pressure to slide the screwdriver safely from top to bottom. Now just work the screwdriver around the shell along with the torch and the bushing will just fall out. Takes a few minutes each. 10minutes at most. Take a look at the pic, the bush came out perfectly on the first try. Almost perfectly in the factory shape.

Then just take a $2 wire drill brush and clean out the residue.

Now you get a perfectly clean setup.

The new bush fits PERFECTLY and he includes all the grease you will need.

Let me know what other pics you may need.
Really, this was pretty straight forward.
MW
My car is a 92 SC300 and the bushings have never been replaced or worked on. I found them to come out very quickly with the proper technique. Here's the method I followed and had excellent success with.
Torch out the centers by applying heat down the center of the inner sleeve. Takes about 3-5 minutes before the sleeve just falls out to the floor. Next, heat one spot on the outer shell for about 3 minutes and then pry a large flathead screwdriver between the shell and the bushing. It will take little pressure to slide the screwdriver safely from top to bottom. Now just work the screwdriver around the shell along with the torch and the bushing will just fall out. Takes a few minutes each. 10minutes at most. Take a look at the pic, the bush came out perfectly on the first try. Almost perfectly in the factory shape.
Then just take a $2 wire drill brush and clean out the residue.
Now you get a perfectly clean setup.
The new bush fits PERFECTLY and he includes all the grease you will need.
Let me know what other pics you may need.
Really, this was pretty straight forward.
MW
11-25-02, 12:11 PM
#4
Lexus Champion

Originally posted by pcmw
Perry,
My car is a 92 SC300 and the bushings have never been replaced or worked on. I found them to come out very quickly with the proper technique. Here's the method I followed and had excellent success with.
Torch out the centers by applying heat down the center of the inner sleeve. Takes about 3-5 minutes before the sleeve just falls out to the floor. Next, heat one spot on the outer shell for about 3 minutes and then pry a large flathead screwdriver between the shell and the bushing. It will take little pressure to slide the screwdriver safely from top to bottom. Now just work the screwdriver around the shell along with the torch and the bushing will just fall out. Takes a few minutes each. 10minutes at most. Take a look at the pic, the bush came out perfectly on the first try. Almost perfectly in the factory shape.
Then just take a $2 wire drill brush and clean out the residue.
Now you get a perfectly clean setup.
The new bush fits PERFECTLY and he includes all the grease you will need.
Let me know what other pics you may need.
Really, this was pretty straight forward.
MW

I am giving this a second run this week.
11-25-02, 12:23 PM
#5
Lexus Champion
Thread Starter
Join Date: May 2002
Location: California
Posts: 1,742
Likes: 0
Received 0 Likes
on
0 Posts
Hermosa,
The way that these are designed, they only go together in one direction. The problem your car had was RUST. You should have purchased a few dozen metal brushes and brought along a drill to clean your arms out. The problems we had doing your car were not the fault of the installer, installee, and definitely not the fault of the PARTS. It was merely a lack of tools.
The Daizen Bushings are a perfect fit and if you follow the instructions that come in the box you should have zero issues with installing them.
MW
11-28-02, 12:56 AM
#6
Lexus Champion
Actually you did put the bushings in backwards. And they were squeezed in so tight that the bushings stretched way out of the arms. The rust had nothing to do with the bushings themselves.
Since the bushing were in backwards and not properly set I had to hack off the bits on the side and temporarily make it fit so I could drive off.
I am doing the bushings over tomorrow.
Since the bushing were in backwards and not properly set I had to hack off the bits on the side and temporarily make it fit so I could drive off.
I am doing the bushings over tomorrow.
Last edited by Hermosa; 11-28-02 at 12:58 AM.
11-28-02, 01:15 AM
#7
Lexus Champion
Thread Starter
Join Date: May 2002
Location: California
Posts: 1,742
Likes: 0
Received 0 Likes
on
0 Posts
Hermosa,
The bushings squishing out was from the cylinders not being wire brushed out.
They can only go one direction causing the serated inner sleeve to go on the back because of the diameter. The inside diameter of each sleeve corresponds only to ONE bushing and then to only one sleeve. You will notice this when you try to do it on your own. It is pretty much one way only. I think the major problem with your install was that the insides of the arm were not prepped because we had no tool to clean it out correctly. Bummer. But the end result of the project is that BOTH front and rear FRONT arm bushings DO infact protrude on BOTH sides. Meaning, yeah, that is the way it is supposed to fit. TIGHT. This is different than the originals with the huge gap on each side of the arm metal. The reason this was done, I am guessing, is that this would prevent the arm from 'clunking' as that noise is caused by the metal hitting metal. With the extended protection of the protruding bushing material prevents this from ever happening.
With that said, my apologies if they were not done correctly, but given the lack of tools and circumstances we were dealing with, I did the best with what was there.
MW
edit... Mike, if indeed the wrong bushes went into the arm...then hopefully Todd sent you 4 new lower arm bushings as that would mean that we used two of the larger/smaller bushings. Hence you will have three smalls/larges and one odd.
Best of luck with that project. I will be in LA and unable to give you a hand.
Last edited by pcmw; 11-28-02 at 01:19 AM.
Trending Topics
11-28-02, 01:37 AM
#8
Lexus Champion
The bushings were in the right locations on the control arm but the bushing faced the wrong direction so the control arm no longer fit when placed back on the car. The rubber edge hit the wrong side and I had to cut the edge to make the arm go back in.
11-28-02, 01:38 AM
#9
Lexus Champion
Oh, and got a pic of the entire control arm after placing the bushings on?
My front drivers side is completely disassembled since I am redoing the suspension as well as adding the Supra Brakes.
My front drivers side is completely disassembled since I am redoing the suspension as well as adding the Supra Brakes.
11-28-02, 01:46 AM
#10
Lexus Champion
Thread Starter
Join Date: May 2002
Location: California
Posts: 1,742
Likes: 0
Received 0 Likes
on
0 Posts
Hmm,
That is odd,
The instructions state they are inserted from the outside. Which is the way that I just did mine....check the pics.
That is the way we did yours.... Are you thinking they are supposed to be installed from the inside out?
Mine fit PERFECTLY. Not an issue at all.
That is really weird.
MW
That is odd,
The instructions state they are inserted from the outside. Which is the way that I just did mine....check the pics.
That is the way we did yours.... Are you thinking they are supposed to be installed from the inside out?
Mine fit PERFECTLY. Not an issue at all.
That is really weird.
MW
11-28-02, 03:49 AM
#12
Lexus Champion
Originally posted by pcmw
Best of luck with that project. I will be in LA and unable to give you a hand.
Best of luck with that project. I will be in LA and unable to give you a hand.
11-30-02, 12:54 AM
#13
Lexus Champion
I just installed my control arm bushings again. It went real well since I cleaned it until it was like new.
The only thing that was different from the instructions was that I had to reverse the direction of the front bushing or the arm would not fit back on the car. Thank goodness for the grease.
I have not had a chance to check out the drive yet since the car is still apart and I have to make the Supra Calipers fit. Springs in front are switched now. Alittle higher but not much. The major difference is that springs are the correct stiffness now.
I can't wait to drive off with the new bushings, correct springs, and all four Supra calipers.

 12-01-02, 10:32 PM
#15
Lexus Champion
Thread Starter
Join Date: May 2002
Location: California
Posts: 1,742
Likes: 0
Received 0 Likes
on
0 Posts