DIY coil over install GS350 F-sport
 09-30-13, 07:41 PM
#1
I know that there are plenty of GS owners and especially F-sport owners who have lots of questions regarding coil overs. Hopefully this thread will shine some light on this subject for all GS owners.
So a big question I've see floating around the forum is will installing coil overs on my GS F-sport throw any errors on my dash board when the automatic dampeners are disconnected? The answer is no, it will not.
second question I see is will it change the "overall feel of my cars handling"? to answer this question it will. BUT, because coil overs are so adjustable to the drivers preference, you can either try and match oem feel of your car or possibly find a new feel you like better.
alot of people may be afraid to DIY install coil overs, and thats understandable, but on the other hand im willing to bet that 60-80 percent of the average joe could figure it out... if you are someone who's thought about DIY install but aren't sure if you can do it then scroll threw this thread to learn more about the installation process.
on a side note, I know lowering your car is not for everyone and I respect that, please do not post negative comments on this thread about how Ive "destroyed the car"
Necessary tools for install.
jack stands (4)
floor jack
1/2" drive impact or socket wrench with 3/4" sockets
3/8" air wrench or socket wrench with 10,12,and 14 mm sockets
tape mesure
hammer
and about 6-12 hours of time depending on you.
before you jack up the car its a good idea to remove the trunk lining to gain access to the top of the of the struts.
If you don't have an impact you also need to loosen all lug nuts on the ground.
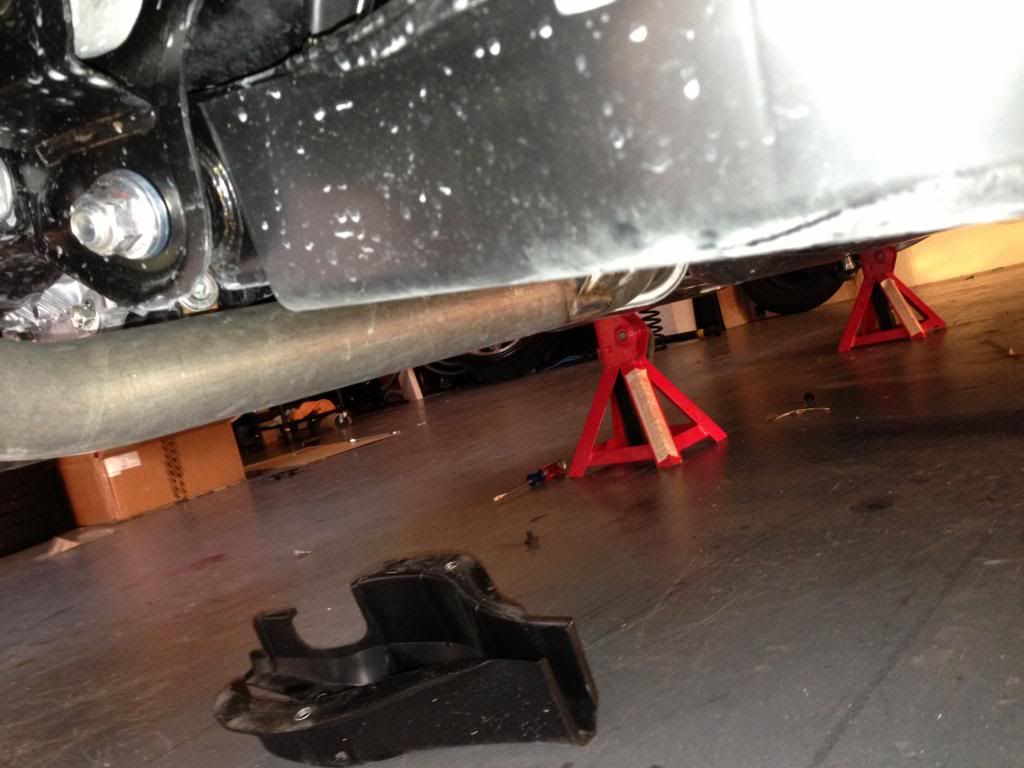
check the owners manual for the 4 jack points, jack up the car and remove the wheels
a tip from someone whos lowered a handful of cars, pick either the front or the back and do both sides, you will learn how to do it and the opposite side will be faster.
I started with the back because imo it takes longer and is more frustrating to do.
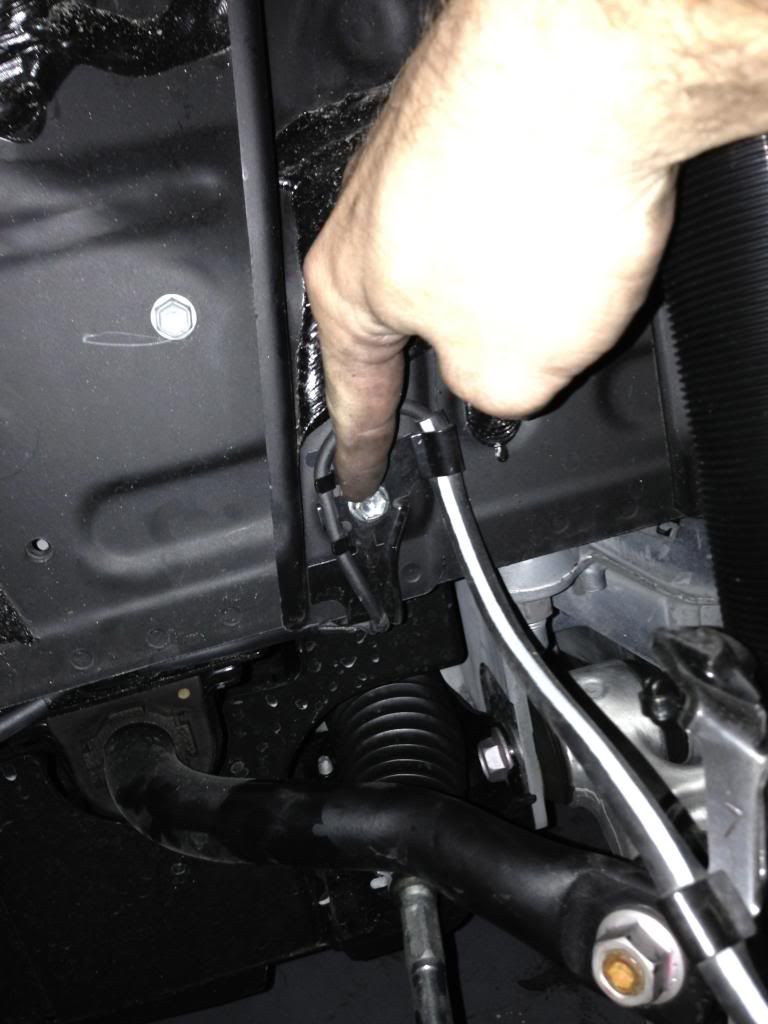
loosen this bolt first, no need to remove just loosen
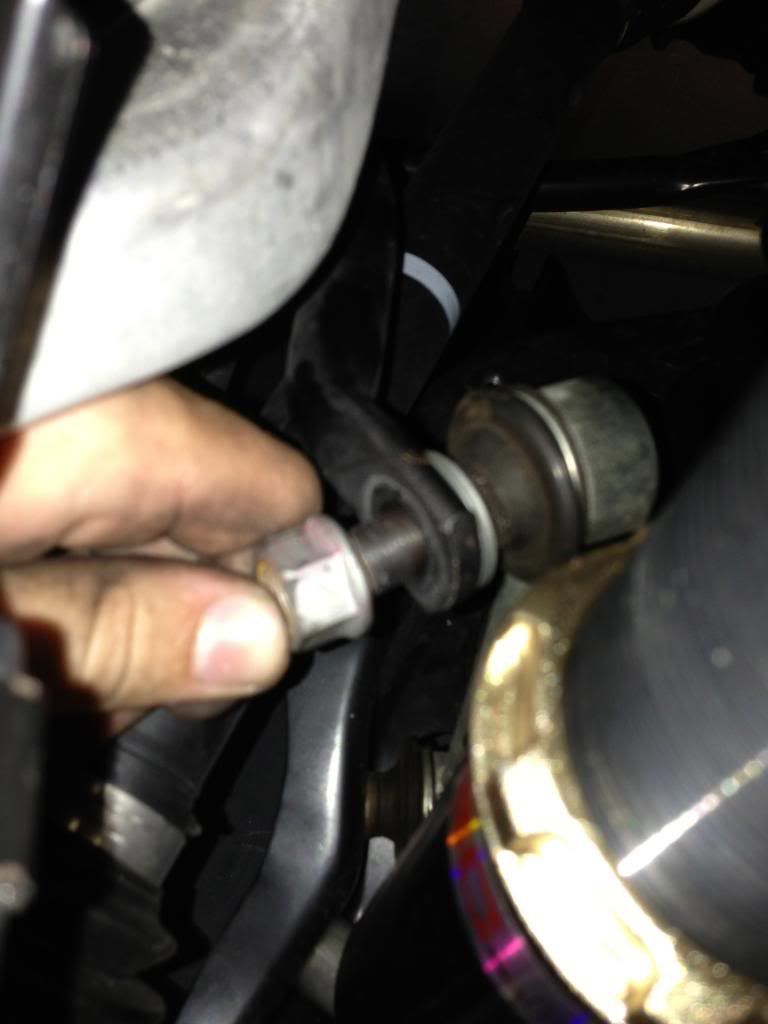
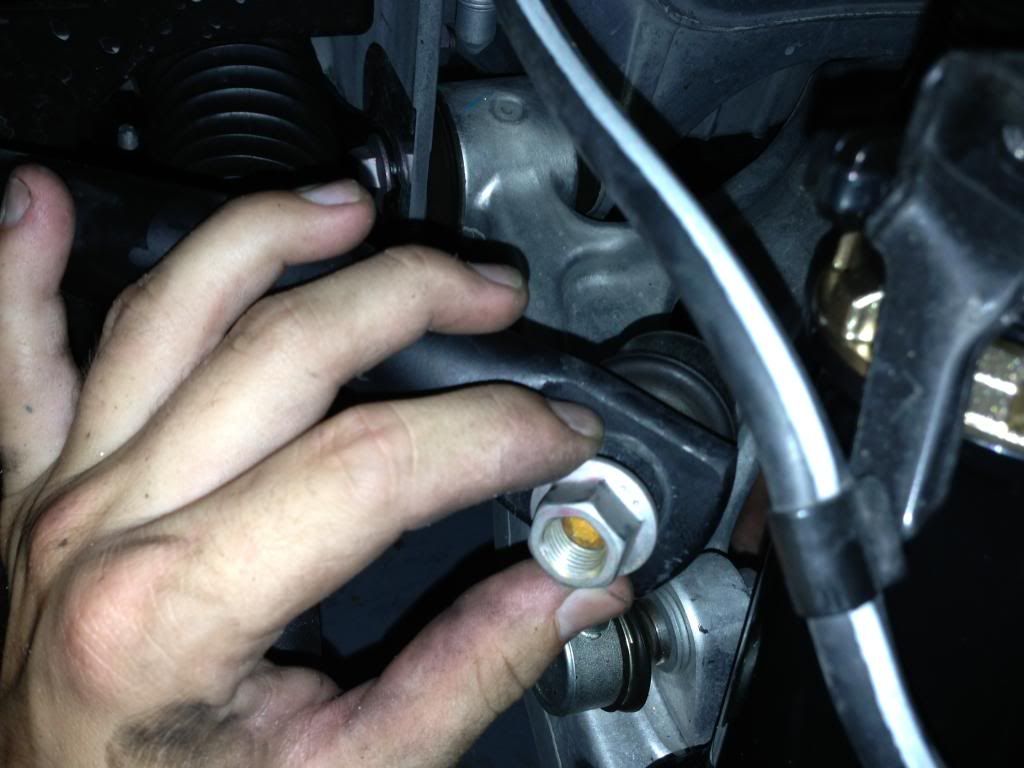
Next remove the nut on the sway bar that connects the end link to the actual sway bar, not the end link from the control arm. pull the end link out and away from everything so that when the control arm drops in the next step it wont catch anything.
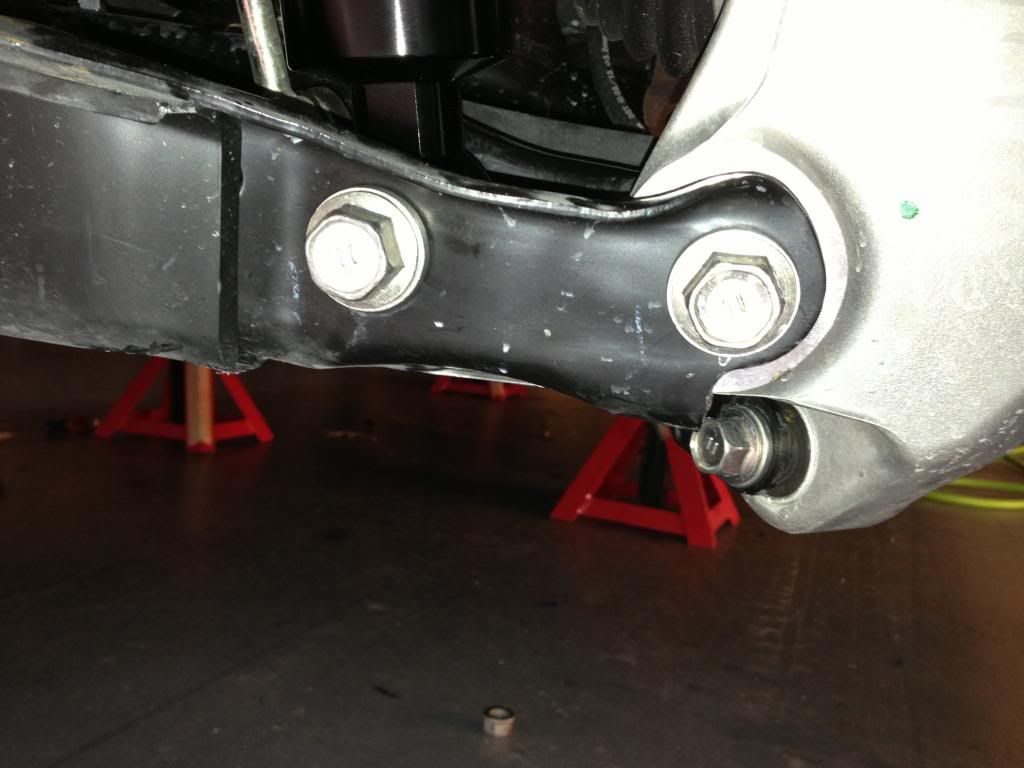
all 3 of the bolts in this picture need to be removed start with the one on the bottom closest to the hub, then remove the other 2 on the control arm. you will need to use the floor jack under the control arm to release the pressure off the bolts and slide them out, when you remove the 3rd bolt the control arm is free and will drop, slowly let it down with the jack and keep in mind that the spring will fall.
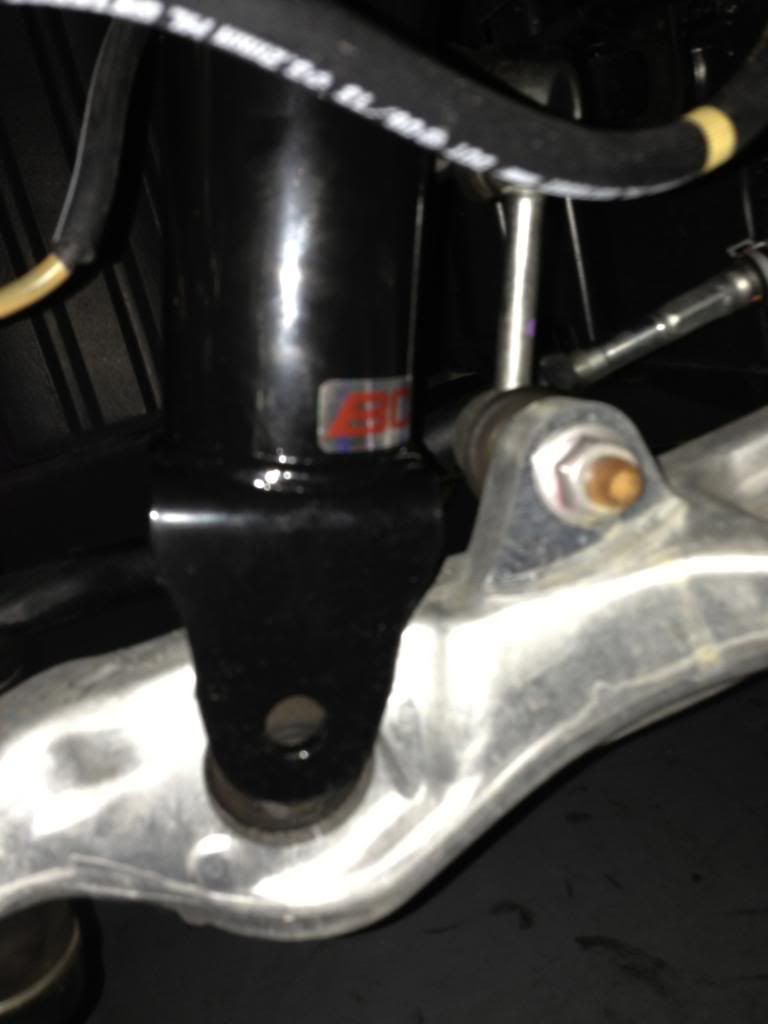
remove the automatic dampening unit by twisting it clockwise off the top and set it aside.
remove the 3 bolts at the top holding in the oem dampener, caution it will fall, either have someone help you or have something to catch it like towels or something for it to land on..
BTW incase you notice I didnt start to take pics until after the install so you will notice my spring and dampeners are all installed.

i zip tied the automatic dampening controller up to existing wires and out of the way.
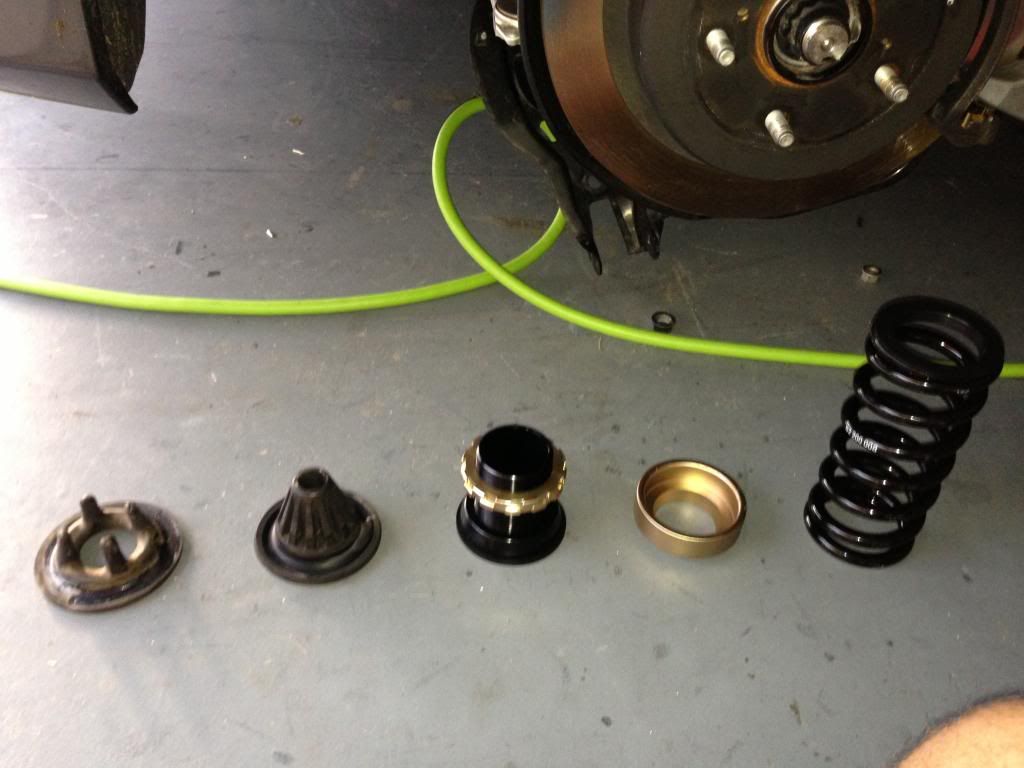
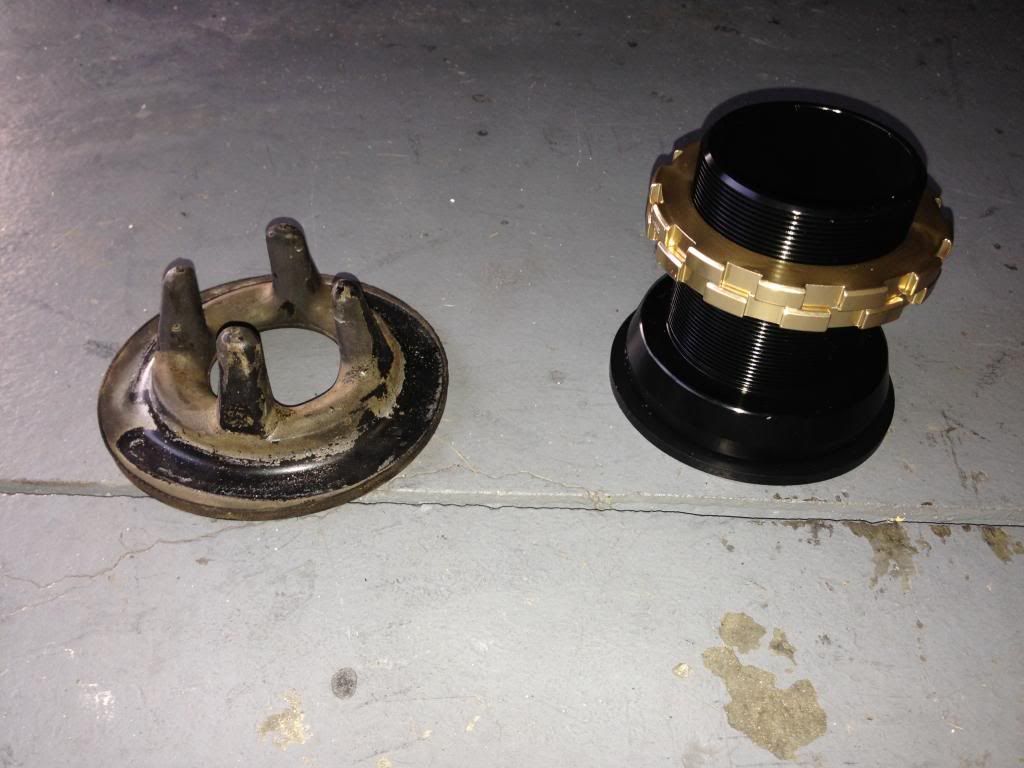
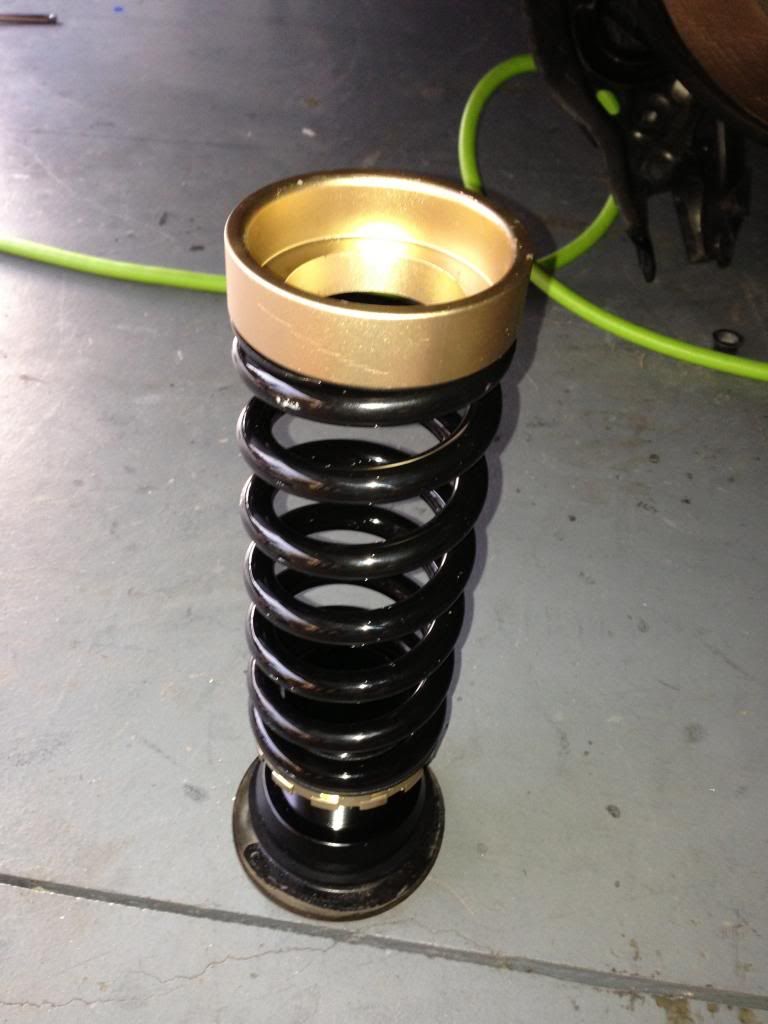
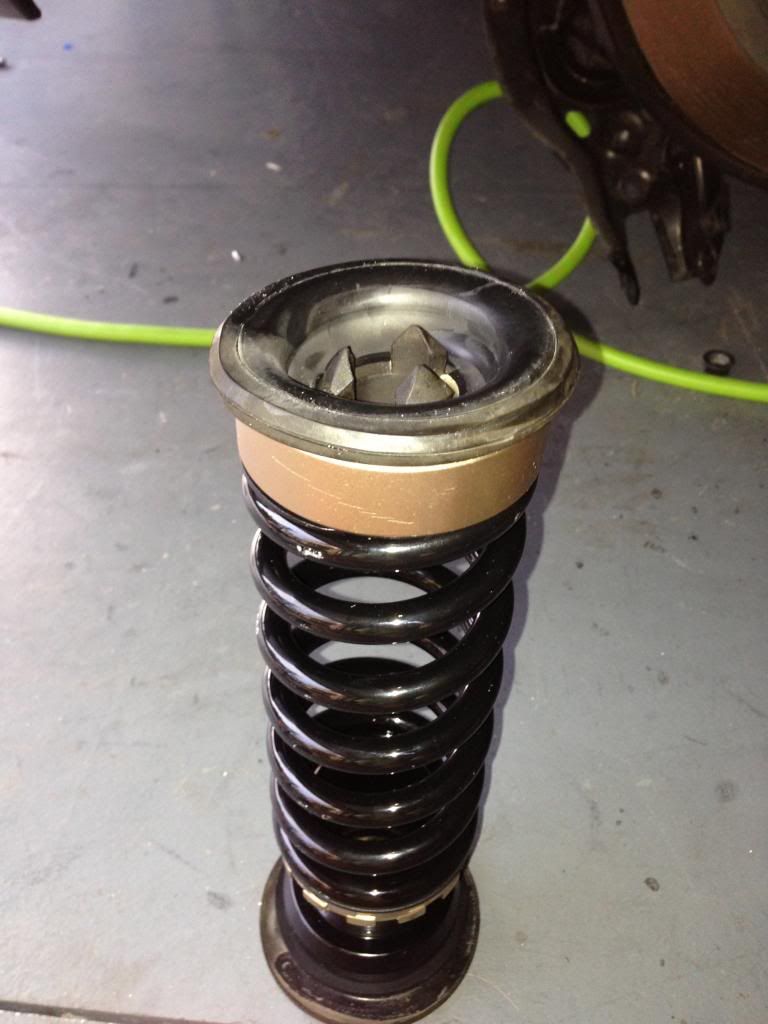
Heres the spring and all the parts to it. This is the way i installed it, im sure there may be other ways to do it but my way has worked great so far, does not make any noises while driving. Keep in mind that you cannot adjust the springs when installed. I honestly took an educated guess at the hight that i wanted and adjusted the threads by a rough percentage of what i though would be a medium drop.

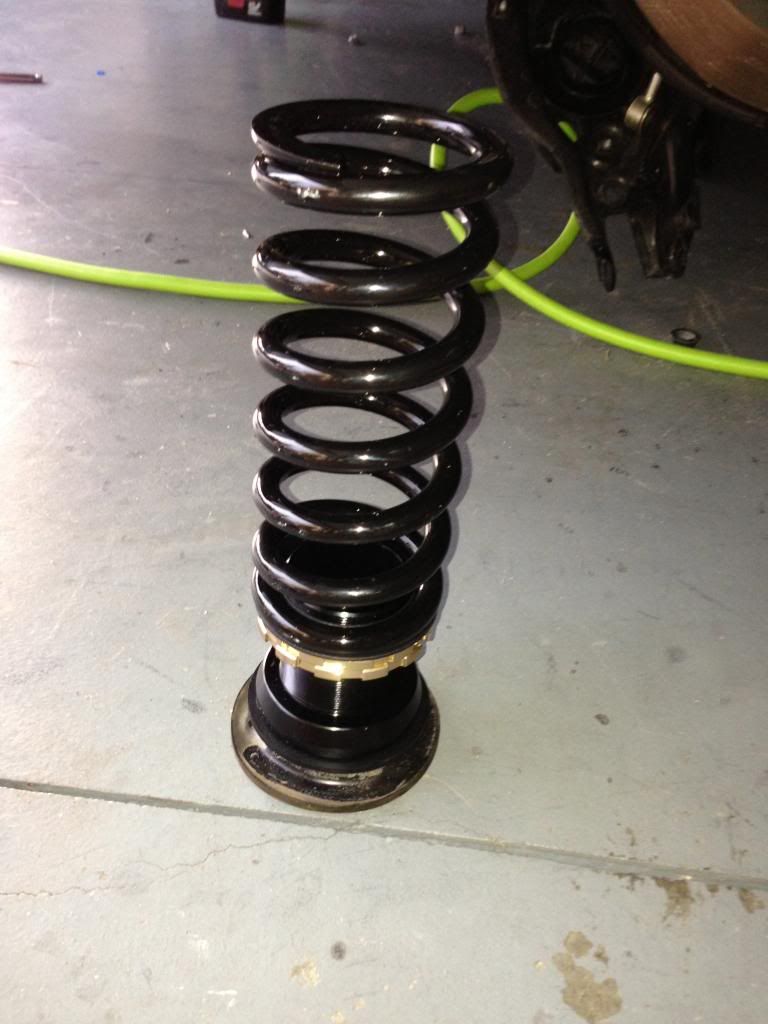

before you install the spring its best to install the dampener, you will need someone to hold it for you while you put the 3 bolts on inside the trunk. after its in you can install the spring and connect the control arm back the way you took it apart, best way is to put the 3 bolts back in in the opposite order you removed them in. you will need to use the jack to apply the pressure needed to line up the holes and put the bolts back in.
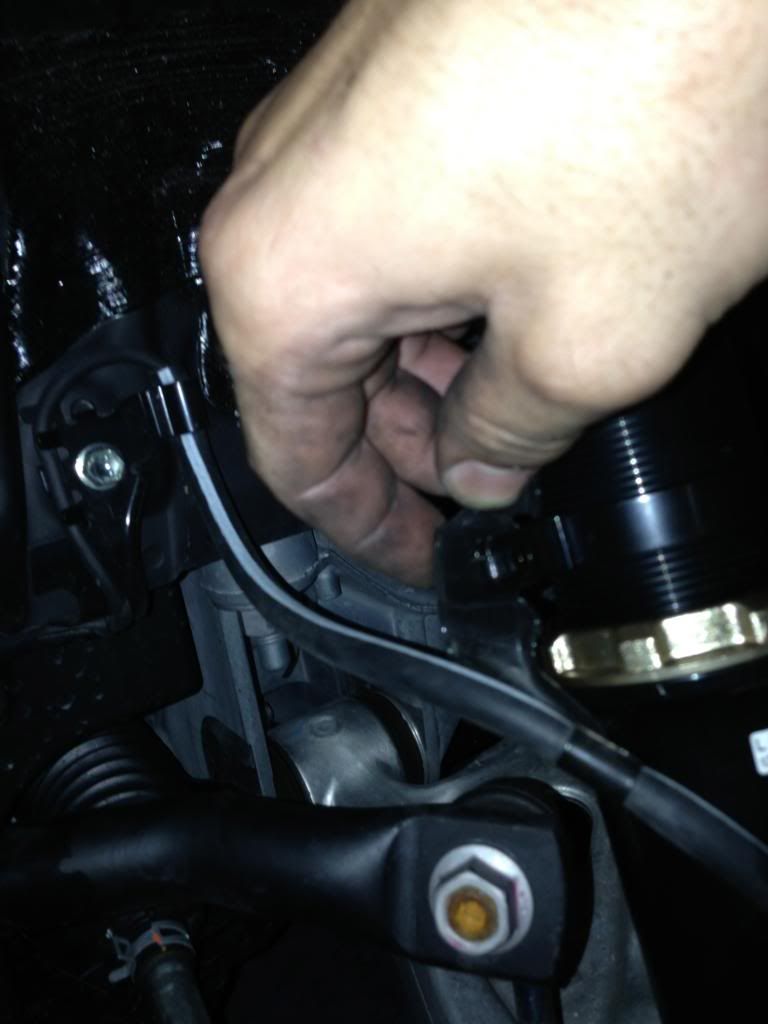
when you put everything back together remember to tighten this nut
also DO NOT connect the sway bar end link back until the other side is finished. you will torque it and wont be able to remove the end link on the opposite side.
to adjust the dampener unit, or the threaded shock body, loosen the locking collar at the bottom and twist in the desired direction, you will need to use the jack to release pressure off the control arm to adjust this, use a tape measure out the distance between the top middle of you're fender to the middle if your hub, match it on both sides. you wont know how much to adjust until you do the front and sit it on the ground then measure how much drop you would like up or down. best bet is to make no adjustments until the install is done.
Remember to re connect the sway bar end links when both sides are lowered.
now the front.
start by removing the nut for the sway bar end link
remove this 10mm nut to give the abs sensor cord some slack.
remove this 10mm nut off the oem strut.
theres supposed to be a bolt here... remove it.
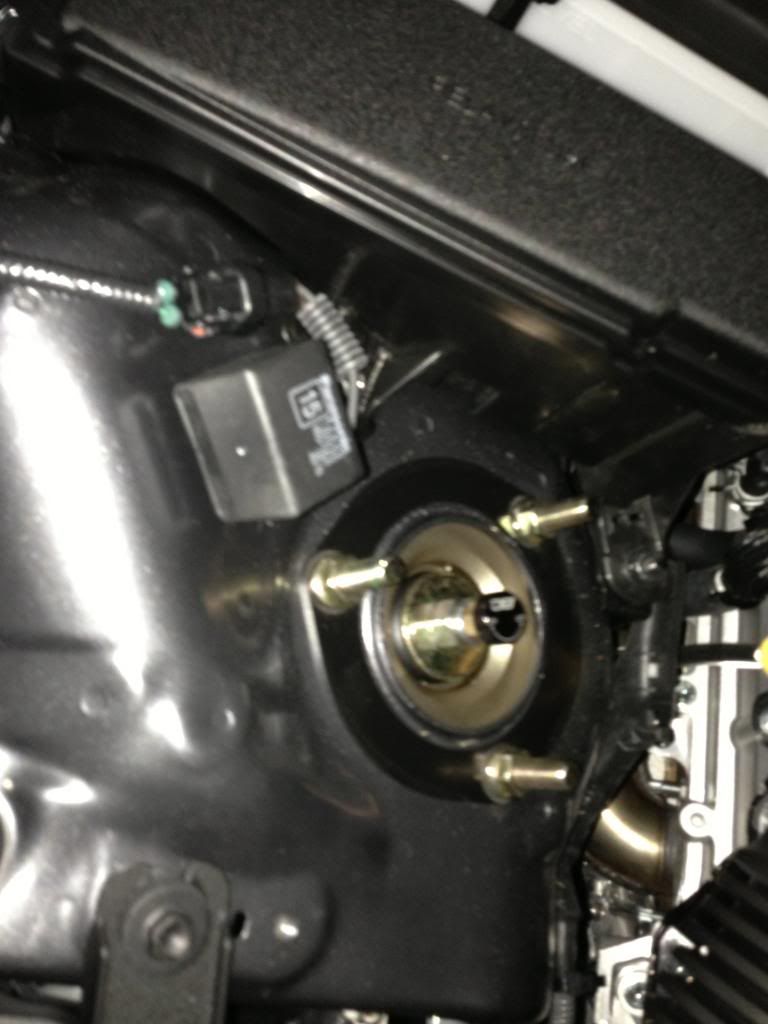
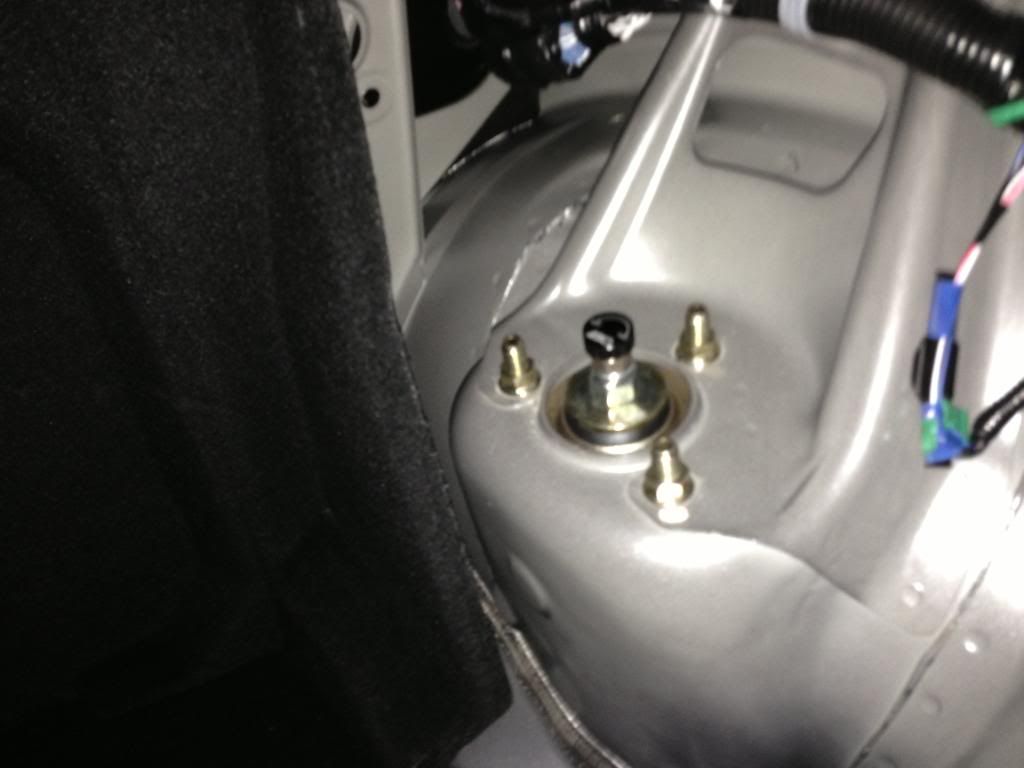
There is 3 nuts to be removed on top of the strut that hold the cover on for the automatic dampening controller remove it and unplug them, there is a wire that unplugs about 6 inches down from the unit, just unplug and remove. next remove the 3 nuts holding the strut to the car.
the strut is free but wont drop out so dont worry about it falling.
un do the clip and remove this bolt, you will need to hammer it up for the upper control arm to disconnect, obviously dont hit the threads they will bend and strip out bolts.. not good. when you disconnect them the lower control arm will drop, make sure not to burst the brake line in this process. this is the reason you gave the abs sensor some slack, Now that you can, remove the strut and slide in the new one.
now just put it all back together in reverse order.
on to adjustments, for the front you want to make sure you set whats called the pre load. I could spend hours typing that out so make it easy on me and yourself and just watch a you youtube video on it... theres 100s.
the rear wont require any pre load since the spring and dampener are separate. put the wheels back on and set the car on the ground, see where you are and adjust accordingly. It will take more then one try, be patient and make sure its 100% level, keep the trunk liner out for a few days for testing purposes while you try and find the best ride comfort settings, you will need to have access to the top of the rear dampeners in the trunk. set the dampening to 16-20 to start and then go up or down according to preference.
Im sure i missed some things and if anyone has any further questions be sure to ask. I hope this thread will help you guys, good luck and happy modding
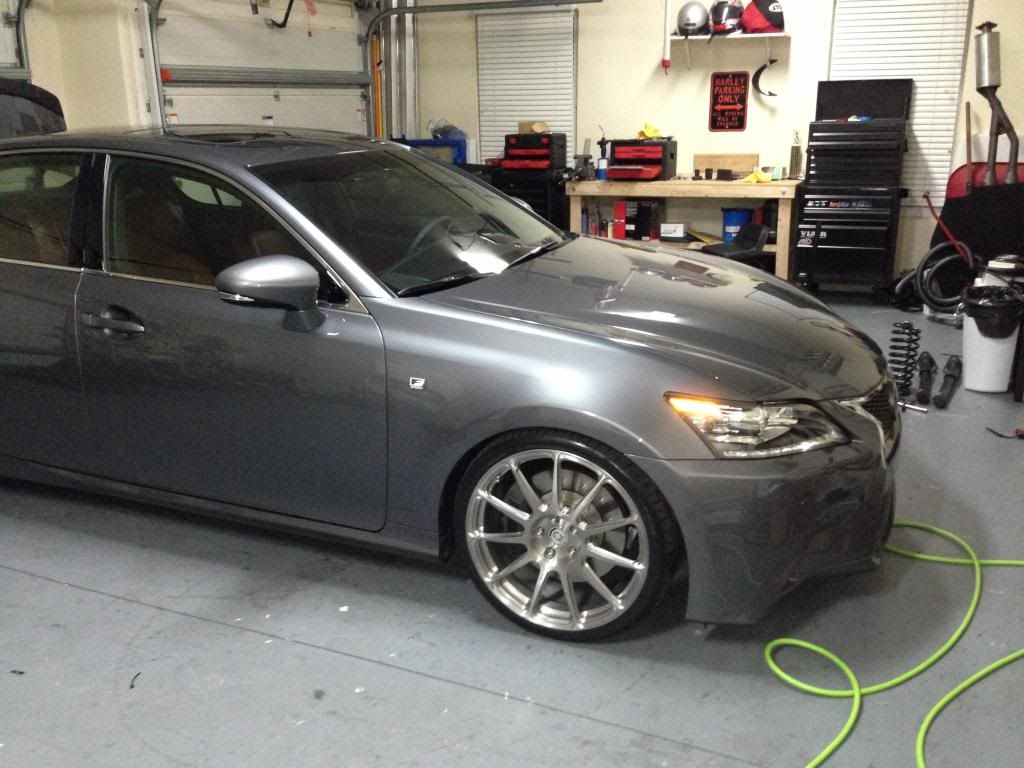
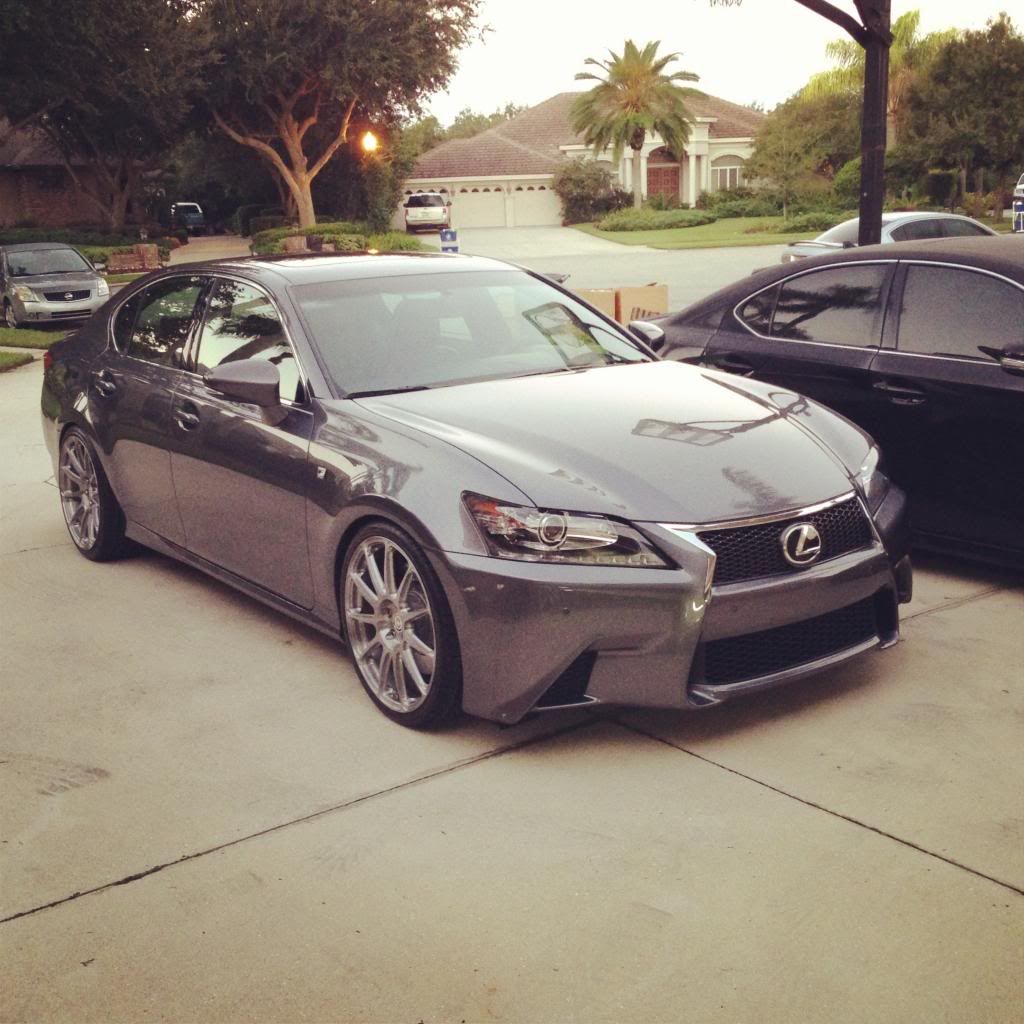
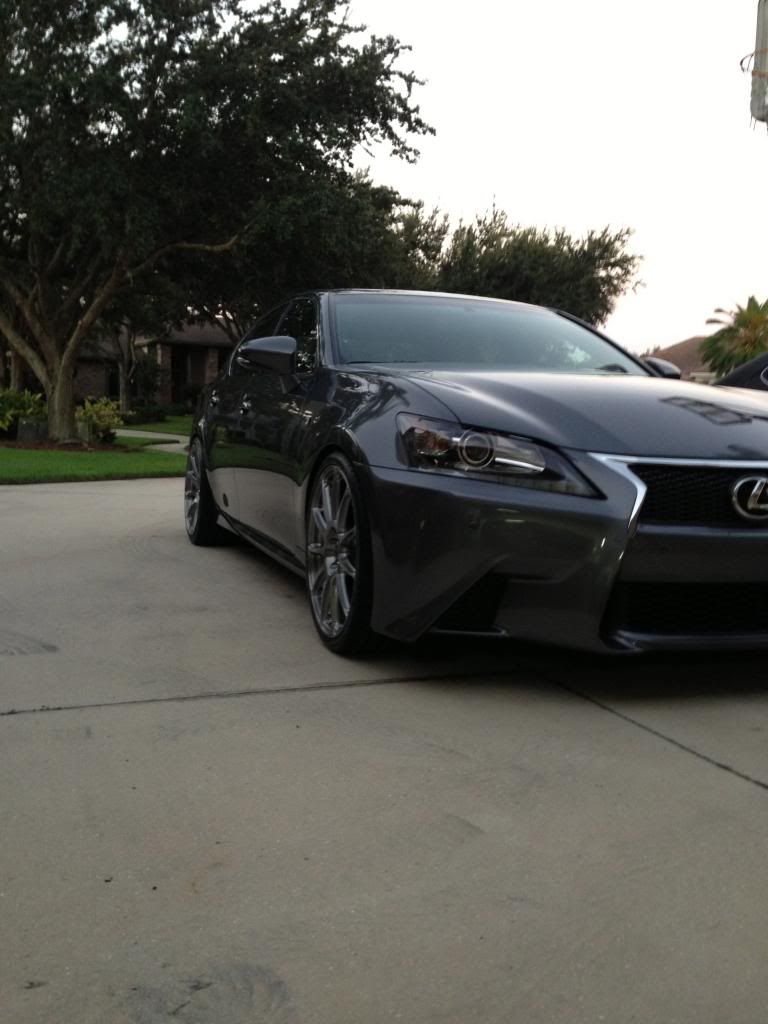
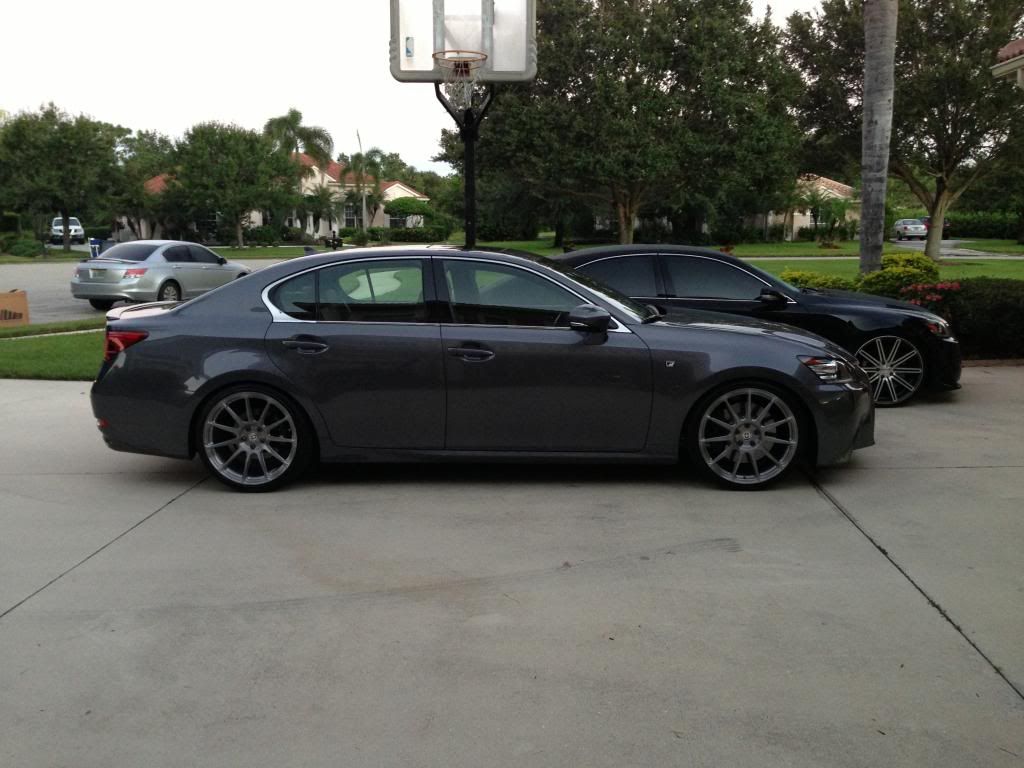
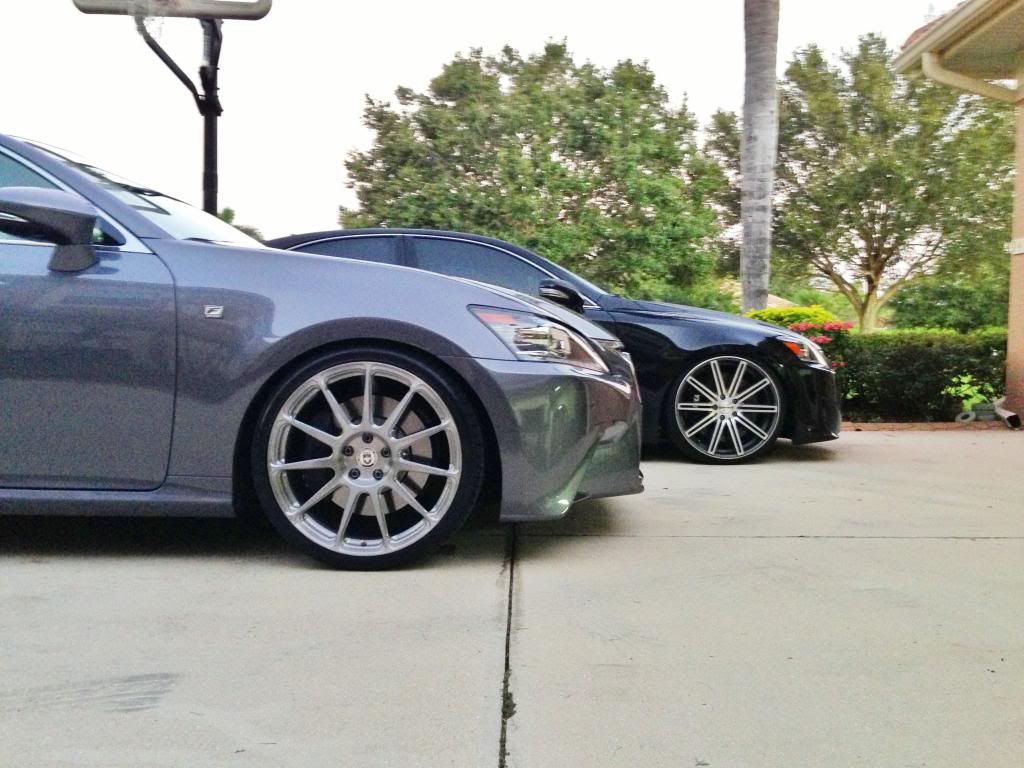
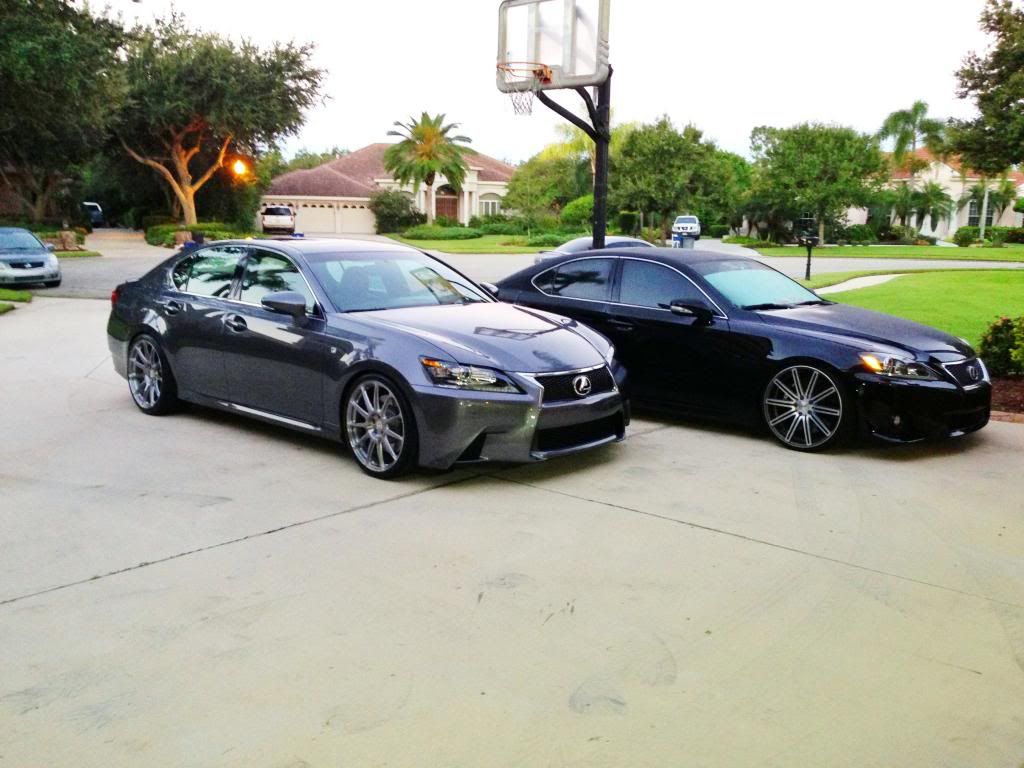
some shots of my GS
So a big question I've see floating around the forum is will installing coil overs on my GS F-sport throw any errors on my dash board when the automatic dampeners are disconnected? The answer is no, it will not.
second question I see is will it change the "overall feel of my cars handling"? to answer this question it will. BUT, because coil overs are so adjustable to the drivers preference, you can either try and match oem feel of your car or possibly find a new feel you like better.
alot of people may be afraid to DIY install coil overs, and thats understandable, but on the other hand im willing to bet that 60-80 percent of the average joe could figure it out... if you are someone who's thought about DIY install but aren't sure if you can do it then scroll threw this thread to learn more about the installation process.
on a side note, I know lowering your car is not for everyone and I respect that, please do not post negative comments on this thread about how Ive "destroyed the car"
Necessary tools for install.
jack stands (4)
floor jack
1/2" drive impact or socket wrench with 3/4" sockets
3/8" air wrench or socket wrench with 10,12,and 14 mm sockets
tape mesure
hammer
and about 6-12 hours of time depending on you.
before you jack up the car its a good idea to remove the trunk lining to gain access to the top of the of the struts.
If you don't have an impact you also need to loosen all lug nuts on the ground.
check the owners manual for the 4 jack points, jack up the car and remove the wheels
a tip from someone whos lowered a handful of cars, pick either the front or the back and do both sides, you will learn how to do it and the opposite side will be faster.
I started with the back because imo it takes longer and is more frustrating to do.

loosen this bolt first, no need to remove just loosen

Next remove the nut on the sway bar that connects the end link to the actual sway bar, not the end link from the control arm. pull the end link out and away from everything so that when the control arm drops in the next step it wont catch anything.

all 3 of the bolts in this picture need to be removed start with the one on the bottom closest to the hub, then remove the other 2 on the control arm. you will need to use the floor jack under the control arm to release the pressure off the bolts and slide them out, when you remove the 3rd bolt the control arm is free and will drop, slowly let it down with the jack and keep in mind that the spring will fall.

remove the automatic dampening unit by twisting it clockwise off the top and set it aside.
remove the 3 bolts at the top holding in the oem dampener, caution it will fall, either have someone help you or have something to catch it like towels or something for it to land on..
BTW incase you notice I didnt start to take pics until after the install so you will notice my spring and dampeners are all installed.

i zip tied the automatic dampening controller up to existing wires and out of the way.

Heres the spring and all the parts to it. This is the way i installed it, im sure there may be other ways to do it but my way has worked great so far, does not make any noises while driving. Keep in mind that you cannot adjust the springs when installed. I honestly took an educated guess at the hight that i wanted and adjusted the threads by a rough percentage of what i though would be a medium drop.


before you install the spring its best to install the dampener, you will need someone to hold it for you while you put the 3 bolts on inside the trunk. after its in you can install the spring and connect the control arm back the way you took it apart, best way is to put the 3 bolts back in in the opposite order you removed them in. you will need to use the jack to apply the pressure needed to line up the holes and put the bolts back in.
when you put everything back together remember to tighten this nut
also DO NOT connect the sway bar end link back until the other side is finished. you will torque it and wont be able to remove the end link on the opposite side.
to adjust the dampener unit, or the threaded shock body, loosen the locking collar at the bottom and twist in the desired direction, you will need to use the jack to release pressure off the control arm to adjust this, use a tape measure out the distance between the top middle of you're fender to the middle if your hub, match it on both sides. you wont know how much to adjust until you do the front and sit it on the ground then measure how much drop you would like up or down. best bet is to make no adjustments until the install is done.
Remember to re connect the sway bar end links when both sides are lowered.
now the front.

start by removing the nut for the sway bar end link

remove this 10mm nut to give the abs sensor cord some slack.

remove this 10mm nut off the oem strut.

theres supposed to be a bolt here... remove it.

There is 3 nuts to be removed on top of the strut that hold the cover on for the automatic dampening controller remove it and unplug them, there is a wire that unplugs about 6 inches down from the unit, just unplug and remove. next remove the 3 nuts holding the strut to the car.
the strut is free but wont drop out so dont worry about it falling.
un do the clip and remove this bolt, you will need to hammer it up for the upper control arm to disconnect, obviously dont hit the threads they will bend and strip out bolts.. not good. when you disconnect them the lower control arm will drop, make sure not to burst the brake line in this process. this is the reason you gave the abs sensor some slack, Now that you can, remove the strut and slide in the new one.
now just put it all back together in reverse order.
on to adjustments, for the front you want to make sure you set whats called the pre load. I could spend hours typing that out so make it easy on me and yourself and just watch a you youtube video on it... theres 100s.
the rear wont require any pre load since the spring and dampener are separate. put the wheels back on and set the car on the ground, see where you are and adjust accordingly. It will take more then one try, be patient and make sure its 100% level, keep the trunk liner out for a few days for testing purposes while you try and find the best ride comfort settings, you will need to have access to the top of the rear dampeners in the trunk. set the dampening to 16-20 to start and then go up or down according to preference.
Im sure i missed some things and if anyone has any further questions be sure to ask. I hope this thread will help you guys, good luck and happy modding
some shots of my GS


 09-30-13, 08:46 PM
#3
Awesome work! I love your HRE wheels on the GS very unique since most GSs out there have Vossens and I am not a fan of just coping everyone else mod. Good job and don't know how much you spent on those HRE 
 09-30-13, 10:30 PM
#5
Will BC be selling these with swiftspring option? someone gotta ask. btw, wheel spec?
answered my own question.. Still interested in the wheel spec though.
someone should print out a retrofit to use the existing dampening controller.
answered my own question.. Still interested in the wheel spec though.
someone should print out a retrofit to use the existing dampening controller.
Last edited by sam430; 09-30-13 at 10:41 PM.
10-01-13, 12:47 AM
#6
Very nice work, car and wheels!
My friend that is a sad assumption you just made, inferring that buying a vossen wheel is "copying." I am certain you are better than that! Generally speaking though, I agree, don't follow the herd. Did you notice the brand of wheel on the other ride in a few of the pictures? You guessed, it is Vossen. And I have no affiliation or preference with or for vossen, just saying I own some, but not because they are the choice of many Lexus owners.
Trending Topics
10-01-13, 04:00 AM
#8
Very nice work, car and wheels!
My friend that is a sad assumption you just made, inferring that buying a vossen wheel is "copying." I am certain you are better than that! Generally speaking though, I agree, don't follow the herd. Did you notice the brand of wheel on the other ride in a few of the pictures? You guessed, it is Vossen. And I have no affiliation or preference with or for vossen, just saying I own some, but not because they are the choice of many Lexus owners.
My friend that is a sad assumption you just made, inferring that buying a vossen wheel is "copying." I am certain you are better than that! Generally speaking though, I agree, don't follow the herd. Did you notice the brand of wheel on the other ride in a few of the pictures? You guessed, it is Vossen. And I have no affiliation or preference with or for vossen, just saying I own some, but not because they are the choice of many Lexus owners.
I know the other IS in the pic is on Vossen .. this company is succesful thats for sure otherwise why so Lexus GSs and ISs out there with Vossen wheels. I was referring by ''coping'' that so many owners love those wheels and this guy put HRE instead to be unique .. I'm being positive here my friend and if the word coping was misunderstood I apologies.
10-01-13, 04:52 AM
#9
Thanks man
I actually ordered the HREs for my IS350 before i bought this car, and i contacted hre after i bought my gs and caught them just in time to have them made to GS specs. I spent way too much on them lol but they look amazing so no complaints.
The rears are easy when you know how to do it but the first few hours i spent on the rear left trying to figure out how to get the arm to drop was a pita. But go for it man, I hope this thread gets more GS owners to get coil overs as opposed to springs.
they sell them now with swift springs,i just did not feel that it was necessary since I have no plans to slam this car. it would be cool if a company could create a way to utilize them but i dont see it happening anytime soon. only specs i know on the hres are 20x9 front and 20x10.5 rear.
HRE never gave me additional info on them, and im not worried because i knew they were going to fit like a glove and they do.
thank you sir
Thanks man, yeah I hate the way IG shrinks photos
they sell them now with swift springs,i just did not feel that it was necessary since I have no plans to slam this car. it would be cool if a company could create a way to utilize them but i dont see it happening anytime soon. only specs i know on the hres are 20x9 front and 20x10.5 rear.
HRE never gave me additional info on them, and im not worried because i knew they were going to fit like a glove and they do.
Very nice work, car and wheels!
My friend that is a sad assumption you just made, inferring that buying a vossen wheel is "copying." I am certain you are better than that! Generally speaking though, I agree, don't follow the herd. Did you notice the brand of wheel on the other ride in a few of the pictures? You guessed, it is Vossen. And I have no affiliation or preference with or for vossen, just saying I own some, but not because they are the choice of many Lexus owners.
My friend that is a sad assumption you just made, inferring that buying a vossen wheel is "copying." I am certain you are better than that! Generally speaking though, I agree, don't follow the herd. Did you notice the brand of wheel on the other ride in a few of the pictures? You guessed, it is Vossen. And I have no affiliation or preference with or for vossen, just saying I own some, but not because they are the choice of many Lexus owners.
thank you sir
Thanks man, yeah I hate the way IG shrinks photos
10-01-13, 12:14 PM
#10
Lexusis07 great write up, this for sure will help out the grease money on this forum. Btw I notice you have bc racing coil overs how much did they run you??? If you dont mind me asking. Didn't even know they made any for our cars. Also rims are hellaa nice bro like mshmsh said its nice seeing other gs with diffrent rims other then vossens. can I ask you how much they ran or pm me the price cause those rims are pretty killer.
Last edited by GSTONY; 10-01-13 at 12:18 PM.
10-02-13, 03:57 AM
#11
Lexusis07 great write up, this for sure will help out the grease money on this forum. Btw I notice you have bc racing coil overs how much did they run you??? If you dont mind me asking. Didn't even know they made any for our cars. Also rims are hellaa nice bro like mshmsh said its nice seeing other gs with diffrent rims other then vossens. can I ask you how much they ran or pm me the price cause those rims are pretty killer.
