Log In
Register
Forums
Vendor News
Club Lexus Vendor Product Announcements
Lexus Model Forums
IS Models
RC Models
GS Models
SC Models
LC Model (2018-present)
LFA Model (2012)
CT 200h Model (2011-2017)
HS 250h Model (2010-2012)
ES Models
LS Models
UX Models (2019-present)
NX Models
RX Models
TX Models (2024-present)
GX Models
LX Models
RZ Model (2023-present)
Lexus Prototypes and Next-Gen Technology
Vendor Marketplace and Member Classifieds
Marketplace
General Classifieds
Club Lexus Vendor Marketplace
Lexus Special Interest Forums
Automotive Care & Detailing
Lexus Audio, Video, Security & Electronics
Lighting
Maintenance
Wheels, Tires & Brakes Forum
Special Interest Groups
Lexus Motorsports and Racing
General Forums
Car Chat
EV Chat
Local Chapters and Regional Forums
Regional ClubLexus Forums
NELOC
Florida Lexus Club
Chicago Lexus Club
Northern California Lexus Club
CL of Southern California
CL of Hawaii
North Texas Lexus Club
Site Suggestions & Problems
Site Suggestions & Problems
Gallery
Tools
Car Payment Calculator
Tire Rim Calculator
Vin Decoder
Recalls
Technical Service Bulletins (TSBs)
Members List
Live Feed
Marketplace
Marketplace
Vendor Directory
Become a Vendor
Lexus News
Lexus CT200h
Lexus ES
Lexus GS
Lexus GX
Lexus HS250h
Lexus IS
Lexus IS-F
Lexus LC500
Lexus LFA
Lexus LS
Lexus LX
Lexus NX
Lexus RC
Lexus RX
Lexus RZ
Lexus SC
Lexus TX
Lexus UX
New Posts
How-Tos
FAQ
View Dark Mode
Please register or login to enable Dark Mode.
Log In
Register
Threads
Google
Threads
Posts
Advanced
Dark Mode
Please register or login to enable Dark Mode.
Log In
Forgot your Password?
By logging into your account, you agree to our
Terms of Use
and
Privacy Policy
, and to the use of cookies as described therein.
or
Login with Google
Login with Facebook
Recent
Commented
Albums
My Pictures
My Post Pictures
xbladex00
November 17, 2014
134
0
Sort:
Default
Default
Most Recent
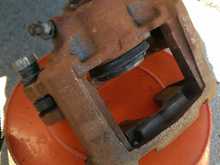
here you can see the rust :(
0
2015/04/12 20:16:32
249131
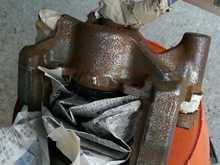
I tried to get off as much rust as possible.... It's very tedious job so i just said screw it and start painting....
0
2015/04/12 20:17:22
249131
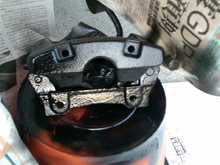
here's what the caliper looks like after one or 2 sprays
0
2015/04/12 20:24:28
249131
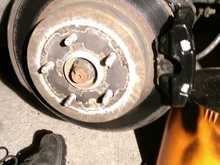
heres what it looks like after it's all assembled
0
2015/04/12 20:25:20
249131
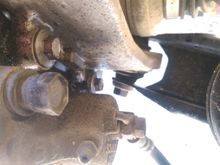
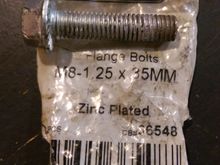
I might be wrong but I think these are 14mm bolts or 16mm....
0
2015/04/12 20:29:58
249131
heres a closer look... i went ahead and put some anti seize on the bolts and the pins! you know the calipers are known to seize! Also this is what happens when you decide to touch it before it drys... you can see the markings on the upper circle....
0
2015/04/12 20:45:05
249131
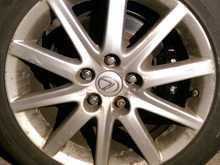
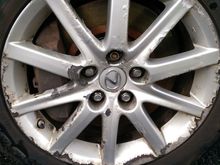
heres what it looks like with the wheel back on... Stealthy ;)
0
2015/04/12 20:51:42
249131
0
2015/04/12 20:52:45
249131
paint chipping side walls scraps and stuff
0
2015/04/19 15:18:33
249131
0
2015/04/28 11:52:30
249131
0
2015/04/28 22:23:24
249131
0
2015/04/28 22:25:45
249131
0
2015/05/07 19:02:47
249131
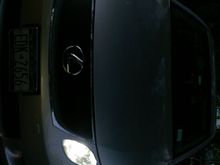
Finally got the LEDs for the parking lights! LOOKING FRESH!
0
2015/05/12 17:42:59
249131
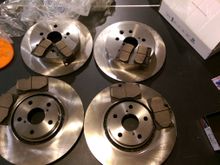
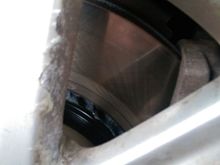
Not sure if the pads actually cover the entire surface of the rotors... I didn't know rotors were pretty heavy felt like they were about 50pounds,or more...
0
2015/05/14 19:25:20
249131
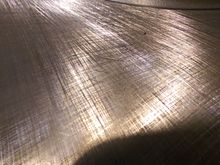
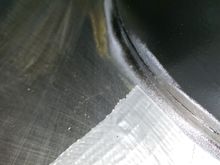
Some weird cuts on it.... Should it be fine?
0
2015/05/14 19:26:11
249131
0
2015/05/14 19:26:57
249131
0
2015/05/14 19:27:00
249131
0
2015/05/16 00:17:25
249131
0
2015/05/16 00:23:25
249131
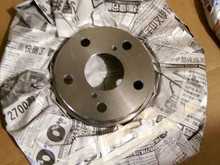
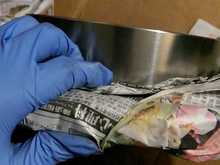
My fromt rotors had some a gap between the rotors and the hub so i just stuffed it in there make sure to tape down the news paper cause it might get in the way
0
2015/05/16 00:23:40
249131
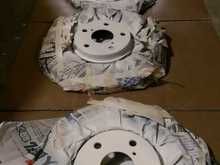
for the rears i tried to leave a good amount of room and to the certain point i wanted to paint it too... Another way would be to just tape the pad contacting parts... I would thing put news paper under the tape instead just using alot of tape...
0
2015/05/16 00:24:50
249131
for the method i have done for the rear's i tried to tape down news paper as much as i could to access the bottom part of the hub...
0
2015/05/16 00:28:13
249131
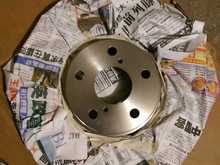
Here it is with all the hubs primed
0
2015/05/16 00:29:35
249131
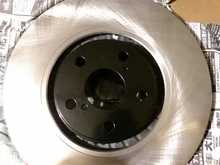
heres the finished product!!!
0
2015/05/16 00:33:27
249131
So i did the tape method
0
2015/05/16 16:17:12
249131
Since
0
2015/05/16 16:18:21
249131
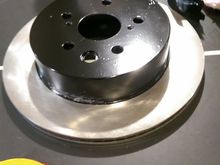
THis is what the rear rotors looked like with my method
0
2015/05/16 16:20:16
249131
0
2015/05/29 09:26:24
249131
See as the pads don't really make much contact
0
2015/05/31 13:42:19
249131
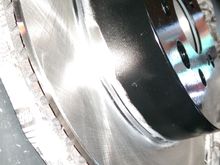
These are the fronts look a bit weird suppose to he like that?
0
2015/05/31 13:56:15
249131
0
2015/05/31 13:58:14
249131
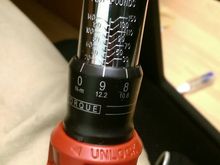
The threads on this bolt fit alot better I bought a 50mm so the threads became a bit more finer, (correct me if I'm wrong!)
0
2015/05/31 14:03:28
249131
0
2015/06/08 08:34:26
249131
0
2015/06/24 20:16:50
249131
They're in pretty bad shape... was planning to fix them this summer!
0
2015/07/01 19:39:39
249131
0
2015/07/14 16:59:57
249131
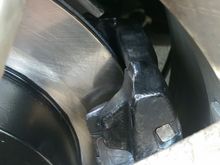
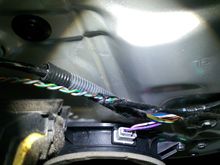
This is where it starts at the gap, following through you can see it going through the rubber seal?
0
2015/08/21 12:04:04
249131
starting from here my wire was cut or broken, you can see it going through the outter rubber sealing of the door...
0
2015/08/21 13:37:01
249131
The wire is orange,green, and white i followed it through
0
2015/08/21 13:37:27
249131
First
Page
2 of 4
Last
Go To
Page
1
2
3
4
2 of 4
Go To
GO
Go to page
of 4
pages
1
2
3
4