Log In
Register
Forums
Vendor News
Club Lexus Vendor Product Announcements
Lexus Model Forums
IS Models
RC Models
GS Models
SC Models
LC Model (2018-present)
LFA Model (2012)
CT 200h Model (2011-2017)
HS 250h Model (2010-2012)
ES Models
LS Models
UX Models (2019-present)
NX Models
RX Models
TX Models (2024-present)
GX Models
LX Models
RZ Model (2023-present)
Lexus Prototypes and Next-Gen Technology
Vendor Marketplace and Member Classifieds
Marketplace
General Classifieds
Club Lexus Vendor Marketplace
Lexus Special Interest Forums
Automotive Care & Detailing
Lexus Audio, Video, Security & Electronics
Lighting
Maintenance
Wheels, Tires & Brakes Forum
Special Interest Groups
Lexus Motorsports and Racing
General Forums
Car Chat
EV Chat
Local Chapters and Regional Forums
Regional ClubLexus Forums
NELOC
Florida Lexus Club
Chicago Lexus Club
Northern California Lexus Club
CL of Southern California
CL of Hawaii
North Texas Lexus Club
Site Suggestions & Problems
Site Suggestions & Problems
Gallery
Tools
Car Payment Calculator
Tire Rim Calculator
Vin Decoder
Recalls
Technical Service Bulletins (TSBs)
Members List
Live Feed
Marketplace
Marketplace
Vendor Directory
Become a Vendor
Lexus News
Lexus CT200h
Lexus ES
Lexus GS
Lexus GX
Lexus HS250h
Lexus IS
Lexus IS-F
Lexus LC500
Lexus LFA
Lexus LS
Lexus LX
Lexus NX
Lexus RC
Lexus RX
Lexus RZ
Lexus SC
Lexus TX
Lexus UX
New Posts
How-Tos
FAQ
View Dark Mode
Please register or login to enable Dark Mode.
Log In
Register
Threads
Google
Threads
Posts
Advanced
Dark Mode
Please register or login to enable Dark Mode.
Log In
Forgot your Password?
By logging into your account, you agree to our
Terms of Use
and
Privacy Policy
, and to the use of cookies as described therein.
or
Login with Google
Login with Facebook
Recent
Commented
Albums
My Pictures
JoeYabuki's Photos
View Profile
Sort:
Commented
Most Recent
Most Comments
Albums
Photos
0
2024/02/18 19:06:46
384548
0
2024/02/18 19:06:40
384548
0
2024/02/18 19:05:57
384548
0
2024/02/18 19:05:51
384548
Highlighting blemishes.
0
2024/02/08 20:55:32
384548
viewing angle
0
2024/02/08 20:55:28
384548
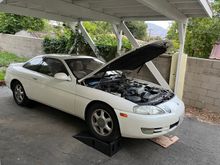
Here is the exact car I pulled from.
0
2024/02/08 20:55:25
384548
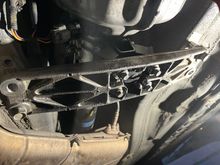
I should have grabbed more pics, but here you can see the trans mount a bit. Please excuse my ghetto solution and the massacre of my stock crossmember
0
2024/02/08 20:14:56
384548
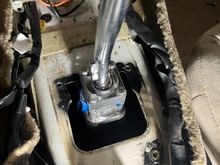
Current tunnel opening
0
2024/02/08 20:14:34
384548
Current tunnel opening
0
2024/02/08 20:14:29
384548
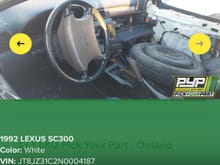
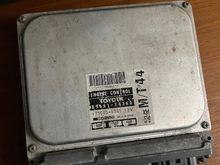
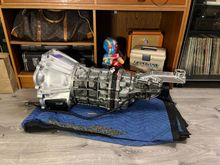
95 Fed Spec
0
2024/01/07 18:48:36
384548
Just need the crossmemember
0
2024/01/07 18:48:31
384548
0
2023/12/20 15:02:07
384548
0
2023/12/06 21:16:49
384548
0
2023/10/02 11:54:25
384548
0
2023/10/02 11:52:17
384548
0
2023/10/02 11:45:40
384548
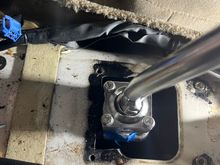
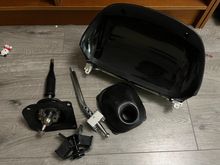
Two piece.
0
2023/10/02 11:41:36
384548
0
2023/10/02 11:41:32
384548
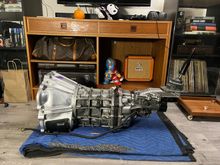
Finally ready to drop in.
0
2023/10/02 11:41:27
384548
Time to disassemble the crank pulley.
0
2023/10/02 11:41:23
384548
0
2023/10/02 11:40:29
384548
0
2023/10/02 11:40:25
384548
0
2023/10/02 11:40:21
384548
0
2023/10/02 11:40:17
384548
two piece hahaha
0
2023/10/02 11:40:01
384548
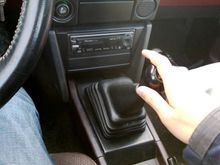
AE86 Shift boot for reference.
0
2023/05/29 21:56:20
384548
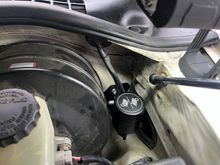
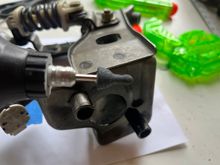
View of the ChaseBays Master from the engine bay. I'm pretty stoked, it looks nice and clean in the engine bay.
0
2023/05/29 21:21:01
384548
0
2023/05/29 21:20:57
384548
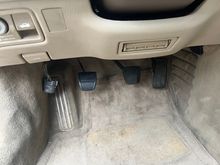
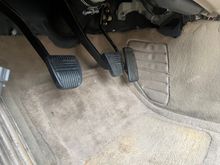
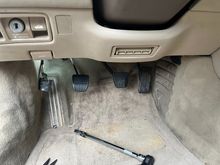
Ran into a small fitment issue. The ChaseBays rubber boot is beefier than the stock Aisin boot. I removed about 3mm of material from the cylinder hole of the pedal assembly so everything sat flush.
0
2023/05/29 21:20:52
384548
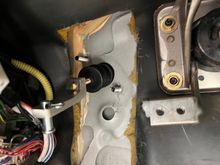
37mm center bore to fit the Chase Bays master cylinder. I used an 9mm drill bit for the two mounting holes. I had a tough time staying centered when drilling the mounting holes. I self taping punch would be a good thing to have.
0
2023/05/29 21:20:47
384548
Deburred and smoothed out the holes using a cheap harbor freight rotary. Test fitting the ChaseBays master before a bit of paint on the exposed metal.
0
2023/05/29 21:20:41
384548
Everything all buttoned back up. I need to take a second look at pedal placement next round. Super stoked all together. I wanted to put the pedal in now as motivation to continue the project. Can't wait for seats and steering wheel.
0
2023/05/29 21:20:37
384548
This is where it is sitting at the moment. It feels a bit off to me. However, I did not attach the pedal itself to the master just yet. So this is full lock up.
0
2023/05/29 21:20:32
384548
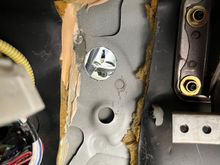
I always wondered why people don't have to many actual pedal install photos. Now I know. It's a b*tch. For ease. I removed the cruise control ECU last week. I ended up mounting the tilt/steering ECU to the CC bracket. This freed up alot of room for the clutch pedal itself.
0
2023/05/29 21:20:28
384548
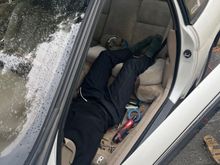
Bonus shot my wife took of my struggle. Tip: Get a small LED light with a magnet mount. Helped a ton under the dash.
0
2023/05/29 21:20:20
384548
0
2023/05/29 21:07:34
384548
0
2023/05/29 21:07:29
384548
I had some fitment issues with the chase bays master cylinder. The rubber boot's diameter was just a tad bigger than the OEM pedal assembly hole. Removed about 3mm of material to get it to slide through.
0
2023/05/29 21:07:24
384548
37mm bore through the cut out. 9mm bit for the mounts. When installing the pedal, I ended up removing more sound deadening in the top left so I could access the top nut for the master cylinder better.
0
2023/05/29 21:07:20
384548
First
Page
1 of 2
Last
Go To
Page
1
2
1 of 2
Go To
GO
Go to page
of 2
pages
1
2