Lexus ES: How to Replace Fuel Pump
Fuel pumps don't fail often, but it sometimes happens in older Lexus ES models. Keep your car running by swapping out a failing fuel pump at home.
This article applies to the Lexus ES (2005-2014).
Similar to signs of having faulty spark plugs, a failing fuel pump can exhibit signs such as hesitation, lack of power, misfires and "dieseling." The one distinguishing symptom will be the whining sound coming from the rear seat. The ultimate sign of a dead fuel pump is an engine that will turn over but won't start. This is why it's best to replace it as soon as it starts to fail, or every 100k miles, to prevent yourself from becoming stranded.

Materials Needed
- 8mm socket
- Flathead screwdriver
- Rags
- Rubbing alcohol
- Silicon
Step 1 – Preparation
When dealing with electrical connections around fuel lines, the first step is to remove the negative battery cable. This is to protect against shorting any wires or blowing any fuses related to the fuel pump. Then, remove the rear seat to get to the access panel. Holding the rear seat in the center, pull forward and up to pop the rear seat free. You'll need to angle it towards the back of the car for the seat belts to slide through.
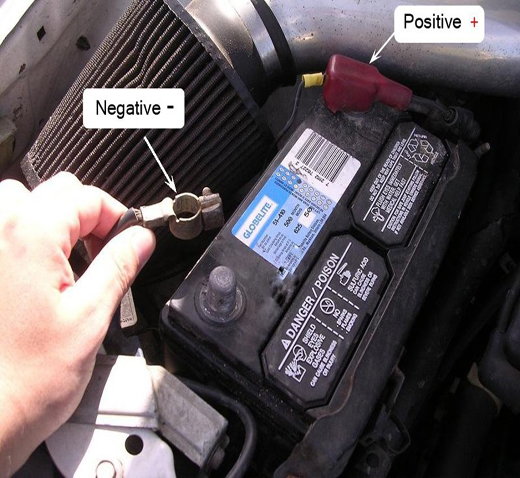
Figure 1a. Remove negative battery cable. 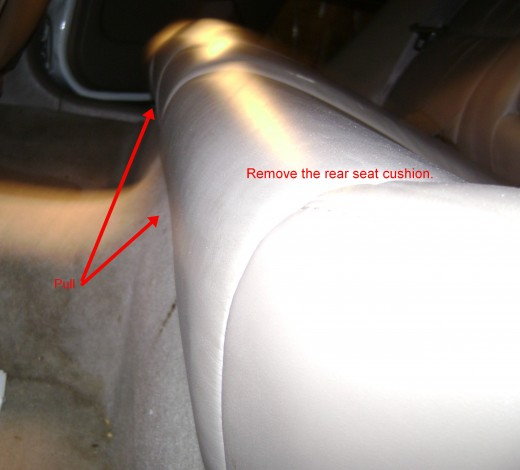
Figure 1b. Remove rear seat.
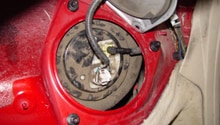
Step 2 – Remove access panel cover
This is one of the most time-consuming steps for this process. Take special care not to bend or warp the lid. The lid keeps moisture and road noise out of the car. If the lid is bent at all, it wont seal properly. Gently pry around the edge with a flathead screwdriver. If necessary, use a box cutter or a razor to cut the sealing glue.
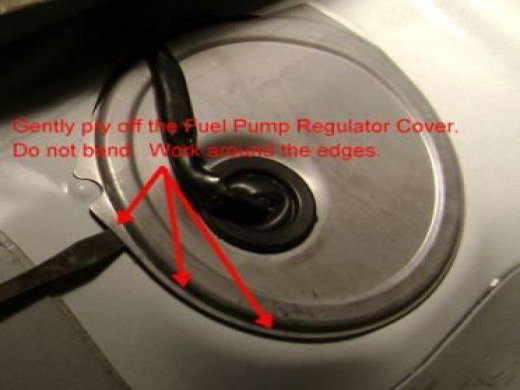
Figure 2a. Work around the edges to remove the access panel cover. 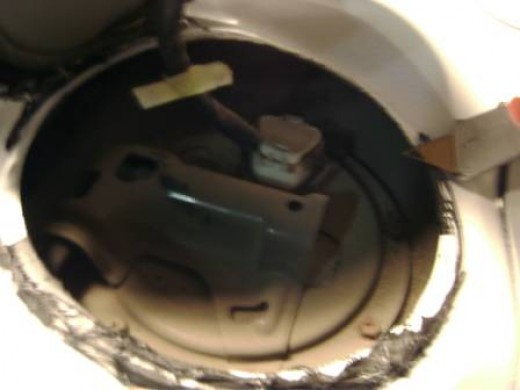
Figure 2b. Lid removed. The factory will use an excess amount of glue.
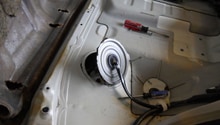
Step 3 – Remove the fuel pump assembly
-
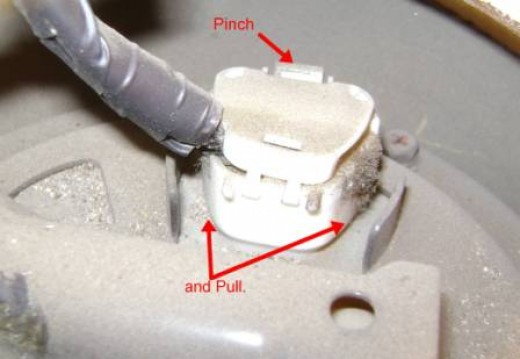
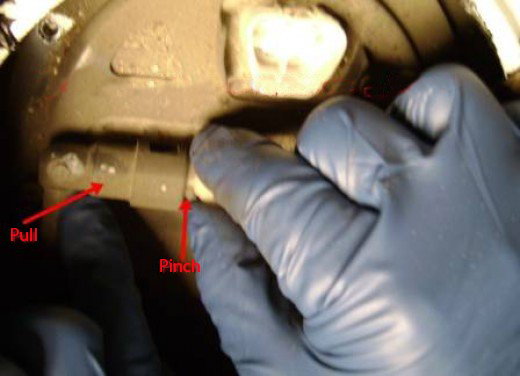
Remove the fuel pump electrical connection. Push in on the release tab. Then, pull up carefully to avoid breaking the tab.
-
Remove the fuel line protective cover; it's held in with two 8mm bolts.
- Slip some rags under the fuel line before disconnecting it to absorb any gas.
-
Disconnect the fuel line by pinching the release tabs in and then pulling it out. Push it off to the side for now so that you have room to get the pump assembly out.
-
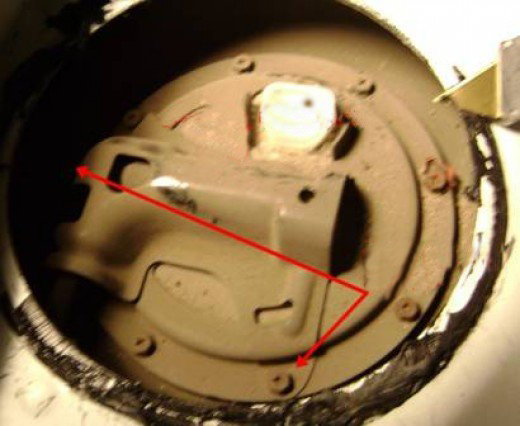
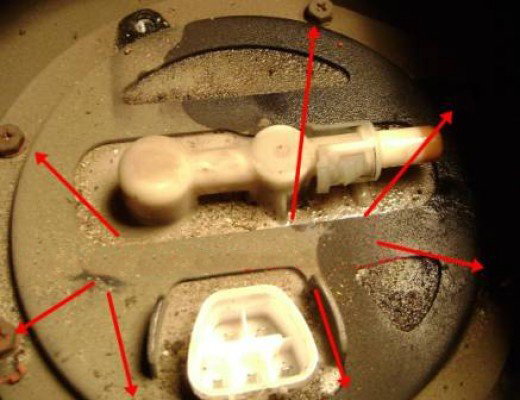
Remove the six remaining 8mm bolts holding the fuel pump assembly in. It's recommended to start with a socket and finish them with your hand so they don't fall by accident.
-
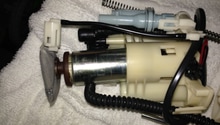
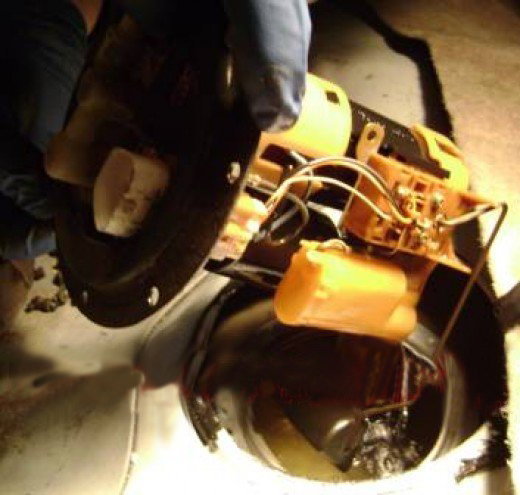
Now, remove the pump assembly. Pull it straight up about halfway. Turn the fuel pump at an angle to get the float to clear the opening. Put rags on the inside of the car to absorb the gas as it drips.
Step 4 – Install new assembly
Installation is essentially the removal process in reverse. Before sealing the lid into place, reconnect the battery cable to test and make sure the pump is functioning properly. Also, you'll need to clean off all of the old glue using rubbing alcohol and a paint scraper. Seal the lid with silicon or something similar.
Featured Video: Camry/ES Fuel Pump Replacement DIY
Related Discussion and Site
- Fuel Pump Issues - ClubLexus.com
- Fuel Pump Replacement Camry/ES DIY - HubPages.com