Lexus ES: How to Replace Oxygen Sensor
Oxygen sensors will eventually fail on the Lexus ES, but replacing them won't cost you a trip to the mechanic.
This article applies to the Lexus ES (2007-2014).
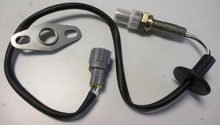
The oxygen sensor measures the amount of oxygen present in the exhaust. The data read from this sensor helps the motor adjust the fuel usage to maximize performance by providing the proper ratio of oxygen to fuel. If the sensor malfunctions and reads the oxygen level as too high, the computer will compensate by dumping in more fuel which leads to wasted gas. Likewise, if it reads too low, the computer will lower the amount of fuel which can lead to performance loss and possibly misfire.
The Lexus ES has four oxygen sensors. The two sensors this guide will describe removing are located after the catalytic converter on the exhaust piping. They're the more challenging pair of sensors to replace. The other two are located on the exhaust manifolds before the catalytic converter. These are typically referred to as the Air/Fuel sensors. They function the same way, but with greater resolution for more minute adjustments. They're easily accessible from the top of the engine bay.

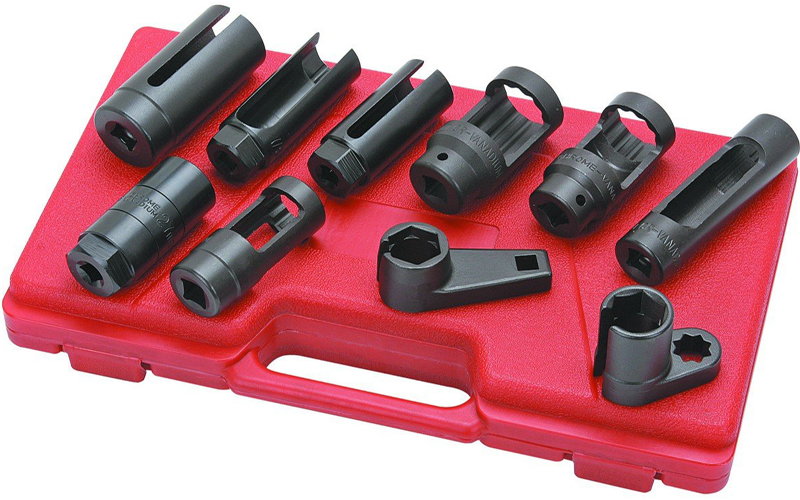
Materials Needed
- 7/8" wrench or oxygen sensor socket
- Phillips head screwdriver
- Flat head screwdriver
- Floor jack
- Jack stands
Step 1 - Jack up the front end
Park the car on flat, level ground. Disconnect the negative battery cable. Block the rear wheels to keep the vehicle from rolling backwards. Jack up the front of the car and place the vehicle on jack stands.
(Related Article: How to Jack Up Your Lexus - ClubLexus.com
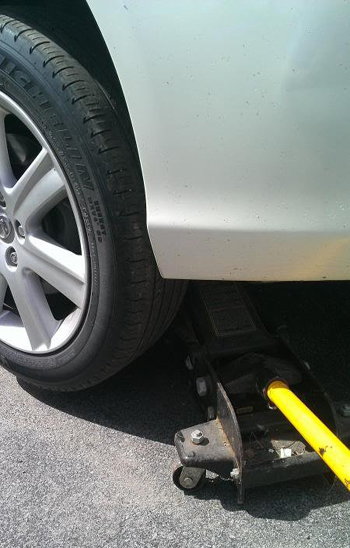
Figure 1. Jack up the front of the car.
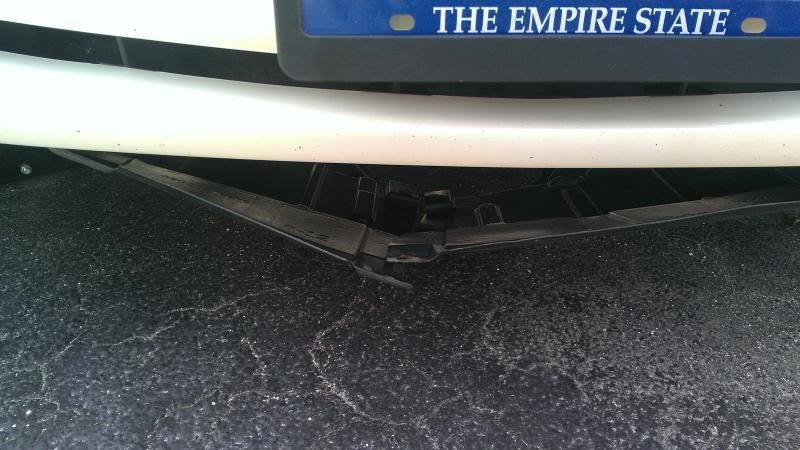
Step 2 - Remove the bumper trim
Remove the lower plastic trim running along the inside of the front bumper to gain access. It'll be held in by push pins or plastic screws exactly like the ones securing the plastic covers under the hood. Work your way around the trim with a flat head, removing clips until the trim can be pulled off.
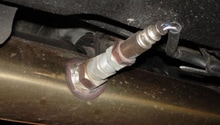
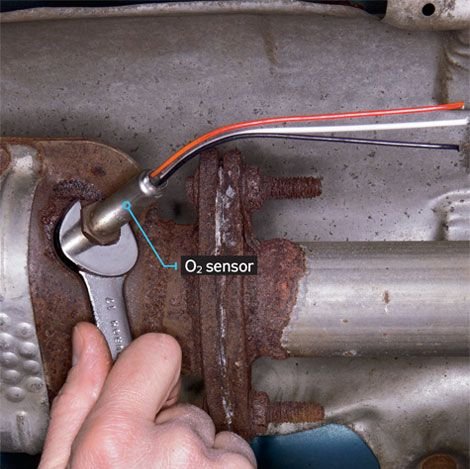
Step 3 - Remove the sensor
Depending on the model year of ES, the sensors will either be on the driver's side or passenger side. They'll be the only sensors sticking out of the exhaust pipe coming from the motor. Also, if you are replacing both sensors at the same time, finish one before starting the other so you don't get the wires crossed.

Follow the wires on the sensor to the wire harness clip. Using your flat head, you can pry up the clip tab and unplug it.
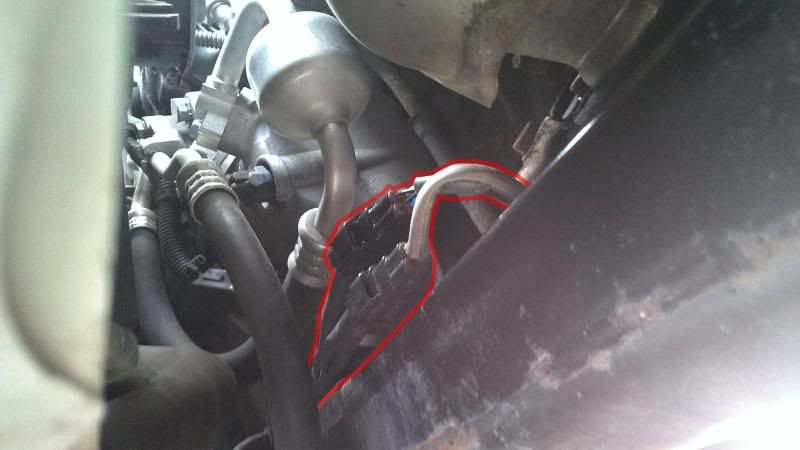
Figure 4. O2 sensor harnesses highlighted. 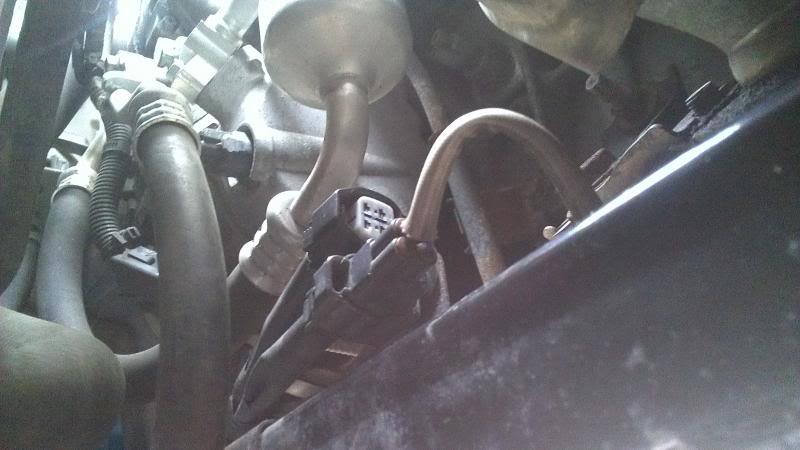
Figure 5. Disconnect the plug of the sensor you're removing.
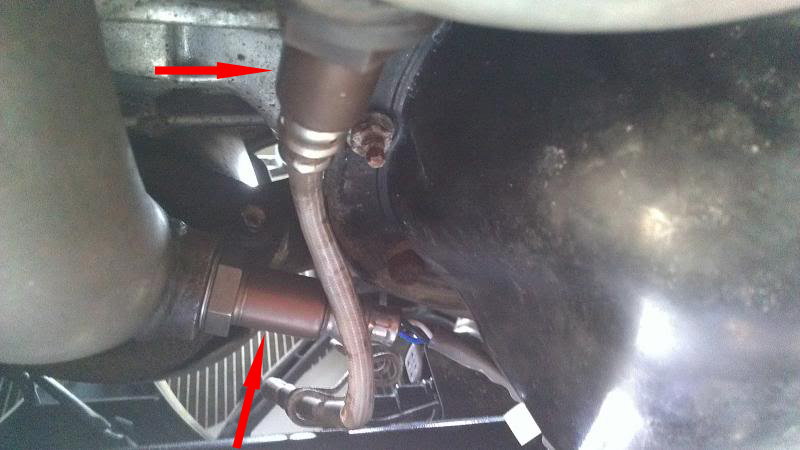
Fit the 7/8" box-end wrench to the old sensors and turn counter-clockwise to unscrew them. If they're stiff, spray them with a penetrating oil (PB Blaster, Liquid Wrench, etc.) and allow it to sit for a few moments.
Pro Tip
If a regular box end wrench doesn't fit, try using an oxygen sensor socket. There are special sockets for oxygen sensors available at most auto part stores. Using one of these makes it easier to get leverage on the sensors.
Step 4 - Install new sensor
Apply anti-seize to the threading on the sensor but take special care not to get any on the actual sensor itself. Hand-tighten the sensor in place and then tighten it fully using the wrench or tool. Plug the electrical connection into the wire harness you unplugged the old one from.
Step 5 - Finishing up
Reconnect the negative battery cable, reattach the plastic trim, and take the car off of the jack stands.
Featured Video: DIY Replace Oxygen Sensor on Toyota Camry V6
Related Discussions
- ES Heated O2 Sensor DIY - ClubLexus.com
- Difference Between the Two Sensors - ClubLexus.com