Lexus ES RX: How to Replace Water Pump
Replacing the water pump on your Lexus ES or RX will save your engine from overheating. If your car has more than 100,000 miles, you may want to consider replacing it.
This article applies to the Lexus ES, RX (2005-2013).
Replacing the water pump on your Lexus ES or RX is intensive labor. The water pump is buried under a number of components. You may also have to raise the engine once or twice, which causes additional time and effort. Therefore, this repair is best left to those with intermediate or advanced skills. In addition, you will need a number of tools to make this repair. Although the parts are fairly inexpensive, the $600 professional cost may be worth your time and the additional cool cost.
Since the engine in the Lexus RX and ES 350 is the same motor in the IS and GS 350, the guides for replacing the water pump in those cars will still apply for the most part. However, the transverse mounting makes the procedure more challenging than in those cars. Since the 2GR series motors from Lexus were only introduced in 2007, most Lexus ES and RX models have a long way to go before needing this repair.

Materials Needed
- Metric socket kit (up to 22mm)
- Bucket and/or drip pan
- Jack and jack stands
- Breaker bars
- Gasket scraper
- Mirror (to view hidden belts behind components)
- 3/8" ratchet
- 1/2" breaker bar
- Torque wrench
- 10mm, 12mm, and 14mm socket wrenches
- 5mm and 10mm Allen or hex wrenches
- Channel lock pliers
- Special pulley holder tool
Step 1 – Remove the plastic covers and radiator cover
Remove the covers from the engine and radiator by removing the plastic pop clips that hold them on. There are only a couple of bolts that hold these parts together.
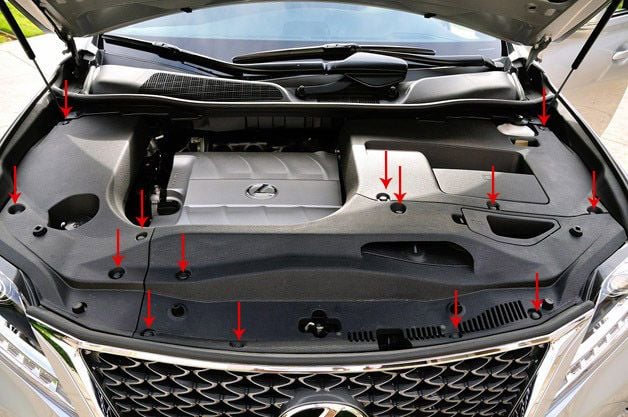
Figure 1a. Engine cover clips. 
Figure 1b. Lexus with engine cover removed.
Step 2 – Drain coolant from block
The engine block is filled with coolant. Unless you drain it from the block first, the fluid will come rushing out when removing the water pump. There are two drain cock plugs located on the block. Their locations are noted in the following diagram.
First, unscrew the radiator cap. Keep a length of hose handy to route the fluid to a catch pan or bucket. Remove the drain plugs and allow the coolant to flow out of the block.

Step 3 – Remove engine brackets
The water pump is located in the center of the engine block. Because of that, there's a lot of hardware directly above it and will need to be removed in order to access the bolts securing the pump. They're mostly engine support brackets and pulleys. When finished, you should have a clear view downward to the water pump pulley.
Begin by unbolting and removing the "dog bone" engine dampner and bracket. This is similar to the one found in the earlier Lexus ES models and it is removed the same way. Just unbolt it and pull it out.

Figure 3. "Dog bone" engine insulator. 
Figure 4. Typical Lexus RX engine mount.
Step 4 – Lift and tilt engine
Grab the floor jack and a foot long 2x4 plank. Align the wood underneath the passenger side of the engine (near the oil pan, but not on it). Lift up on the engine through the plank with the floor jack. Since the nuts on the passenger side, front, and rear engine mounts have been removed, the engine will tilt upward.
Then remove the six bolts securing the engine bracket to the block. There are three different bolt lengths, so when removing them pay careful attention which one goes where. The three long bolts go in the bottom-middle three holes, while the shorter length ones go to the right and up top.
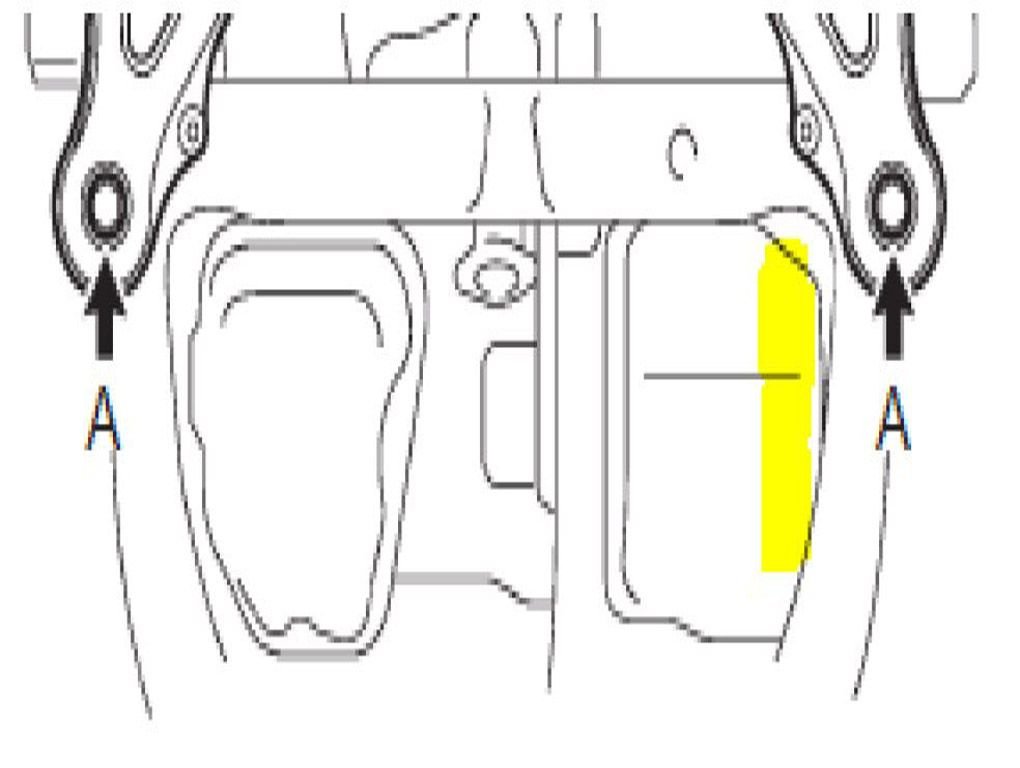
Figure 5. Yellow mark is where the plank goes. The oil pan is on the other side. 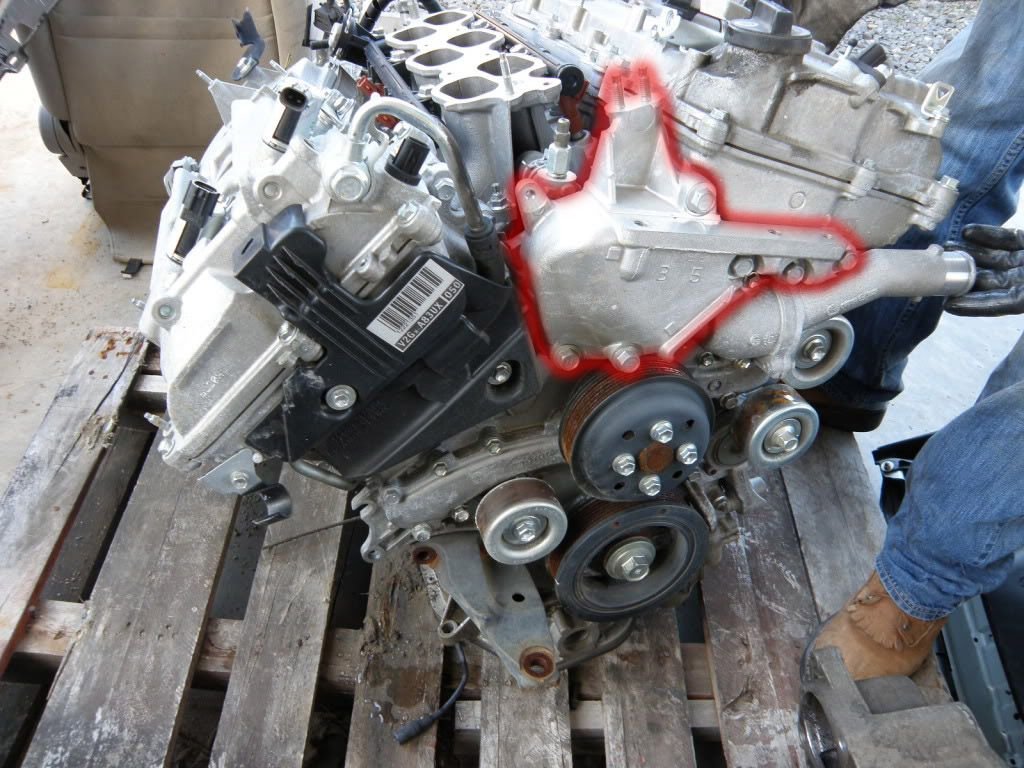
Figure 6. Engine mount bracket.
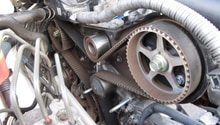
Step 5 – Remove pulleys and drive belt
Break the bolts idler pulleys (red arrows in Figure 7a) while the accessory belt is still on. Then, break the four bolts on the water pump pulley (circled in Figure 7b). Put a 14 mm socket wrench on the belt tensioner. Turn the tensioner counterclockwise. Doing this by hand will be difficult, so use a breaker bar to help.

Figure 7a. Location of the pulleys. 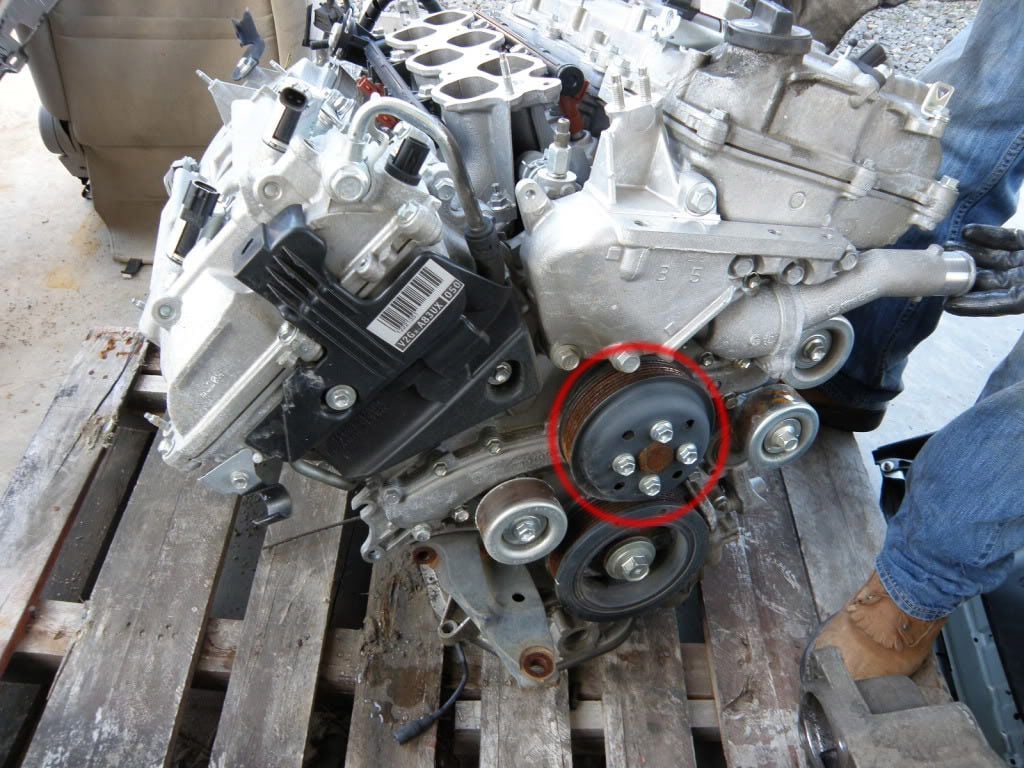
Figure 7b. Water pump pulley.
Step 6 – Remove the water inlet
Remove the hose from the water inlet housing. Then, unbolt the water inlet housing and remove it. Keep a few rags handy in case coolant splashes.
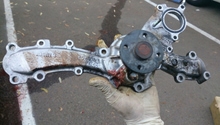
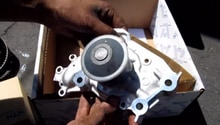
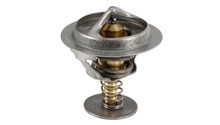
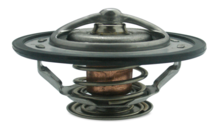
Step 7 – Remove and replace the water pump
There are 16 bolts holding the water pump on, as pictured in Figure 9a. They vary in size. Place a pan underneath the engine before loosening the bolts in order to catch the fluid. Remove the bolts. You may have to lightly pry or tap the water pump loose.
The bolts are replaced as shown in Figure 9b. Replace the bolts according to the sizes of A, B, and C.
- A, medium bolts
- B, short bolts
- C, large bolts
Medium and short bolts must be torqued to 9.1 Nm (93 kgf-cm, 6.5 ft. lbs). For the large bolts, torque to 21 Nm (214 kgf-cm, 15 ft. lbs).
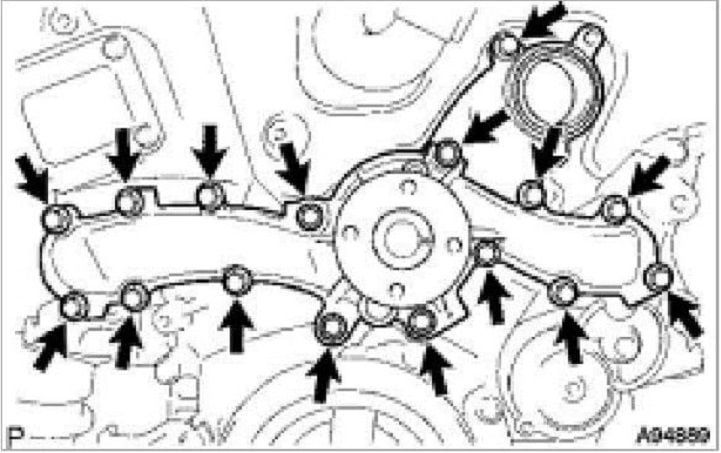
Figure 9a. 16 bolts hold the water pump on the engine. 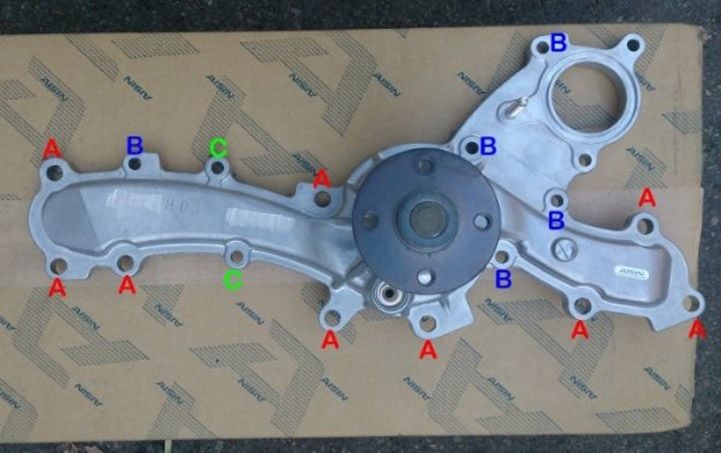
Figure 9b. Bolt locations according to sizes A, B, and C.
Pro Tip
In order to make sure the bolts go back where they belong, use this procedure. As you remove each bolt, place it in the same hole on the new water pump. When you take the old water pump out, transfer the bolts from the new water pump to the old water pump. Then, pull the bolts from the old water pump and screw them into the same hole on the new water pump.
Step 8 – Re-installation
- Bolt the water inlet housing back to the block and reattach the hose.
- Bolt on the water pump pulley. Tighten bolts to 15 ft-lbs.
- Re-install idler pulleys and drive belt. Tighten bolts to 32 ft-lbs.
- Re-install engine bracket. Tighten bolts to 40 ft-lbs.
- If the engine is still lifted on a jack, lower it. Then, re-install the rear engine mount nuts to 58 lb-ft, the front engine mount nut to 64 lb-ft, and the passenger side engine mount nut to 70 lb-ft.
- Re-install the "dog bone" engine mount assembly. Tighten bolts to 28 ft-lbs. Don't forget to re-install the engine mounting stay.
- Reconnect the radiator hoses.
Step 9 – Refill coolant
- Re-install the drain cock plug. Torque the plug to 9 ft-lbs.
- Loosen the air drain plug at the top of the radiator by three or so turns.
- Fill reservoir tank until full.
- Press inlet and outlet hoses several times by hand and check levels.
- Install radiator cap and reservoir cap.
Related Discussion
- DIY RX350 Water Pump Replacement - ClubLexus.com