Lexus GS: How to Replace Fuel Pump
Before your Lexus GS is left stranded, fix a failing fuel pump with these easy steps.
This article applies to the Lexus GS (2005-2014).
Parts on your car wear out overtime and the fuel pump is no exception. A warning sign will be a whining noise coming from around the rear seat of the passenger side. Eventually, fuel flow will drop low enough to trigger a lean diagnostic trouble code (DTC) or a stuttering feeling while accelerating. If the fuel pump breaks down while driving, you will be stranded. It is best to replace the fuel pump as early as possible. It is also recommend replacing the fuel filter at the same time because a clogged fuel filter might be the cause of a failing fuel pump.

Materials Needed
- Flathead screwdriver
- 12, 10, 8mm sockets
- Rags
- Needle nose pliers
Step 1 – Preparation
- Disconnect the negative battery cable. It prevents from shorting any wires or blowing fuses when disconnecting and reconnecting the fuel pump wire harness. (Figure 1)
-
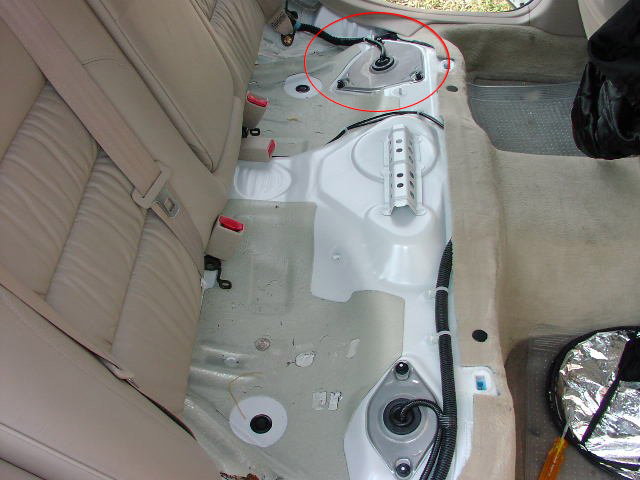
Remove the bottom portion of the rear seat. Simply grasp at the front of the seat and pull straight up to pop it free. Set the seat aside. (Figure 2)

Figure 1. Remove the negative battery cable. 
Figure 2. Rear seat removal.
Step 2 – Fuel pump removal
The fuel pump is located below the rear seat of the driver's side and has an access panel.
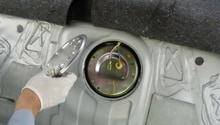
- Remove the access panel by using your 12mm socket to remove the three nuts. The panel is probably also glued into place. Similar to the way you would open a paint can, use a flathead screwdriver to pry it up. Avoid bending the lid or it won't seal properly during installation.
- Disconnect the electrical connector from the top of the pump assembly. Use a flathead to pry the clip forward, so you can slide it off.
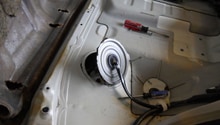
- Remove the fuel line from the top of the pump assembly. Place rags around the area to catch any gas that spills out. To remove, slide the yellow clip back from the line. Then, pull it straight up and off. (Figure 4)
- Remove the eight 8mm bolts around the fuel pump assembly. (Figure 5)
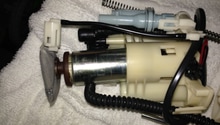
- Now, pull the assembly out halfway. (Figure 6)
- There'll be a hose attached to the side of the pump. Squeeze the center of the clip to remove it. Then, pull the hose off.
-
Now, remove the pump completely. it'll take some wiggling and angling in order to get it out.
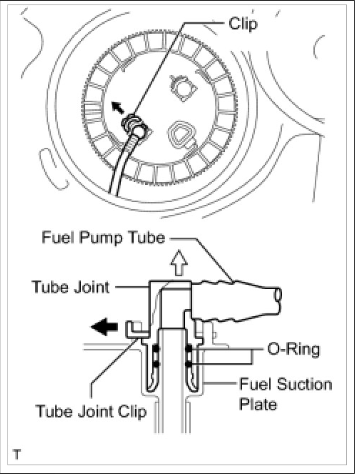
Figure 4. Fuel line retaining clip. 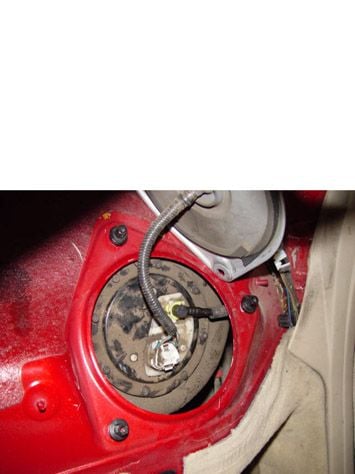
Figure 5. Electrical connector, fuel line, and 8mm bolts. 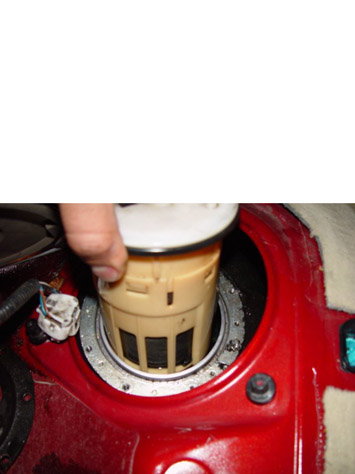
Figure 6. Fuel pump halfway out.
Step 3 – Install
The installation will be the reverse process of removal. Make sure all of the hose connections and electrical connections are properly secured. Before you finish installing the fuel pump access panel lid, reconnect the battery cable to test the pump. If the pump is functioning properly, then you can go ahead and finish installing everything else.
Related Discussion
- Replacing Fuel Pump - ClubLexus.com