Lexus: How to Detail Your Car
Get your Lexus showroom-ready by detailing it yourself. Learn how in this guide.
This article applies to the Lexus IS, GS, ES, and RX (2005-2014).
Lexus is a top selling luxury brand for many reasons, one of them being its captivating appearance. When you pull out of the driveway in something that looks and feels powerful, that sensation seems to rub off, instantly elevating your self-esteem and possibly affecting even the moods of those around you. The only thing better than a vehicle that exudes sophistication is a brand new vehicle that does the same. If you love the idea of driving a showroom-ready Lexus on a regular basis, you might want to look into detailing your car. While many drivers might think car detailing is best left up to the pros, the truth is it's something you can do from home.
The steps below are a crash course when it comes to detailing a Lexus (or any other vehicle). The owner looking for even more detail should dive into the care and detailing section of the ClubLexus.com forums. Owners interested in advanced details can jump to the related discussions below.

Materials Needed (some optional)
- Meguiars #1, 2, 7, 39 and 40 (fine cut cleaner, medium cut cleaner, show car glaze, heavy duty vinyl cleaner, vinyl and rubber conditioner)
- Meguiars show car wax
- Meguiars quick detailer
- Meguiars SoftBuff pads
- Meguiars Claybar kit
- The Absorber chamois towel
- California Water Blade
- Dawn dishwashing liquid
- Meguiars heavy duty carpet cleaner
- Meguiars gold class leather conditioner
- Meguiars gold class all metal restorer
- Meguiars endurance high gloss tire gel
- Meguiars chrome polish
- Meguiars PlastX
- Meguiars gold class vinyl/rubber protectant
- RainX windshield treatment
- Car wash concentrate
- Windex
- Meguiars professional wheel cleaner
- Rain-X fog wipes
- Cotton towels
- Sponge
- Reliable can vacuum with attachments and nozzle
- Porter Cable 7424 buffer
Completing this job yourself will cost a little over $300 if you have to purchase all of the equipment/materials. Bear in mind that much of this equipment can be used multiple times and for multiple projects, especially the $118 Porter Cable sold at Home Depot. This product accounts for 1/3 of the price. If you already have one on hand, you're a step ahead.
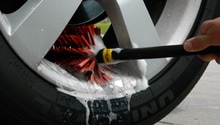
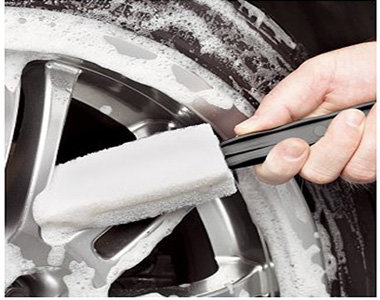
Step 1 - Start at the wheels
Starting at the bottom is a popular choice for the majority of car detailing professionals. To begin the wheel cleaning portion of this DIY, spray Meguiars professional wheel cleaner on all four wheels and allow it to sit for a few minutes. Rinse the rims and polish each wheel with Meguiars gold class all metal restorer (If your wheels are chrome, substitute with chrome polish). Once polished, wipe each wheel with a cotton towel and remove excess residue. Next, apply Meguiars endurance high gloss with a sponge. To really make the wheel wells shine, apply a generous amount of the Meguiars PlastX, rinse, and then dress each wheel well with Meguiars gold class vinyl/rubber protectant.
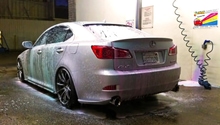
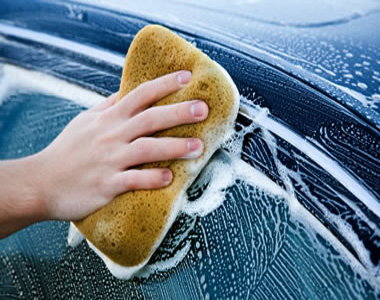
Step 2 - Wash the exterior
A surprising ingredient in the car detailing recipe is Dawn dishwashing liquid (not recommended for use on a regular basis). Dishwashing soap is great for stripping away everything between the clear coat and the sponge. Apply this solution generously to the exterior and then dry with the California water blade and a microfiber towel (or chamois). Clean the blade each time residue builds up on it to avoid scratching your paint job.
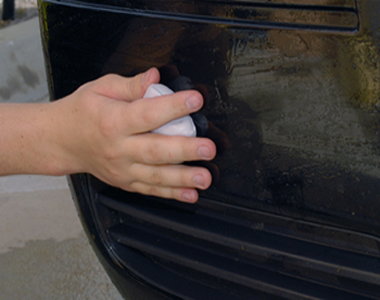
Step 3 - Clay bar the paint
Next, use the Meguiars clay bar kit to clear the surface of harmful, shine-blocking particles. Once harmful particles have been completely removed (approximately an hour and a half later) whip out your car wash concentrate and clean the entire exterior one more time. Once the exterior is gleaming, it's time to pull out the heavy artillery and move on to Step 3.
Step 4 - Buff the vehicle
While somewhat pricey, the Porter cable 7424 buffer is by far the most popular choice among car buffs. This powerful tool is mulifunctional and features a different pad for each step. When buffing, flat surfaces respond best to a front to back motion while side panels should be buffed vertically. Apply Meguiars 1 and 2 throughout the process. Once finished, spray your Lexus with Quick Detailer and wipe it dry with the cotton towel. Repeat this step up to four times as needed.

Featured Video: How to Polish/Buff Paint
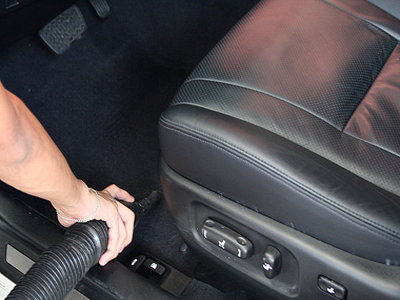
Step 5 - Clean the interior
Free your car of the useless gum wrappers and to-go cups that have found their way to the floor of the backseat. Using the can vacuum, thoroughly go over the interior, interchanging the nozzle for those hard to reach crannies. Use a heavy duty carpet cleaner to vacuum out the fabric. Meguiars #39 and #40 can be applied to interior plastic pieces with a cotton towel or sponge. Rain-X fog wipes are perfect for removing streaks from the interior glass without exposing yourself to harsh chemicals while working inside of a vehicle. Apply Windex to these surfaces as needed. For leather sections inside of your car, Meguiars gold class leather conditioner will work wonders when rubbed carefully into the leather with a cloth or towel. Vacuum the carpet once more to remove any dust you stirred up while Windex-ing and conditioning.
The aforementioned steps will have you well on your way to being showroom ready. If you practice this procedure on your own vehicle, you could even turn car detailing into supplemental income, meaning the expensive equipment would basically pay for itself.
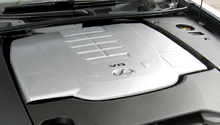
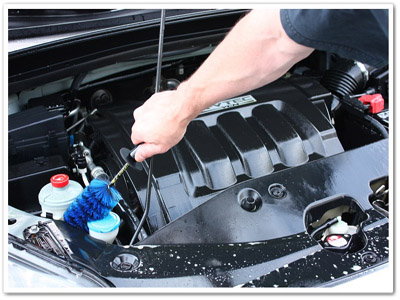
Step 6 - Detail the engine bay
The first thing to do when detailing the engine bay is to cover the electrical connectors and wiring with plastic. This is just a safety precaution; the electronics under the engine bay are covered anyway and a hose isn't likely to cause problems, but never directly spray any electrical areas. Begin by spraying down the engine bay with engine degreaser. The fluid containers and the hoses tend to get especially dirty, so be sure to spray them all. A slow stream of water should be enough to rinse off dirt. Use a detailing brush and degreaser to get to the harder-to-reach areas. Waterless wash chemicals also work. Rinse off the excess soap and dirt. Dry the engine bay with microfiber towels or an air gun. Polish up the the plastics and hoses with a rubber/vinyl treatment like 303 Aerospace Protectant.
(Related Article: How to Clean Your Engine Bay - ClubLexus.com)
Featured Video: How to Detail your Car
Related Discussions and Site
- Wash Prep/Detailing 101 - ClubLexus.com
- Show/Prep Detailing Guide & Definitions - ClubLexus.com
- Auto Detailing Guide - DetailedImage.com