Lexus: How to Make Your Own Sun Shade
Making a custom-fitted windshield sun shade for your Lexus is a simple DIY project. Follow the step-by-step instructions in this article to learn how to make your own.
This article applies to the Lexus IS, ES, GS, and RX (2000-2014).
A windshield sun shade is an essential accessory that keeps the inside temperature of your Lexus cool while protecting the interior surfaces, like leather seats and the dashboard, from the scorching sun. Lexus vehicles with metal shift knobs can be particularly unpleasant to touch after sitting in direct sunlight for any period of time. If you often park your Lexus outside in unshaded areas, then why not consider making a sun shade yourself? Professionally made sun shades cost double the price and may not be custom-fitted to your windshield. Follow this step-by-step guide to make your own sun shade in under an hour or longer if you are feeling incredibly crafty. This easy DIY project allows for exercising your creativity in customizing it, too.

Materials Needed
- Utility or X-Acto knife
- Newspaper
- Cardboard
- Multi-purpose adhesive
- Reflective vinyl material
- Scotch tape
- Pen
- Painting supplies (optional)
- UV protective clear coat (optional)
Step 1 - Cut out a newspaper outline
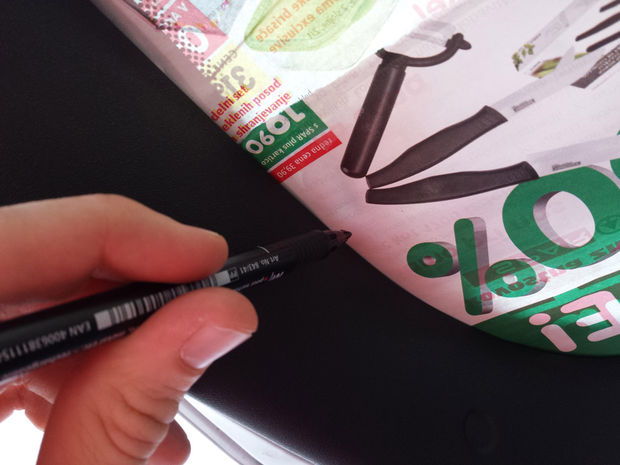
Tape pieces of newspaper together on the exterior surface of the windshield, covering it fully. Measure the rear-view mirror and cut the top of the newspaper to account for the width and height of the mirror. The goal is to tuck the sun shade up and under the mirror. Mark the outline of the windshield onto the newspaper.
Step 2 - Trace the shape onto cardboard
Remove the newspaper outline from the windshield. Working on a flat surface, place the outline on top of the large piece of cardboard. Trace the exact shape of the outline onto the cardboard using a pen.
Pro Tip
If you want a bit of fold in your sun shade, as opposed to a perfect fit, add a few inches of width on each side of the cardboard outline.
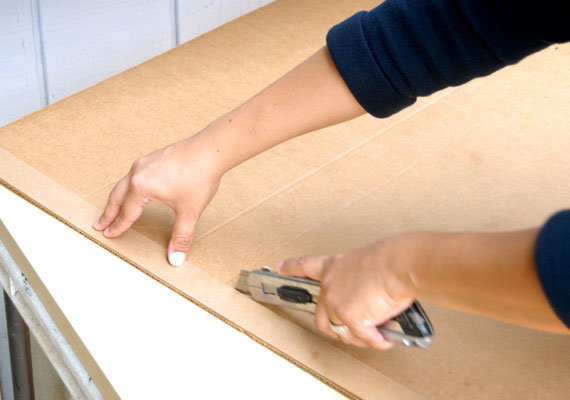
Step 3 - Cut out the cardboard shape
Remove the newspaper from the cardboard. Using a utility or X-Acto knife, cut along the edges of the outline on the cardboard.
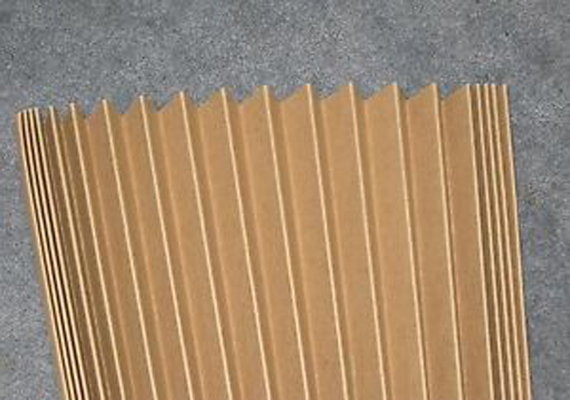
Step 4 - Fold the cardboard into desired shape
Draw vertical lines from top to bottom on the cardboard, measuring at about 5 inches in width. Although your hands will do, you can use another piece of cardboard or a yard stick to help you bend the sun shade back and forth alternately on the lines, creating an accordion-shaped sun shade.
Step 5 - Customize as desired
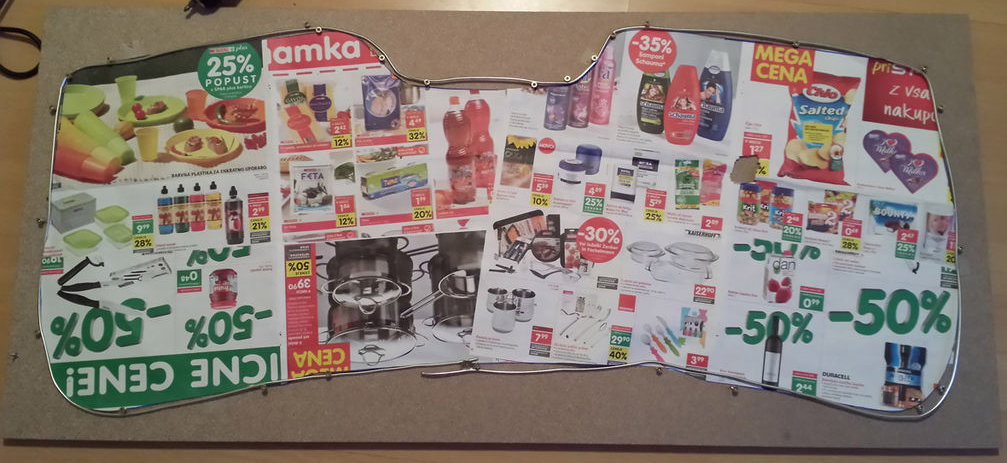
At this point your sun shade could use a little flair. The beauty of cardboard is that it's a blank canvas on which you can paint or add reflective material to in this case. Specifically, it's recommended to add reflective vinyl material, which can be purchased online. Simply cut the vinyl material to the shape of the shade and glue it on using a multi-purpose adhesive.
Alternatively, if you choose to paint your sun shade, it's recommended to spray a UV-resistant clear coat to help protect your design and reflect light back into the atmosphere. Links to purchasing these products online can be found in the related sites below.
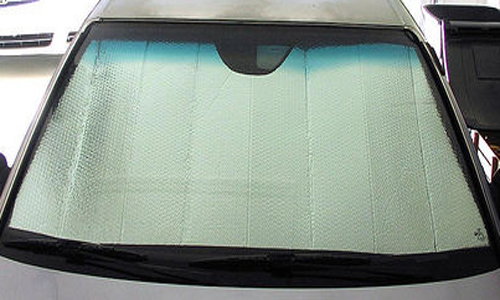
Figure 5. Sun shade with reflective material. 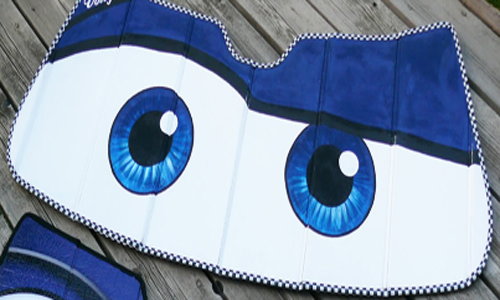
Figure 6. A hand-painted sun shade.
Pro Tips
- Make sure you allow ample time for your customized sun shade to dry before placing it in your Lexus.
- If you add reflective material or any kind of fabric, be sure you glue it on so it's loose at each fold so that when you fold it into an accordion the material isn't too tightly glued on; this will help prevent tears in the sun shade.
Related Sites
- Energy Shield 200 Reflective Vinyl - Onlinefabricstore.net
- UV Resistant Clear Coating - Krylon.com
- Eclectic E6000 Multi-Purpose Adhesive - Google.com
- Utrecht Corrogated Cardboard - Utrechtart.com