Lexus IS: How to Install Windshield Molding
If your window molding is bad, you might hear a whistle while driving on the freeway or experience water leakage. In either case, here's how to change it yourself.
This article applies to the Lexus IS (2005-2013).
Over time, several components can wear on a vehicle, and many of them wear faster due to the climate. Some components, like seals and moldings, are prone to cracking, especially if your car sits outside in the sun. Windshield moldings are notorious for this type of wear and can often show signs of needing replacement. You may hear a whistling noise while driving on the freeway, or you or your passengers may feel a draft. Aside from weather, another factor that can contribute to molding wear is the type of washing fluid used, especially if it has hard detergents. Dish soap commonly contains some of the hardest detergents and should not be used to clean vehicle moldings or any other components.

Materials Needed
- Flathead screwdriver
- Non-marring pry tool
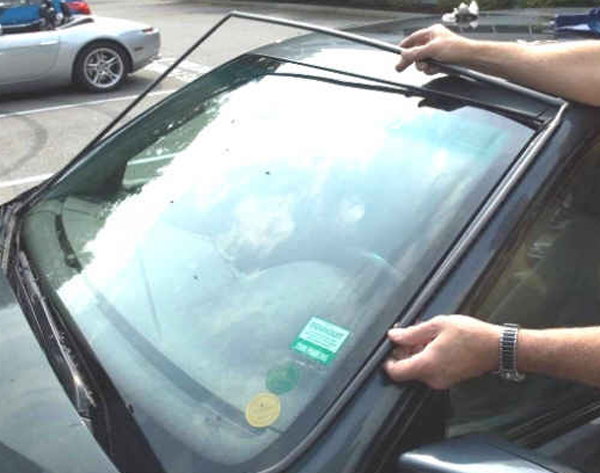
Step 1 - Pry off old molding and remove clips
Use a flathead screwdriver or non-marrying pry tool to lift and remove the old molding to expose old clips. Use the screwdriver again to remove clips.
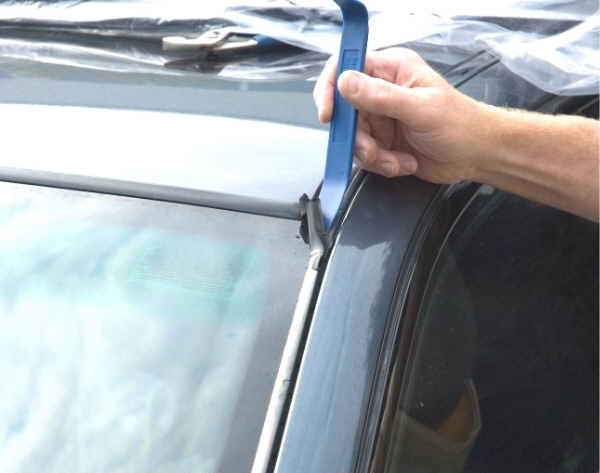
Figure 1. Remove the old molding with a tool. 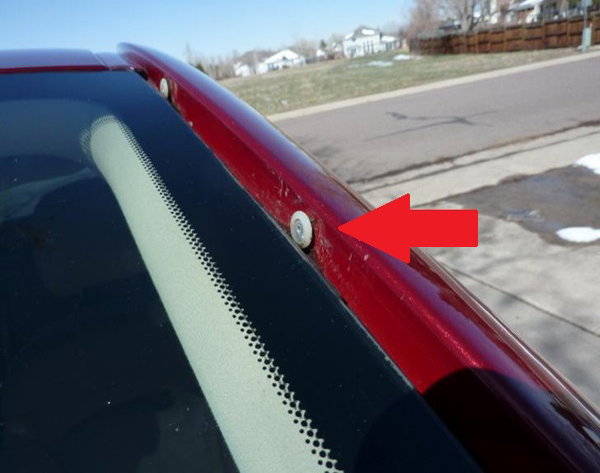
Figure 2. The clips are exposed when trim is removed; use a screwdriver here.
Pro Tip
Moldings and clips are one-time-use type of components, and if you break some in the process of removal, that's okay.
Step 2 - Install new clips
It is possible for the clips to be worn and/or break when you are in the process of removing the old molding (Figure 3). Pop off the old clips and install the new ones (Figure 4).

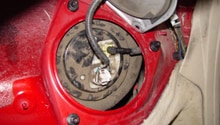
Figure 3. Worn clip (bottom) vs. new (top). 
Figure 4. New clip, installed.
Pro Tip
Whether clips are broken or not, it is best to replace them with new ones so everything is as fresh as possible from the start.
Step 3 - Install new molding
With new clips installed, the new molding will press and clip into place.
Related Discussions
- Windshield Molding Cracking Problem - ClubLexus.com
- DIY Windshield Molding Trim Replacement - ClubLexus.com
- Where to Find Clips and Moldings? - ClubLexus.com