Lexus IS: How to Replace Oxygen Sensor
Replacing a bad O2 sensor is a straightforward process that anyone with some time and the right tools can do. Learn how to perform this common repair with this step-by-step walkthrough.
This article applies to the Lexus IS 250/IS 350 (2005-2014).
The oxygen sensors in your Lexus play a very important role in how your car operates. This little gadget can cause many headaches when it decides that it doesn't want to function properly any longer. The biggest reason for the headache is that it normally does not just burn out and die all at once; it is a gradual fade which goes unnoticed for quite some time before complete failure. The problem is that while it is gradually fading, it is causing your engine lots of damage that can cause bigger problems over time. You should replace your O2 sensor every 60,000 to 90,000 miles. A failure before then will definitely trigger the check engine light.
The role of your O2 sensor is to check your Lexus' exhaust and report the results to your car's computer. This tells your Lexus exactly what the ideal air to fuel ratio should be for optimal performance. When this little device starts getting it wrong, you might not have a check engine light to tell you, so be in tune with your car and be sure to notice if your engine is idling really rough or missing altogether. You might also experience some engine pinging and increased vehicle emissions. Another tell tale sign is getting some really bad gas mileage; the key factor here is that when you try to accelerate, the car just seems to struggle. Knowing these signs is a great help in getting the most often misdiagnosed part of your car corrected. Follow these steps to change the O2 sensors yourself, which will save you a great deal of time and money from having a professional do this relatively simple task.

Materials Needed
- WD-40 or other lubricant
- Normal wrench with offset, special O2 sensor socket or special combo tool
- Anti-seize compound
- Thread chaser (optional)
Pro Tips
- Actual replacement should take no more than 15 minutes. You will want to pre-lube the O2 sensors with a penetrating lubricant 12-24 hours prior to beginning.
- The O2 sensor is connected to a quick-disconnect wiring harness and the special socket is needed to prevent the wires from getting twisted and bound up using a normal socket. The special tool can cost from $8 - $100 depending on the style and brand you choose. Overall it's an easy job, but care should be exercised in handling these parts.
Step 1 - Locate the oxygen sensor
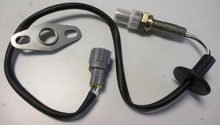
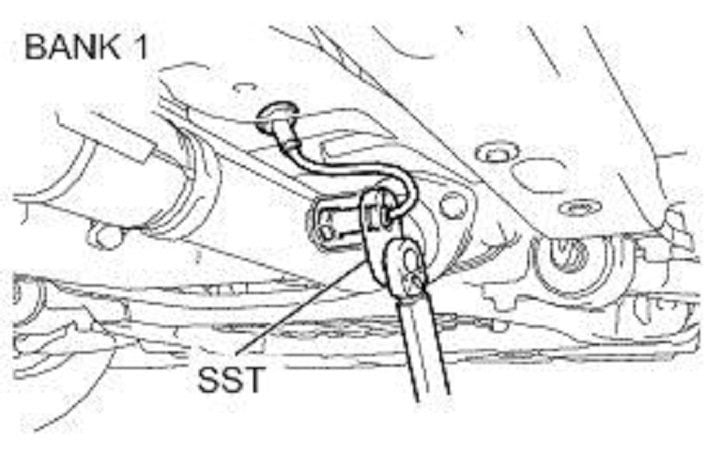
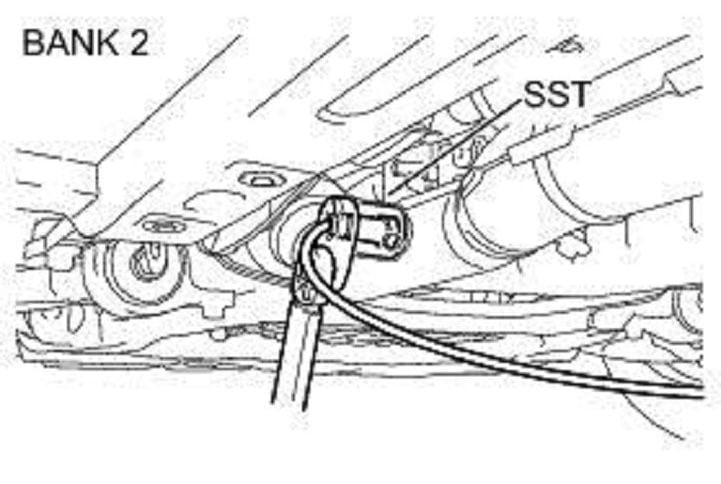
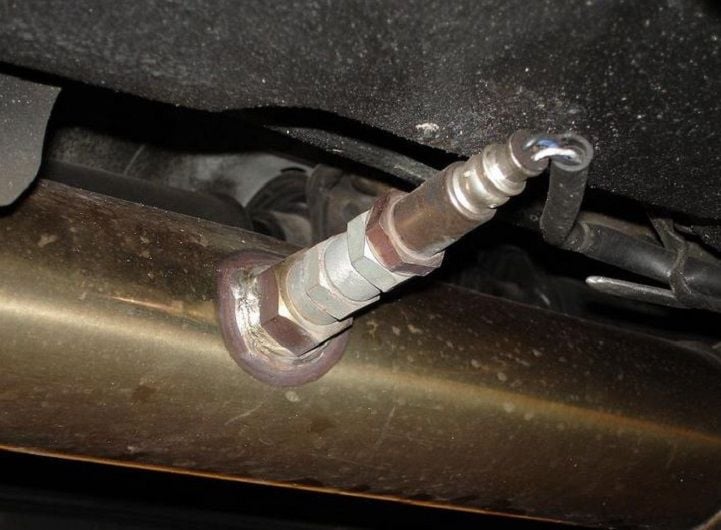
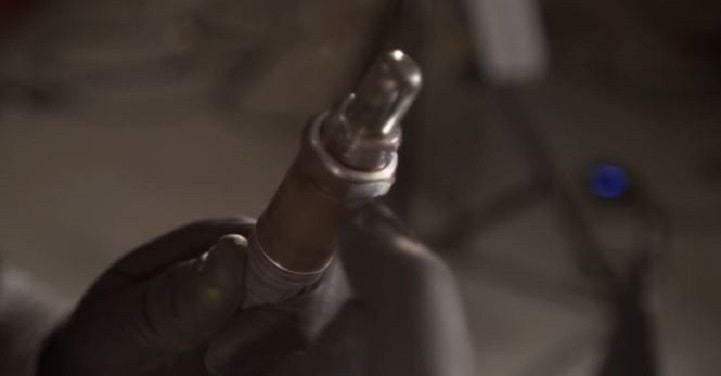
The Lexus will have a bank 1 and a bank 2 O2 sensor: one is near the firewall and in front of the catalytic converter; the other is behind the converter closer to the rear. They should primarily be the same part, just different lengths of wiring. The bulb part is connected to the exhaust.
Step 2 - Spray WD-40 or other lubricant generously on the bulb threads
Spraying the area with a penetrating lubricant (like liquid wrench) even 12-24 hours earlier to let it soak is great idea. The threads holding the O2 sensor in the exhaust is an extremely harsh environment. Extreme heat, plus cold causes the threads to expand and retract, allowing grime and road salts to get in there and lock it in tight.
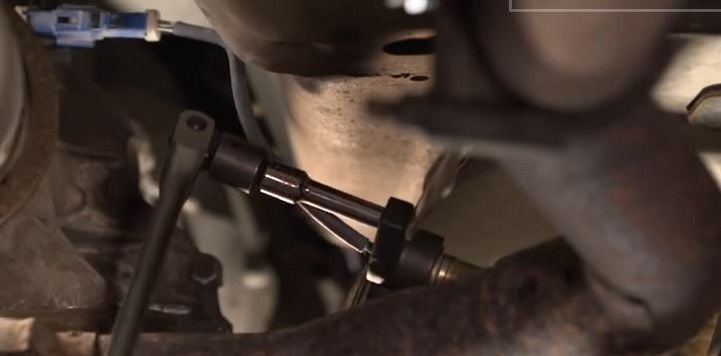
Step 3 - Use the special O2 sensor socket and remove the bulb
After the lubricant has had time to penetrate the sensor bulb threads, put the special socket over the threads and break it free. Once you have loosened the bulb, finish removal by hand.
Pro Tip
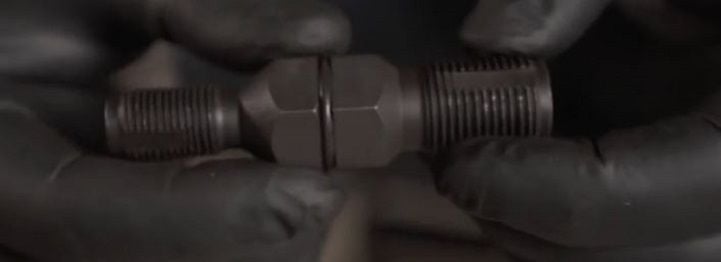
If you have a thread chaser tool, it is a good idea to use it to clean out the bunghole after the sensor has been removed. It will make inserting the new sensor into the bunghole much easier. This will also help keep the sensor bulb from cross-threading.
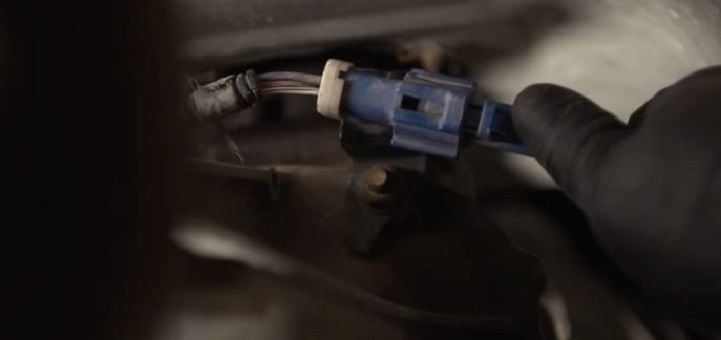
Step 4 - Disconnect the quick clip wiring harness
There will be push-tabs that make removing the wiring harness very easy. Simply push in the tabs at the base and pull apart. The harness, along with the rest of the old sensor assembly, can now be removed.
Step 5 - Install the new sensor bulb
Install the new sensor bulb first before you connect the new harness. This will prevent the wires from getting twisted. The new sensor may have come with anti-seize compound already on the threads or in a small pack to apply to the threads. If it doesn't, you should find some anti-seize compound and apply it to the threads before installing the sensor. This will greatly help with removal should you need to replace this sensor again in the future.
Pro Tip
Be very careful to not get any anti-seize compound on the bulb itself. Also be careful to not hit the bulb or let it touch the sides of the bunghole when you are inserting it. The bulb could malfunction and you'll need to repeat this process with another new sensor all over again.
Step 6 - Connect the new harness to the quick connect clip
Connect the new sensor harness to the quick connect and make sure that you feel and hear it click into place.

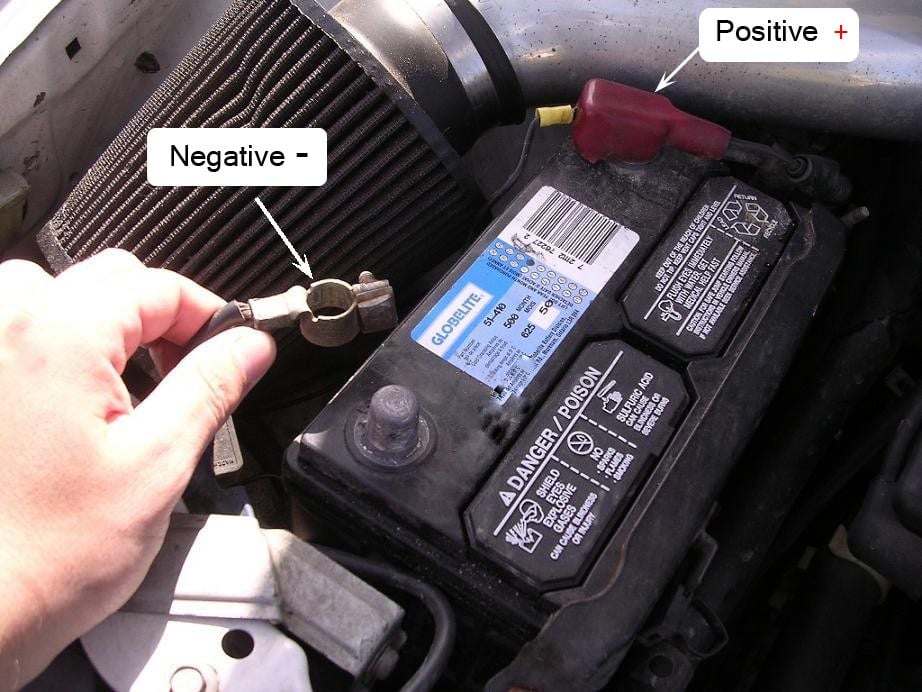
Step 7 - Unplug the negative terminal from the battery (optional)
This step is optional if your check engine light is on. If you disconnect your battery for about 30 minutes, it should allow the vehicle computer to re-set with the new O2 sensor which should in turn, clear the check engine light.
Featured Video: How to Replace Oxygen Sensor in Lexus IS
Related Discussions and Sites
- DIY Oxygen Sensor Replacement - ClubLexus.com
- O2 Sensor Removal Tool - ClubLexus.com
- How to Replace an Oxygen Sensor - Youtube.com
- Difference Between Bank 1 and 2 Sensors - Spiderchat.com
- Bad Oxygen Sensor Symptom - Primechoiceautoparts.com