Lexus IS: How to Replace Your Power Window Actuator
Replacing the power window actuator on the Lexus IS isn't a difficult process, but you will need patience because it is located in a very tight area.
This article applies to the Lexus IS (2005-2013).
After a long period of time, the power window regulators in your Lexus IS may no longer work. By following the step-by-step instructions below, you can save a considerable amount of money rather than heading to the auto shop, and get your regulator and power windows working once again.

Materials Needed
- Flathead and Phillips screwdriver
- Ratchet set and/or 14mm Allen wrench and/or 14mm wrench
- Duct tape
Step 1 - Remove the screws
Remove the door panel covering the window regulator that you will be replacing. Depending on your Lexus IS model, there should be two screws on each side, four screws below the door, and one screw in the door pocket area. Additionally, there will be one screw by the handle/door lock mechanism.
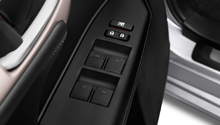
Step 2 - Remove the power lock cover and window switch, disconnect wiring
Use the flathead screwdriver to gently pop off the power window switch and power lock cover and power window switch. Gently disconnect the wiring from the system.

Figure 2. Pry off the power lock cover. 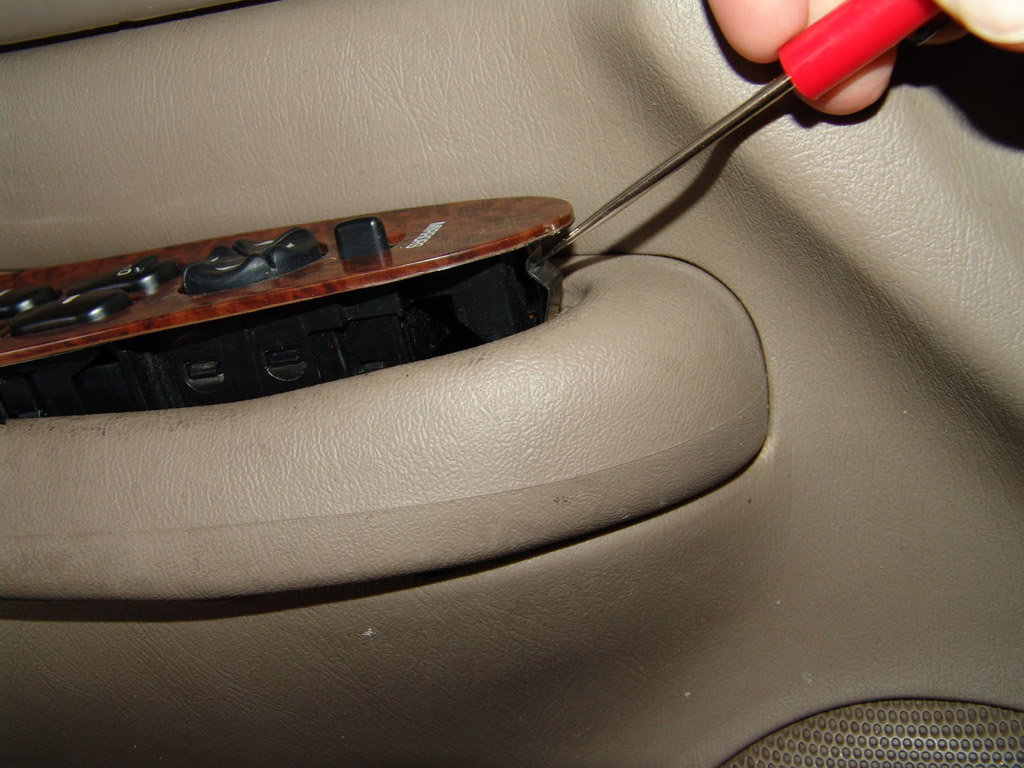
Figure 3. Pop off the window switch and disconnect the wires.
Step 3 - Remove the window from the power window regulator
Use the 14 millimeter ratchet, Allen wrench tool, or wrench to remove the support bar that is holding the window to the power window regulator. Pull the window up and secure it to the top of the door with duct tape so the window does not come down on your fingers while replacing the regulator.
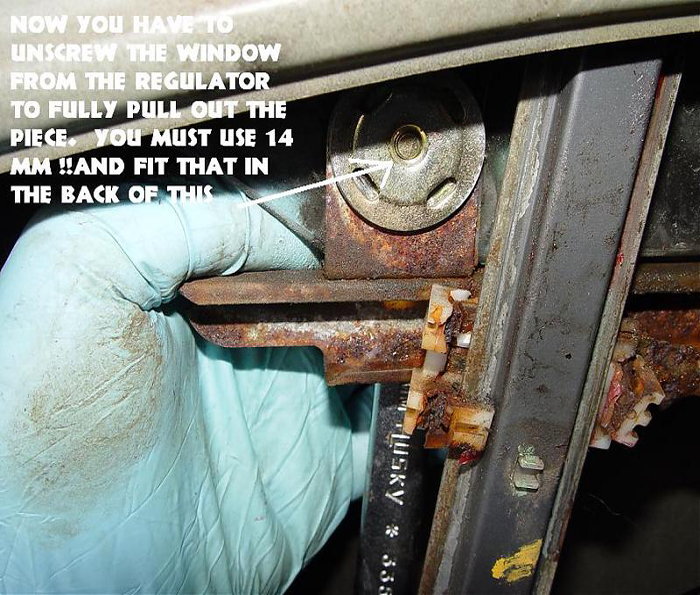
Figure 4. Use a wrench tool to remove support bar. 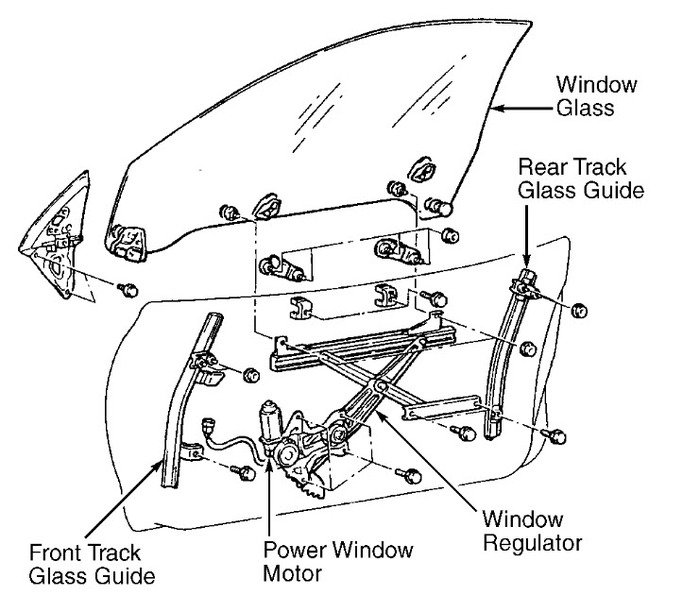
Figure 5. Window diagram. 
Figure 6. Use duct tape to secure the window.
Step 4 - Remove the regulator from the door
Remove all the screws holding the regulator to the door. There may be a small bar blocking access to the power window regulator; it can be easily removed with a Phillips screwdriver. You will now be able to remove the power window regulator. Be gentle not to bend the bar or any of the other parts as this could affect operation after replacement.
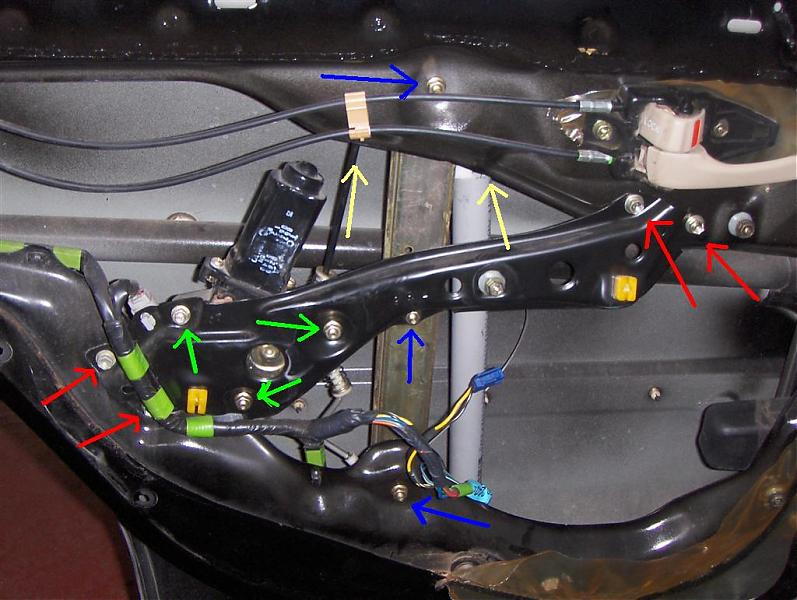
Figure 7. Remove the screws indicated. 
Figure 8. Remove the regulator from door.
Step 5 - Remove the regulator from the motor
Pry the old regulator from the motor with a flathead screwdriver. Be certain to make sure the spool does not unwind; otherwise, it will become very messy and time consuming to put back together.

Step 6 - Insert the new regulator
Insert the new regulator and align the square knob with the knob in the motor. Once again, be certain to make sure the spool does not open or unravel.

Step 7 - Reassemble the power window regulator
Reassembly is reversed. Fit the regulator back in the door, re-tighten all the screws, rest the glass back on the regulator, and connect the switches back.
Related Discussions
- Step-by-Step Instructions - ClubLexus.com
- Window Removal - ClubLexus.com