Lexus RX: How to Disable Your Daytime Running Lights
The Lexus RX doesn't come with a handy switch or button to disable the daytime running lights, so you'll have to do it on your own. However, for most owners, it's a simple and straightforward process that should only take a few minutes to complete. The best part is that it doesn't cost any money to disable the daytime running lights on your own.
This article applies to the Lexus RX (2004-2013).
The primary goal of installing daytime running lights in a vehicle is to make it more visible on the road, even in the middle of a bright and sunny day. Regardless of which model or year your RX is, the daytime running lights will automatically turn on once the low or high beams are turned off. In some models, a trip to the dealership can disable the lights via software settings. For those without that feature or who would rather perform the task on their own, it will require a little bit of time and effort.

Materials Needed
- Miniature screwdriver (1/8" wide)
- Small screwdriver
- Electrical tape
Step 1 – Remove the engine compartment fasteners
Open up the hood and take off the black panel that covers the right side of the car's engine compartment. There are four fasteners here. Push the fastener center dot to release them. Set the released fasteners aside then remove the cover, also setting it aside.

Pro Tip
Once you release the fasteners, take extra care to avoid dropping them into the engine or surrounding areas.
Step 2 – Open the relay top and remove the relays
There is a black box labeled "relay" on the vehicle's right inner fender. Using the small screwdriver, gently prod the end locks to open the top. Set the top aside. You will find two relays inside. Gently pull on the relay in front to remove it. This relay has five contacts, including three in a row and two on the other side. Set the relay aside.
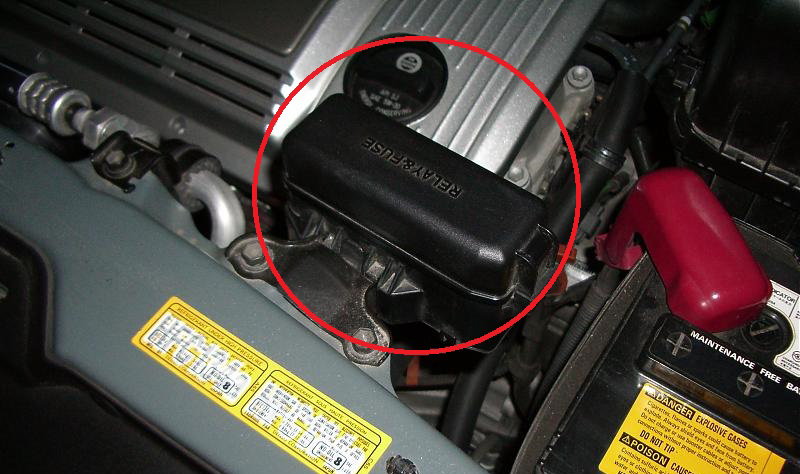
Figure 2. Relay box location. 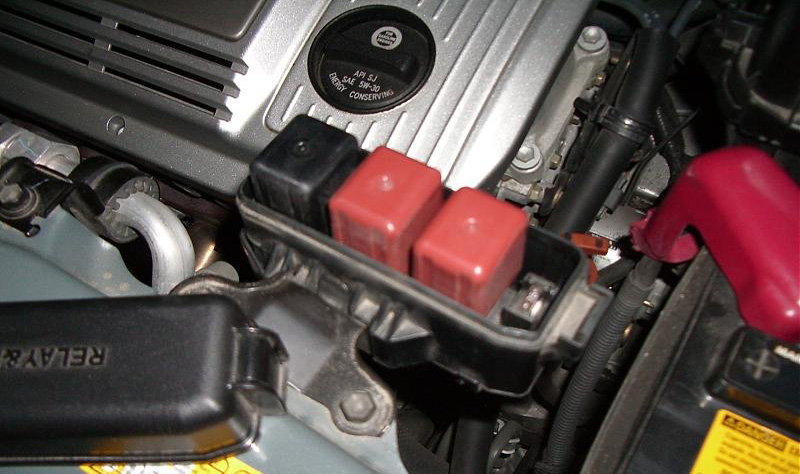
Figure 3. Relay cover removed.
Step 3 – Confirm the relay
Confirm that you have the correct relay by restarting the engine and ensuring that the daytime running lights are off. Turn the headlamps on then toggle the high beam. Make sure that the left headlight high beam is ON and the right headlight high beam is OFF, which indicates that you have the correct relay. Turn off the car's engine and lights.
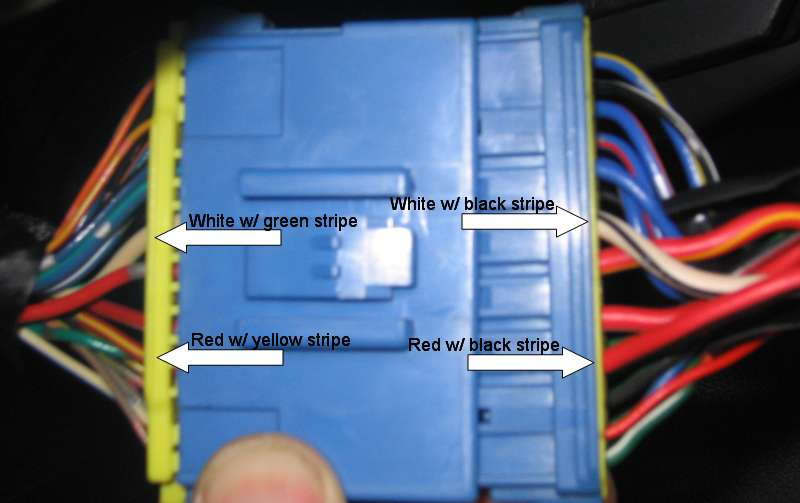
Step 4 – Find and remove the front relay's center contact
There are five wires leading to the front relay: orange, blue, turquoise, and two white/black striped. Locate the thicker white/black striped wire, which leads to the center contact of the three in the row set. With the relay box in an upright position, use the miniature screwdriver to remove the center contact of three in a row. It may be necessary to use the metal shim to remove the locking pin of the contact. Remove the contact by sliding the shim or screwdriver down the middle of the contact's rounded side, which is clearly visible from above. As you push the screwdriver down, gently pull the thicker white/black striped wire from the backside.
Pro Tip
The wire should easily come out of the box. If it doesn't, repeat this process without using much force.
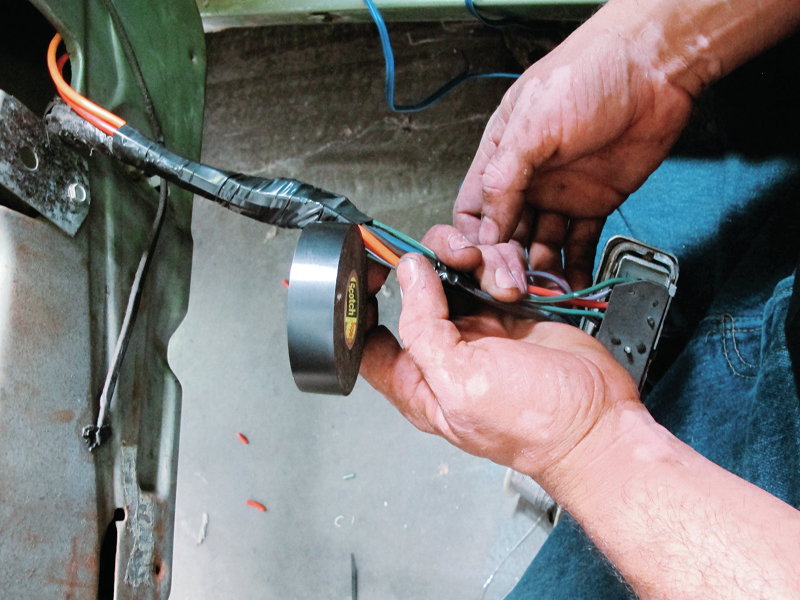
Step 5 – Insulate the contact and replace the relay box
Once the contact is out of the housing, insulate it by wrapping it in electrical tape. Fold the wire into the relay box then close the boxing, ensuring both sides snap securely into place. Place the relay box in its original mounting location on the inner fender. With the relay box in place, replace each relay, pressing it firmly into place. Replace the relay box cover, snapping each side securely in place.
Step 6 - Replace the engine cover and start the engine
Place the engine cover back on followed by the four fasteners. Reset the fasteners by gently pulling the two legs apart until it's possible to push the center dot back up from the bottom to a protruding position. Then, insert the fastener into the protruding dots and click the dot portion down halfway to lock the engine cover in place. Start the engine to ensure the daytime running lights are off. Check the low and high beams to verify that they work properly.
Related Discussion
- Daytime Running Lights Disable Instructions - ClubLexus.com